| | | Homemade tools and stuff from junk laying around |  |
|
+11CraftsmanQuad19 TourMax muckmudd AllisKidD21 MightyRaze frostypaws RichieRichOverdrive MatthewD TheBeal Crazy_Carl prancstaman 15 posters | |
| Author | Message |
|---|
muckmudd
Established Member

2018 Build-Off Entrant
2018 Build-Off Entrant
Join date : 2017-07-11
Posts : 825
| | | | | CraftsmanQuad19
Veteran Member


2018 Build-Off Entrant
2018 Build-Off Entrant
2019 Build-Off Finalist
2019 Build-Off Finalist
Age : 23
Join date : 2016-04-12
Points : 5740
Posts : 2617
Location : Indiana
| | | | | prancstaman
Veteran Member
Join date : 2015-02-02
Points : 4880
Posts : 1412
Location : Cleveland,Ohio
|  Subject: Second Hammer Subject: Second Hammer  December 27th 2018, 8:54 pm December 27th 2018, 8:54 pm | |
| Hay People, Made another hammer for another guy at work. The first guy I made a hammer for didn't want it, so I kept it and I am using it. His loss, LOL. So, this hammer is for concrete, I guess, because of the shape of the back part. I don't know to much about hammers, apparently. I showed the pic of the different broken hammer heads to the guy and he picked one out. He will be taking it home to use because he is remodeling his house and involves alot of concrete work. OK. I lay out the parts. The wrench is as long as a 2 liter bottle, a 24 mm wrench. 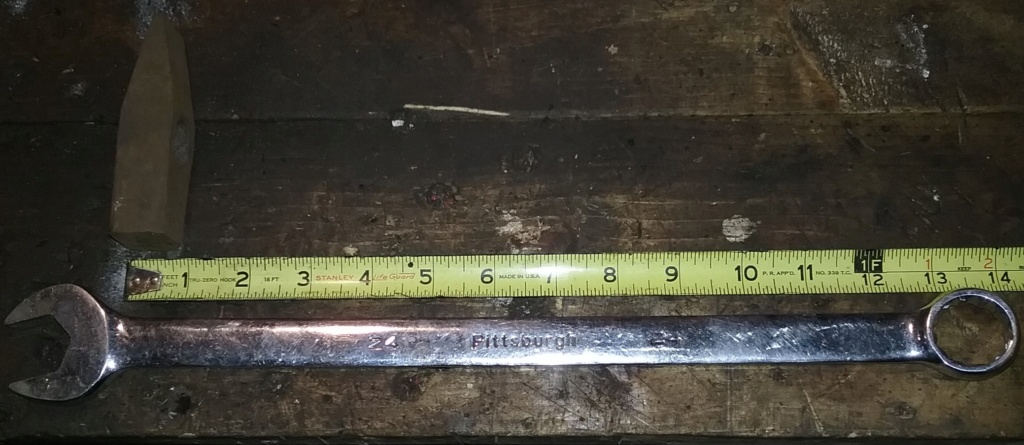 Straight forward, I cut the open end off and shave it to fit inside the hammer head. Tried 3 times to tack it and the tack kept breaking trying to adjust it straight. Strapping it to stuff didn't help one bit so in a bit of frustration I layed it on top of the pole, balanced it and layed one big weld on it. And it worked for the most part.  Checked for squareness. 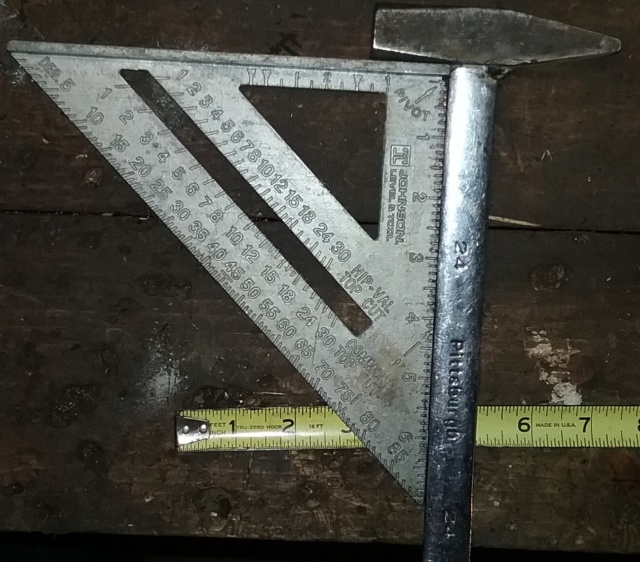 And burned it in solid. 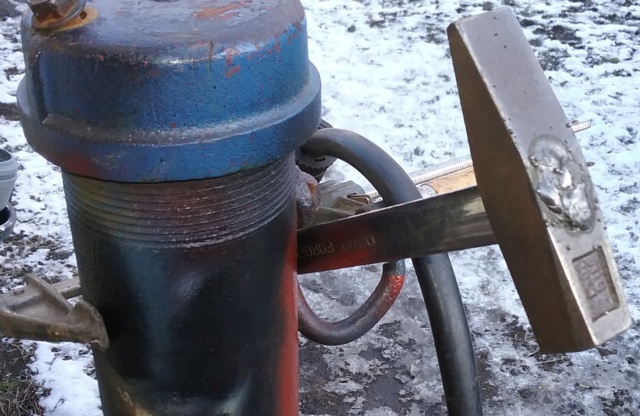 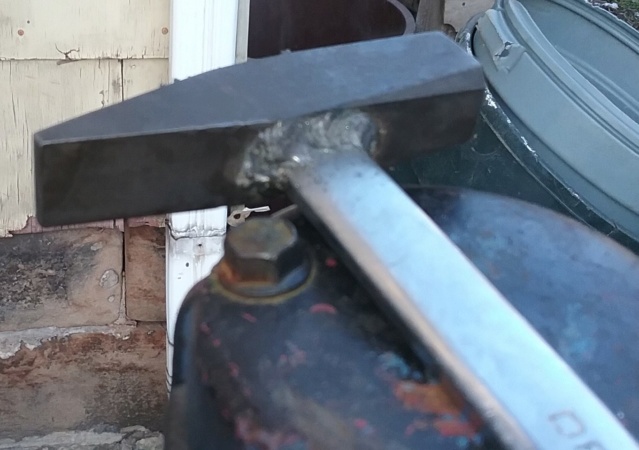 Cleaned it up by grinding flat the weld on top and took a flapper wheel to it to smoothen it out and shine it up some. 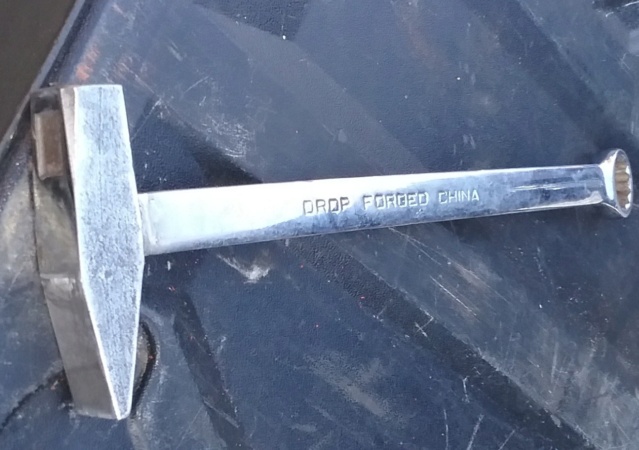 I then drill 2 holes in the wrench at the end for the para cord string grip. Let me tell ya, that para cord can absorb some shock way better then a wood or fiberglass handle. Even with it wrapped on a forged steel handle. You feel nothing. 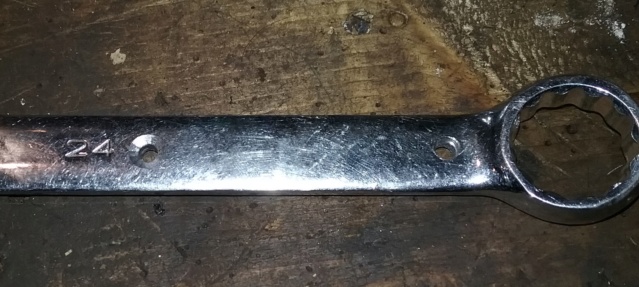 I finished tonight. Still drying when I took the pic. Came out even better then the first one did. Probably because I knew how to wrap it the on the very first time on this hammer. And used the brush on electrical tape to hold and cover the end of the wrap. The beginning of the para cord is covered by the wrap on the box end of the wrench. There are a total of 3 layers of para cord wond up for the grip. 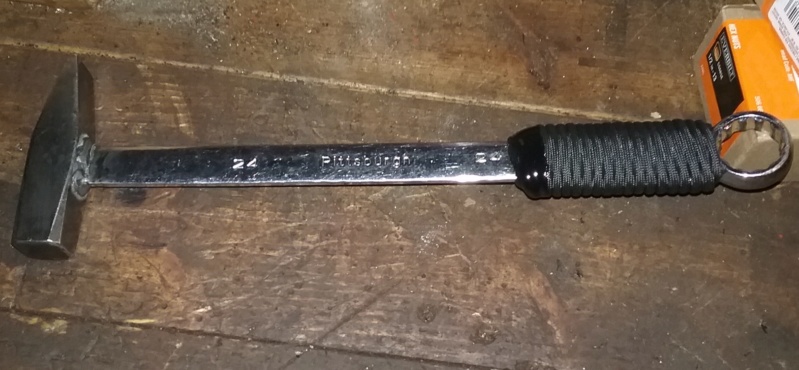 Took about 3 hours total to make this one, stretched out over a week or so. Doing it between other jobs around the house. Pretty cool, My buddy from work will be taking it home and him and his kid will be using it. He had borrowed one of these hammers from his Uncle to use for the concrete work and will be giving it back, since he has his own now.  | |
| | | | prancstaman
Veteran Member
Join date : 2015-02-02
Points : 4880
Posts : 1412
Location : Cleveland,Ohio
| | | | | CraftsmanQuad19
Veteran Member
2018 Build-Off Entrant
2018 Build-Off Entrant
2019 Build-Off Finalist
2019 Build-Off Finalist
Age : 23
Join date : 2016-04-12
Points : 5740
Posts : 2617
Location : Indiana
| | | | | prancstaman
Veteran Member
Join date : 2015-02-02
Points : 4880
Posts : 1412
Location : Cleveland,Ohio
| | | | | prancstaman
Veteran Member
Join date : 2015-02-02
Points : 4880
Posts : 1412
Location : Cleveland,Ohio
| | Subject: Hydraulic press part 13 Little upgrade February 17th 2019, 10:47 pm | |
| Hay People, Bought some stuff for the hydraulic press and had to upgrade the framing of the top part of the press to use the stuff. The 12 ton bottle jack I bought at Harbor Freight for $26 I think. And the yellow one was $20. Not too bad. The yellow one was probably used once. The first pic is comparing the 12 ton to the 2 ton, wow, some difference there. 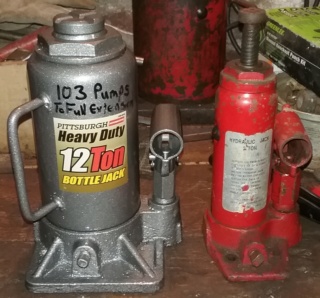 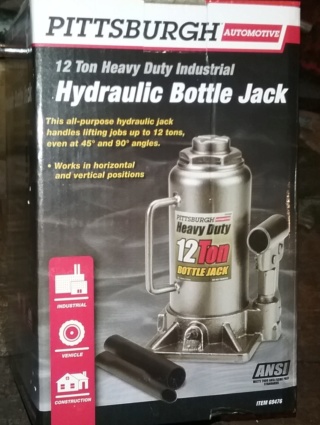 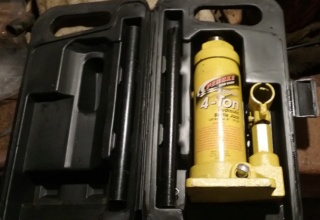 I don't want to just shove the 12 ton in there and start using it, The reinforcing of the top last time was just for the 2 ton. I need to add a thick, long hunk of steel to the top so the force from the ram of the bottle jack is spread out and not bend or flex the top. I'll use the base plate from the 20 ton jack I took apart and used for the ram. The base plate is around 1 inch thick steel. 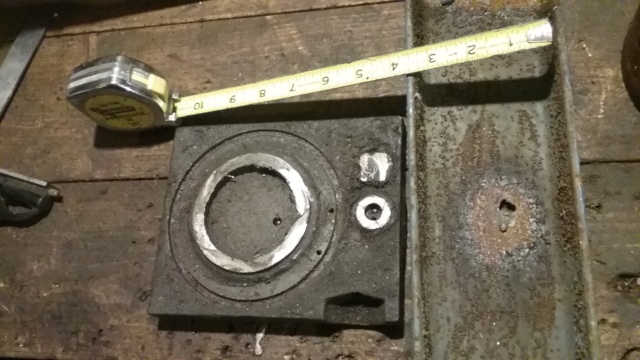 I cut out the piece I need with a hand held band saw. Was better then using a sawzaw. 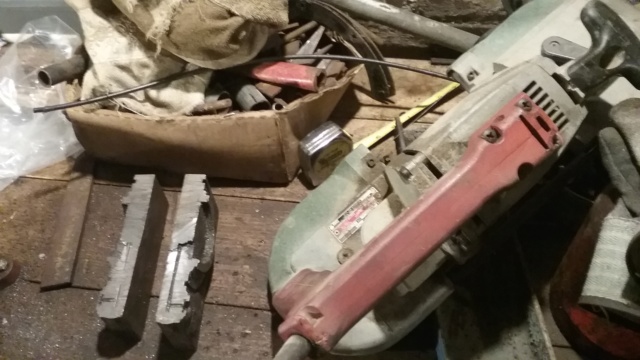 Fit the plate in the C channel and grind the piece flat and trim the necessary edges so it fits flat inside. 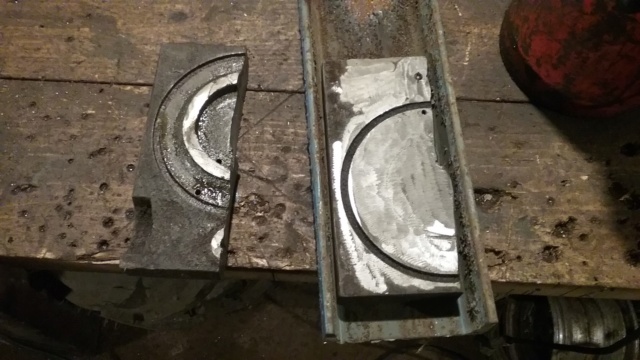 Drilled and cut out the parts for the rods to fit through it. Then I tack weld it in place, if I need to remove it later then it will be easy to cut the tacks off. 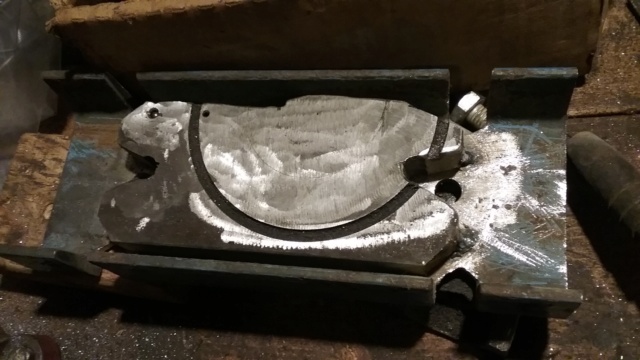 Here is the plate steel in place. The ram of the bottle jack pushes into it and the force is spread out through the top. Before, the force was concentrated to the spot where the ram pushed up at and would flex the top 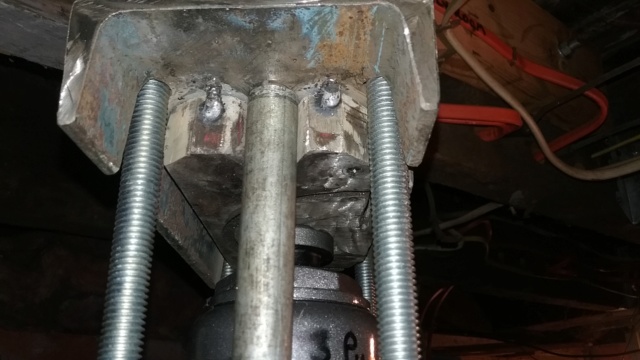 It will bend the C channel and 1/4 inch thick angle iron now. I tried to take apart a wheel bearing with the upgrade and didn't happen. The bearing must have a locking lip inside the 2 halves. I'll figure it out, LOL. But the upgrade works at least. Later. | |
| | | | prancstaman
Veteran Member
Join date : 2015-02-02
Points : 4880
Posts : 1412
Location : Cleveland,Ohio
| | Subject: Pipe or tubing holder for Drill Press March 2nd 2019, 8:50 pm | |
| Hay People, Got another tool I made!! Made from by best box of junk too! The tool took about 15 to 20 minutes to make. It's a fixture to hold pipe while you are drilling it. Seems simple, and was simple to make too. I was fixing my tire changer again and needed to drill holes in a piece of pipe (like 7 holes). I didn't want to wing it like normally because there was too many to drill. Just frustration there, LOL. Stopped dead in my tracks to think about it some. A piece of angle iron would hold it nicely, but angle iron isn't flat on the bottom. OK, weld a piece of plate steel to the bottom for a base, and bingo! Something to hold the pipe while drilling it. Dug around my best junk box for bits and pieces to use. Not all of this will be used. some of it will be used to hold the angle iron in place to weld it up. 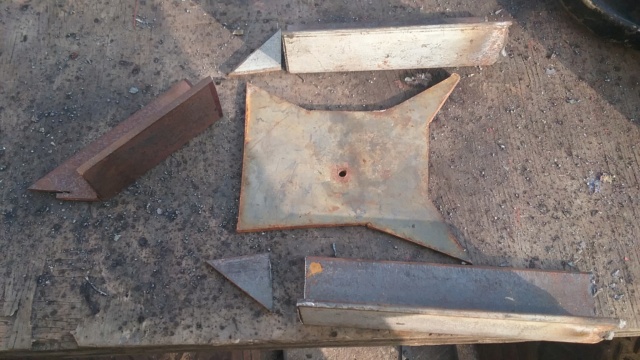 I make an "M" out of the 3 pieces of angle iron. the 2 ends hold up the center piece at the right angle on top of the plate steel. Tacked the angle iron on the plate steel and removed the two end pieces of angle iron. 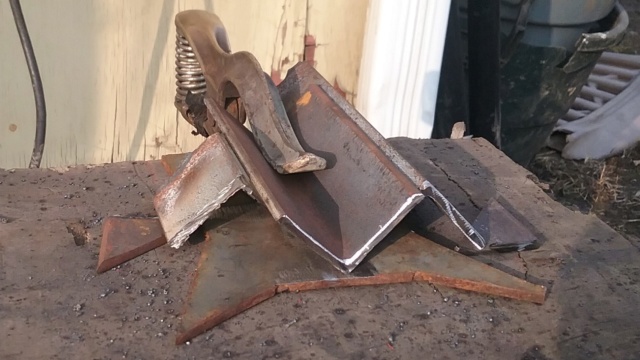 The 2 little triangles are gussets for the sides and were cut at 45 degrees, for supports in the center of the angle iron. Tacked those in place. 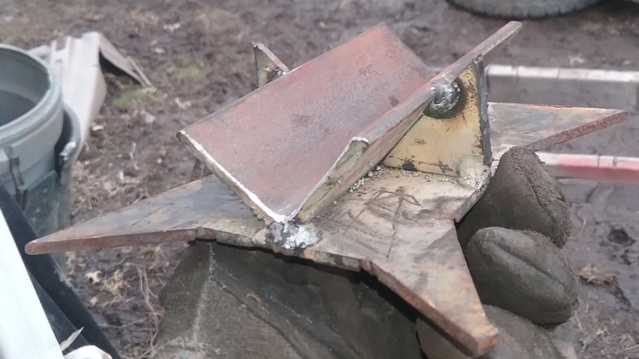 And done! I just tack welded the whole thing together so the welding don't distort it any. Cleaned up the welds so nothing is hanging over any edges, so the fixture sits flat on the table and the pipe or tubing sits flat in the fixture. Not to big, and not to small for my drill press. 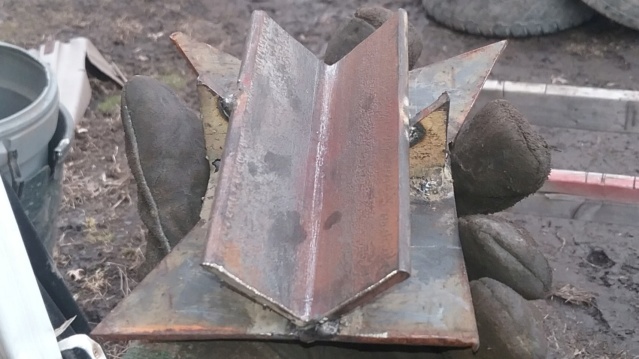 And the glamour shots of me using it. Worked great too. I noticed that when I drilled through the pipe, since the pipe was not sitting flat in the angle but was supported on the sides of the pipe because of the angle iron shape. This left a space right under the pipe. So when I drilled all the way through the pipe, the drill bit did not drill into the fixture because of the space underneath. I felt the drill bit punch through, then drop, and I knew to stop pushing. When I was done, I just threw it at the bottom of the drill press stand for later use. 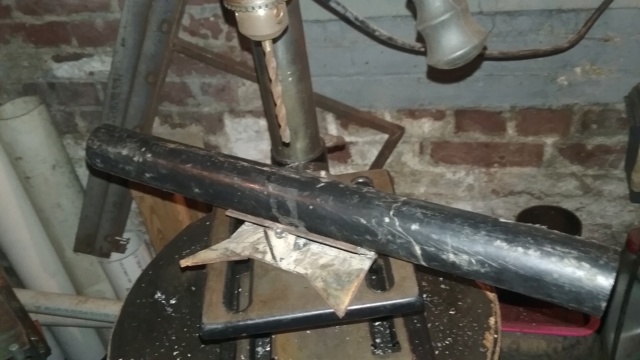  Got another brewin too. Probably finish it up tomorrow for a post tomorrow night, LOL. Later. | |
| | | | Crazy_Carl
Veteran Member

2018 Build-Off Entrant
2018 Build-Off Entrant
2024 Build-Off Entrant
2024 Build-Off Entrant
Age : 35
Join date : 2017-10-30
Points : 5117
Posts : 2561
Location : Rochester, New York
| | | | | prancstaman
Veteran Member
Join date : 2015-02-02
Points : 4880
Posts : 1412
Location : Cleveland,Ohio
| | Subject: Re: Homemade tools and stuff from junk laying around March 4th 2019, 6:54 pm | |
| I thought about how to clamp it down. I figure drill a couple 1/2 inch holes and bolt it to the table. Just drop the drill bit down so it sits at the bottom of the V and then tighten the bolts. That way no worries about the V block sliding to the side while drilling and will be always centered to where you always start drilling at the highest spot on the pipe or tubing. | |
| | | | prancstaman
Veteran Member
Join date : 2015-02-02
Points : 4880
Posts : 1412
Location : Cleveland,Ohio
| | Subject: Wrench holder and Oil holder March 17th 2019, 10:36 pm | |
| Hay People, And another installment of Homemade tools and stuff from junk laying around. This post, I will consider these 2 things to be the "stuff" part of it, LOL. OK, the first thing I made is for the drill press table. I noticed right off the bat that when I placed my oil bottle on the side of the drill press that it was getting in the way, I would knock it over, it would fall onto the floor, or making adjustments to the drill press and the oil bottle would jump off and land BEHIND it. How annoying. Off the path for a second. The city tore down the house next to my kid's house and my kid's house is next to my house. The contractors had to tear down part of a fence on the other side of this house and threw some of the fencing poles in our yard. 1 part of the poles had the metal cap on it for the vertical pole. I pulled it off when I was cutting up the long pole to use for stuff, LOL. I actually threw the metal cap in the scrap. And an hour later came up with the idea and dug it back out of the scrap can. It was all bent up. 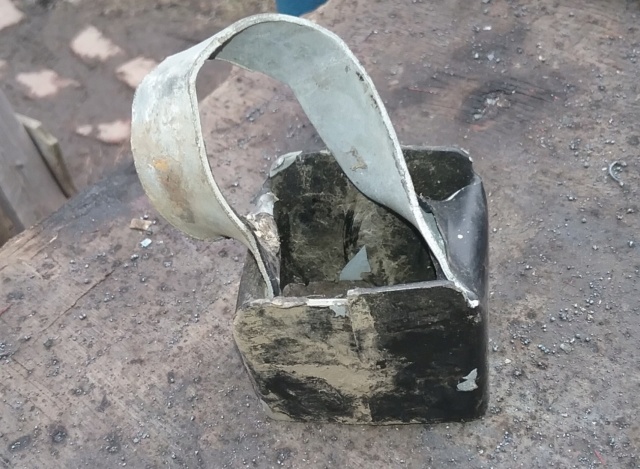 Hammered it back into somewhat of it's original shape and cut the loop on one side and hammered it down so it stuck out to the side and made a bottom for the cup part. This made a way to bolt it to the stand. Then I tack welded it all together just to do it. Probably didn't need to be welded but the welder was out and thought why not. 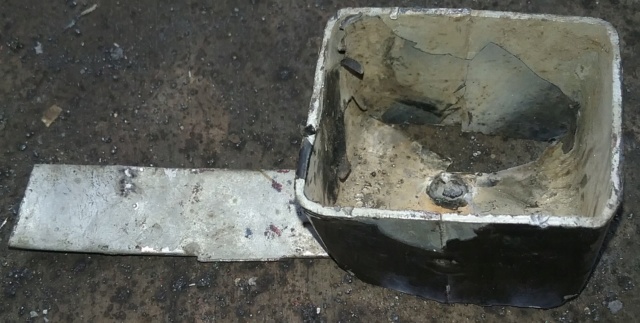 I drilled a hole at the end of the newly made strap with the drill press. Then drilled a hole on the side of the rim on the bead part. Found a bolt and nut for it. And there ya go. I can shake all I want and the oil bottle will stay put. In the cup, since the strap is not that wide, the bottom of the cup has open spots so any metal chips fall into it then the chips will fall out of it because of the open slots, an added bonus there. But I think I goofed here, just a little one though. Thinking about it, it might do OK where I mounted it, I shall see when I have to grab for it. I might have to remount it on the other side. I put it on the right side because that was the side I would put the oil bottle on the table and always worked out. I'll just have to wait an see how it works out. All in all, it is doing what I need it to do. 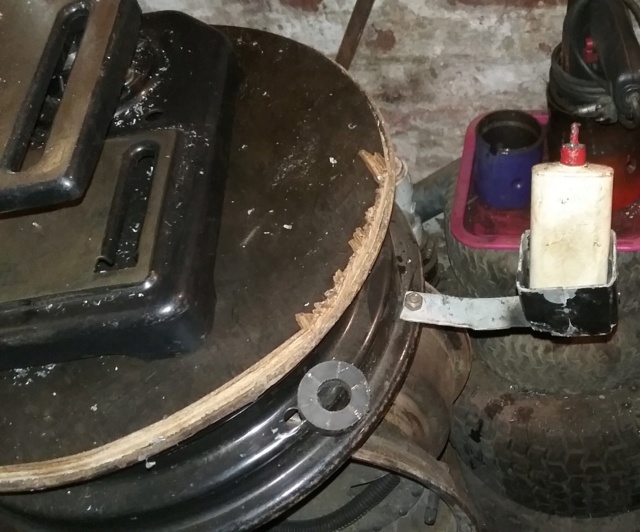 OK. This next thing is for my hand wrenches. I got alot of hand wrenches. Hell, in case you haven't noticed, I started to think of ways to use the hand wrenches in ways other then hand wrenches, in case you all haven't noticed, LOL. I think I got like 3 whole tool boxes full of the things. I keep 1 whole set in my tool box that I use to work on stuff. When one breaks, I find one to replace it. I usually grab the crappy ones first just so I can break it and grab another one, but I don't break too many wrenches. It's usually ratchets that I break. I got like 5 breaker bars made out of the broken ratchets, LOL, but that is another post. Plus, I am tired of digging in the tool boxes looking for that size I need. I need something to organize the wrenches and out in the open so all I have to do is look and grab it. I actually timed myself to see how much time is spent looking for the tools to do the job, wasn't pretty. So this project is thought up out of necessity if anything. Here is what I'll be using for this project. I got alot of it and figured out a way to use just this one thing to make the hand wrench holder. I can make as many as I need and in any length up to about 4 feet. I get these cage tops from work. roughly 4 feet by 4 feet cage top made from 1/4 inch round bar. It's the same thing I used for the cleats used for my tracks on my tank. Very handy stuff. I get it free too. I just use a bolt cutter to get what I need out of it. So I got some left over's laying around the yard and looking at it one day last week is when I figured it out. I'll be using that piece on the little roof there, the double row of bars for this. Been sitting there for about a year when I cleaned the yard back then. 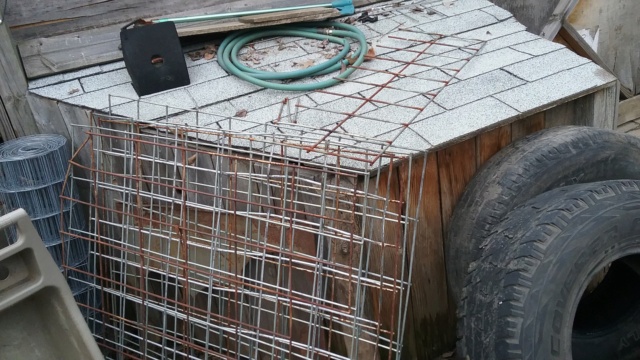 I cut the double row in half and lay one on top of the other. With the bars sticking outward, there is a gap at the base of it between the bars. this gap is 1/4 inch which is the thickness of the bars and would make a good place to put a screw through which will be dry wall screws. I can put a dry wall screw in every slot if I wanted to but I think 3 screws evenly spaced would be enough. I welded it together at every spot where the bars touched. 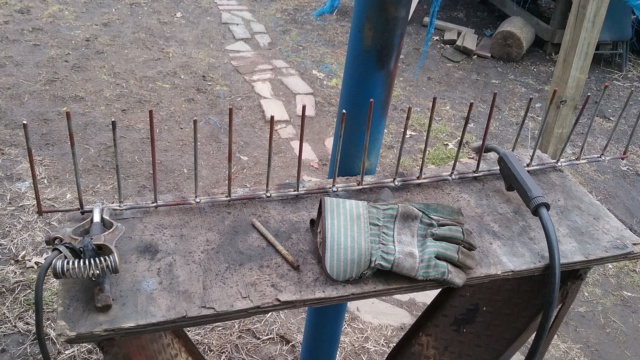 I think the dry wall screws won't be enough to hold the bars straight out. Going to be alot of weight hanging off the bars when full of wrenches. I cut up some single bars and weld them in pointing down. Should be strong enough now to hold up the wrenches. The holders are angled slightly upward so any wiggling of the wrench and it will slide down to the base of the holder. It's not perfect but will work. The bars are easy enough to bend, because as you can see a couple of them are out of wack and if needed I can even bend the tips up some more too. 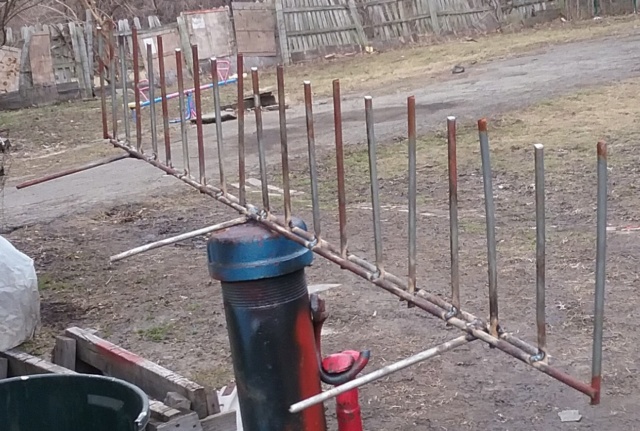 I just mounted the holder on a 2 by 4 on my shelf. You can see like half of one tool box worth of wrenches laying on the shelf there, LOL. Threw a couple on the holder for show. I need to figure out a place for it now but is working. If I keep it there, it will poke my eyes out. I was thinking about putting the wrench holder in the rafters of the basement. Just have to find an easy to get to spot now.  This wrench holder has 20 spots for wrenches. Took about an hour or so to make. I actually made it waiting for parts while working on my car. I needed a wrench and took like 10 to 15 minutes to find one. That's when I grabbed my welder and went at it. I'm happy, now that I did something about it and it was free.   | |
| | | | prancstaman
Veteran Member
Join date : 2015-02-02
Points : 4880
Posts : 1412
Location : Cleveland,Ohio
| | Subject: Little update June 2nd 2019, 9:45 pm | |
| Hay People, Thought I might update alittle. Did a job this weekend on someone's car. Normally I would pass on the job. The job was changing the front wheel bearing. The kind that is pressed into the spindle. I usually do wheel bearings, the kind that are bolted in, usually done in an hour. Since I made myself a press, I figure I would give it a go at it, if the press couldn't do it then I would resort to hammering it out and hammering the new bearing in, done it before without a hitch, just to get the job done. This meant I had to remove the spindle from the car, drive across town to my house to change the bearings out. The hydraulic press I made did it with no sweat. Took 2 hours to remove the spindle, an hour driving back and forth from my house, an hour to switch out the bearing, then an hour to put it back together. Worked out great with no fear of damaging the new bearing. 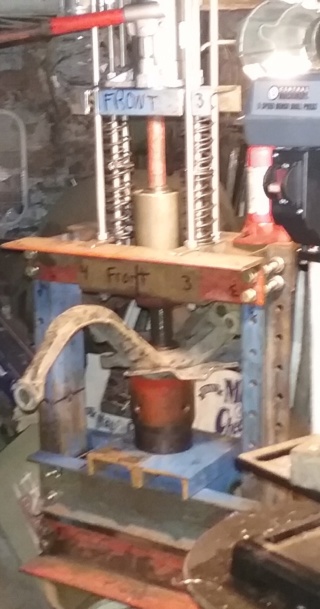 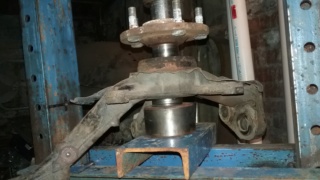 This single job almost paid me back for the money put into the press, LOL. One more job with using this press and I will be in the green. I love my tools!! OK, another update on something. Remember this?  The forks was made into a bench grinder. Yes, I use it now and then, still have to finish it too. I do like 20 different things a day and me focusing on one thing is kinda hard. It will get done but on a whim. But this will be on the frame of the mini bike. I had planned to use the frame to make a lift for my mini bike, kinda like a fork lift thing, with wheels, a hitch, and even steering on it. To be able to move it around, but..... One of my kids wanted a bike, I really didn't have time lately to build the lift anyways, would have been probably next year to do that to just get it away from my porch, LOL. So..... check it out. 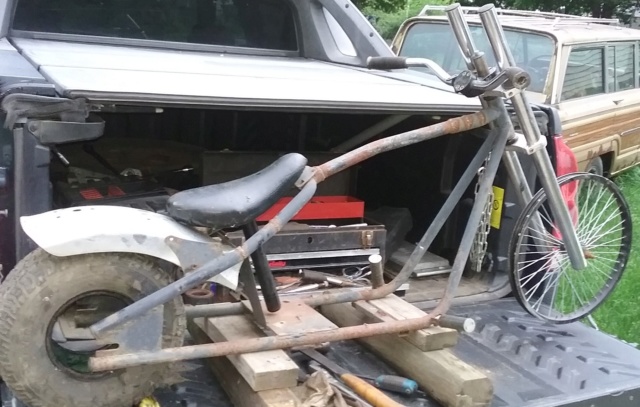 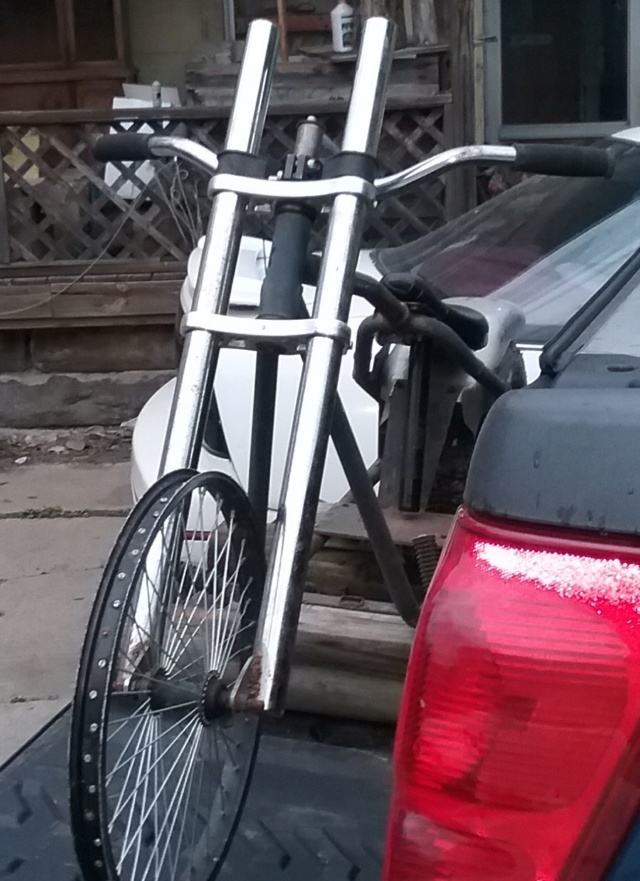 Just a mock up. Used the forks from one of those West Coast Chopper bike's. This will be to just get it to where he can ride it. Will have a 3.5 hp motor, 20 inch front wheel, and a 6 or 5 inch rear wheel. He brought me an old ape hanger handle bars for it today but I need to cut it up to redo the mount on the bars to fit the goose neck right. Should be cool, LOL. I might take a spin on it too. Future mods will be an 8 inch rim with a wide tire for the rear, like on my bike. Rake the front to stretch it another foot, the forks piece together like a set of motorcycle forks. So redoing the forks will drop the tubes down to where the bars mount on the tree I think it's called. Should be longer them my bike, IDK about that, might have to change my bike a little bit, LOL. | |
| | | | prancstaman
Veteran Member
Join date : 2015-02-02
Points : 4880
Posts : 1412
Location : Cleveland,Ohio
| | Subject: Steel roller part 1 February 1st 2020, 9:27 pm | |
| Hay People, I have to make another tool, need a steel roller. Current project on another thread needs some steel rolled for a set of rims so I can widen them. I just don't want to bend the steel around something and call it good. Would be quicker but I love my tools and a chance to make another seems like a treat, LOL. The outcome using a tool for the job makes the project look way better also. For this, I don't have a plan, didn't get anything for it yet, and will be done on the fly, LOL. I did however edumacate myself by watching You Tube vids, LOL. Did not help though! So, lets get to it..... First off, I need a frame so I go to my steel pile. Grab some heavy duty angle iron, 3 inch by 1/4 inch thick, from the pile.  I chop off 2 pieces of the angle iron, 12 inches long. 1/4 inch thick stuff, yah that took a minute. I throw the left over piece back in the pile. 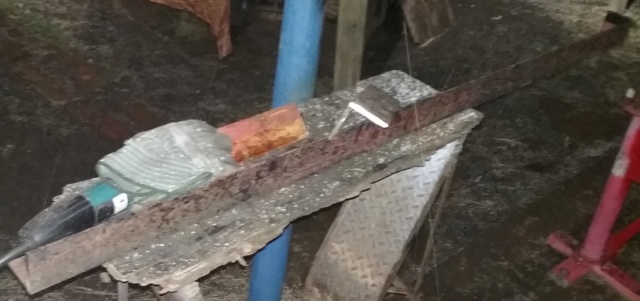 So, I got the steel for the frame. Now I need some bearings, and bearing holders. I dig through a box for the bearings, el cheapo's from BMI that I bought 10 years ago. I got some 1 1/2 inch pipe laying on my bench and ID is 1 3/8 inch for the bearings. I would like to cut the pipe square but doing it free handed won't do it right. I bought a huge pipe cutter like 15 years ago that I never used yet, I grab it off the shelf. Mount the pipe in the vise and give it a whirl. Worked great. But I do need to clean the burrs on the ID of the pipe but the bearing holders are square.  As for the shafts that will do the bending, I got some linear shafts from my job a while ago, nice and smooth, and should be strong enough for this. I just need one shaft which is 18 inches long. I lay out what I got so far. 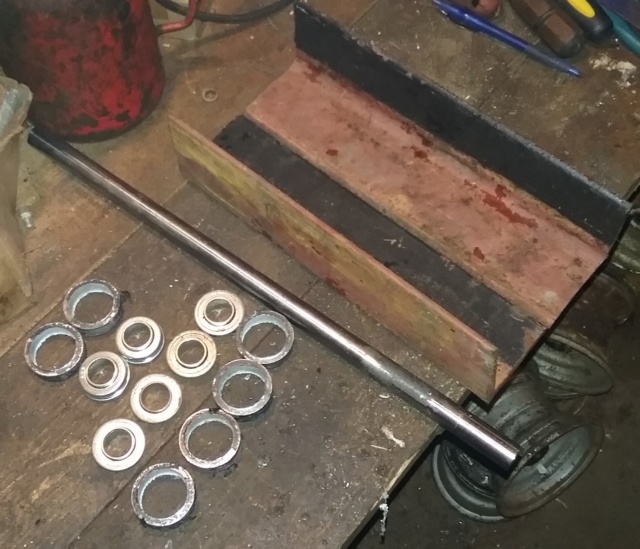 I do some thinkin on the layout of the tool. Figure the 2 end shafts will be inside the frame and the center shaft that will be doing the bending will be longer then the frame and sticking out on one side for the crank/wheel. The angle iron will make a channel for this. Chop the shaft up and lay in the pieces. The inside of the channel is 5 1/2 inches. Pretty good. Don't think I will need anything wider then that, and with that width then the shafts should be plenty strong for rolling some thick steel and maybe some pipe for other projects. 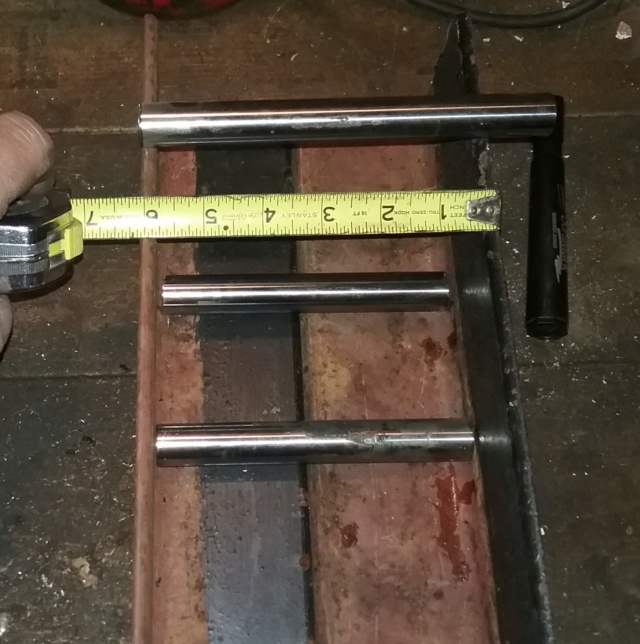 I lay the bearings in on the shafts for a mock up. Looks good so far. 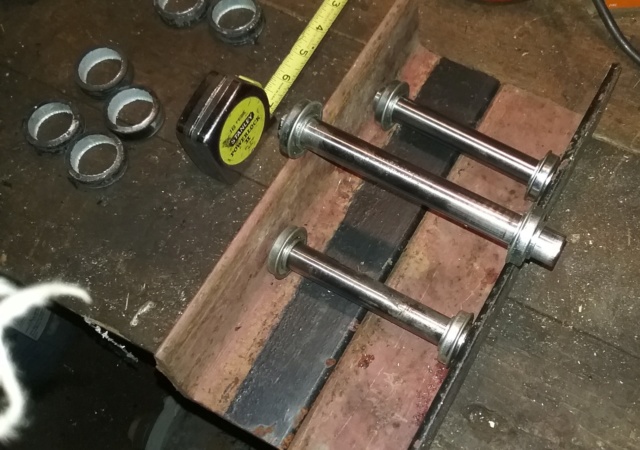 That's it for now, a spare time thing. Don't know too much more on what I'll be doing since it's being done on the fly, LOL. But I want to try to keep this to where it bolts together so I can modify it for other projects, seems like a good idea. So welding will be kept to a minimum. And to use it, I want to clamp it into a vise and have legs on it so it can sit on the floor/table to use it. OK, later...…………. | |
| | | | prancstaman
Veteran Member
Join date : 2015-02-02
Points : 4880
Posts : 1412
Location : Cleveland,Ohio
| | Subject: Steel roller part 2 February 2nd 2020, 11:32 pm | |
| Hay People, Got more done today. Had a job waiting for me but the guy never called, while I was waiting for the call I worked on this. Got a lot done too. So, first thing done was the bearing holders deburred and bearings put in them. The bearings just drop right in, I'll use tape or something later to hold them in better. 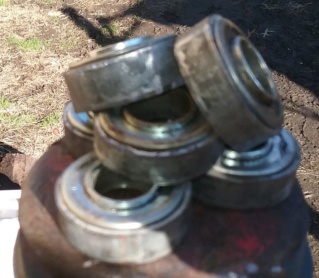 For the 2 end shafts, the bearings will be on the ends (ofcourse), Then grind a notch next to the bearing for some wire to wrap around and twisty the ends which will hold the bearings in place. Here is the basic idea on how the end shafts will set in place too. I found safety wire at Harbor Freight, love the stuff, made for twisting and is stainless steel so it don't rust. So many uses for this stuff. 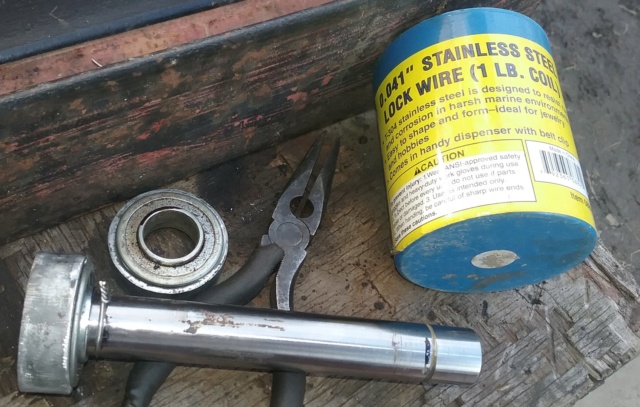 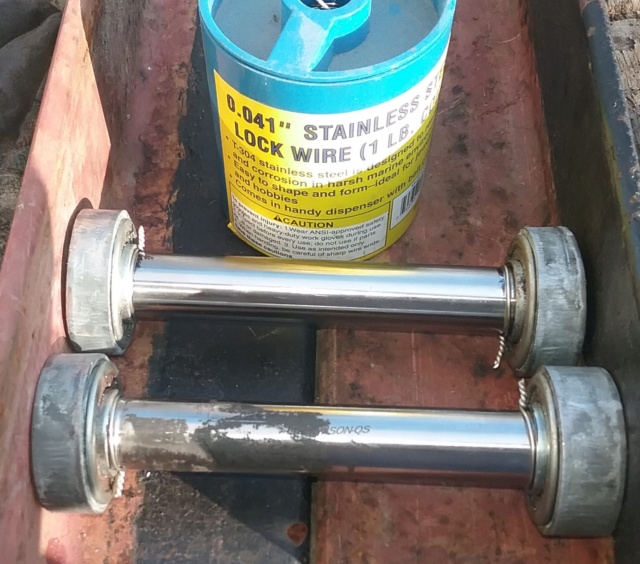 Time to connect the 2 pieces of angle iron for the frame. I number them so they get put back together the same way when I drill them. I use 2 more smaller pieces of angle iron underneath and 4 bolts per side. After drilling and bolting I use the grinder and cut slots on the ends for marks that won't be erased. I'll be taking this apart numerous times and will ensure it goes back together the same way every time with ease. 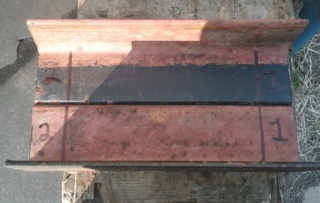  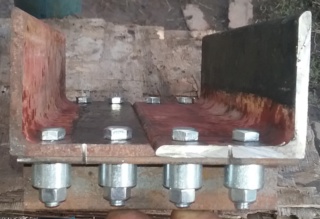 Need to make the center on the frame for both sides and need to be in the same spot on both sides. Kinda hard since the 2 frame halves are not cut the same. I just hacked off the 2 pieces by hand. But they are butted up to each other and are flat and parallel. I grab my carpenter squares and piece one together with 2 of the brackets and fit it on the frame's center I marked on one side and tighten the setup down so it won't move. I then use another angle to scribe a line on both sides. This make the center lines even on both sides. 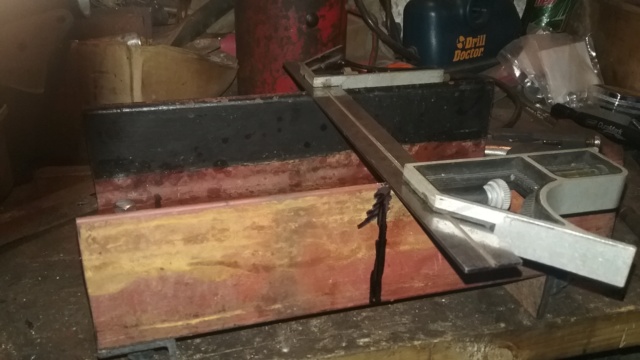 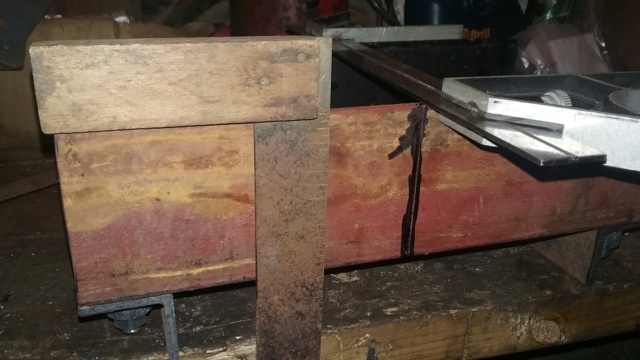 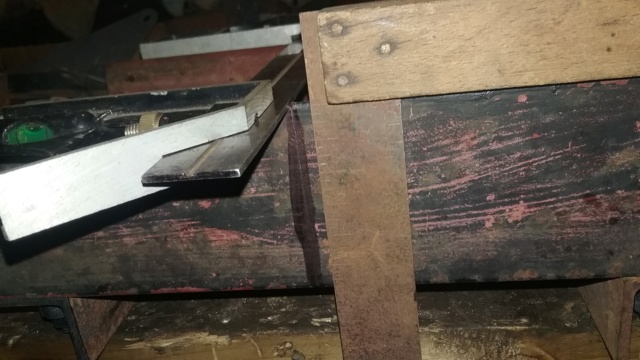 Next, I make a center punch mark 1/2 inch down from the top on both sides for a reference point. Here's a good tip. A permanent marker makes a good tooler's die for scribing marks on your work piece. 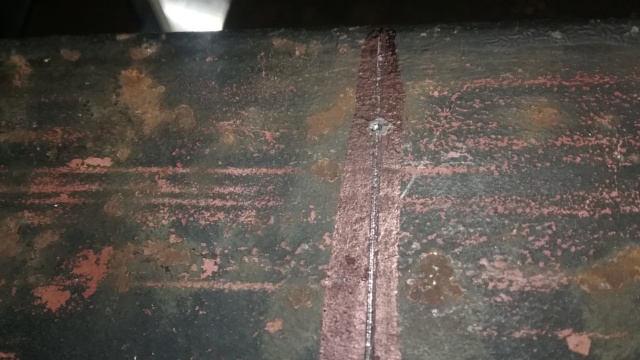 I make center punch marks for holes that will have bolts to hold the bearing holders. I use the center line as a starting point. 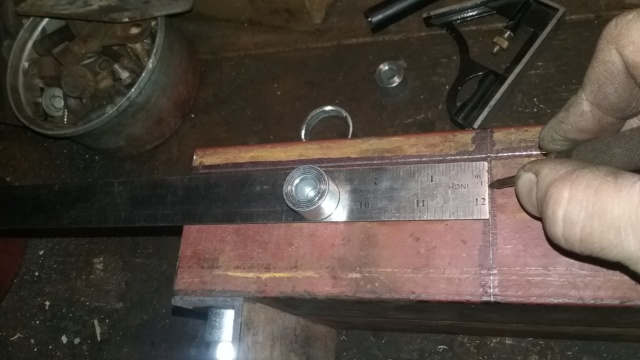  After a lot of drilling. 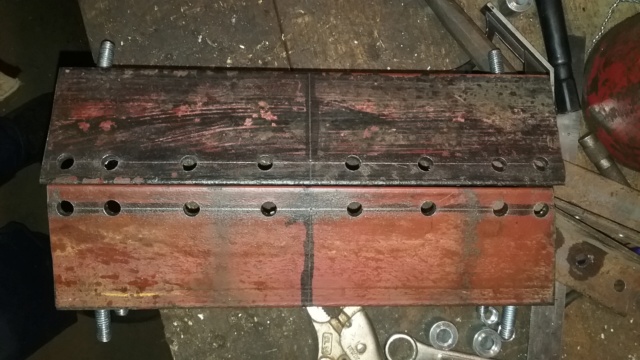 So, I got this part all squared away. Pop it back together with ease because of the marks I cut into the ends. I stick bolts with spacers in every hole for the mockup and for the pics. I won't be using all the bolts with spacers, just what I need. This will give a good idea on how many choices I'll have for setting this up for other projects. 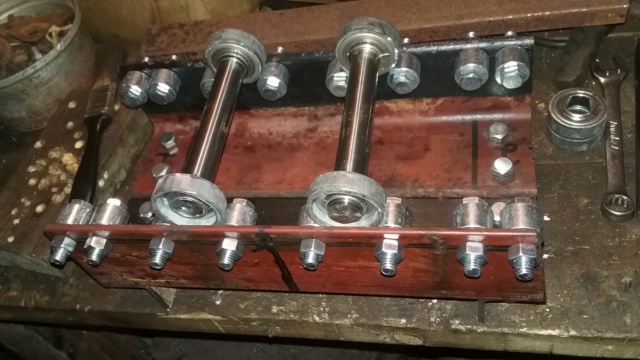  The total working area width is like 4 to 4 1/2 inches wide. I don't think I'll need anything wider.  Next will be the part that pulls down on the work piece. I think I need to buy something for that. One of those threaded rod connectors or an extra long nut, with a matching piece of threaded rod maybe 3/4 stuff, LOL. After making this part, I can't see me being able to mount it in a vise. I'll probably just put legs on it. I need to cut some more of that thick angle iron too, to weld to this. Would be handy to have a bandsaw for cutting steel, hint, hint, LOL. Anywho, it's late and is my bedtime, Later...………….. | |
| | | | prancstaman
Veteran Member
Join date : 2015-02-02
Points : 4880
Posts : 1412
Location : Cleveland,Ohio
| | Subject: Steel roller part 3 February 5th 2020, 9:50 pm | |
| Hay People, Got more done. Starting to take shape now. I need a way to pull the metal downwards, I start the work on that part. I had to buy stuff, bolts and nuts.  Scribe a line under the frame of the center.  The gold long bolts will be pulling down on the center shaft, on the inboard sides. Holes need drilled. For the center shaft to go down far enough, I need to cut slots on the sides of 3/4". I start off with 3/4" holes for the slots. I'll cut the slots out later.  I'm far enough along to do a good mock up to show what I'm after. 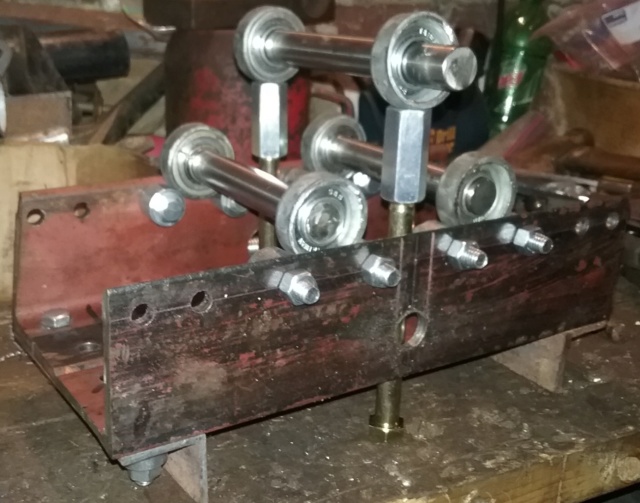 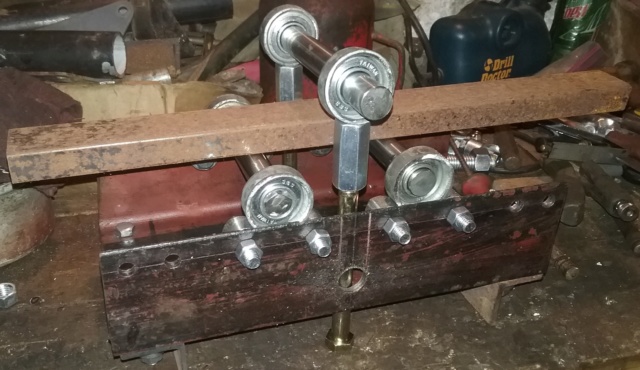 That's it for now. Later...…….. | |
| | | | frostypaws
Member


2014 Build-Off Entrant
2014 Build-Off Entrant
Age : 29
Join date : 2012-07-01
Points : 4473
Posts : 131
Location : iowaaaa
| | Subject: Re: Homemade tools and stuff from junk laying around February 6th 2020, 6:31 pm | |
| I like the adjustability of your pyramid roller. The one I built awhile back does good on thick stuff but it would be nice to adjust the bottom drive rollers to get rid of the flat spots on the end of a roll for thinner stock. 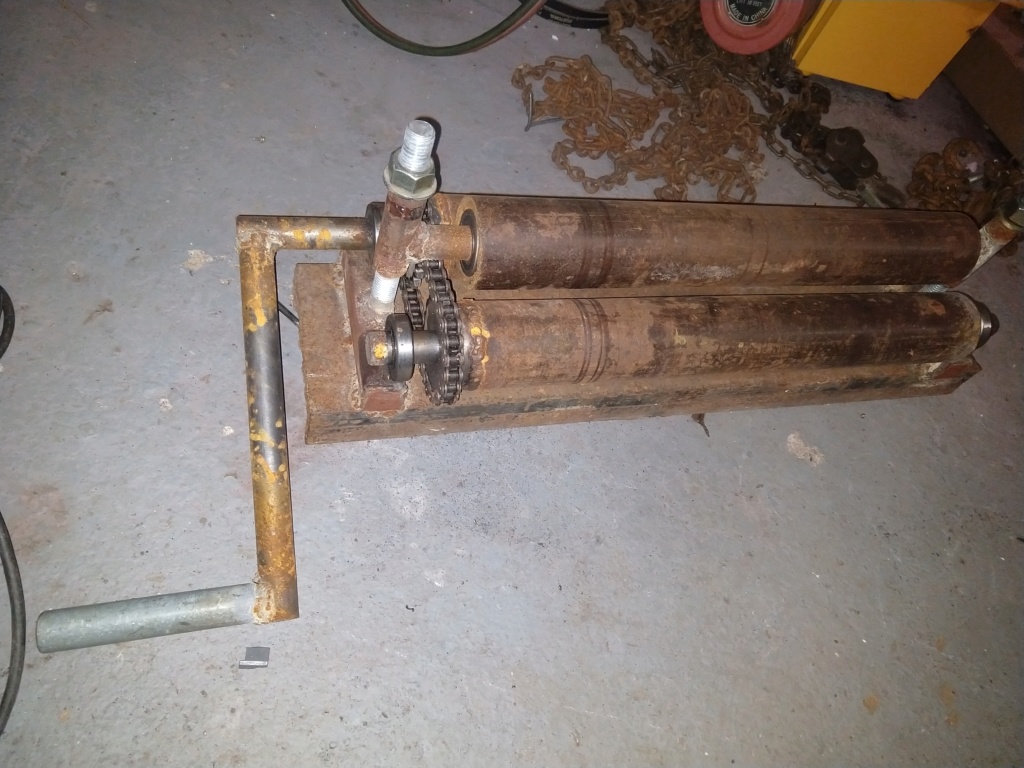 | |
| | | | prancstaman
Veteran Member
Join date : 2015-02-02
Points : 4880
Posts : 1412
Location : Cleveland,Ohio
| | Subject: Re: Homemade tools and stuff from junk laying around February 6th 2020, 8:11 pm | |
| @frostypaws Thanks. I will make the part that moves the center bar down on the underneath part so no framing will be in the way of rolling anything with removeable bars on the pyramid when needed. I think I will be able to roll a 4 inch circle from plate steel, LOL. The ends seem to be the nature of the beast with these tools. I think mine will have about a 1 to 2 inch flat spot on the end of the plate I roll. Any tighter on the rollers would probably bend the rollers when tightening it down. | |
| | | | prancstaman
Veteran Member
Join date : 2015-02-02
Points : 4880
Posts : 1412
Location : Cleveland,Ohio
| | Subject: Steel roller part 4 February 11th 2020, 9:15 pm | |
| Hay People, Got more done on this. I cut the slots for the center roller to come down into on the main framing. Just a little bigger then the 3/4" shaft. I drilled 3/4" holes at the bottom of the slots and then cut down to the holes and test fit the shaft.  I need to cut more angle iron. I need 4 more pieces that are 6 inches long, for extending the frame up to support the center roller. Then cut one side off the 4 pieces. I battled the cold, snow, and darkness to do it, LOL. 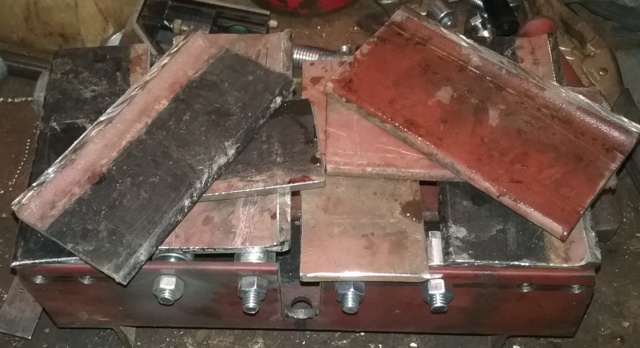 So far, The 3 inch angle iron of 1/4 inch thickness, I started out with a piece that was 8 feet long. I used 4 feet of the stuff so far. This is going to be heavy, LOL. 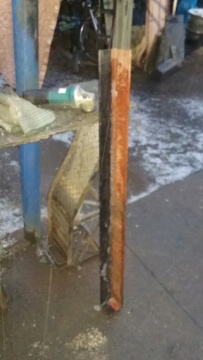 I start putting the framing extensions on for the center shaft. Use a piece under to line up the extensions. After welding the inner part, I lay a strait edge on it and bows inward alittle. No big deal. 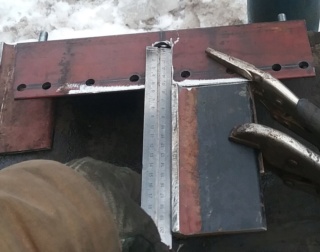  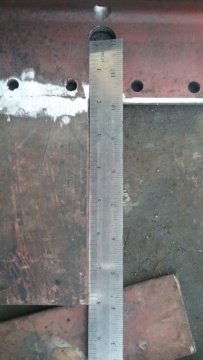 Welded up both sides for strength and grinded, well sorta smooth, LOL. Since I cut into the side framing, it weakened it of strength, so I welded on top of the extensions some 3/8 inch rod to get the strength back. Since the extensions are long this gives leverage strength to the 3/8 inch rod also. Should be plenty strong and no fear of bowing in on the slots and plenty tall too. 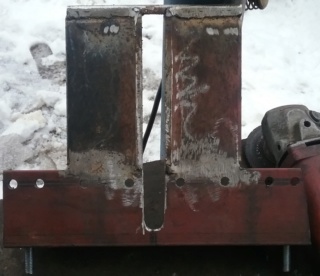  The welded framing made for a good glove warmer, LOL. It was that cold. 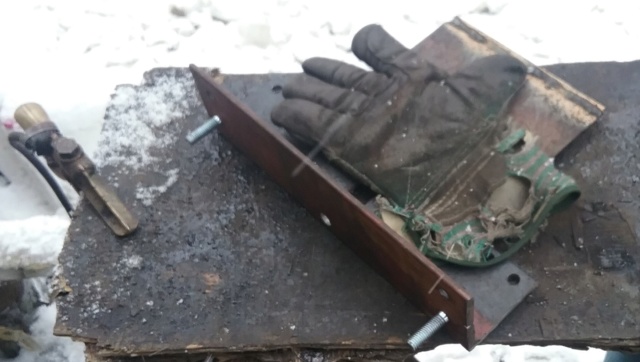 I do a mockup of the framing. I drill a couple holes on top of the extensions for a support bolt. Threaded rods work great for this. I use one to move from side to side if needed or to remove if in the way. Will hold the extensions steady under stress. 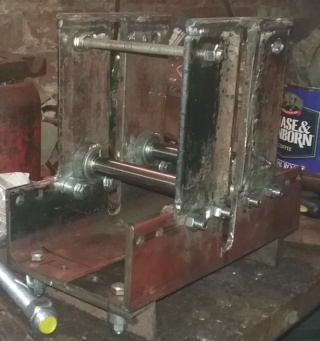  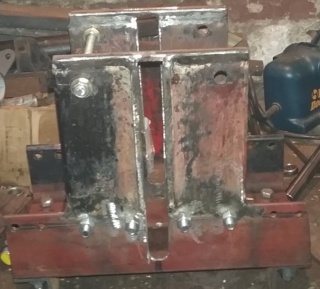 Mockups are good practice. I mockup my setup and reveals 2 issues. First, the center shaft bearing holders hit the outer shaft holders. I would like the center shaft to come down more so the holders will be relocated but will make a larger circle on the work piece but still doable for right now. I can always make different holders later to put the outer shafts back into this spot. No biggie here. Second, I am using threaded rod couplers to weld onto the bearing holders because of the length of them is like 4 nuts long, LOL. The couplers seem to be too long and is also keeping the center shaft from coming down to where I would like. I'll just cut the couples in half and the rest of the description is censored, LOL.  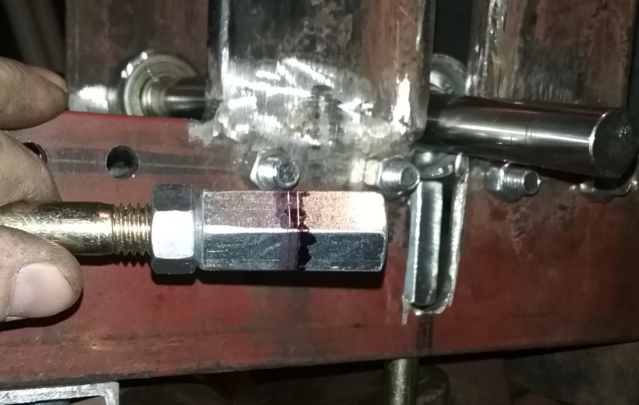 Time to finish off the center shaft bearing holders. The coupler I cut in half, I use the 2 pieces to weld to the bearing holders. I figure the holders wouldn't be strong enough so I buy a piece of 1/2 inch by 1/8 inch thick flat steel stock, $8, to wrap around the bearing holders and then welded to the bearing holders and couplers on one side for strength.  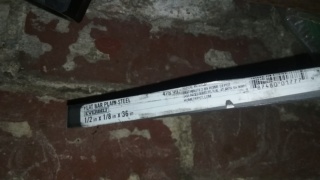  The end results. The welded side of the holder goes outward, I think. I can't remember right now. But welded only on one side for a clearance thing. The bearing will fit in either way. We shall see.  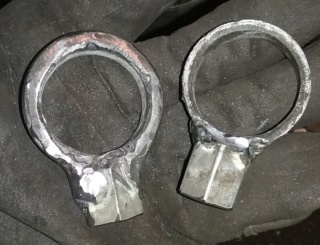 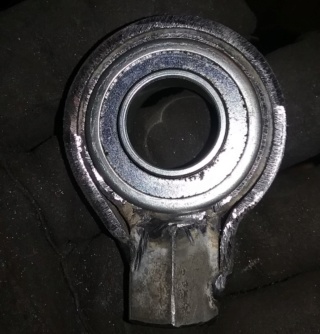 Here is the setup. Grade 8, 1/2 inch bolts at 7 inches long, to pull down on the work piece with the shaft in place. Should be plenty strong for what I have in mind for now and future use. I figure with the bolts being threaded into the couplers, I can adjust the angle of this shaft when needed. Either leveled on the work piece or at an angle on the work piece, just by threading in or out on the couplers.  Next, is to move the holes for the bolts that hold the outer shafts in place. I just make 4 new holes on each side right now. No sense in making the frame into swiss cheese yet. The new holes are 1/2 inch lower and 1/2 inch over. With these new holes, I can do a couple more combo's to lower and raise the outer shafts. The left side would be lowering that shaft, while the right side is raising the shaft. And the center shaft all the way down. 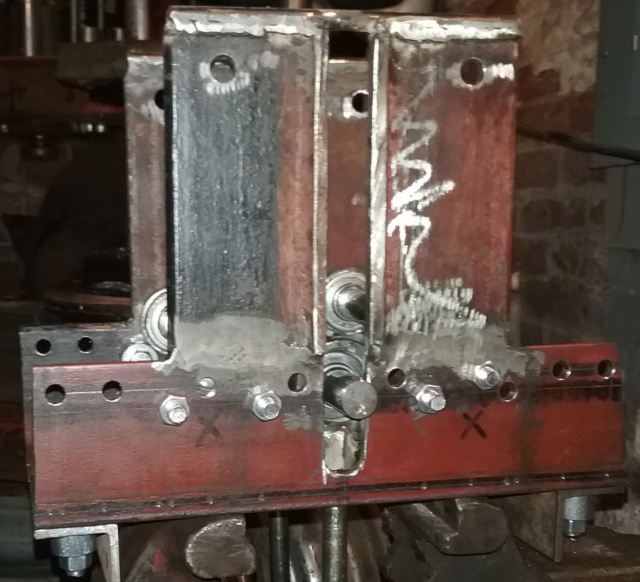 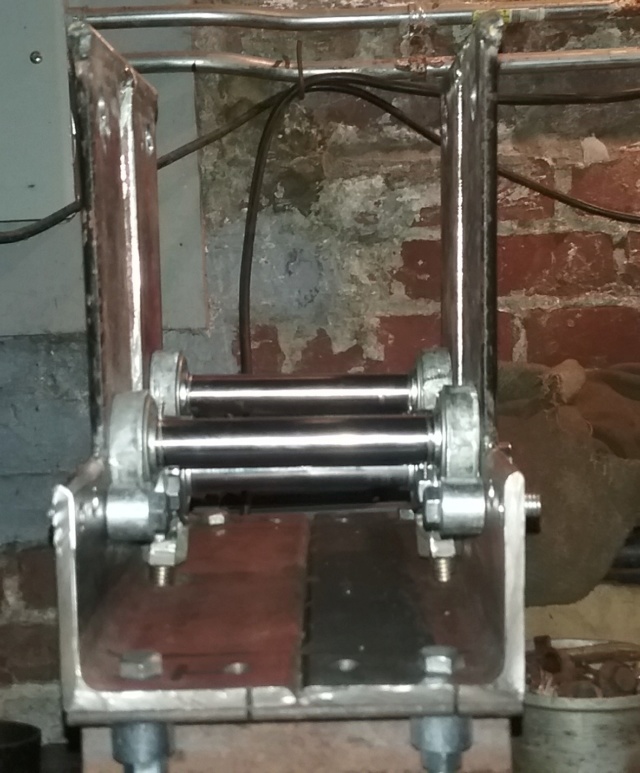 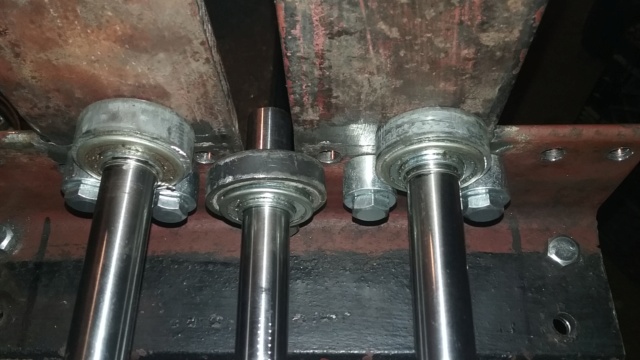 That's as far as I got. 3 more things to do and I'm done and ready to use this tool. Need to make the part to pull the center shaft down, legs, and a way to turn the center shaft. I got something nice in mind for the way to turn the center shaft. OK, Later...……………... | |
| | | | prancstaman
Veteran Member
Join date : 2015-02-02
Points : 4880
Posts : 1412
Location : Cleveland,Ohio
| | | | | prancstaman
Veteran Member
Join date : 2015-02-02
Points : 4880
Posts : 1412
Location : Cleveland,Ohio
| | Subject: Steel roller part 6 March 14th 2020, 12:22 am | |
| Hay People, Been busy working on this tool, I have it finished. Just been too busy to post. I'll work on the bottom half of the steel roller in this post because I still have the rest of the pics to edit and these are the only pics I have ready for now. OK, this part is the part that is the handle for the part that does the bending of the metal. I don't want to waste a ratchet on this part or make some crappy looking arm crank for it. Enough said, now off to the work, LOL. The end of the threaded rod, I grind a double D shape on it for the mounting of an adapter.  I figured this would be cool to use since I'm building a riding mower with it. The adapter fits on good. The wheel is from some mower I stripped years ago and kept the steering wheel since it's in good shape along with the mounting hardware and plastic covering. 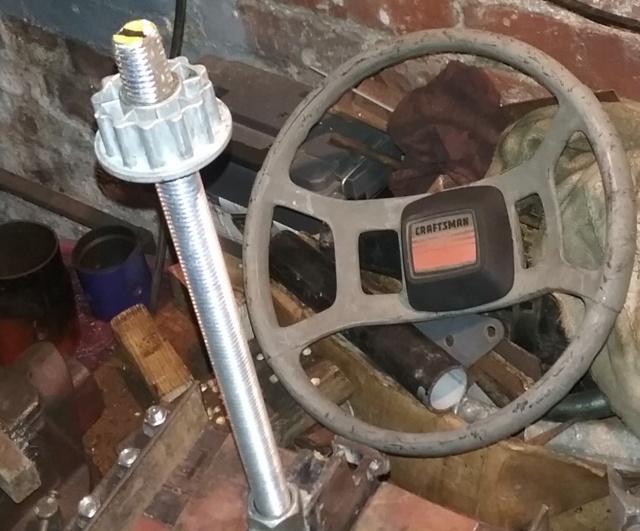 Mount it on and I like it but it looks a little long. Plus, in the pic of the whole thing, the tool is upside down sitting on the bench. Now when it will be sitting the right way then you won't see the name on the steering wheel and the hand grips of the steering wheel will be facing in the wrong direction also. 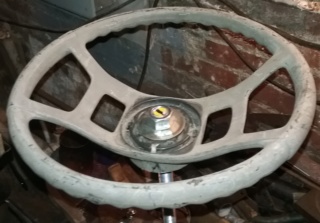 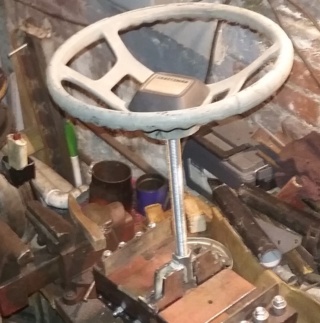 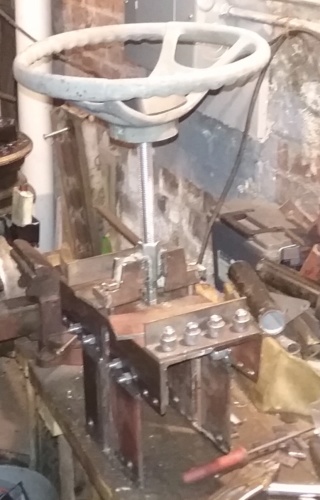 Since I'm making this, I can have the steering wheel face any way I want. So I start the work to flip around the steering wheel. I pull the plastic cover of the center and look at it. Since it seems to be pretty square or evenly made, I measure the picture and mark the center. I drill a 3/4 inch hole and it just clears the name on it. 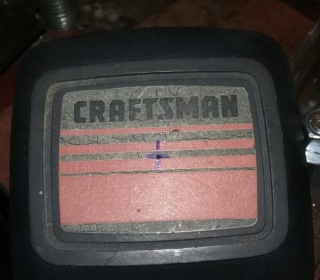 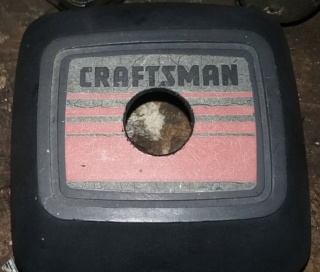 I slide the center cover down onto the rod and flip the steering wheel around and remount it. Perfect! 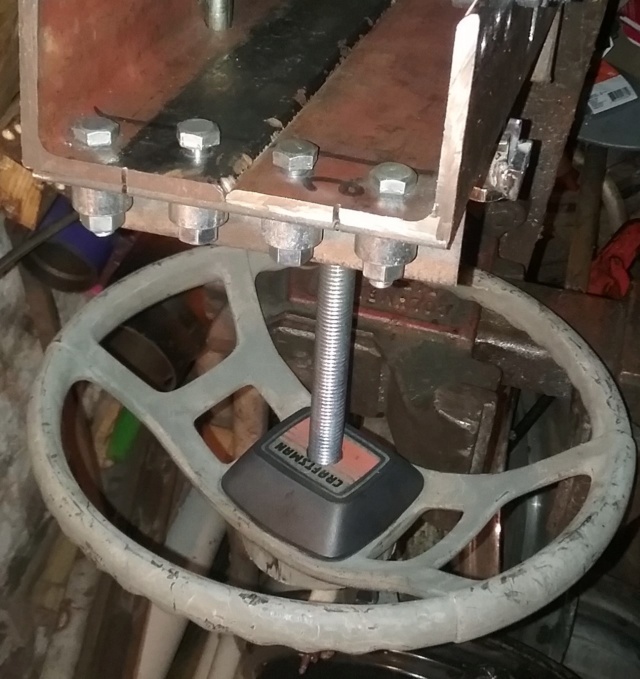  Looking good so far!! I'll post the next set of pics when I get them edited. Later. | |
| | | | loggers gogert
Member

2020 Build-Off Entrant
2020 Build-Off Entrant
Age : 18
Join date : 2020-02-14
Points : 1745
Posts : 202
Location : U.S, virginia
| | Subject: Re: Homemade tools and stuff from junk laying around March 15th 2020, 9:31 am | |
| i know I'm a bit late... but DUDE you gotta make me 1 of those wrench hammer things...lol those things are awesome no but I'm dead serious........ ( ill pay you) just think about it..... | |
| | | | prancstaman
Veteran Member
Join date : 2015-02-02
Points : 4880
Posts : 1412
Location : Cleveland,Ohio
| | Subject: Re: Homemade tools and stuff from junk laying around March 15th 2020, 10:32 am | |
| @loggers gogert NO!!  The idea in this thread is that you do it yourself because you know how. The hammer would be a great project for you to learn how to use a welder, cutoff wheel, and grinder. And make a cool tool also. Plus just by doing it, the learning and experience is mainly what the point is. On a side not, even when you fail, you learn way more then you do when you succeed. Give it a try and have fun learning..... | |
| | | | loggers gogert
Member
2020 Build-Off Entrant
2020 Build-Off Entrant
Age : 18
Join date : 2020-02-14
Points : 1745
Posts : 202
Location : U.S, virginia
| | | | | prancstaman
Veteran Member
Join date : 2015-02-02
Points : 4880
Posts : 1412
Location : Cleveland,Ohio
| | Subject: Steel roller part 7 March 15th 2020, 12:57 pm | |
| Hay People, I got around to editing the rest of the pics. It's a lot, I'll do 2 more posts and that should be done with this project then. I'm at the step where the part that bends the metal will be pushing into the frame at the seam of the angle iron on where they come together in the middle of the frame. The frame being 1/4 inch thick mild steel would still bend like butter under the pressure. So something needs to be made to spread out the pressure onto the frame. I thought of this before hand which is why there is room for the socket to fit inside where the threaded rod threads through. I'm thinking a socket with feet, LOL. I picked a socket because it is better steel then a piece of pipe and has a certain shape to it already to have the desired result. A 3/4 inch socket with a 3/8 drive. The feet are made from the 2 left over pieces of steel cut off the top frame tower part. Which leaves 1- 3 by 6 inch piece of steel 1/4 inch thick, left over for something else.  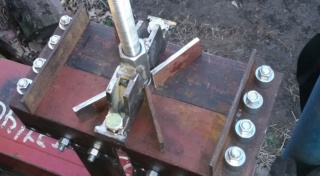  I weld it together and clean it up. The end result.  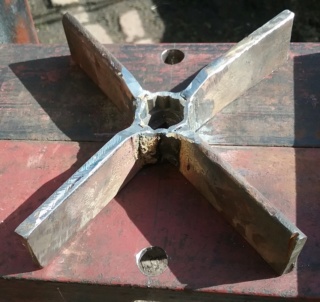 I clearance where needs to be. The puller fits almost flush with the frame. I give the feet on the socket a shape to where the ends of the feet touch the frame, and when the pressure is a lot will push down on the feet and lay flat on the frame. Kinda like the feet on a wooden chair but less of a shape. The feet will flex and bend so I figure I take advantage of it. If you look close at where the socket is, you will see a slight gap, and at the feet on the ends sit on the frame. Very small gap where the socket is to the frame but will go away after enough pressure is put down on it. 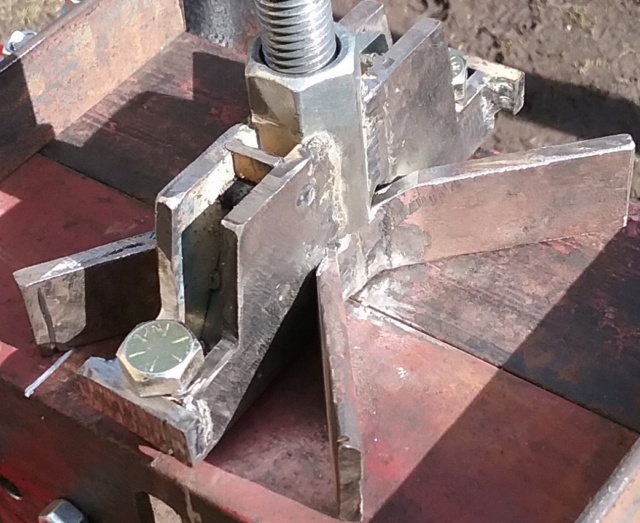 To finish this part off, the threaded rod fits inside the socket but the socket has the 3/8 hole for the ratchet. This hole needs to be plugged. I cut a bolt head off and drop it inside and weld the other end of it so the bolt head don't fall out. This gives the threaded rod a flat spot inside of the socket to push on so it won't damage the threads on the end. I also cone shape the end of the threaded rod because after many years of use will mushroom this end and the cone shape will prolong this from happening by years and still be able to unscrew the threaded rod without issues until then. "Many Years" LOL, I hope I use the crap out of this tool...  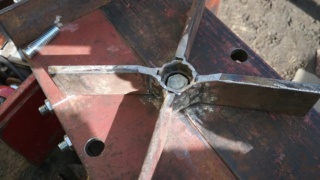 OK, onto the next part of this tool, the feet. The feet will be made from square tubing I got from my job Free. Got a pile of the stuff just sitting on my basement floor. Just very thin walled tubing. 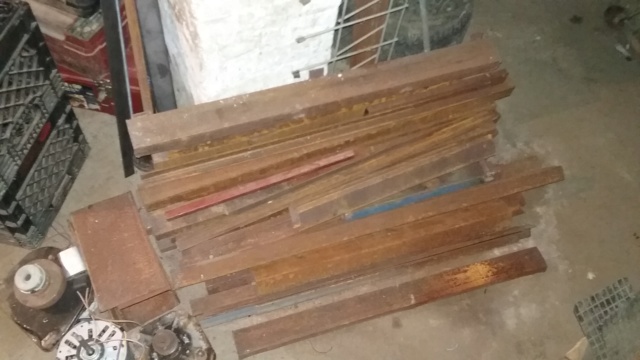 I pick out a couple 1 by 2 inch pieces for the feet. Cut to length so it snakes around the bottom wheel. I use notches for the bends and weld the notches up. The crossover on the feet doubles as a support for the threaded rod to hold that whole assemble in place, so it's not flopping around or falling out. I use a piece of tubing, I think it was a bike seat tube I found in the box on my work bench with all the good junk in it, LOL. Then weld everything up. So the feet are welded to the angle iron that holds the frame halves together.  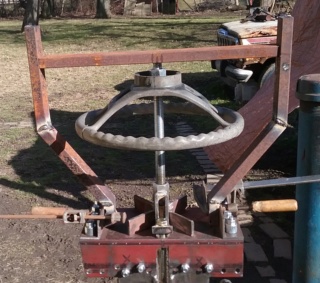  I get some thin angle iron for the actual feet. I lay it on the ground to weld them on, so the thing doesn't wobble when sitting on the ground or table or where ever it may be used. This pic also shows the whole assemble. The little pic to the side, well, even I do bugger welds, well sometimes. Nobody is perfect, even me. LOL. 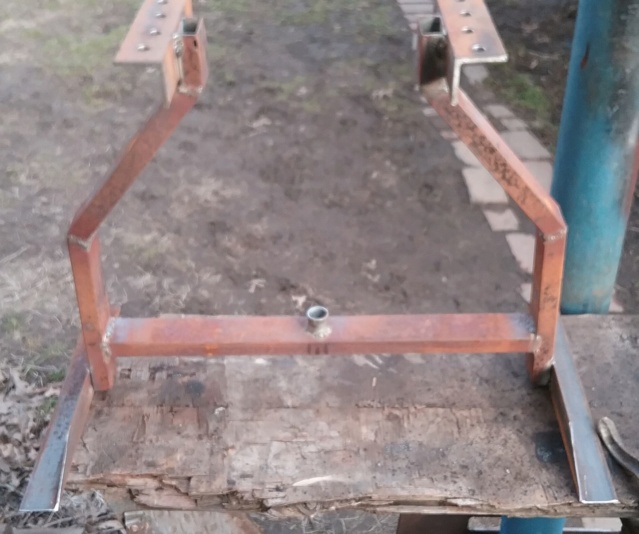 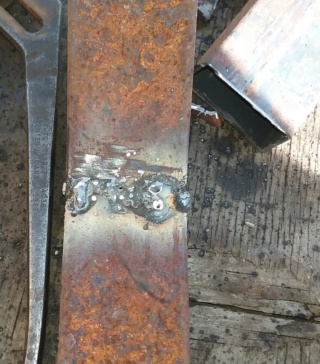 OK, now for the glamour shots of what I have so far. "Lovin it" 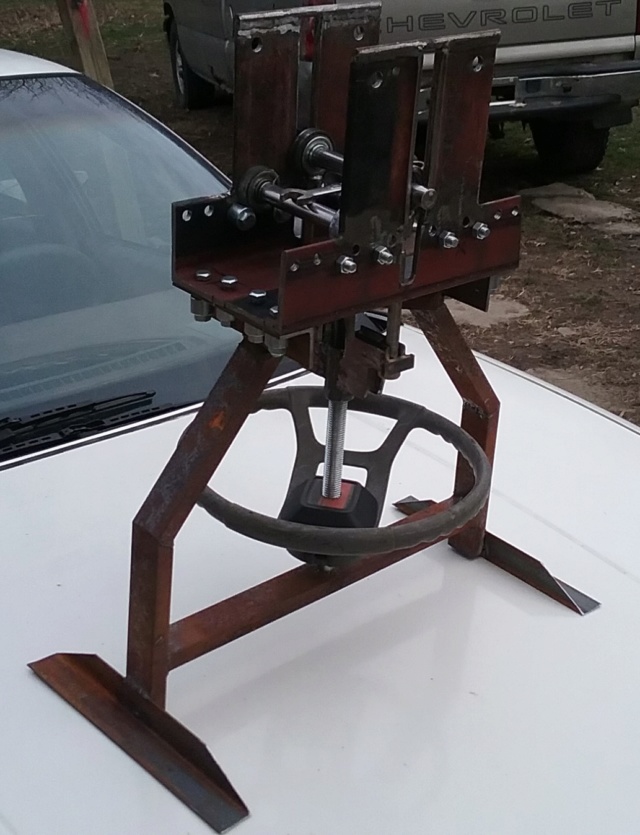 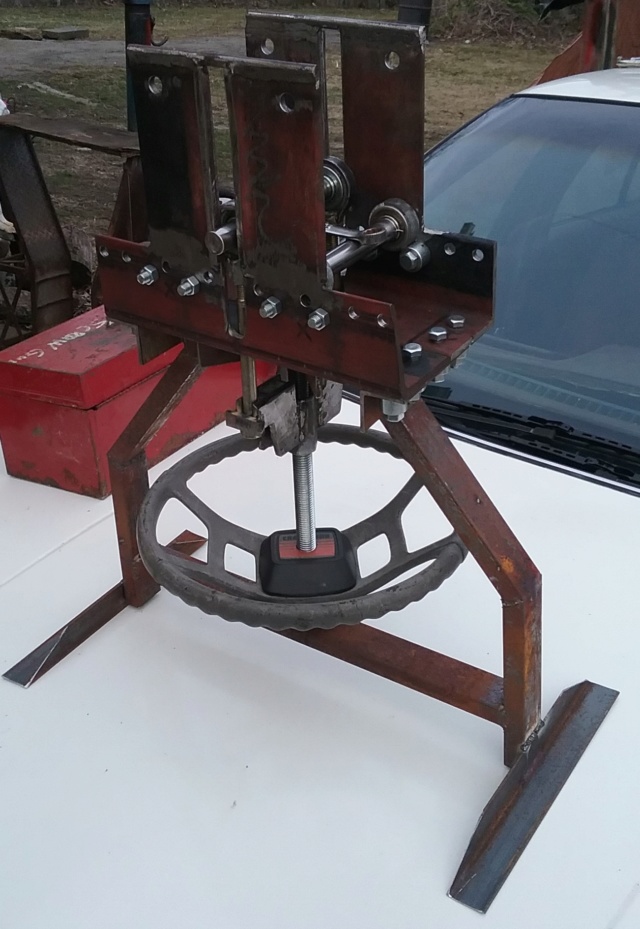 One more post on this project tool and that's it. Any upgrades on this will be in separate posts. The wrench that is in the rollers, in the glamour shots. I put that there to hold the middle roller up in place for the pics. It's a 9/16 inch craftsman wrench and this thing can bend it like it was nothing, LOL. | |
| | | | prancstaman
Veteran Member
Join date : 2015-02-02
Points : 4880
Posts : 1412
Location : Cleveland,Ohio
| | Subject: Behind the 8 Ball Steel Roller part 8 March 15th 2020, 6:57 pm | |
| Hay People, Finished my work outside early, so looks like I can finish this thing off today and move on. If you noticed the title of this post, since I finished this project up, I decided to name this one, LOL. "Behind the 8 Ball Steel Roller" comes to mind after seeing the finished product. I got everything done except for the handle that spins to roll the metal through. Got something special in mind. After seeing everybody else on You Tube on what is used. Some sort of wheel is used, or a hand crank is used. Blah, hand crank, and I'm not going to make a wheel for it. I got something that has been sitting in the basement for about 20 years. My old Jeep steering wheel, LOL. When I got my Jeep back in the day and was rebuilding it, I had an old Grant steering wheel I put on it and never used the original one. I just threw it on a hook back in the corner and never touched it since. I'm pretty sure I'll never put it on another car or truck again. You can kinda see the dust and cobwebs on it, LOL. So...…  Still in pretty good shape too. Just missing the AMC symbol in the center of the horn button. The Jeep it came off of is the one you see in the back ground. 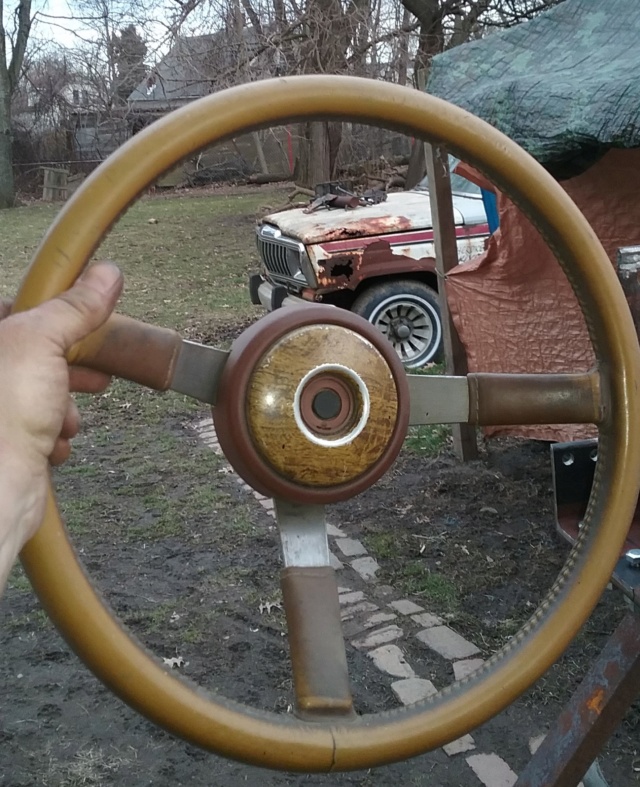 OK, The mounting hole for the steering wheel is almost 3/4 inch. The center roller, I'm pretty sure is 3/4 inch. I drill out the center of the wheel hub just a tad, I don't want the shaft to slide in too far because the shaft is barely long enough to mount the steering wheel and clear stuff. I was going to use my hydraulic press to push in the shaft into the hub but the damn wheel wouldn't fit inside the press, LOL. So I just nailed it in. I open the vise a little bit so the shaft can spin on top the vise jaws. Give it a spin to make sure it doesn't wobble and tack weld it on, then spin it again, and then final weld it on the shaft. Worked great. It would have drove me nuts if it wobbled any but no, it's pretty straight. 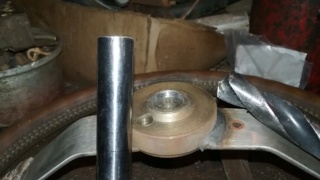 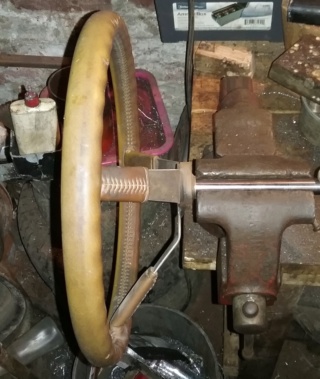  I put the horn plastic stuff back on and mock up the steering wheel, LOL. Awesome!  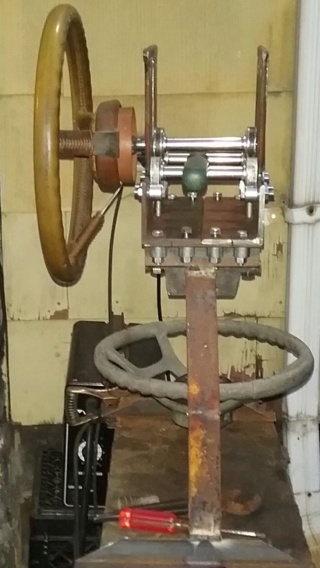 I then grind little grooves in the shaft to wrap wire around to lock the shaft in place on the bearings.  OK, here is where I got the name for it. I wanted to get this since I thought of building this tool. I had the whole thing planned out in my head on the main parts and what I'll be using for them. I thought of using the Jeep steering wheel when I first thought of building this thing, LOL. And since I was using a steering wheel, I can go get a suicide ball for it. And Auto Zone just happen to have an 8 Ball one, NICE! Didn't even have to pay for it, I got it with my points that I been saving for something special like this. 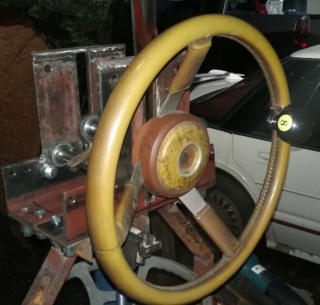  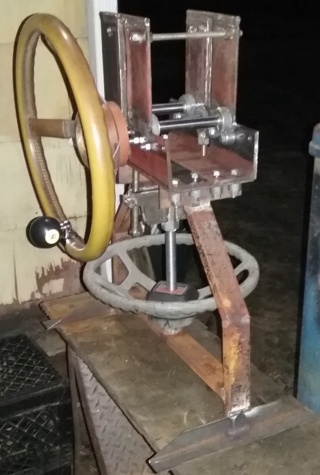 My "Behind the 8 Ball Steel Roller". 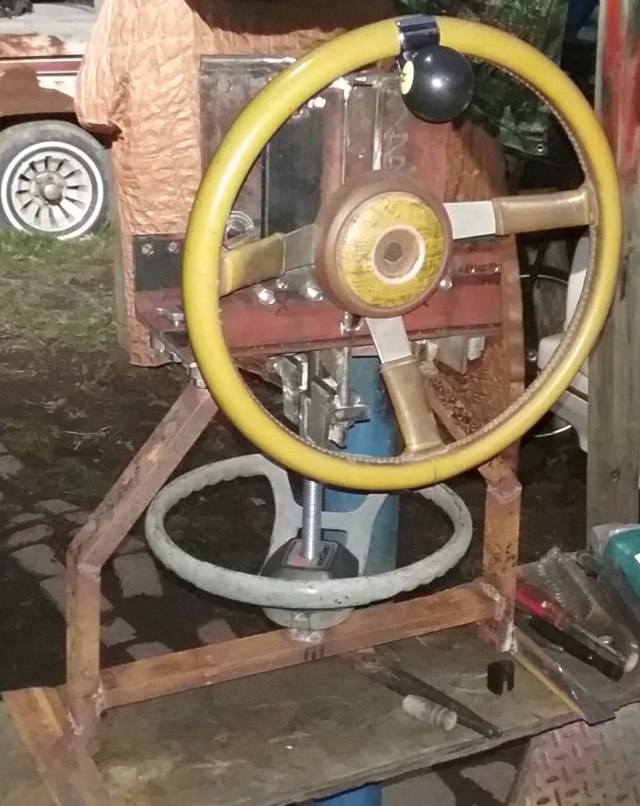 Yup, had to try it out real quick. I grabbed the left over flat stock 1/2 inch steel and give it a whirl. Perfect! A little tweak here and there and will be great. Evidently, if I go too small of a circle with the steel then the rollers on the ends will pop out the holder. Easy fix there. The ends of the worked piece will be untouched by the rollers and will be waste from the work, nature of the tool. But all in all, works great. 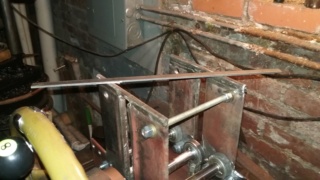 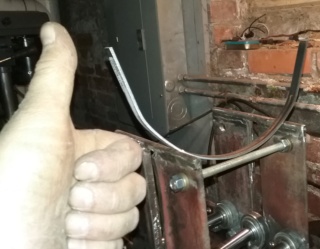 Now that this tool is done, onto the project at hand. | |
| | | | loggers gogert
Member
2020 Build-Off Entrant
2020 Build-Off Entrant
Age : 18
Join date : 2020-02-14
Points : 1745
Posts : 202
Location : U.S, virginia
| | | | | Sponsored content
| | | | | | | Homemade tools and stuff from junk laying around | |
|
Similar topics |  |
|
| | Permissions in this forum: | You cannot reply to topics in this forum
| |
| |
| | Who is online? | In total there are 33 users online :: 1 Registered, 0 Hidden and 32 Guests MightyRazeMost users ever online was 412 on January 7th 2023, 7:59 am |
|