| | | Project : Argoceptor! |  |
|
+11Dave.MTD frostypaws CraftsmanQuad19 prancstaman MatthewD TheBeal Creepycrawler RichieRichOverdrive Hillbilly Homer Crazy_Carl TourMax 15 posters | |
| Author | Message |
|---|
TourMax
Member

Join date : 2018-10-06
Posts : 438
|  Subject: Re: Project : Argoceptor! Subject: Re: Project : Argoceptor!  May 26th 2019, 4:55 pm May 26th 2019, 4:55 pm | |
| I can’t believe it took me nearly the whole day to make this one plate on the firewall: 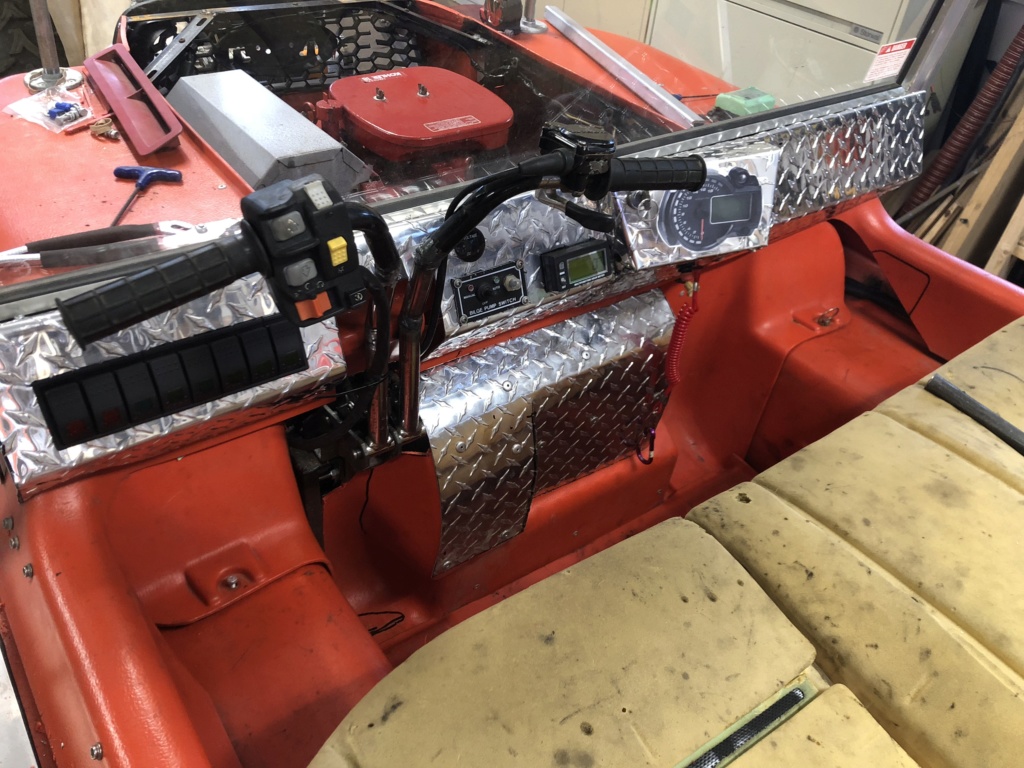 That stupid diamond plate did NOT want to form at all. Now I have to decide what I want to do for the shifter. I could just re-cut the horizontal slot and put the stock shifter rod back on, but that just seems so much like a “cop out” after all the other custom work I’ve done.... | |
| | | | TourMax
Member
Join date : 2018-10-06
Points : 2509
Posts : 438
| | Subject: Re: Project : Argoceptor! May 30th 2019, 8:23 am | |
| I've been going through various linkages for the shift mechanism, but it just isn't going to work.
The problem is the Argo transmission needs such a wide arc to shift fully from reverse to high gear that there's just not enough room to make the linkage fit and have the shifter not protruding into the driver/passenger leg/knee space.
The alternative is multiple rods and bellcranks to make it work and that just gets needlessly complex and introduces more places for "slop" and looseness. Not a feeling of quality to say the least.
So I think I'll look at a push/pull cable shift mechanism. That give me the option of putting the shifter nearly anywhere I want it. For example, I could even put it on the left side of the seat if I need to.
My back is pretty messed up today (as well as my shoulder) so I'll probably limit myself to just designing it until everything calms down a bit.
| |
| | | | TourMax
Member
Join date : 2018-10-06
Points : 2509
Posts : 438
| | Subject: Re: Project : Argoceptor! June 2nd 2019, 4:57 pm | |
| Getting there on the firewall:  Still some work to do making the bits look nice, but its in, it fits and it’s functional. I still want to do a few things with the shifter. I’ve go the old shift ball on there, but I want to rig up a brake for the driven clutch. Sometimes, there just enough belt drag to rotate the driven clutch, even when the drive clutch is fully disengaged. Shifting with even this light rotation makes it hard to shift and grinds gears. My plan is to use a bicycle rubber stopping caliper to grab the driven clutch and hold it while shifting. A small lever on the shifter lever will actuate it, which means a slight redesign of the shifter lever end in the cockpit. Nothing complicated, probably a “grip” style shifter handle and the cable lever. Something along these lines, although nowhere near as fancy looking: 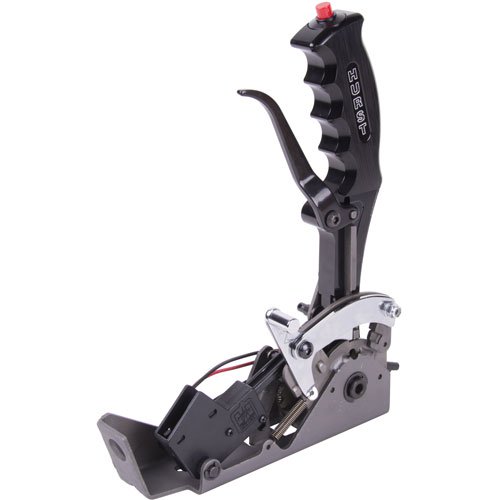 I’m also tired of looking at that open engine bay, so I’m starting the work on the fiberglass hood... | |
| | | | TourMax
Member
Join date : 2018-10-06
Points : 2509
Posts : 438
| | Subject: Re: Project : Argoceptor! June 3rd 2019, 3:11 pm | |
| Not my best fiberglass work, but for the first lay-up, it’s a decent enough start: 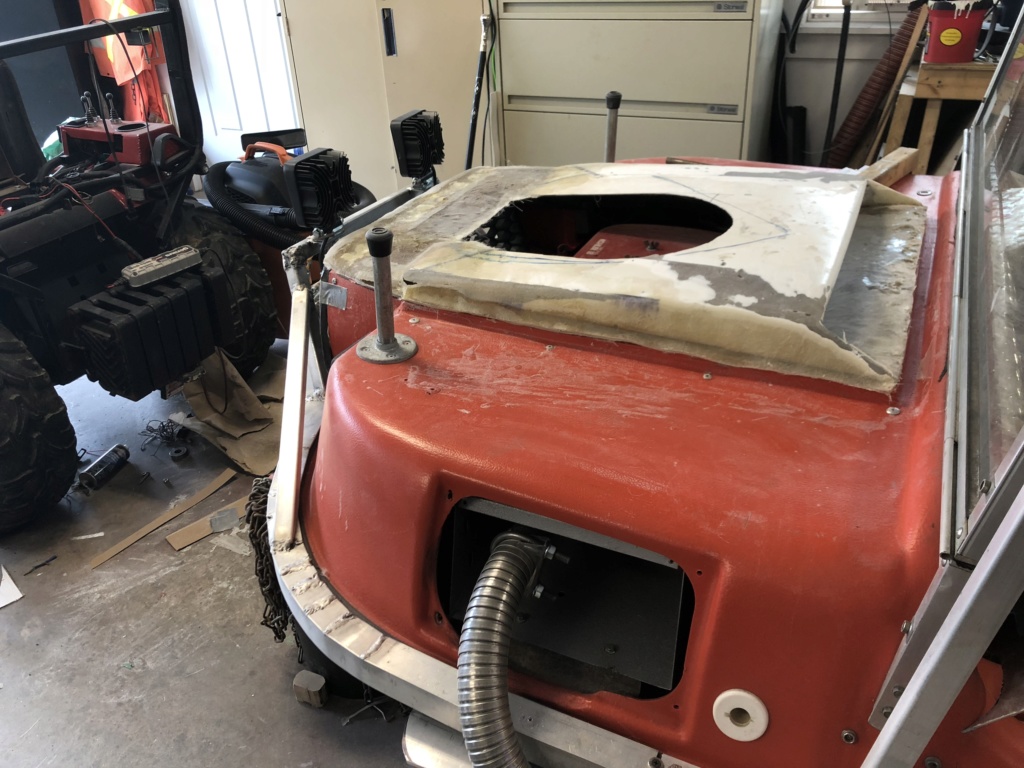  The basic shape is at least there. Now it’s layering in some reinforcing layers and building up the outside to where I can shape it properly. Not sure what color to paint it when done. I’m thinking orange like the argo, or maybe a flat black. Dunno, thats a long way off. Lots of time to think about it.... | |
| | | | TourMax
Member
Join date : 2018-10-06
Points : 2509
Posts : 438
| | Subject: Re: Project : Argoceptor! June 4th 2019, 4:04 pm | |
| Decided to just ‘glass back in the center piece rather than make the hood “buldge”: 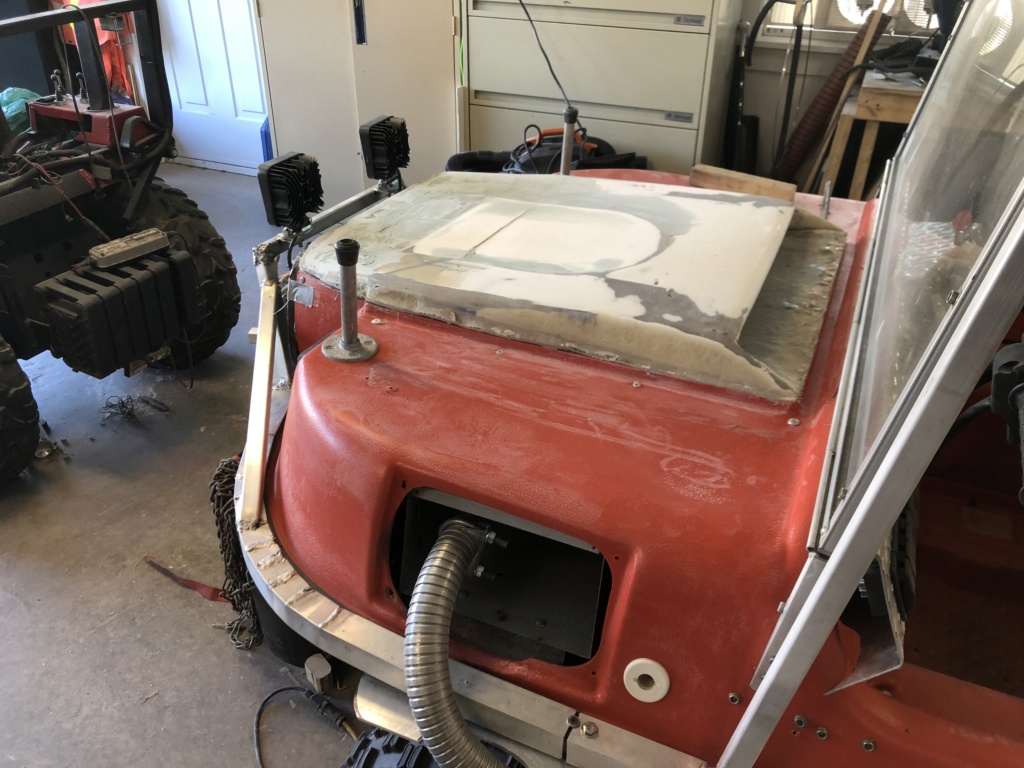 The buldge was for the vf750f engine and now that I’ll orobably be running the Kohler for the next couple years, it didn’t make sense to bother with it for now. It’s coming along ok. Still lots more work to do before it will be ready for paint. Of all the things I have to do, bodywork has to be the most sespised for me. Sooo much dust....everywhere. | |
| | | | TourMax
Member
Join date : 2018-10-06
Points : 2509
Posts : 438
| | Subject: Re: Project : Argoceptor! June 6th 2019, 5:16 pm | |
| So two things I’m planning to do to the Kohler M18: 1. Add a remote oil filter 2. add an oil heat exchanger The Kohler is a little unusual for a small engine in that it has a full pressure oil system. Thats a nice feature, it even though you could have bought it with a filter and cooler, mine does not have them. The filter is desirable because, well, it’s an oil filter. Any time you add a filter to a system, its a good thing. The oil cooler/exchanger I have two purposes for. The first is obviously cooling engine oil, but the second is to use the oil cooler to dump heated air into the cabin area. Simple enough to build with a fan and some ducting. The filter isn’t a problem, I’ve got a remote filter kit thats been ha ging around for a couple years now. The cooler isn’t a problem either as I’ve got a couple different sized coolers lying around from various projects. The engine itself has a block off plate where the factory oil filter woukd bolt on. The adapter is prety hard to come by, only popping up on places like ebay infrequently and expensive when they do. So plan is to grab a 1/2” block of aluminum and machine my own adapter plate. Thats a pretty easy little piece to spin out.  | |
| | | | TourMax
Member
Join date : 2018-10-06
Points : 2509
Posts : 438
| | Subject: Re: Project : Argoceptor! January 26th 2020, 8:40 pm | |
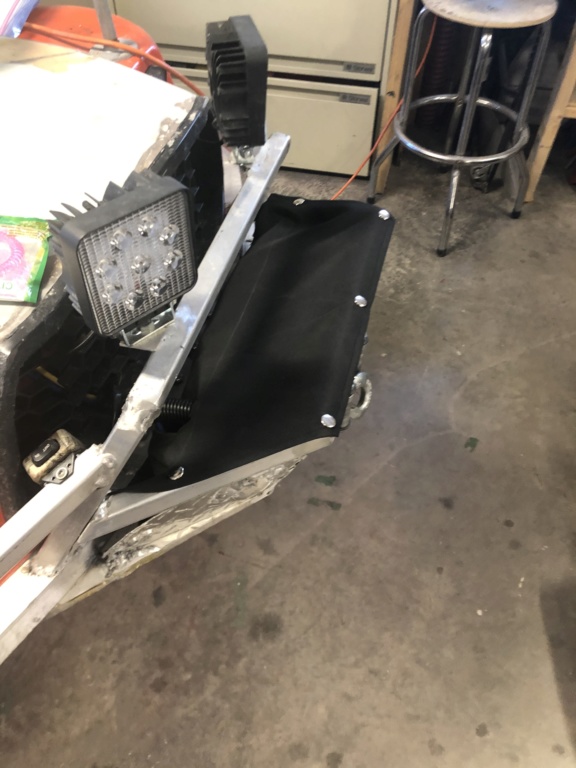
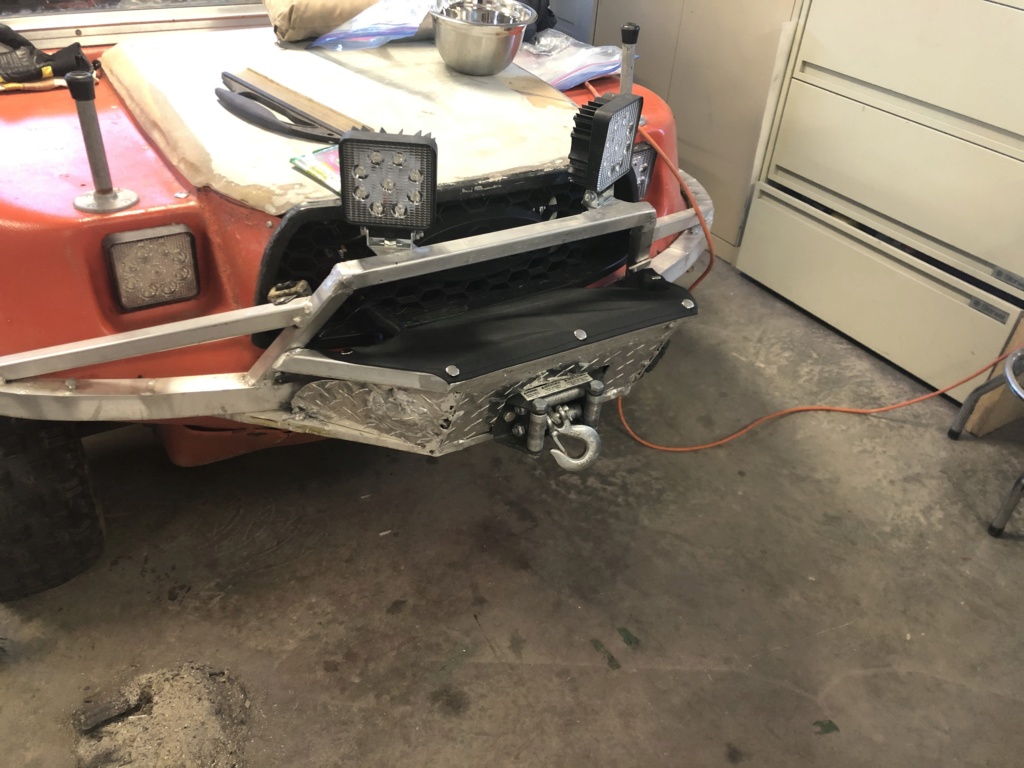
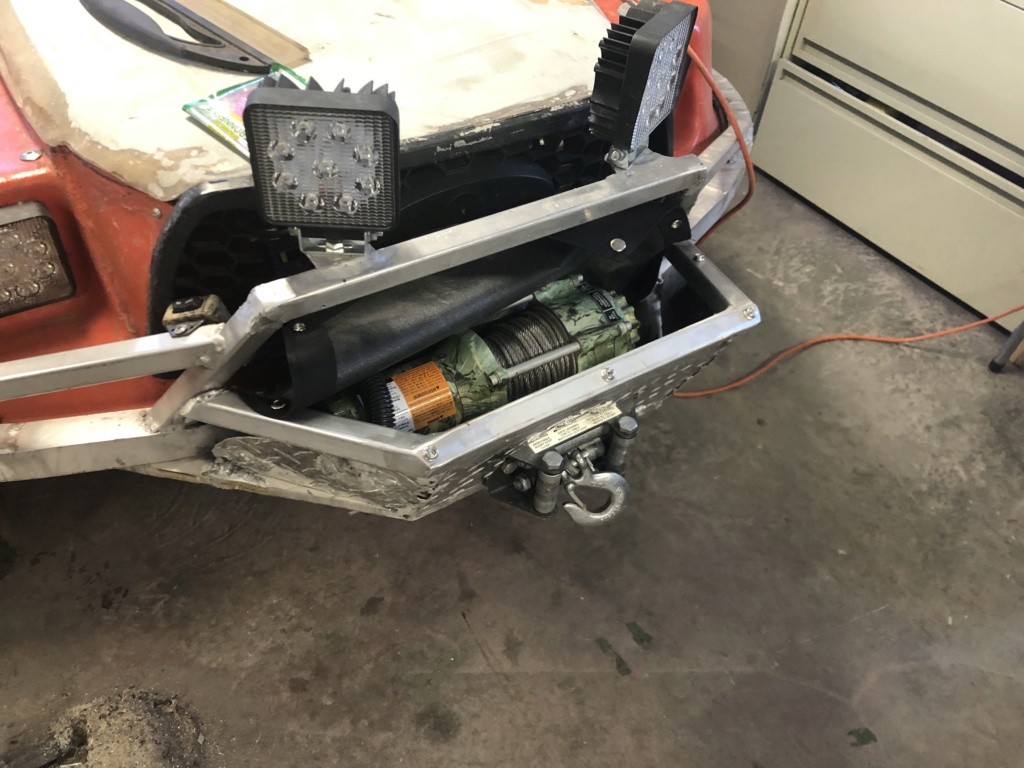
| Been a while since doing anything to the argo. Got some tig welding done and more wiring. Welded up a guard/splash shield: 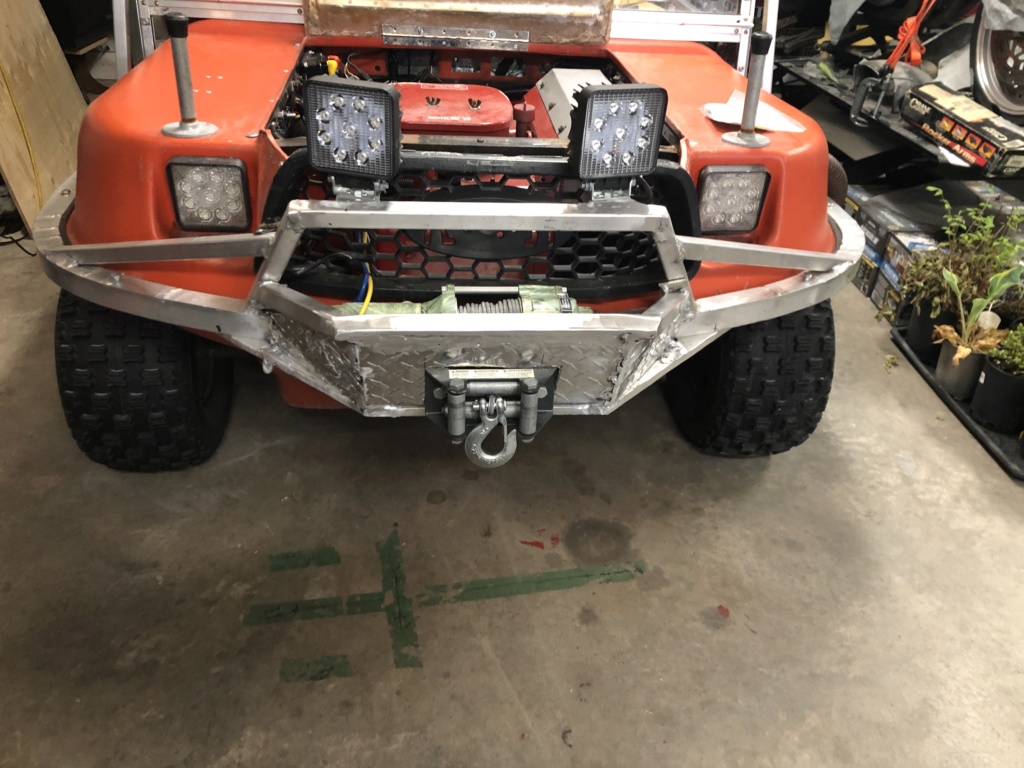 It’s not crooked, it’s the angke the pic was taken at that makes it look “crooked”. Now when I’m crashing through the bush, the winch has some protection. The diamond plate also serves as a splash shield on water entry. Water won’t really hurt the winch, but no need subjecting it to more than needed. The shield will also help prevent water from rushing in through the grill opening. Any that does make it in will be easily handled by the bilge pumps. I have one pump set on “auto” and it turns itself on via a float switch. Theres a second pump on the other side of the engine and that is tied to the manual switch on the bilge pump control panel. “Auto” only arms the float switch pump, manual I have rigged to run both pumps. Reason being; the float switch pump deals with whatever small amounts finding its way past the axle seals, but when it’s obvious something has gone very wrong and theres a large leak, I hit “manual” and both pumps start chucking water out as fast as they can. My reasoning is if I’ve got a big problem (like punching a hole in the tub), two pumps going at 2500 lpm might give me enough time to make it back to shore. I’ve got a big deep cycle battery in the back (group 24, agm), so the pumps can run for a good long time before running the battery down. Then I went at making an exhaust shield: 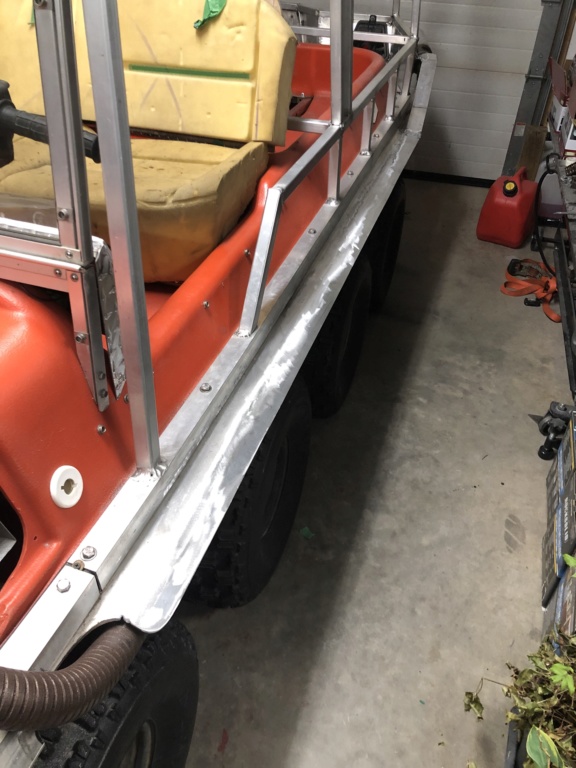 I just tig-ed a piece of 1/8 flat stock to the existing 1/4 flat stock that already formed the lower cap. No moreleaning over the side and burning my legs. Then, made the housing for the switches, installed the speedometer and wired it all up: 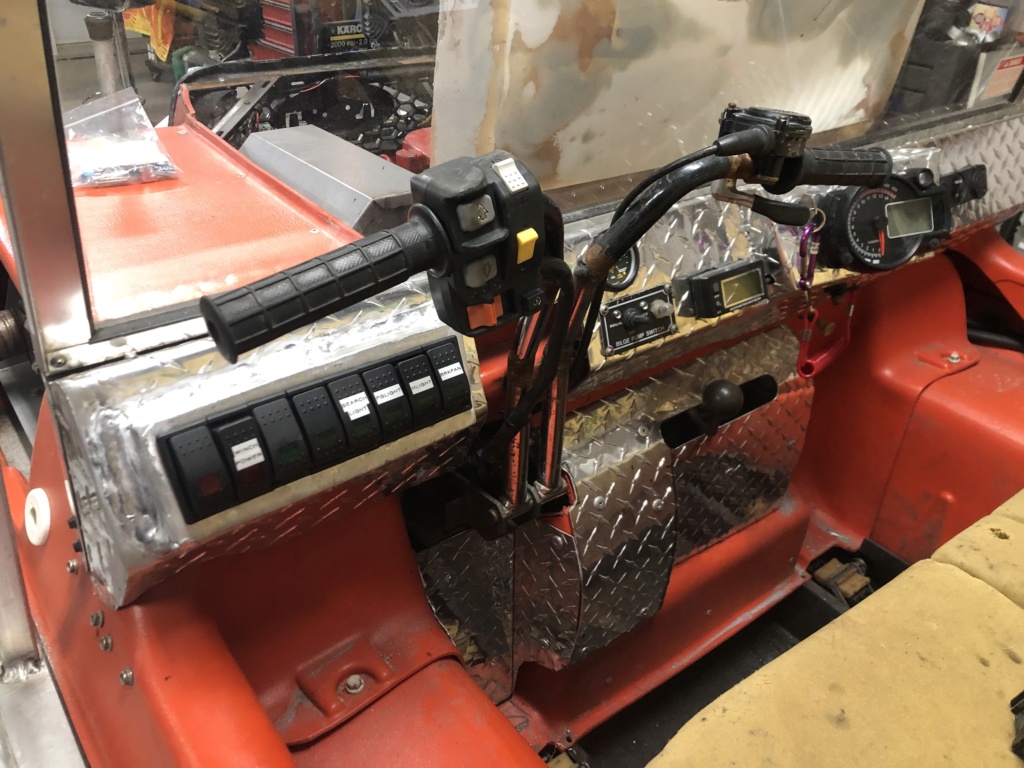 The honda rubicon switches on the lh bar don’t work right now, except for the “up/down” shift buttons, which I repurposed to work the winch “in/out”. Works nicely and its right at hand when I need to winch while trying to drive out of a “stuck”. The rh bar has the “thumb throttle” from the rubicon. Works ok, maybe a little better than the twist grip. But I do need to make a lever for the front of it so you can run the throttle either by pushing on the thumb throttle of pulling on the lever. The thumb throttle can get a little tiring on the thumb and it would be nice to be able to let go from time to time to rest the thumb. The rest of the switches will eventually get wired up to their intended purpose, which will free up some dash switches for more functions. Also tidied up the engine bay wiring and added a fuse panel:   Nice and neat and the fuse panel still has 6 slots open for future “add ons”. Theres lots of other small things that have been added/finished. Tomorrow I’m going to take it out for a burn. Time to get a little payback from it. Then I need to work on things like the side and rear search light, the tail/brake lights and stitch up some seat covers. Still a long way to go, but making progress... | |
| | | | mr.modified
Veteran Member


2015 Build-Off Top 3 Winner
2015 Build-Off Top 3 Winner
2016 Build-Off Top 3 Winner
2016 Build-Off Top 3 Winner
2018 Build-Off Finalist
2018 Build-Off Finalist
2022 Build-Off Entrant
2022 Build-Off Entrant
1st Place Build-Off 2014
1st Place Build-Off Winner 2014
2023 Build-Off Entrant
2023 Build-Off Entrant
Age : 34
Join date : 2013-11-02
Points : 6947
Posts : 2906
Location : New Jersey USA
| | | | | TourMax
Member
Join date : 2018-10-06
Points : 2509
Posts : 438
| | Subject: Re: Project : Argoceptor! February 4th 2020, 12:09 pm | |
| Well, I "repaired" a wheel that was consistently going flat. It was rust on the bead surface and a round with a flap wheel and some paint sorted it out. But, it made me think about something I've had in the back of my mind for a while now: bead locks. 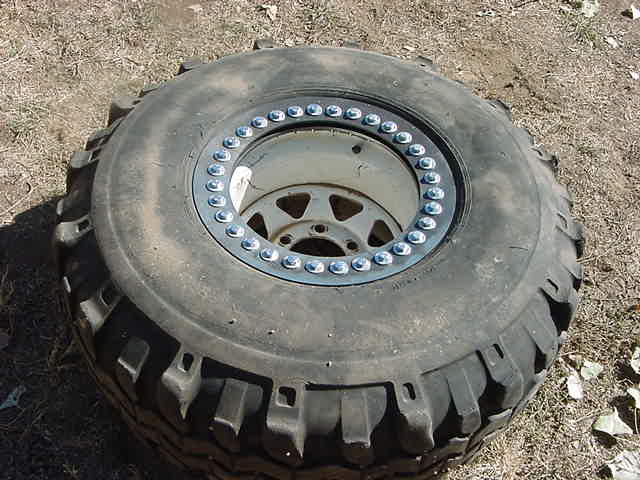 Welding isn't an issue as I recently picked up a 250 amp tig: 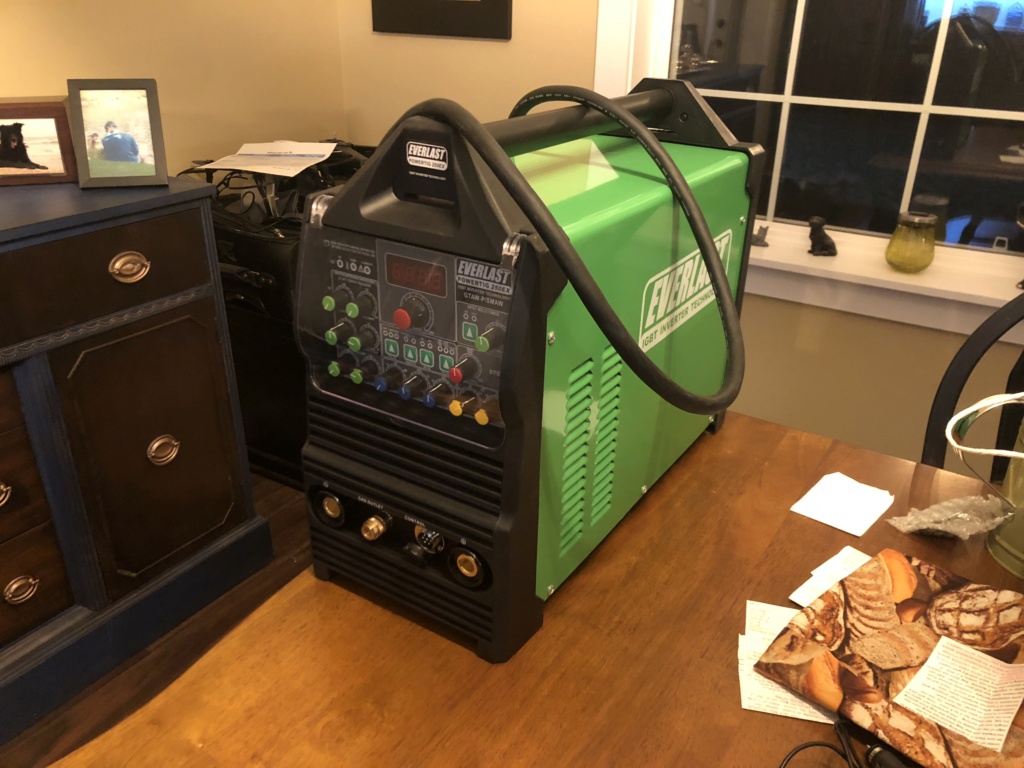 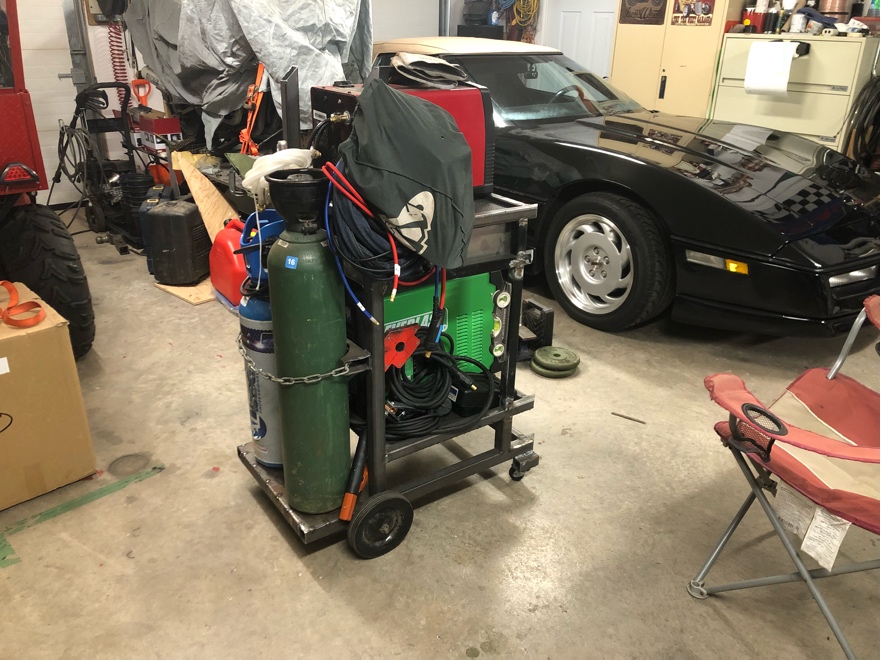 Between the tig and mig, no issues putting them together. But, there's 8 wheels on the argo, which means 16 rings to cut out and weld. If you want to be really picky about it, it's actually 32 circles to cut. One for each ring and another cut inside the plate to make the inner ring: 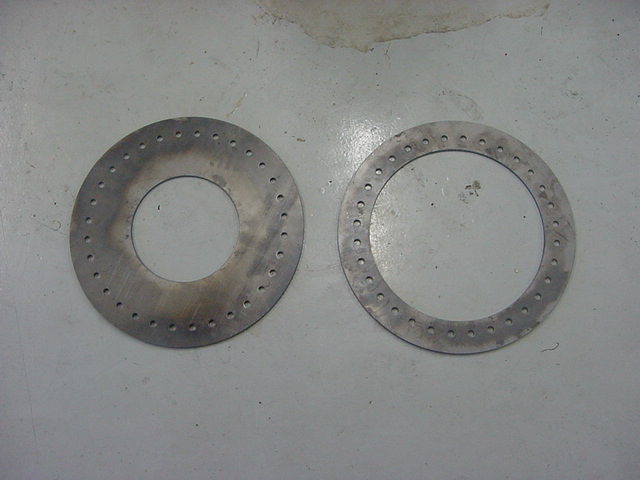 Waaaaay too much work to do that with angle grinders or jig saws. Checking prices on having them cut out just gets really foolish, really fast.Finding anything "ready made" just doesn't happen for the tiny rims on the Argo. So, rather than spending lots of money and only getting a set of argo bead lock rims, I bought one of these instead:  Chinese plasma cutter, 50 amp. Supposedly good to 1/2", but I won't be cutting much more than 3/16" mild steel. Reviews on the machine are mostly good, with a few "Chinese junk" or "worked for a week" comments. I won't be using it much, but when I do it should be for fairly long periods (ie:cutting So set up a circle cutter, buy some steel and go at it. I might end up spending a little more than I woudl have if I'd had a local shop cut them out, but now I'll have a plasma cutter I can use again and again. Will probably come in handy as I'm going to have 16 left over 3/16" round circle plates..... rofl | |
| | | | TourMax
Member
Join date : 2018-10-06
Points : 2509
Posts : 438
| | Subject: Re: Project : Argoceptor! February 17th 2020, 10:12 am | |
| Well, finally got tired enough of being rained on, snowed on and snow/rain inside the argo that I made a top for it:   Thats an outdoor rated, water “resistant” fabric. Sort of like “sunbrella”, but a little lighter and a membrane adhered to the under-side of it. Thats a good start. Next will be the sides. Sides will zipper on to the roof and have large clear plastic windows. But for now, the top by itself is a 100% improvement.... | |
| | | | TourMax
Member
Join date : 2018-10-06
Points : 2509
Posts : 438
| | Subject: Re: Project : Argoceptor! April 19th 2020, 3:25 pm | |
| Well, I finally got tired of the foam mat (Think: yoga mat) I was using in the back of the Argo, over the aluminum rear floor. It just wasn’t up to the task. It ripped easily, it slid around and folded upon itself and just was an all around pita. So:  Thats a big, heavy horse stall mat cut to size. Its nice and thick, so it won’t squirm around or fold on you when you’re in the back. It’s also heavy enough to keep the aluminum floor from “clanking” when traversing rough ground. Theres no way in heck you would be able to tear it. As an added bonus its ribbed on one side and flat textured on the other. So one side can accept a bit of water and still have a dry standing surface, whike it can be flipped over if you need a flat surface to place something on. It does add a bit of weight to the Argo, but when your rig already weighs around 1000lbs, 20 or 30 more really makes no difference. | |
| | | | RichieRichOverdrive
Moderator


2018 Build-Off Entrant
2018 Build-Off Entrant
2024 Build-Off Entrant
2024 Build-Off Entrant
Age : 21
Join date : 2016-10-29
Points : 6578
Posts : 3613
Location : Lewisburg, KY
| | Subject: Re: Project : Argoceptor! April 19th 2020, 3:37 pm | |
| This thing is as neat as it gets. Any progress on the bead locks? I don't even have a machine heavy enough to need more of a bead lock than the little ridge on the rim, but your idea is still cool. | |
| | | | TourMax
Member
Join date : 2018-10-06
Points : 2509
Posts : 438
| | Subject: Re: Project : Argoceptor! April 19th 2020, 4:05 pm | |
| - RichieRichOverdrive wrote:
- This thing is as neat as it gets. Any progress on the bead locks? I don't even have a machine heavy enough to need more of a bead lock than the little ridge on the rim, but your idea is still cool.
Nothing yet on bead locks. But its nothing complicated. Attach the compass to the plasma cutter and start cutting circles out of 3/16 plate. Then weld the smaller ring to the rim and bolt the larger ring over the tire. It would be a pita if I didn’t have the Tig, but it could be done with mig. Mig is just harder to get a nice finish and making it airtight. TIG is fine control, so its easy peasy to get a clean weld and have it air tight. Cutting the circles without something like the plasma cutter would be a manor pita though. Same with the bolt holes. Would be a major pita without a drill press. Luckily I also have a drill press and cobalt bits at my disposal, so its just a matter of spending some time to get ‘em done. Bead locks are more about running tires at low pressure than anything else. The Argo runs on 1-3 psi, so popping a bead is a very real possibility (and its happened to me several times just turning). It runs low pressure because there is no suspension, other than the sidewall flexing. But any vehicle can be benefit from “airing down” for increased traction and floatation. Its all about what the terrain calls for. What I really need to get done for this rig is the suspension build. One reason is so the tires can be aired up a little more and not have the rig bust your teeth out or burst a kidney at faster speeds, but also to get more ground clearance. The Argo only has about 5-7 inches of clearance at the tub. It designed to slide or float over objects, but if you get it high centered, you’re done. At around 1000 lbs, you're not muscling it off either. With only 5-7 inches, its just a wee bit too easy to high center, it gets stuck in the woods here A LOT. Suspension would give it another 5+ inches of clearance. | |
| | | | TourMax
Member
Join date : 2018-10-06
Points : 2509
Posts : 438
| | Subject: Re: Project : Argoceptor! April 25th 2020, 3:58 pm | |
|
Last edited by TourMax on April 26th 2020, 11:19 am; edited 1 time in total | |
| | | | MightyRaze
Administrator


2017 Build-Off Finalist
2017 Build-Off Finalist
2018 Build-Off Top 3 Winner
2018 Build-Off Top 3 Winner
2019 Build-Off Top 3 Winner
2019 Build-Off Top 3 Winner
2021 Winner of Winners
2021 Winner of Winners
1st Place Build-Off 2022
1st Place Build-Off Winner 2022
10,000 POSTS!
10,000 POSTS!
2024 Build-Off Entrant
2024 Build-Off Entrant
Age : 49
Join date : 2016-09-06
Points : 15032
Posts : 10618
Location : Oklahoma
| | | | | TourMax
Member
Join date : 2018-10-06
Points : 2509
Posts : 438
| | Subject: Re: Project : Argoceptor! May 3rd 2020, 10:34 am | |
| Couple pics of the Argo out doing stuff that I built it for:  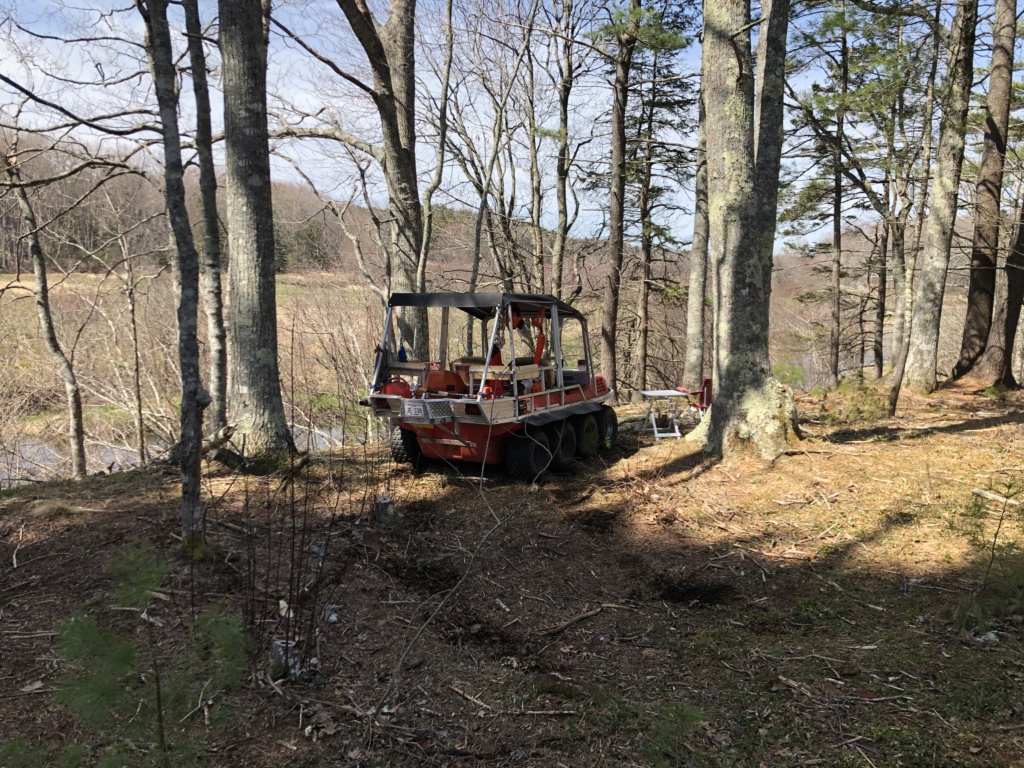 Thats the back of our lot and I’m just working on cleaning out deadwood and general mess. Plan is to (eventually) build a small boardwalk back to the river and a small deck where we can sit and enjoy nature. River has fish, mostly trout and sometimes atlantic salmon, but I haven’t fished in years. May take it up again now that I’m full on retired... | |
| | | | TourMax
Member
Join date : 2018-10-06
Points : 2509
Posts : 438
| | Subject: Re: Project : Argoceptor! May 18th 2020, 4:10 pm | |
| 30 years of SAR has left me pretty beat up. Pretty broken. I was the guy who could grab a 302 short block and walk across the shop with it. Now I struggle with a couple paint cans. In the shop isn’t a big problem, I’ve got cranes and lifts to move heavy stuff. Outside is a different story. So I built myself an all-terrain “crane”: 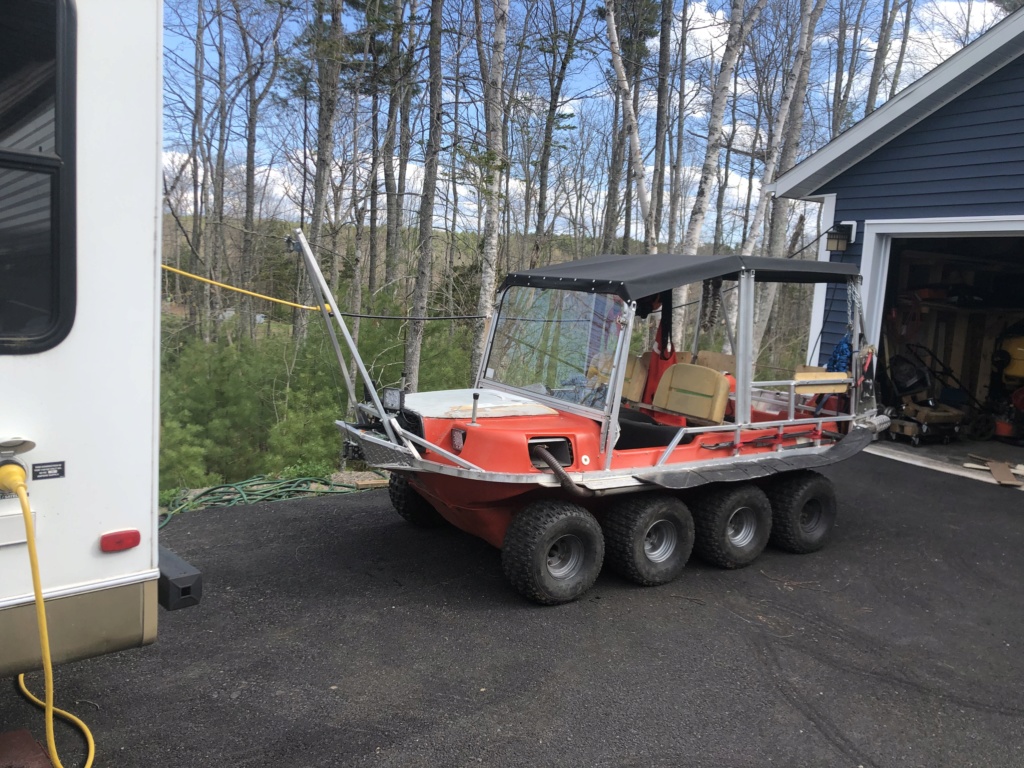 First job was to lift up the lawn tractor so I could spray the caked grass off the deck. Worked great! This will be quite helpful for my yard and woods work! And if I want to remove it, its just two bolts and pull the pin in the pulley to release the winch cable. I just have to be careful how much weight I try to lift as the plastic tub will inly support so much... | |
| | | | TourMax
Member
Join date : 2018-10-06
Points : 2509
Posts : 438
| | Subject: Re: Project : Argoceptor! June 27th 2020, 5:08 pm | |
| Picked up another "toy" today:  Singer 331k105. It's a walking foot machine, which I can use to sew up some leather and vinyl seat covers, amoung other things. Its all there and intact, it's out of time though. So I'm going to tear it down to the last nut and bolt, lean and repair it all and put it back together. Should be a fun project all in itself..... | |
| | | | Sponsored content
| | | | | | | Project : Argoceptor! | |
|
Similar topics |  |
|
| | Permissions in this forum: | You cannot reply to topics in this forum
| |
| |
| | Who is online? | In total there are 20 users online :: 0 Registered, 0 Hidden and 20 Guests
None
Most users ever online was 412 on January 7th 2023, 7:59 am
|
|