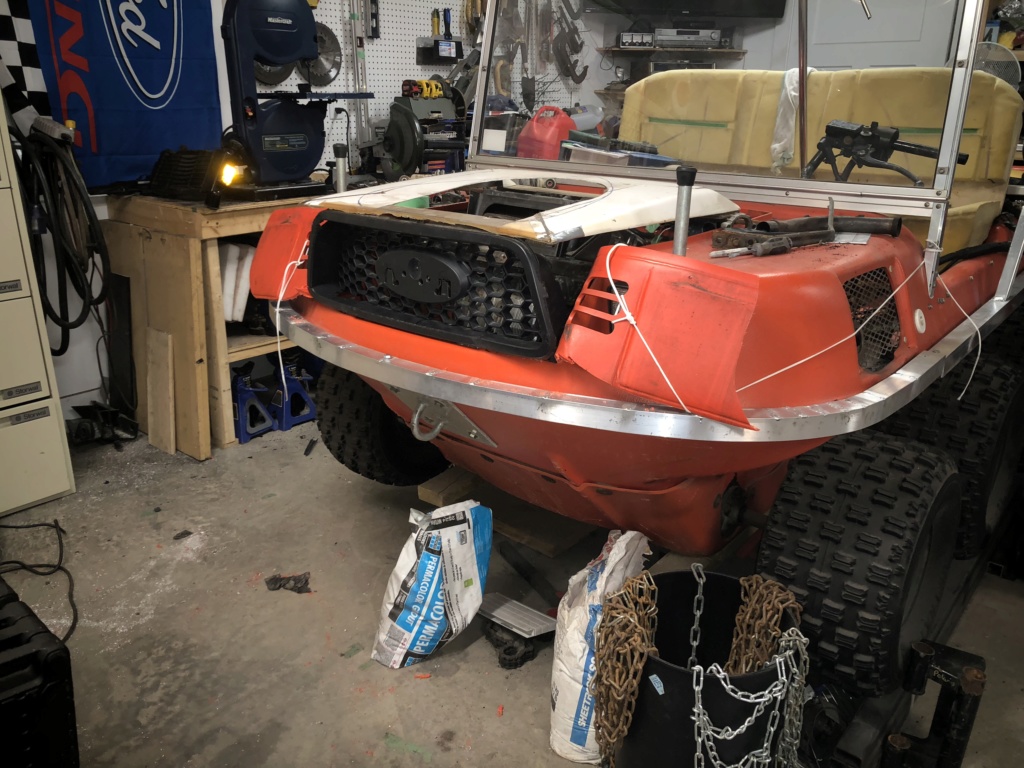
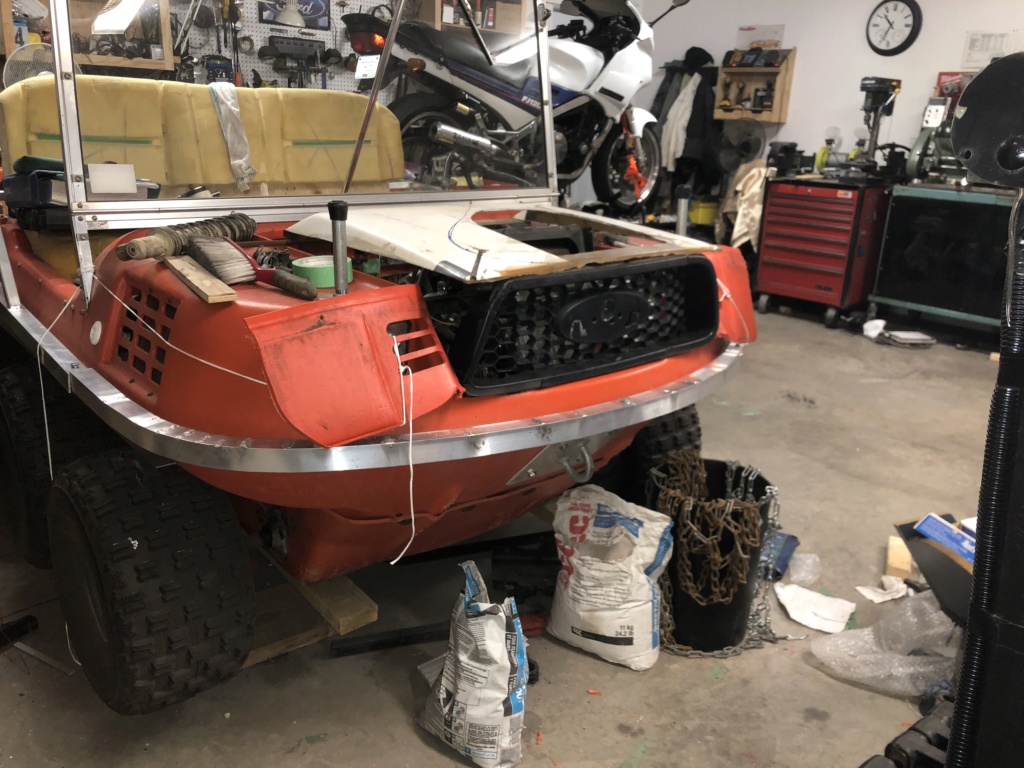
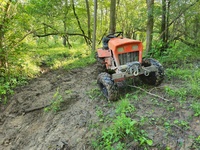
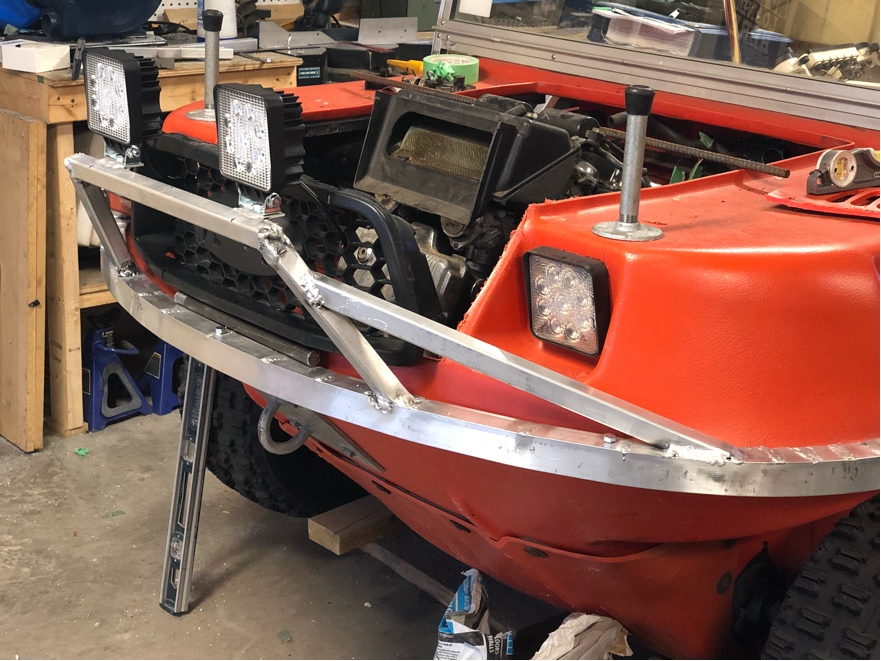
After trying multiple times to reshape the plastic, I’ve decided to just slice it right off. I’ll make the grill part of the hood and fiberglass the sides to blend it to the cut opening. I can get a much smoother and finished look that way instead of trying to reshape the plastic.
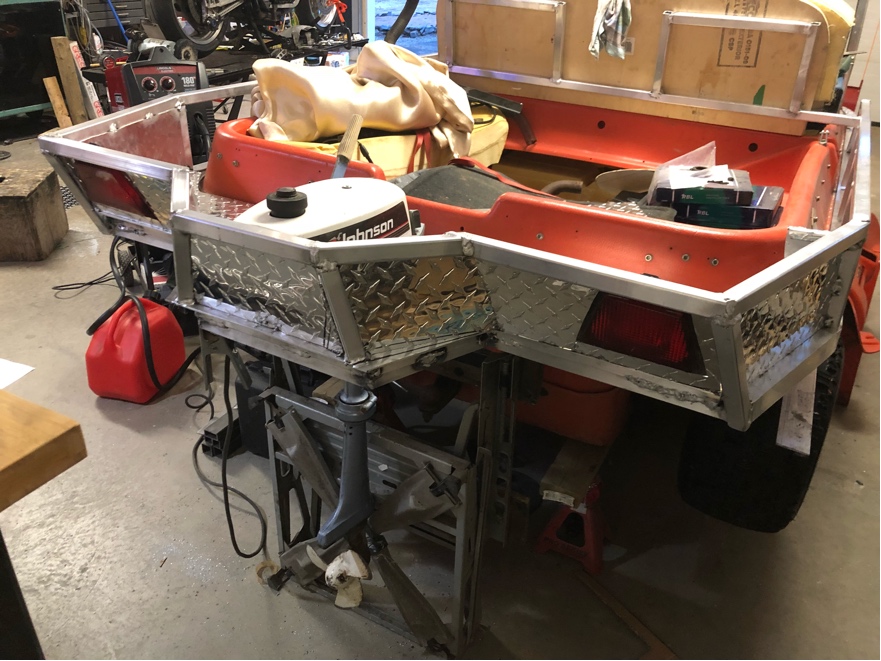
rear carrier/outboard mount is coming along nicely:
I'm going to make up a plate that will fit in the space where the outboard currently is so when the outboard isn't mounted, the entire rear carrier just becomes storage space.
Tomorrow I'll either build the outboard sliding mount or the front brush guard. Not sure which I want to work on next.
It will likely be the front brush guard because I'm still working out some details on the outboard mount in my head right now.....
AllisKidD21 Moderator
5000+ Posts
5000+ Posts!
2020 Build-Off Entrant
2020 Build-Off Entrant
1st Place Build-Off 2019
1st Place Build-Off Winner 2019
Age : 25 Join date : 2016-07-10 Points : 8371 Posts : 5190 Location : Ontario Canada
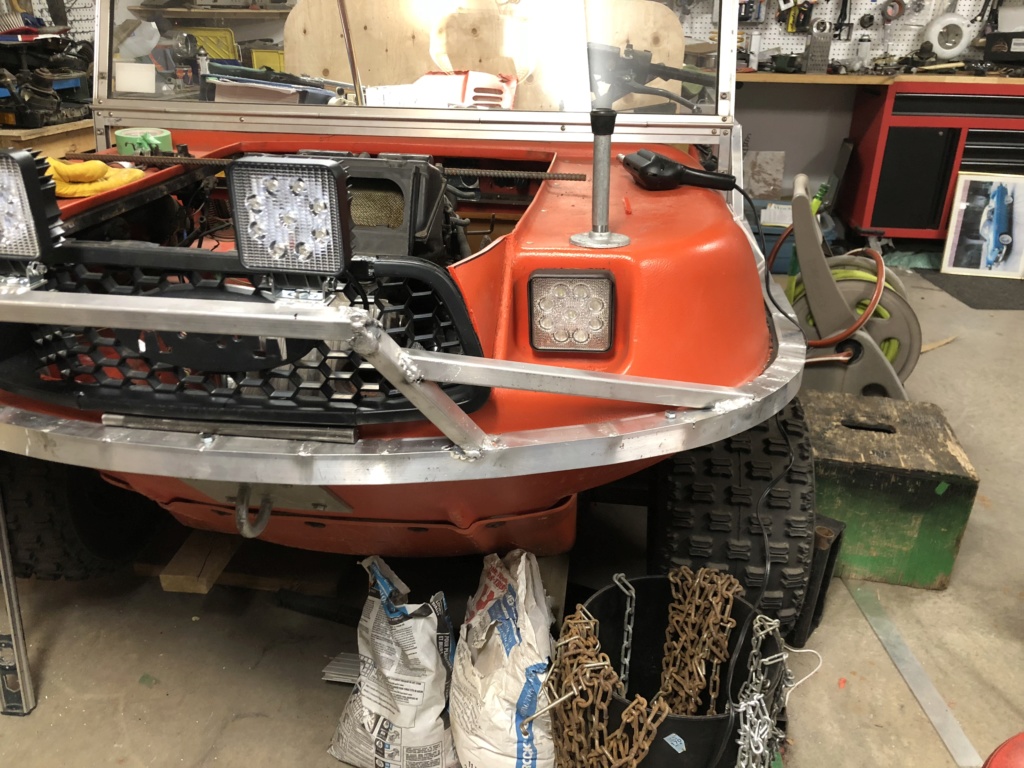
That's a good start. Please ignore the sloppy welds. I was having trouble with the spool gun jamming and it burned through in places. I had to try and fill the holes with weld so it look pretty ugly in some places. I'll sand it smooth later on when I'm doing the finishing work. Spool gun contact tip was a 0.35 and the wire is 0.35, so when it got some heat in it it dragged too much. I had to open the tip up to a 0.45 to get it flowing well again.
Still to build: winch mount and supports, a "deflector" to keep water from splashing up an into the grill when entering the water. The deflector is nothing complicated, just a plate across the front that is angled forward so when the water/splash comes up when entering rivers, ponds, etc, it's prevented from just rushing in through the grill opening. Once floating, the water is below the body line and the grill is well up and out of the water.
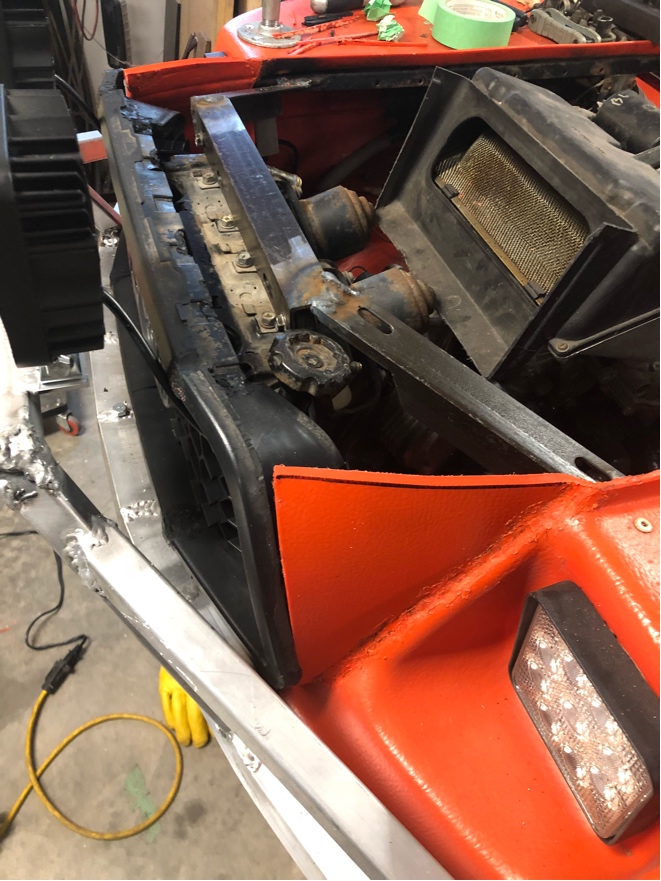
Decided I didn’t like the thought of how it is going to look with the fiberglass hood coming down to cover the openings on the sides of the new grill. So I took some of the scrap hdpe plastic, cut to fit, heated it to form (oven at 275 for 10 minutes) and bonded to the hull with some plastic welding.
Went from this:
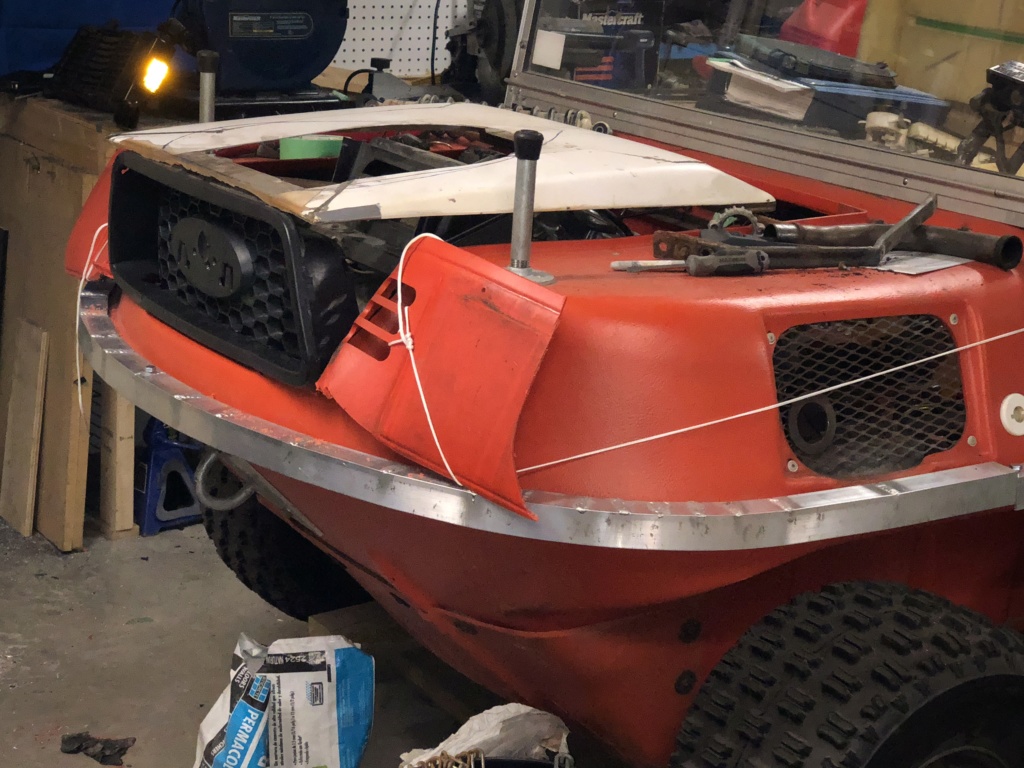
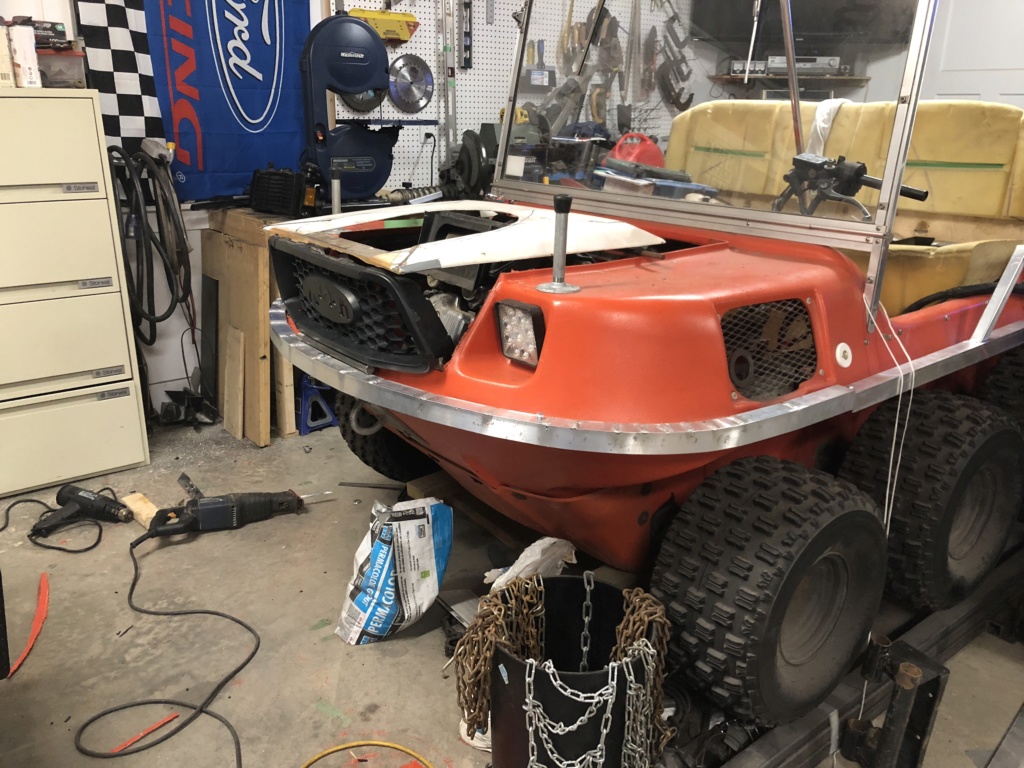
To this:
Ah, much better! A little more shaping, some clean up work and it will almost look factory. The hood can now be shaped to come forward nice and flat. Well, there will still be a little contouring for aesthetics, but it will look much more integrated now.
Well, I'm considering pulling the V4 engine back out and putting the Kohler 18hp magnum back in.
Let me explain; it's not that I can't or don't want to do the V4 swap any longer, it's more about not being able to get it done this year.
The thing is, I've got lots of projects on the go right now. The result is nothing moves very fast in the progression to finished. The Argo itself has a lot of modifications on the go. Right now, I'd prefer it doesn't become one of those projects that hangs around for a couple years and takes up space because I can't use it.
So I'm thinking of putting the Kohler back in so I can at least have a little fun with the rig this summer. It will still be loud, it will still be slow and it will still be hot. But I will be able to go bash around the trails a bit and enjoy it for what it is. There's still lots of things to finish and swapping the Kohler back in will allow me to focus on the other things already in progress.
Plus, I can build the suspension pieces while I am still bombing around in the Argo. The suspension is a lot of work welding parts up in a jig, so that can be done off the machine and (hopefully) bolted on in a weekend when it's finished.
Once everything else is done, I can get back to the V4 and concentrate on just the engine swap as the rest of the Argo will be done.
It's currently just a thought, but it's one that seems to make sense at the moment. I'd like to get a little payback from it this summer instead of just staring at it in the garage and working on it....
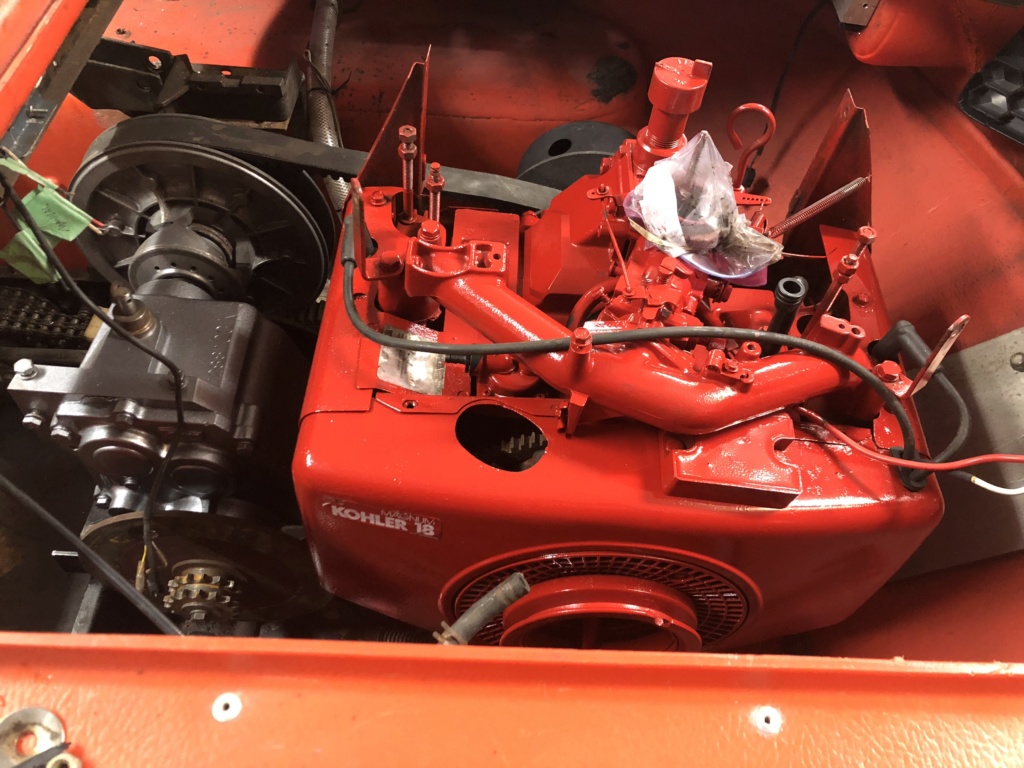
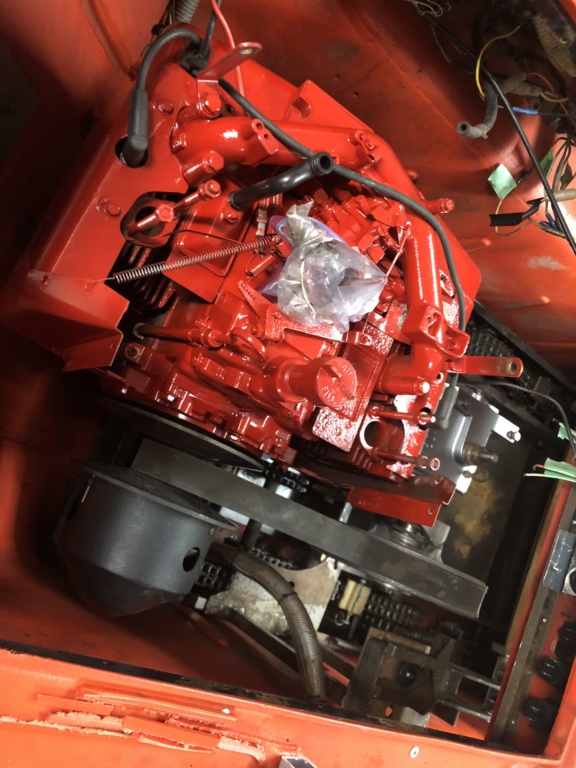
I had to weld up the engine tray to mount the kohler back in there, but that was an easy iob. I kept the pieces I cut out to mount the v4 so it was just clean up the metal and mig it back in place.
I also took the opportunity to tart up the engine and transmission with some cleaning and fresh paint.
Now I can focus on finishing up the other projects on the Argoceptor and maybe have a little fun with it this summer.
mowerjunkie03 Member
Age : 20 Join date : 2018-10-29 Points : 2380 Posts : 342 Location : Burnt Ranch, California
Looks great I'm loving this build! Suspension will be badass if you do it. Those Kohler Magnums are bullet proof and you could probably get alittle more rpm out of it. Maybe you mentioned it earlier and I missed it but why did you decide against the V4?
Looks great I'm loving this build! Suspension will be badass if you do it. Those Kohler Magnums are bullet proof and you could probably get alittle more rpm out of it. Maybe you mentioned it earlier and I missed it but why did you decide against the V4?
Too many projects on the go. With the magnum back in, I can concentrate on finishing the rest and get a little use (ie:fun) out of it this summer. I’ll revisit installing the V4 when it’s the only thing I have to work on.
The engine "cradle" slides stright up and down, with the space you can see in the aluminum channel piece to be filled with HDPE plastic to make it slide nicely on the rails.
Not sure if that's the final form, as I would like the outboard Skeg to be a little higher (or closer in to the body) when in land transport mode.
But ya gotta start somewhere when designing something new....
mowerjunkie03 Member
Age : 20 Join date : 2018-10-29 Points : 2380 Posts : 342 Location : Burnt Ranch, California
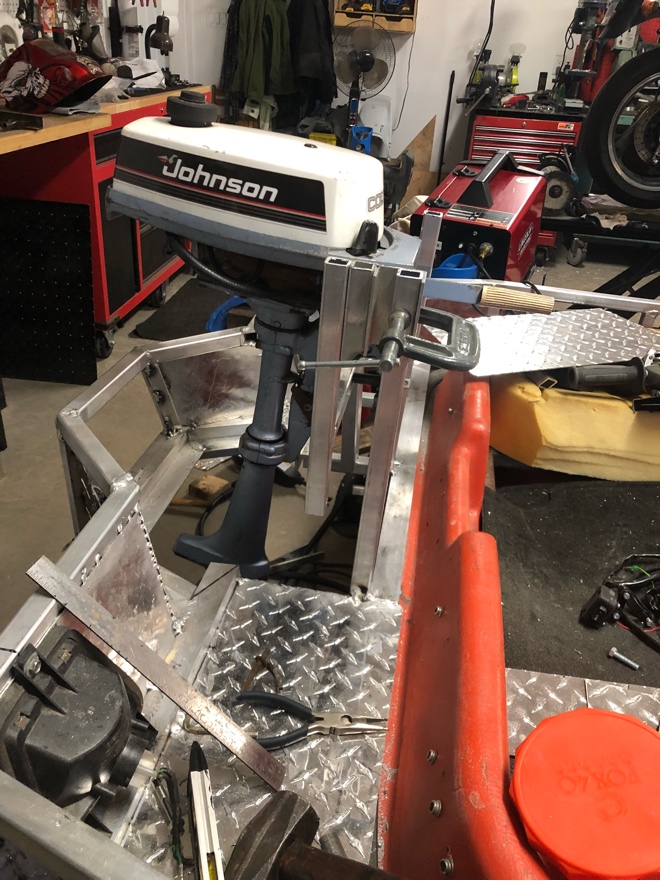
Looks great loving the diamond plate! How many hp is the outboard?
Just a 2hp kicker.
Plenty to move the Argo around. As a displacement hull (not to mention 8 tires sticking out), it’s always going to be slow no matter what size outboard. So I went with a little 2hp I’ve had lying around for a while. One of the big plusses is it’s very light, which is very important when having it in the storage postion and banging over rough terrain. Less mass, less chance of it breaking something loose...
The "legs" will get two "sleeves" that they will slide into and a couple pins to lock them in place. The prop will get a "weed guard" and that will clip into a bracket on the rear rail of the carrier rack. The opening where the outboard slides down will get a simple diamond plate piece that will just drop into the hole for more carrying capacity. I will, of course, always have the option to just remove the outboard altogether and leave it at home.
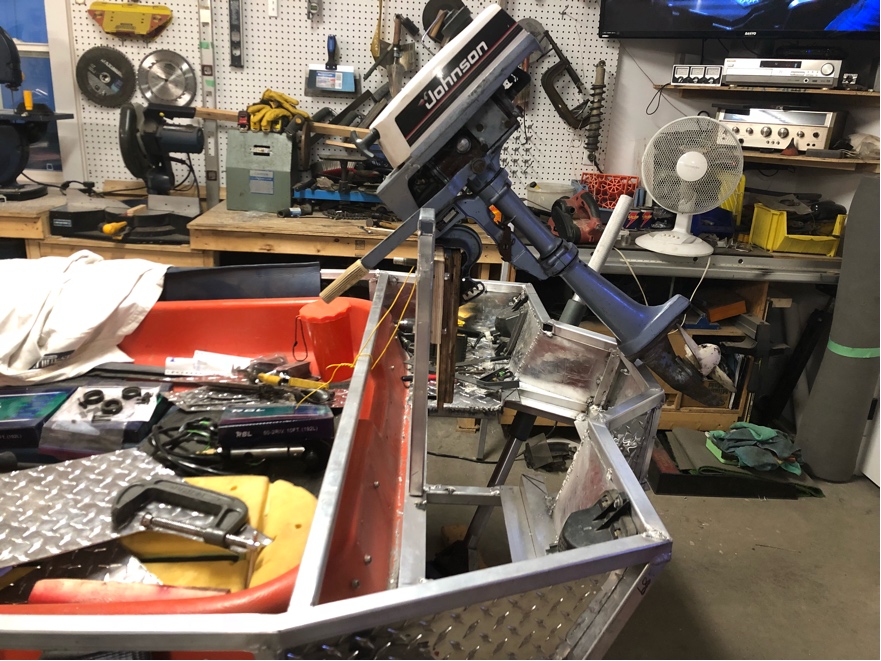
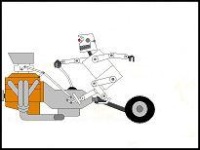
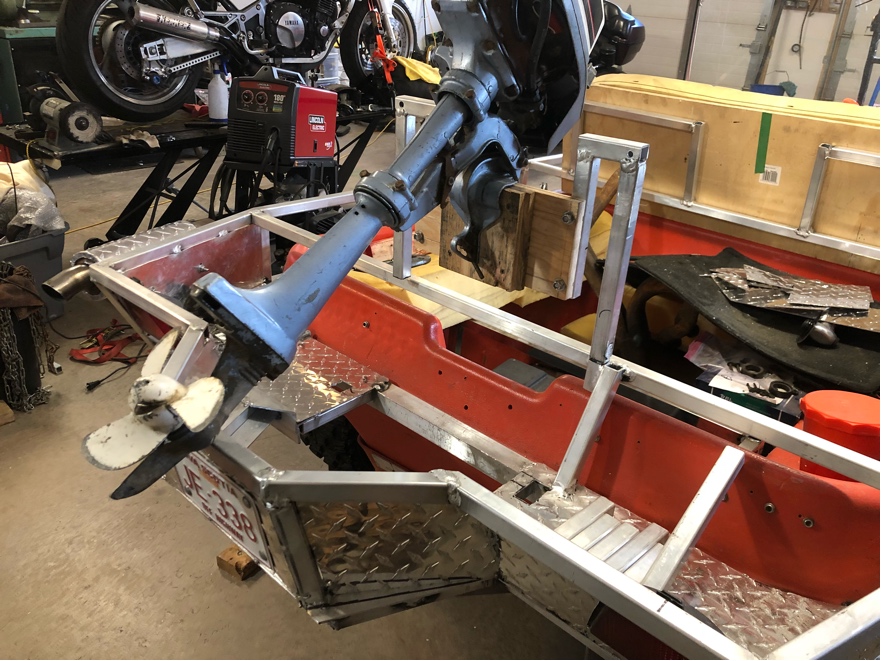
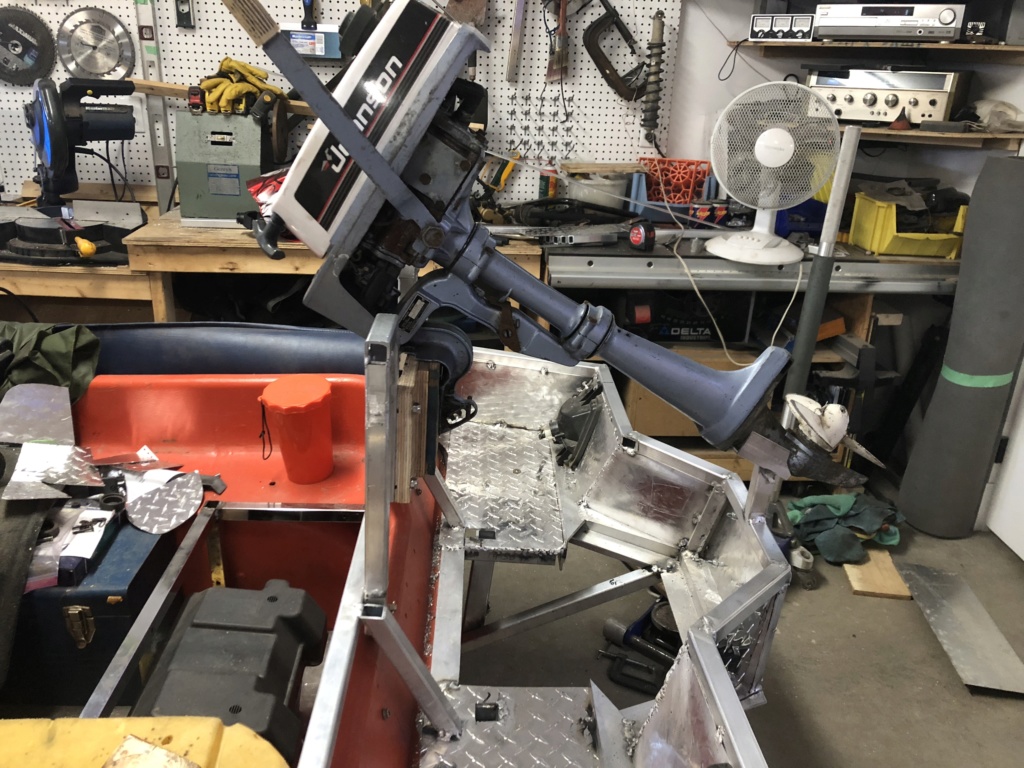
Outboard lowered for water travel:
Fits nicely. There's enough clearance that the outboard can spin a full 360. That means if I want to reverse, I can just spin the outboard around to travel backwards if needed.
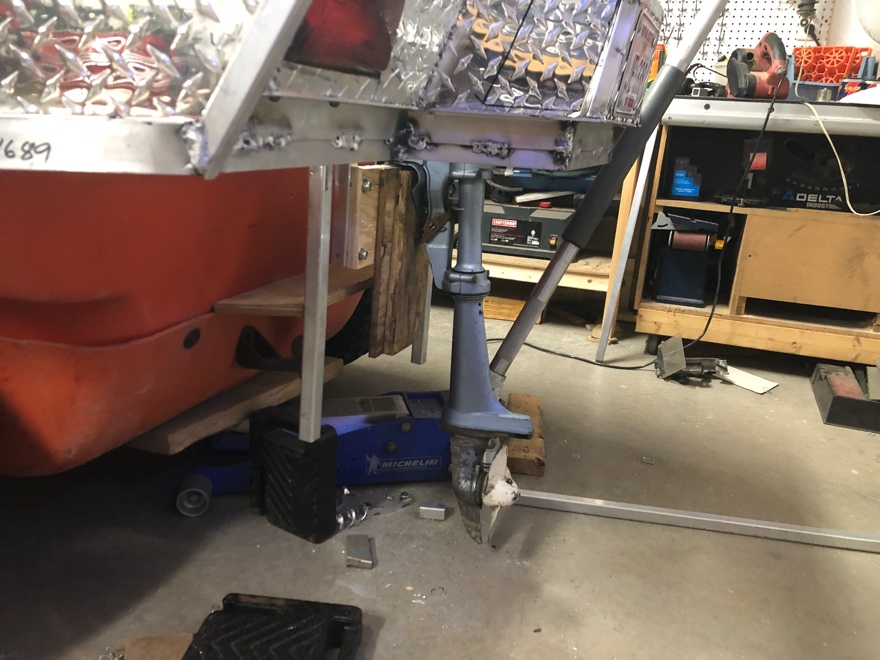
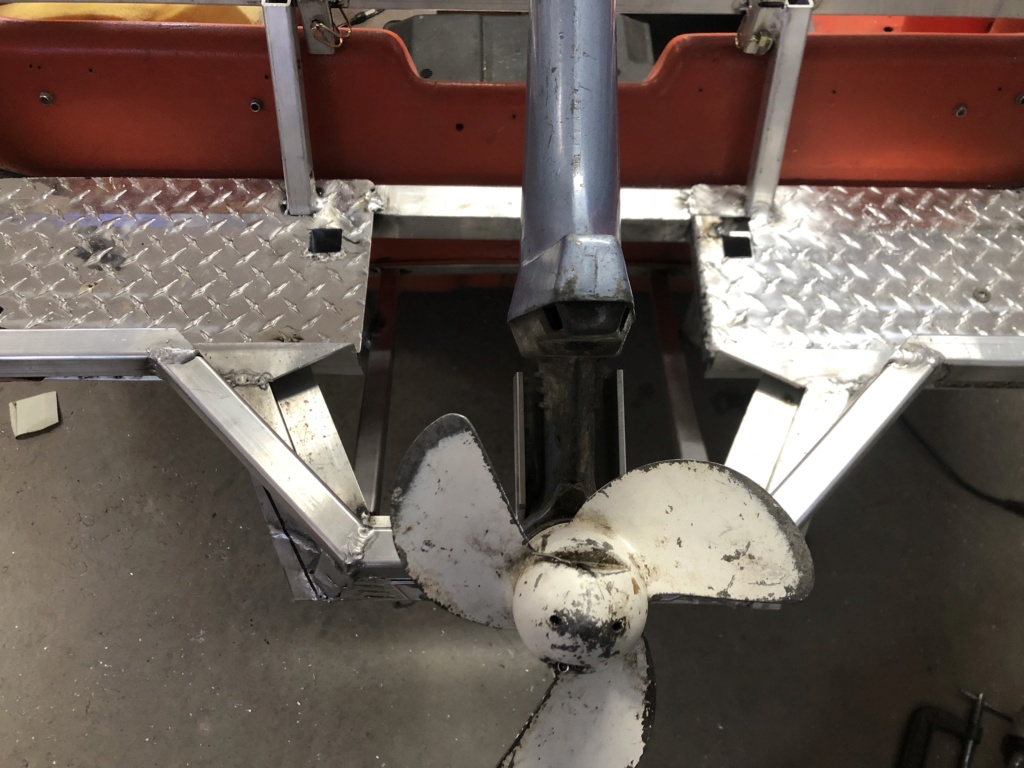
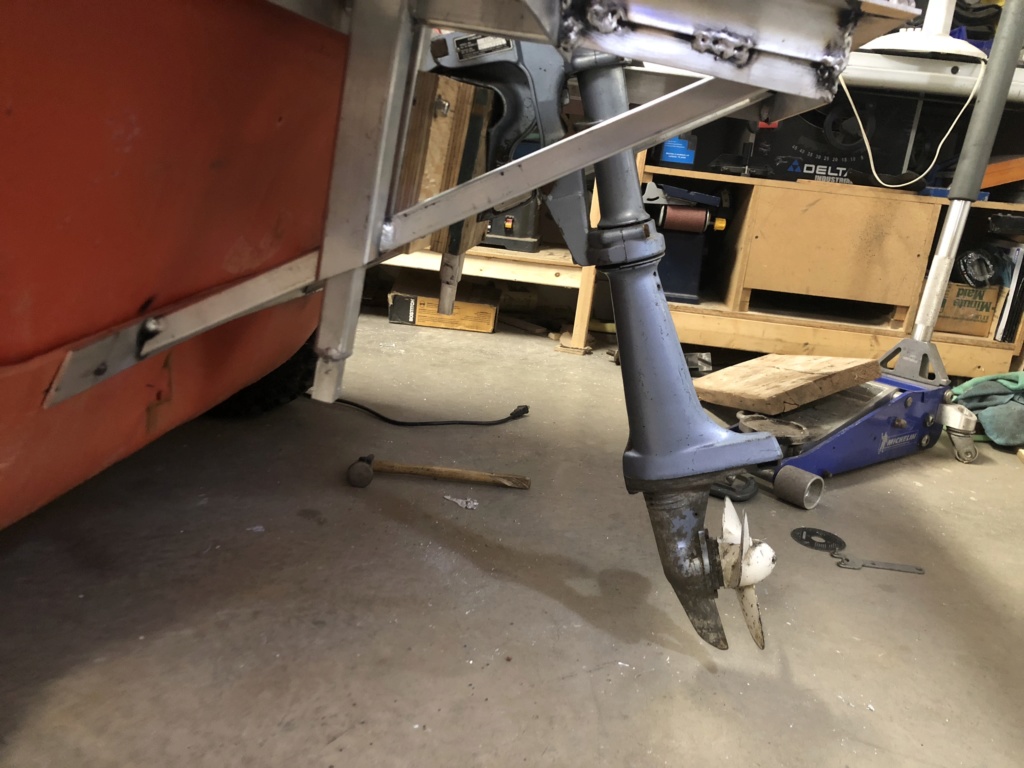
Lower leg and prop position:
Places the cavitation plate level with the bottom of the hull, like is should be for good cooling water flow. The prop is below the hull to give it clear water to work in.
Coming along nicely. The only thing I had to give up was a "hard mounted" outboard mount. I'll have to lift it up out of the running position by hand power alone. That's not an issue though as the little 2 HP 2 stroke is very light and easily manhandled with one arm.
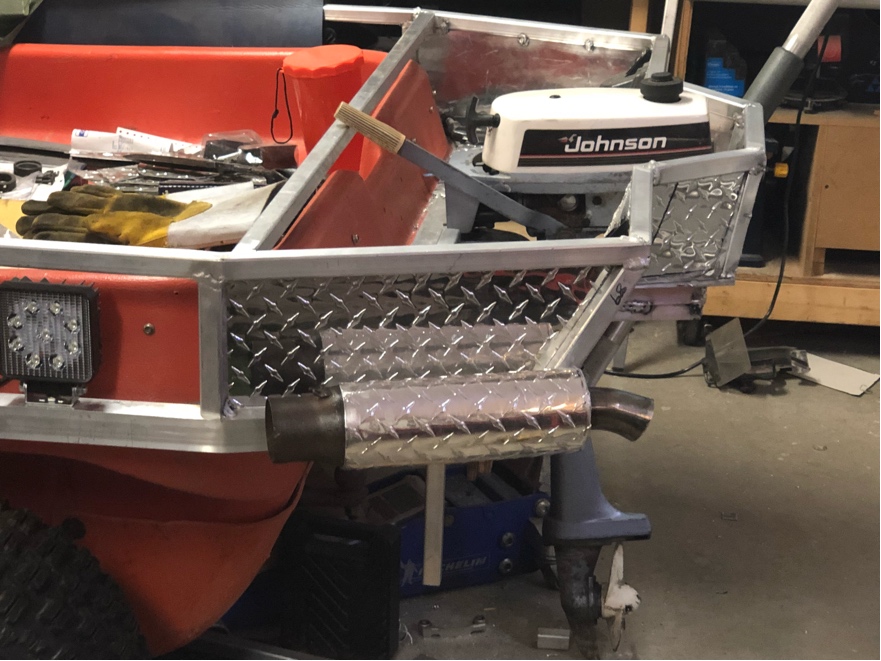
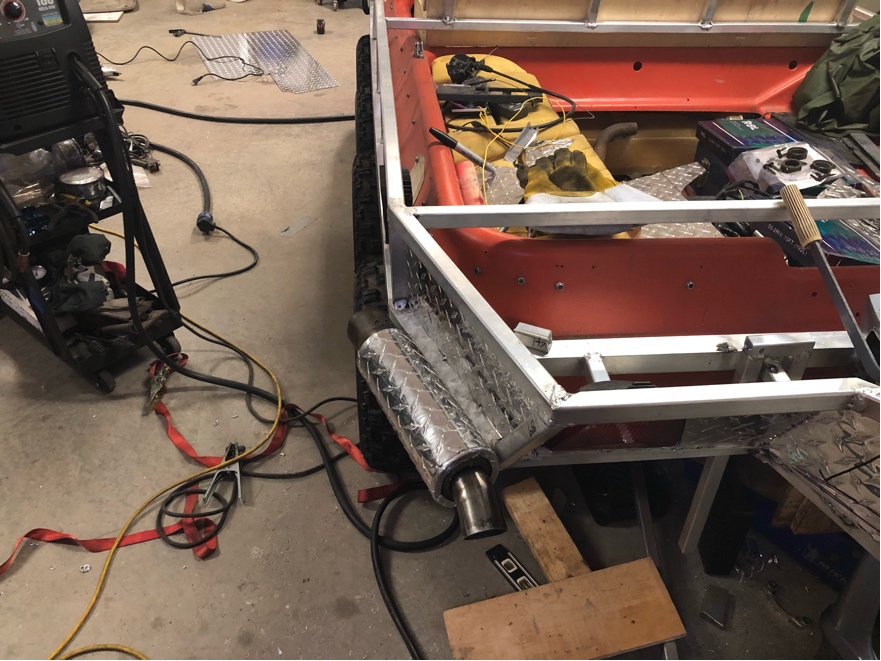
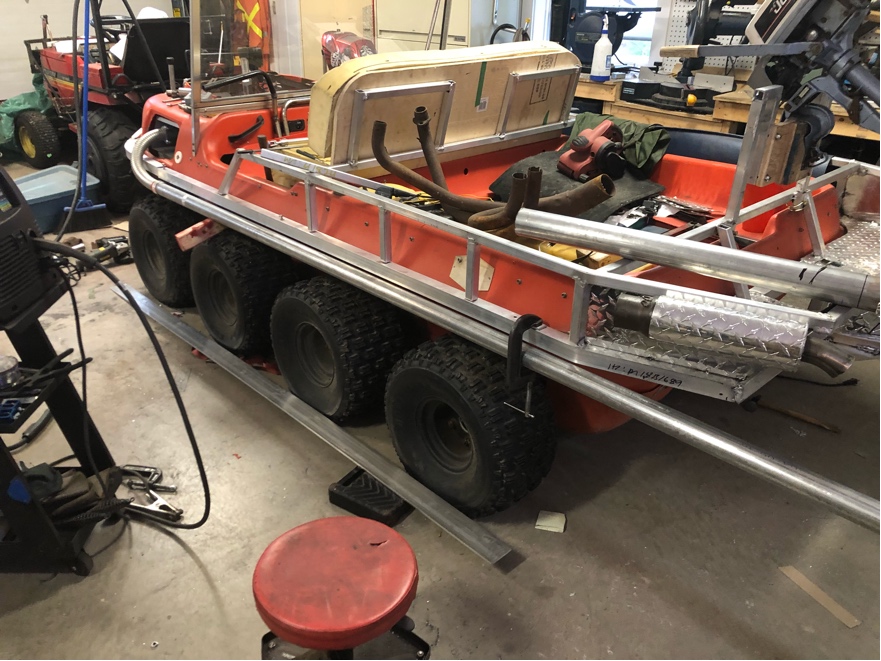
Built the muffler today. Used the core from the VF750F Hindle exhaust and wrapped it in diamond plate. It originally had an aluminum "can" over it, but it had been seriously crash damaged in the past and just generally ugly looking. So I cut it off and made the diamond plate "can" over the Hindle interior and end cap bits. Looks pretty good, goes with the rest of the diamond plate already on the rig.
Tried it "low" mounted:
But somehow, it just didn't look right. So I tried it angled up instead:
Yup, that looks better! Sort of feels like it's a bit better protected as well. Makes it a little more difficult to curve the intermediate pipe to meet it, but nothing I can't handle.
Nice can, LOL. Definitely looks better angled up. Too bad you're not running a 2 stroke, it would be killer with a little gray smoke coming out of it, LOL.
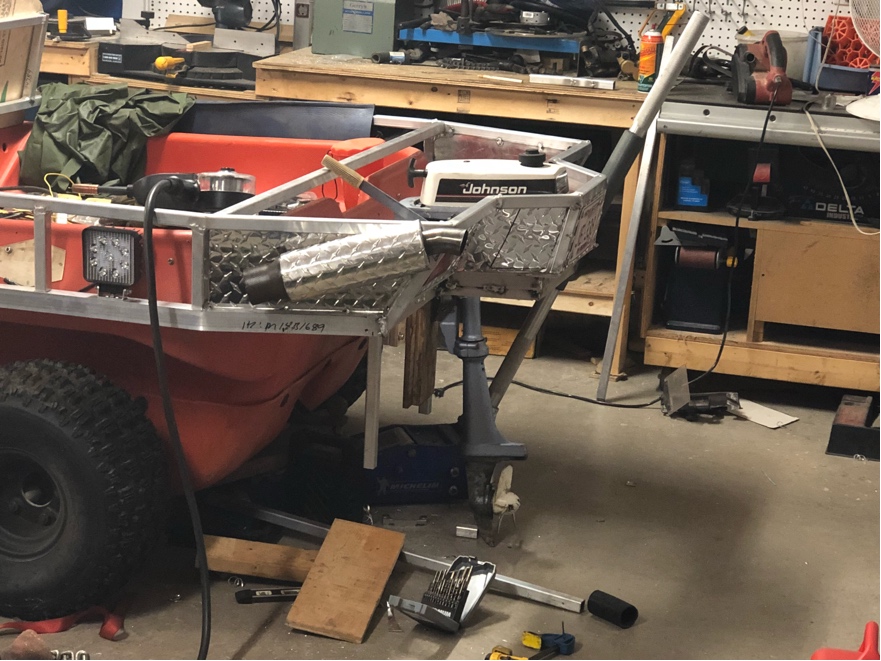
So, outboard mount is pretty much finished. At least in the design. Still have a little more building to do.
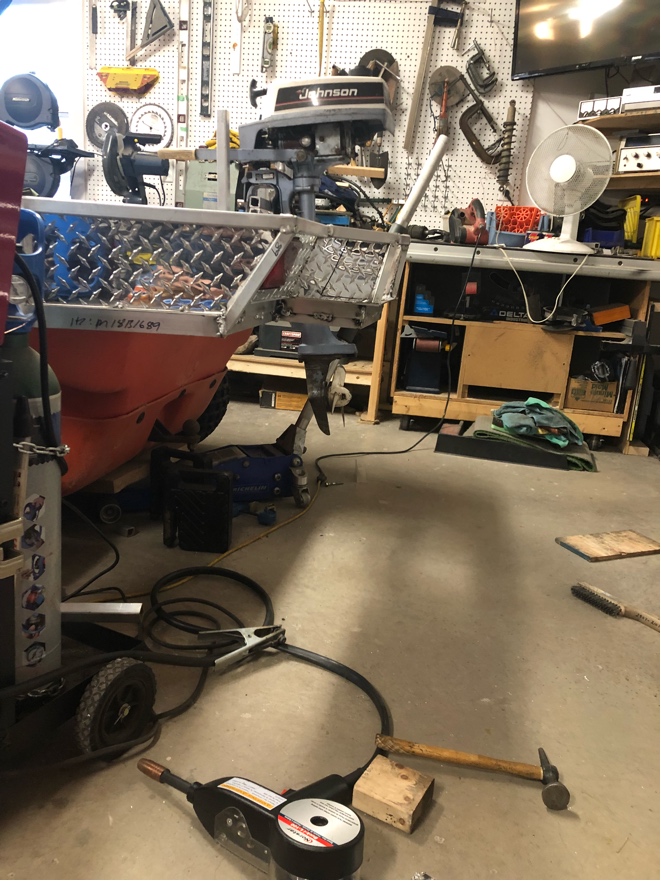
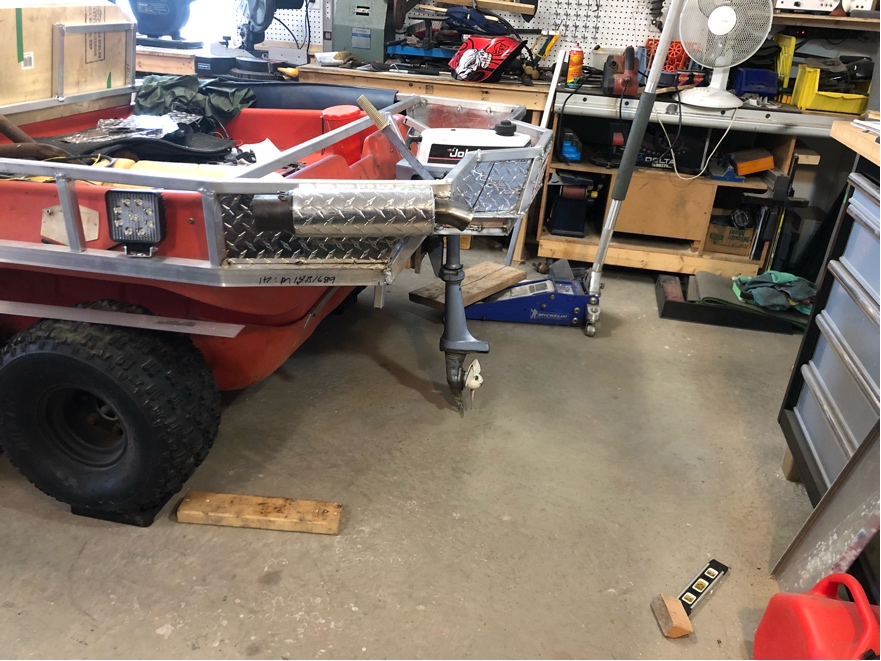
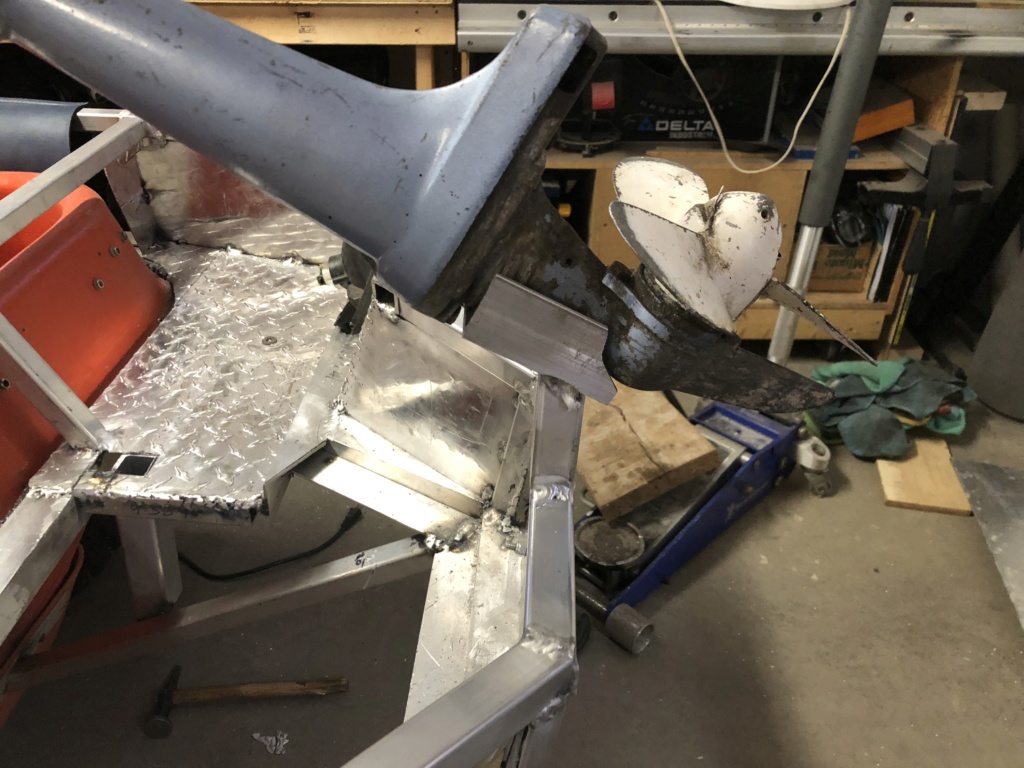
Here it is in "deployed" position:
The outboard actually hangs too low to be all the way down, it's built like that so the water intake is low enough to get good flow and the prop is below the hull bottom. I have blocks under the rear wheels to raise the back up enough that the skeg doesn't hit the ground.
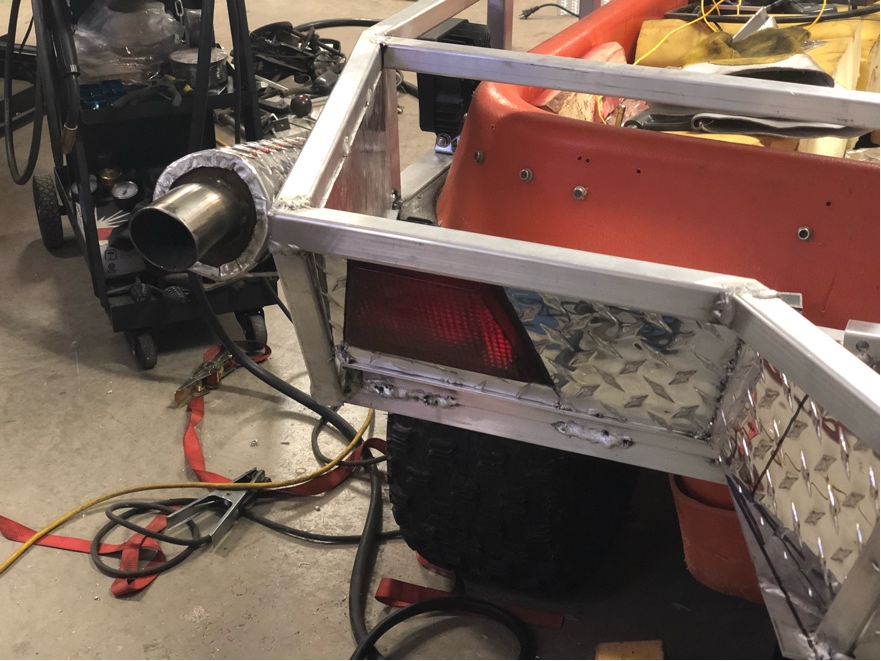
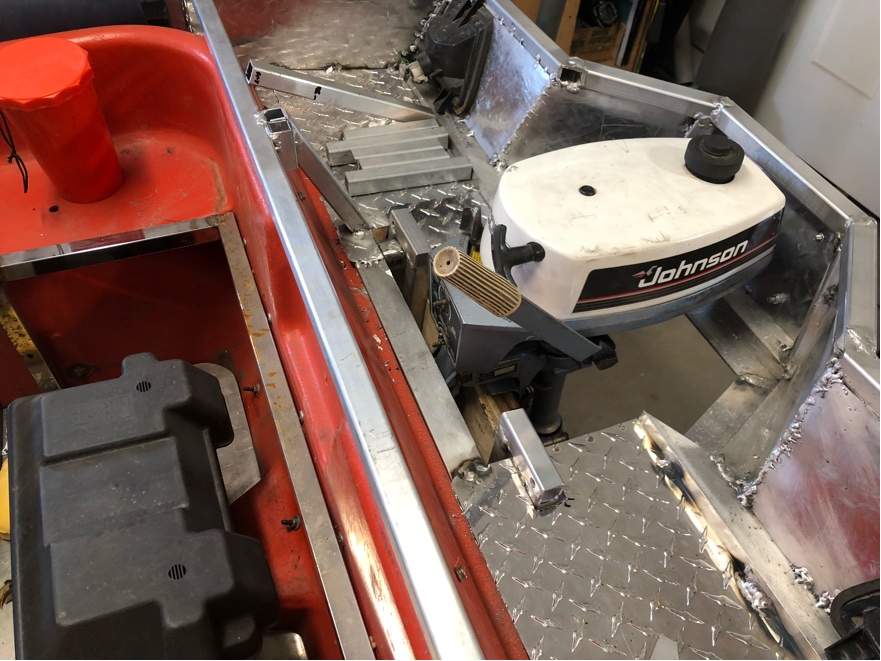
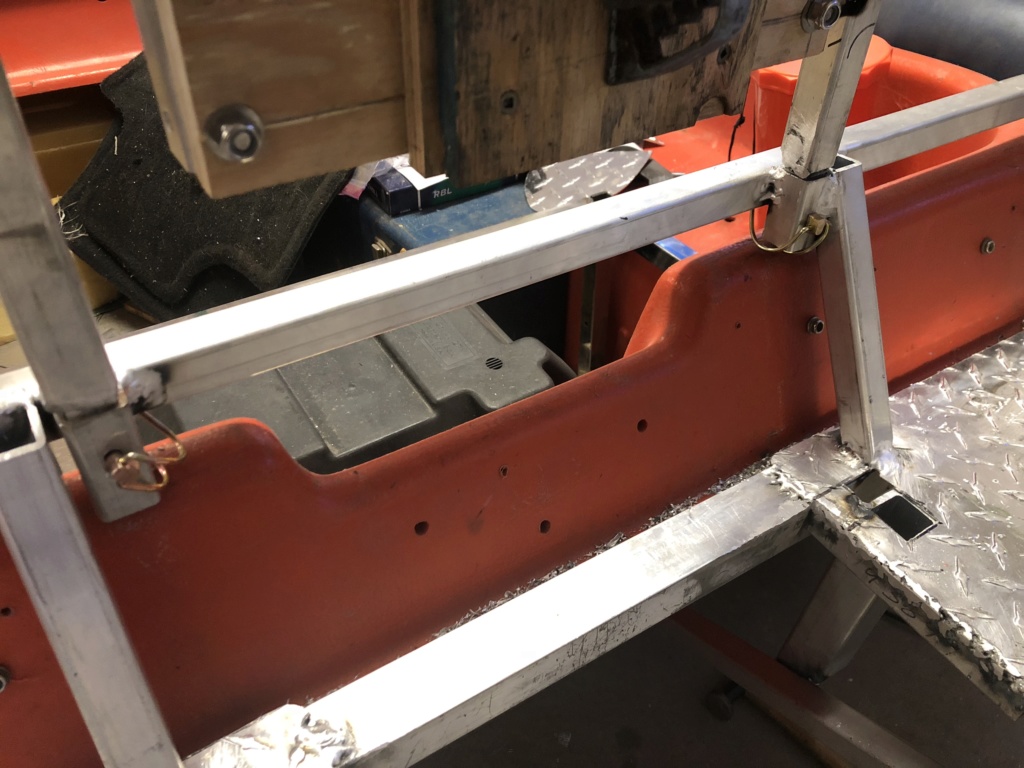
Here you can see where it goes through the cargo rack:
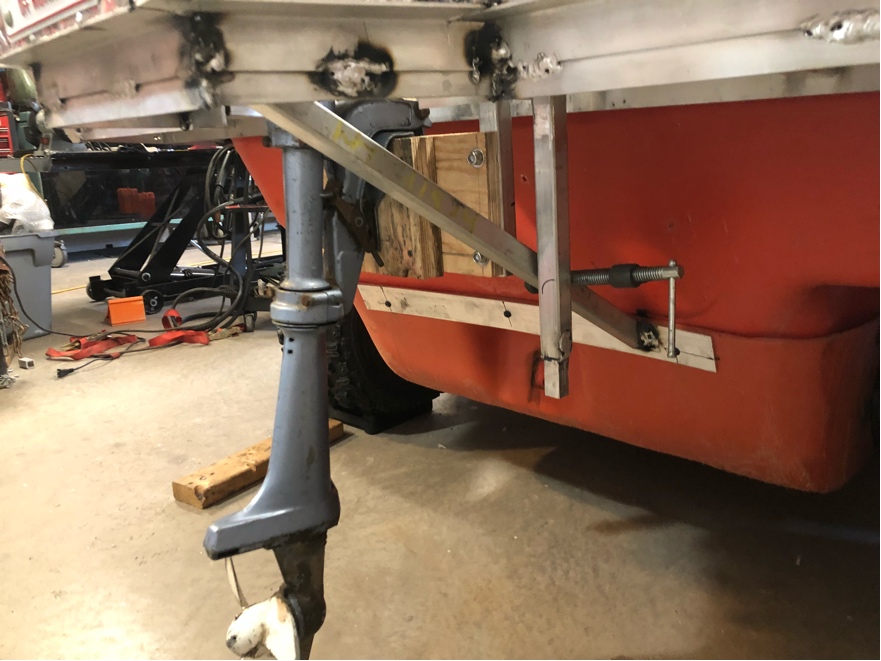
Basically, it just drops into the holes and "hangs" off the rack. There are supports under the rack that I'll use to keep the outboard mount from swinging back and forth:
Right now, there's only one support and I'm using a clamp as the "stop" to get the positioning right. There will be another support on the other side and the "stop" will be another piece of square tubing the mount "legs" will drop into.
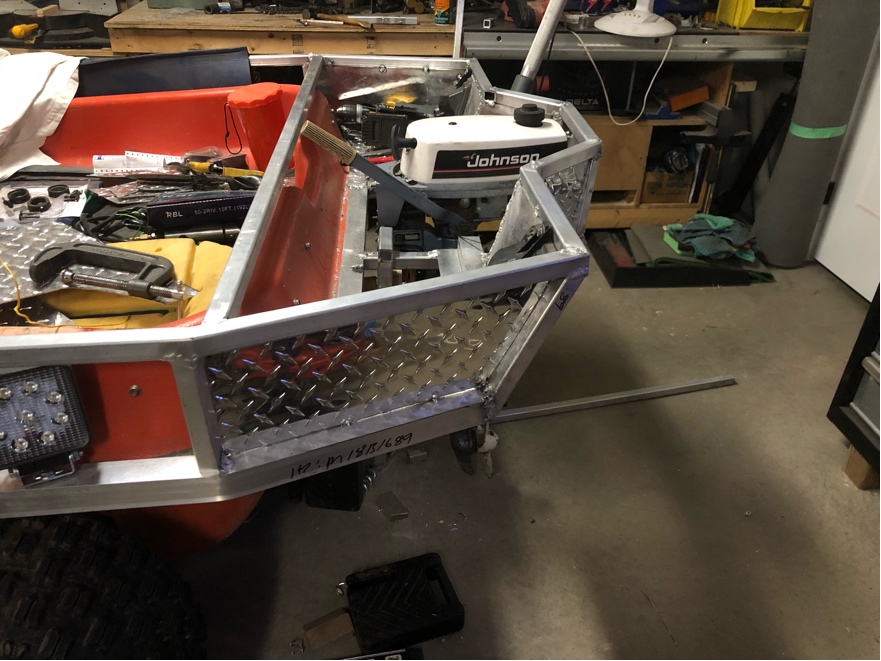
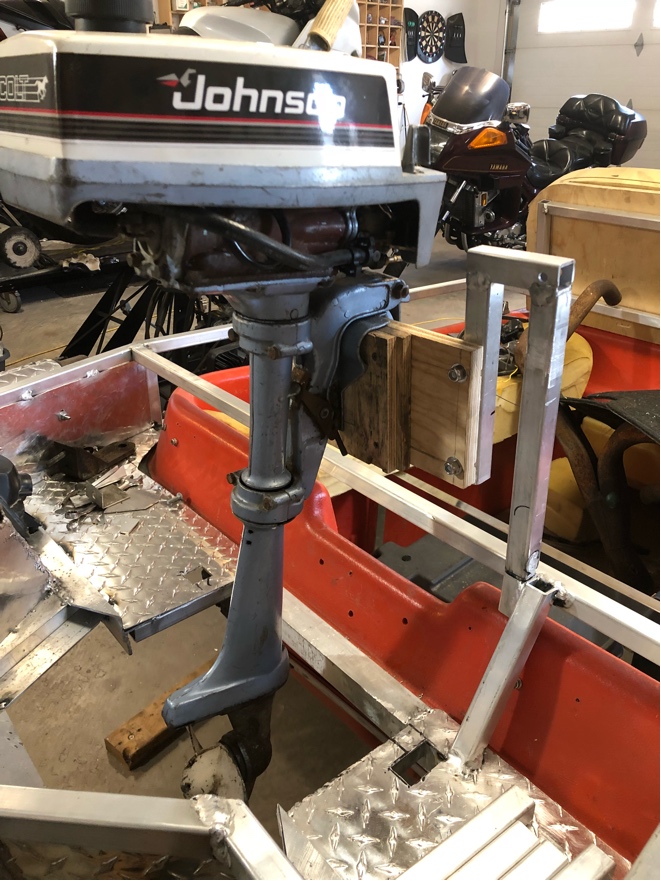
For land travel, I will have a couple options. The mount legs have a machined block on the ends. This block will slip into a receiver on the transom. The RH receiver is already in place.
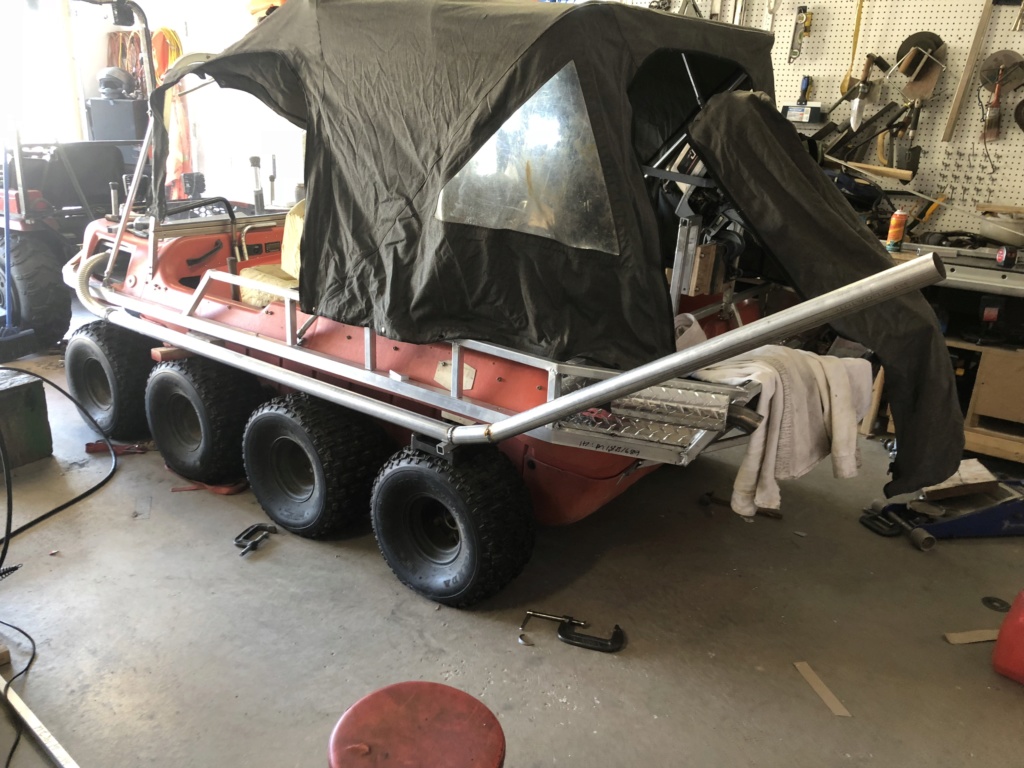
I can either let it hang vertically:
Or, if I want it more solidly mounted, I can swing the outboard back and attach it to the rear rail:
Obviously, that's the better way to carry it over rough ground since it can't bang around or flex as much as it would be if just hanging off the receivers.
I still have to machine a second block for the LH leg and build the LH receiver, but it's coming along nicely. Should be pretty slick once done!
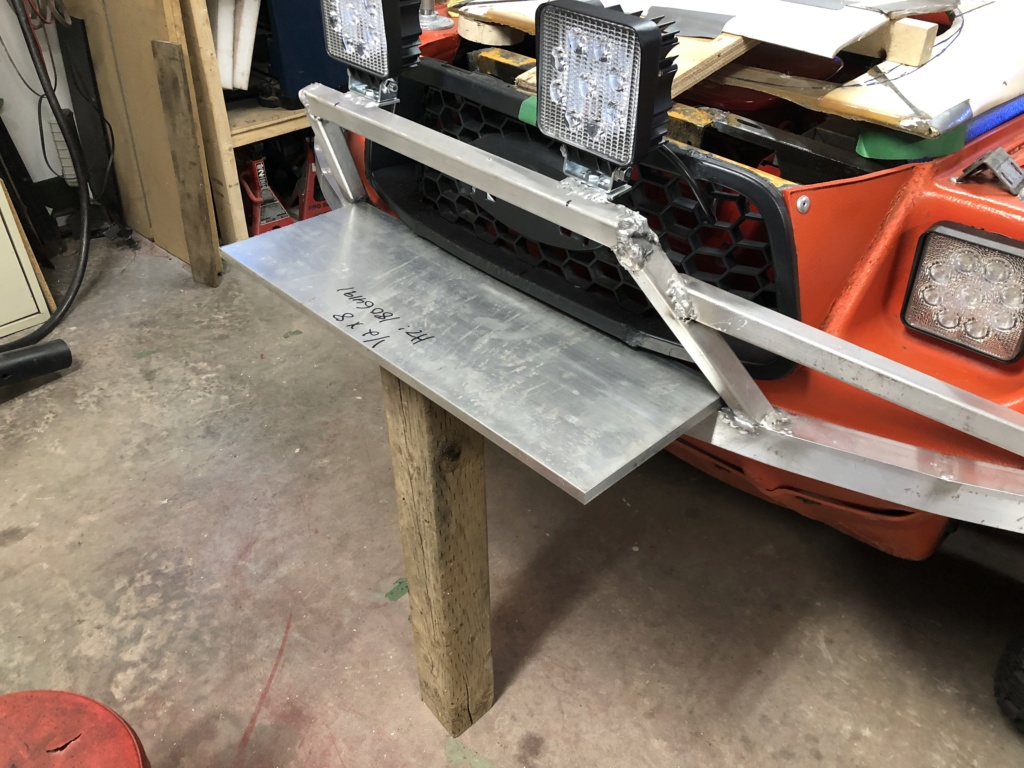
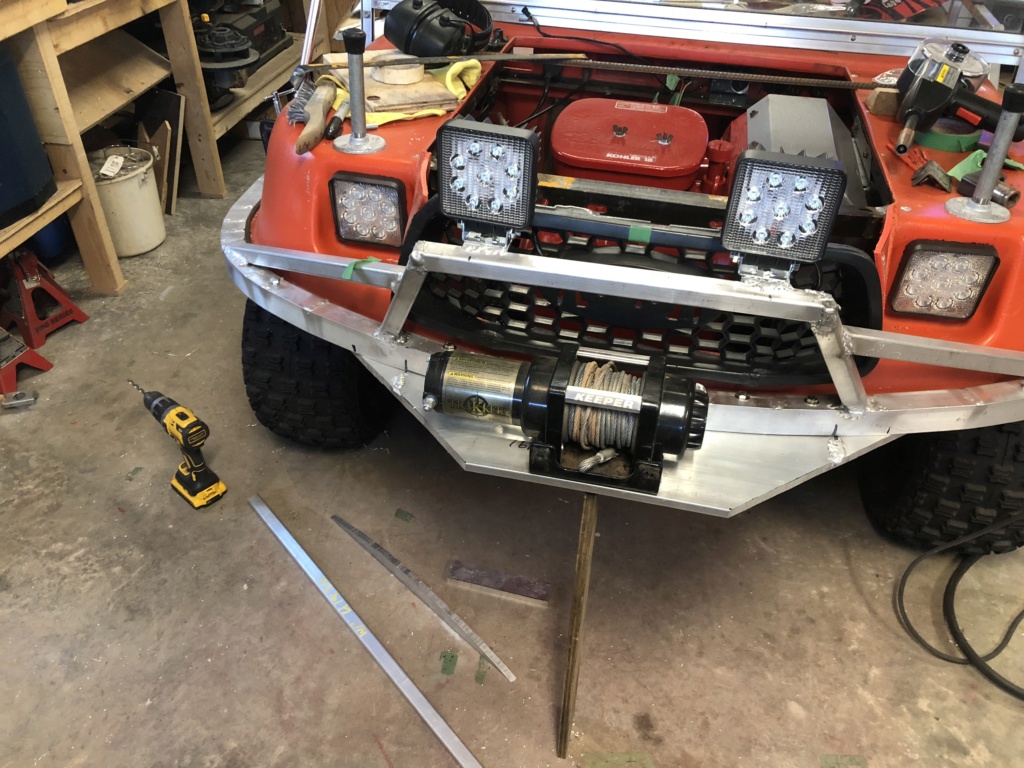
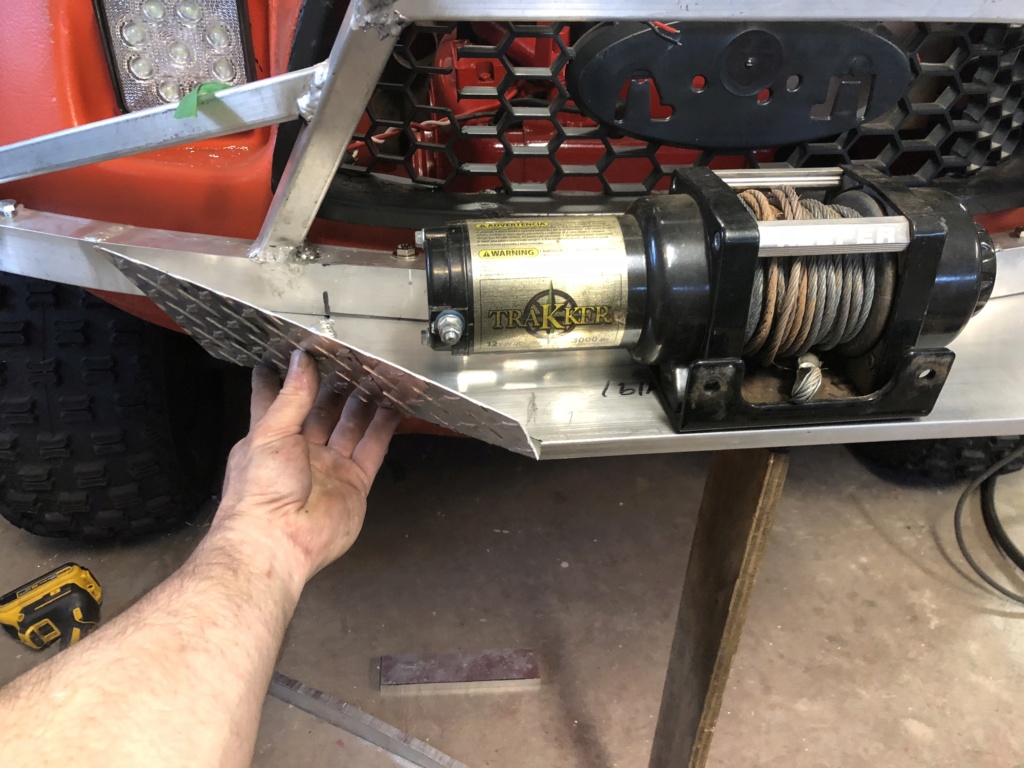
That a chunk of 1/2” thick aluminum. It will get bolted through the body split line and will get struts top and bottom that will carry the loads into the body and down to the frame.
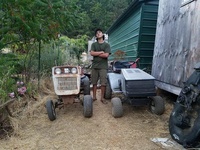
Nothing overly serious is going on there, just a 2500 lb winch, same as what I have on my garden tractor. I’ll use the winch on the tractor to prototype and wait for the winches to go on sale. They usually go on sale in the spring/early summer for around 100 bucks.
I’m in no rush, I can wait for them to go on sale...
Once I get the basic shape laid out, I’ll add a short “water dam” to the front edge to deflect the water from rushing up and over the front and in through the grill. Similar to how the prow of a boat splits a wave and pushes it down the sides. Little hard to picture, it will make more sense once it’s built.
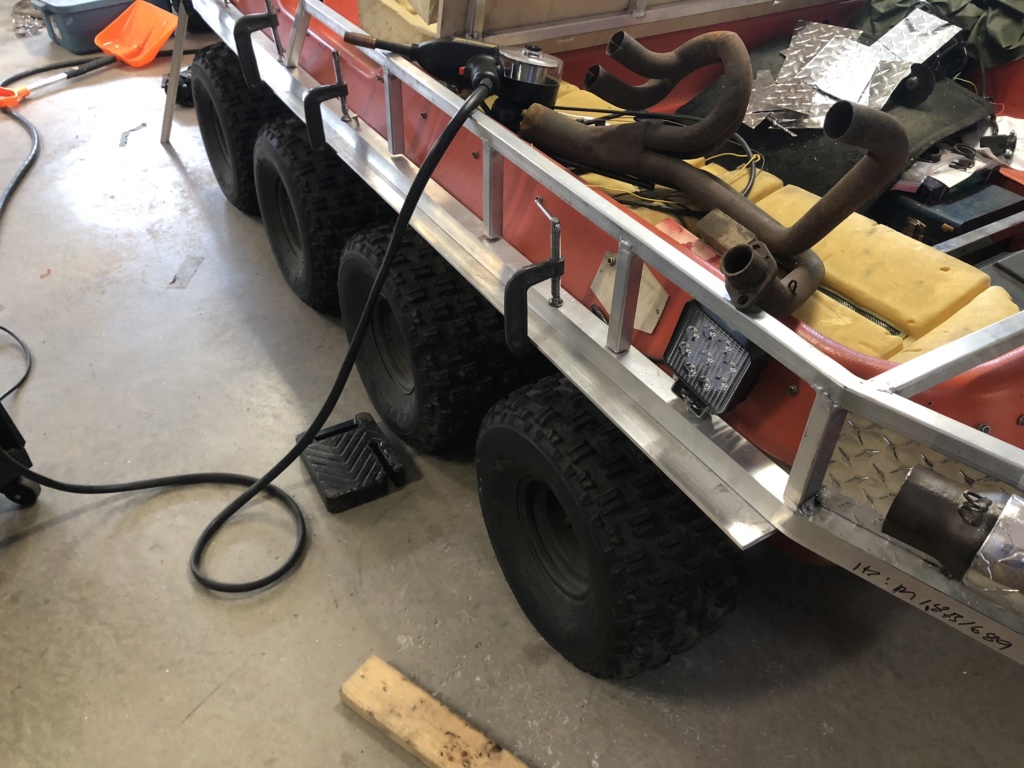
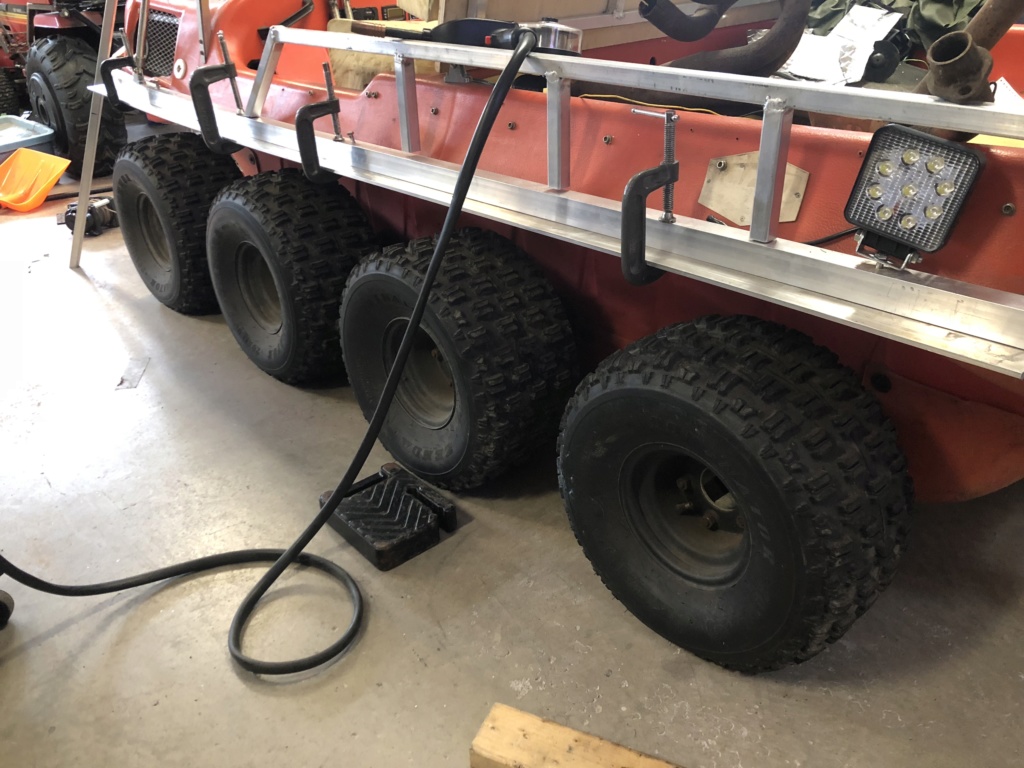
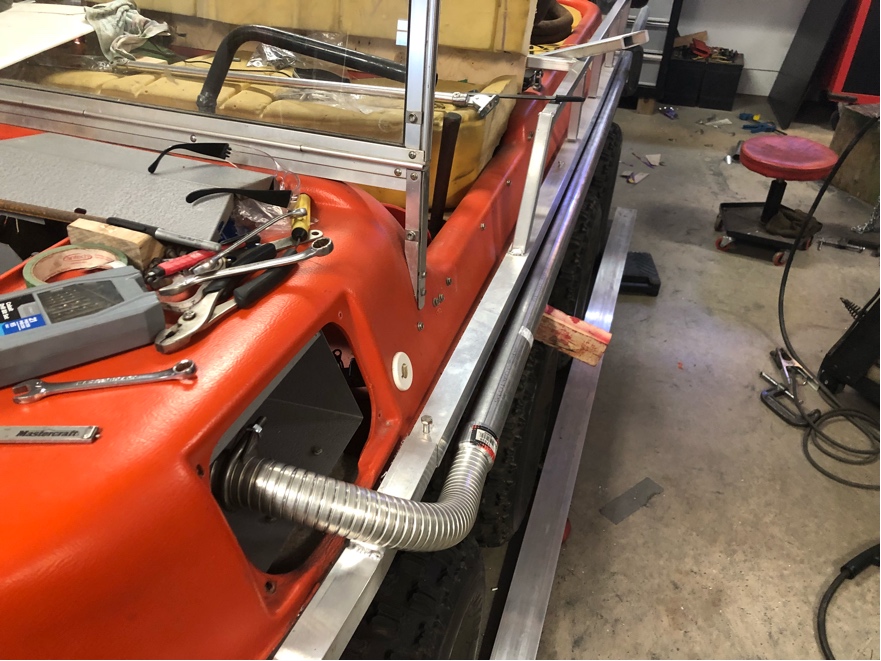
When I picked up my aluminum order yesterday, I grabbed two 8 foot 3”x1/4” flat stock. This is for the body band lower piece. I was going to use 1/8” flat stock, but the argo tub has just a bit too much sag and I wanted the metal to help support it. 1/8” was just too flexible. I also bumped it up to 3” from 2” to give me a little bit of a “splash guard”:
It also give me a place to attach wider “mud flaps” in the future. Since this is intended for search and rescue as well as a play toy, splattering mud and water all over the occupants isn’t really the greatest idea. So mud flaps will be needed.
Now orginally, I was thinking to run the exhaust pipe down the side to the rear on top of the “splash guard” to the rear muffler. But looking at it now, I’m thinking I might run it under.
It’s a little more work, but the pipe would be mostly covered, which would be a plus for not accidentally getting burnt by the hot pipe when getting in and out and it would look a little less “ugly” when the pipe eventually rusts. I would do the header and pipe in stainless, but I’m not set up to weld stainless, nor do I have any practice at it. I might redo it later on when I get a bit better at it, but for now aluminized steel will do.
It would be a little closer to the wheels mounted underneath, but since there is no suspension hitting the pipe is not an issue. When I do get around to building the suspension, I can just build it so the travel doesn’t reach the pipe.
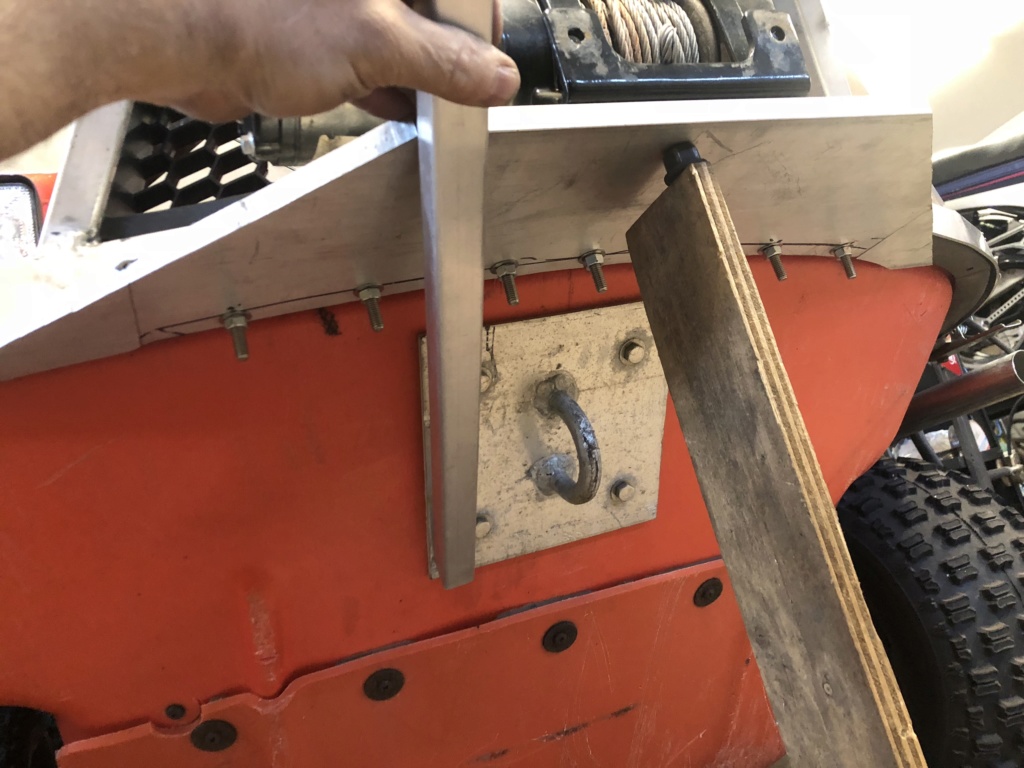
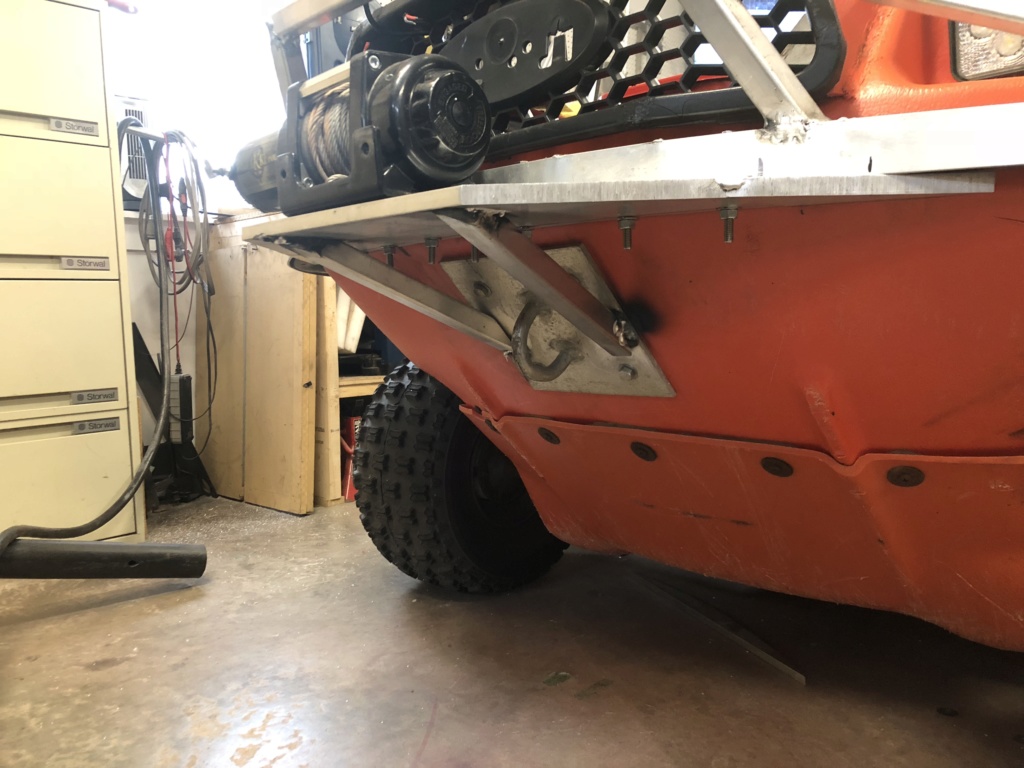
It’s bolted on, but the rubber body band compressed a little more than I wanted and gave the plate a slight “down in front” angle. Thats why the small wood strut is there.
I’ll fix that with a few spacers and two struts on the bottom of the plate that will also serve to carry some of the winch load down to the interior steel frame:
The PO bolted that plate to the body, so I’ll use it to weld the exterior struts to. Then, a couple steel struts inside will bolt to it and then down to the frame. There’s another aluminum plate on the inside, so the body is well supported. I just wish the PO had taken enough care to get it square on the body. It’s only a tiny bit off, but it bugs the heck out of me! I can’t move it because that would mean 4 more holes in the tub....
I’m willing to bet having the winch plate bolted through the body band (and tub seam) is enough to carry the winch loads. Especially since the body band is now encased in the aluminum angle, which goes all around the body and is bolted through the body seam in about 50 places. But I’ll add the interior winching frame down to the chassis, just to be sure.
Here’s a quick idea of what I meant when I said I would build a “prow” to keep the water from sloshing into the grill:
Basically, when you enter the water it will push the water up and forward instead of rushing straight back over the winch mount plate. Sure, if I sink the nose for more than a few seconds, water will gush into the tub. But water entry is essentially a “splash” and then you’re back up and floating.
Pushing the water is the same principle as driving an off road truck in deeper water: as long as you keep pushing, the water piles up in front of the truck and the rest is in shallower water. I’ve often used a floor mat tied to the front bumper to enhance that effect. Same idea here in building the prow....or “water deflector” if that makes more sense to you.
AllisKidD21 Moderator
5000+ Posts
5000+ Posts!
2020 Build-Off Entrant
2020 Build-Off Entrant
1st Place Build-Off 2019
1st Place Build-Off Winner 2019
Age : 25 Join date : 2016-07-10 Points : 8371 Posts : 5190 Location : Ontario Canada
The small receiver on the rear rail will get a little padding to protect the leg and a strap or clip to hold the outboad firmly in place so it doesn’t bang around during land travel. It’s pretty solid and supported the way it is, a strap will keep it all from even twitching on the worst terrain.
The front just uses a couple lynch pins to hold it in place:
Pull them out and you just drop the mount legs down the holes in the deck:
You can see the supports and the square tube that the legs slide into underneath. The tubes are set at a 5 degree forward tilt, since the argo floats nose down. The tilt will just make it a little easier to get the outboard vertical once in the “down” postion. The outboard is angled back a large amount in this pic to clear the floor:
So when in the water it hangs down lower to get to the “clean” water just below the hull bottom. A side bonus of it being able to swing back so far (it can swing back even further) is if it hits a rock (or something soild) it will hopefully just pivot back instead of breaking off the skeg or prop. I still have to build a “rock basket” for the outboard lower for additional protection, ut thats for another day.
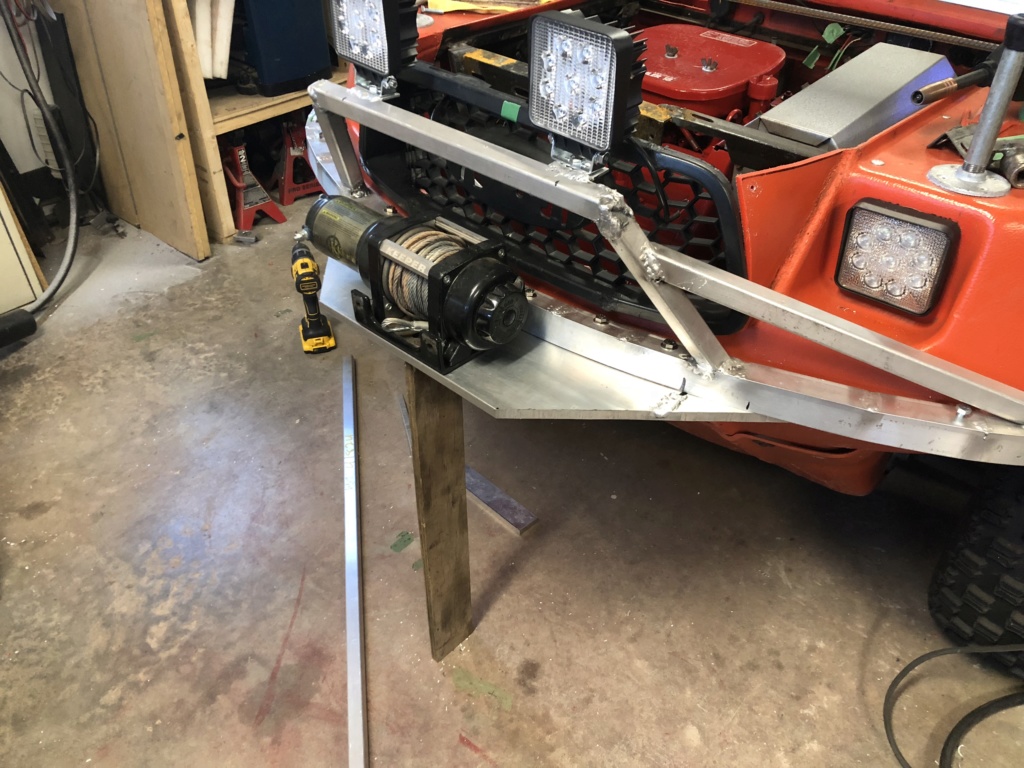
I also added the support struts to the front winch mount:
Pretty strong as it sits. I can stand my 200 lbs on the plate and it hardly moves at all. I think most of the movement I felt was actually the tires “squishing” under the force of my fat butt! Lol!
Now I think I’m going to take a break from the aluminum work. It all still has to come off and be finish welded, but its at least fabricated and strong enough for some light “wheeling”.
So, time to take the spool gun off and go back to the wire feed gun to do some work building the exhaust and then get it running again.
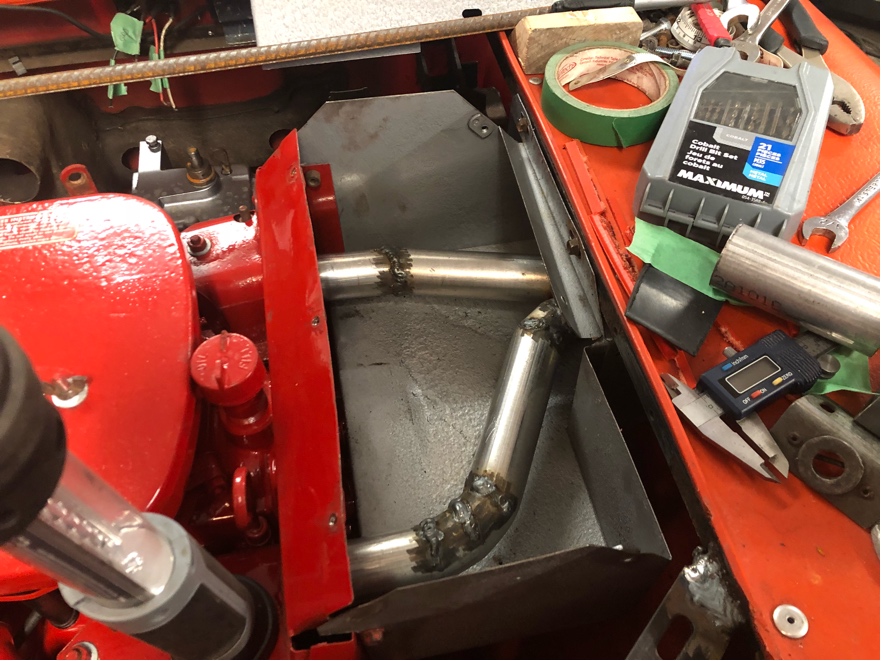
I just went with the "cut and weld" method of forming the pipes. I don't have a bender and the "heat and bend" method I find to just be a major PITA. Besides, I had to weld up the collector anyways, so might as well just weld the bends up. Looks a little ugly, but some grinding and a spritz of header paint will fix that up well enough. I tried to keep the header primary tubes equal length, but there was just no way to do it without getting into more bends and turns. Even so, the rear primary is only about 1.5" shorter than the front primary. I'll just have to live with it like that, as if it's going to make a huge difference on an flathead Kohler 18HP opposed twin that was designed in the early 70's.....
The flex pipe might seem like a short cut or cheap way out, but it's there intentionally. Because it will move, it will help to absorb the engine vibrations and compensate for thermal expansion.
To make it all removable, the muffler will get springs to hold the slip fit joint together and the flex pipe has a slip fit piece of pipe as a transition between the flex pipe and header collector, which will also b held together with springs. The springs will allow for some additional movement for engine vibes and thermal expansion, as well as allowing the exhaust to be removed and re-installed reasonably easily.
But I resisted that urge and finished up the exhaust to the rear muffler. Quick sound clip of the old Magnum put-putting through the full exhaust:
Theres a few leaks I have to sort out, mostly around the diamond plate on the muffler. A little exhaust grade silicone sealant will seal that up nicely.
Yes, the pipe gets hot, but the 1/4 aluminum plate is going to cover more stof it so it’s not a big concern. By the time it gets to the up pile for the muffler, it’s just “warm”. You can put your bare hand on it and while you don’t want to leave it there long, it doesn’t burn you.
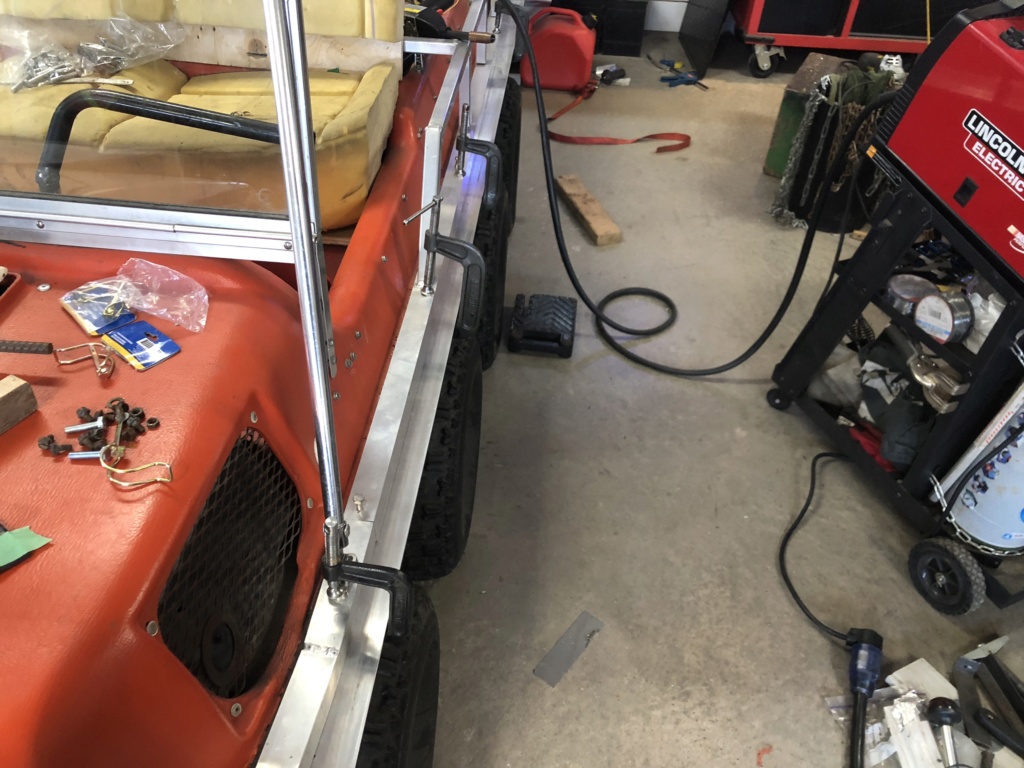
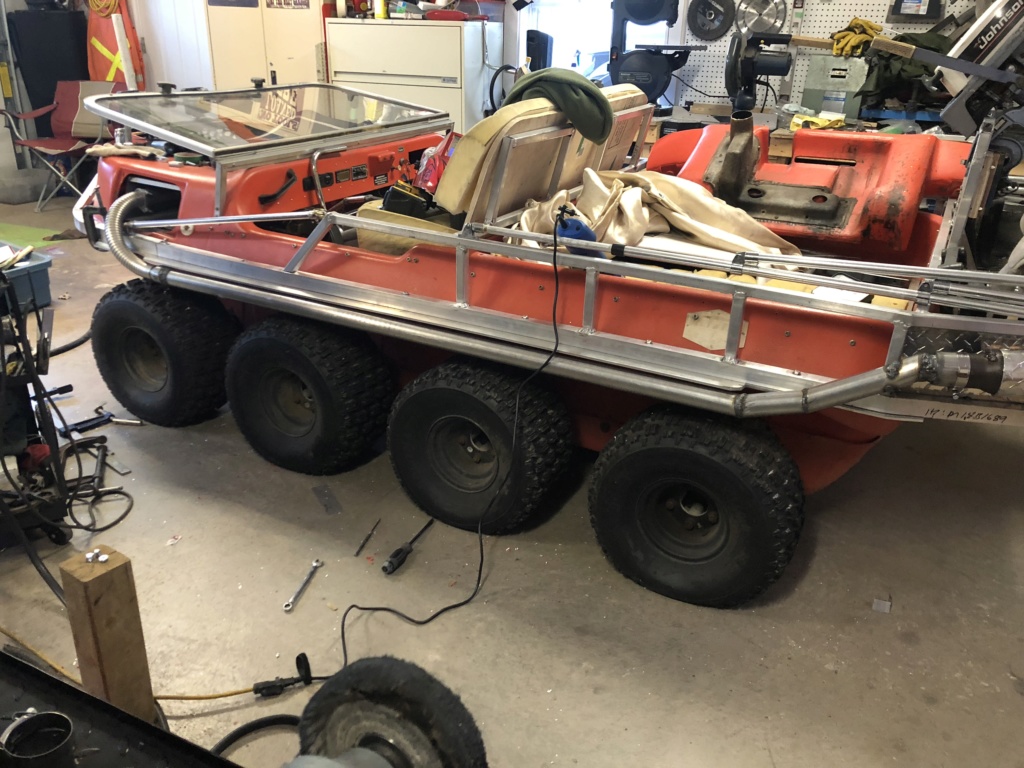
Had a significant sag in the tub right at the midpoint. I suspect it was either just age or a PO had strapped it down to a trailer across the middle at some point in it’s past.
But once I jacked it up in the center and bolted the upper body band rail to the lower 1/4” bottom plate, it straightened right out! It’s made even more “rigid” by the upper “grab rail”, which essentially makes the upper piece even stronger by it’s “ladder” type construction. Like a suspension bridge sort of deal-e-o.
So, sagging tub...BEGONE!
Lol!
Ps: the gap at the exhaust pipe isn’t even the entire length because the pipe has a slight “bow” in the middle. Can’t do a lot a about it, it’s just the way the pipe was formed.