| | | Mastercraft Off road project |  |
|
+28MowBandit redlinemotorsportts motorizedeverything Doc Sprocket mudmonkey06 tractorboy567 xxXMowerdudeXxx richie thomas RCG Thunderdivine truckin42 THE MTD GUY Doug Murray modder Stretch44875 Tractor Man Jeff CornishMorgan Junkstarbuilds craftsman rider Trikahilux Bandit1 dylansrockinrigs dangeroustoys56 greener179 muddstir W1ldyOvvnZ Chopperhed TennesseeCowboy 32 posters | |
| Author | Message |
|---|
dangeroustoys56
Veteran Member

Join date : 2010-02-10
Posts : 1726
|  Subject: Re: Mastercraft Off road project Subject: Re: Mastercraft Off road project  December 1st 2012, 10:43 am December 1st 2012, 10:43 am | |
| Most racers run around 4" of clearance - even thats pretty low. If you could locate a go kart setup( hubs/wheels/brakes ) you could still keep brakes up front - you might want them when racing with others.
Its just the ease of swapping setups out when either racing or running around - i suppose its why i chose to stick with golf kart 4 bolt rims/hubs- its universal and a simple wheel swap.
I think youre limited on tire size with atv stuff on how low of profile you can go - i noticed that when i got some ATV wheels, theyre a 9" rim up front - my rear wooley booger 8" ATV wheels actually have a golf kart rim on them. | |
| | | | Chopperhed
Moderator


Age : 57
Join date : 2012-10-14
Points : 5051
Posts : 801
Location : Edmonton, Alberta, Canada Eh!
| | Subject: Re: Mastercraft Off road project December 1st 2012, 10:48 am | |
| my fronts are 10 inch, In order to run a smaller rim, I'd have to remove the caliper and disc. I'm looking at modifying a smaller rim to slip on the spindle, with out the ATV hub. | |
| | | | Chopperhed
Moderator
Age : 57
Join date : 2012-10-14
Points : 5051
Posts : 801
Location : Edmonton, Alberta, Canada Eh!
| | Subject: Re: Mastercraft Off road project December 8th 2012, 10:21 am | |
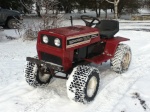
| More pics Got a bit of work done. Finished the assembly of the chain guard, Need to clean up the edges and polish it a bit, 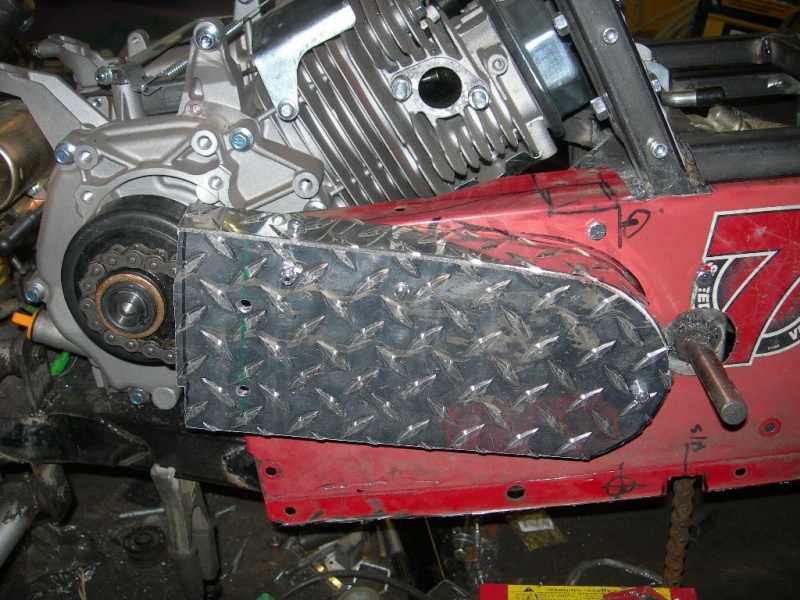  Building a new exhaust for it. The tubing is well over sized so I should have some good flow. I have a spark arrestor to go on the end for some backpressure.  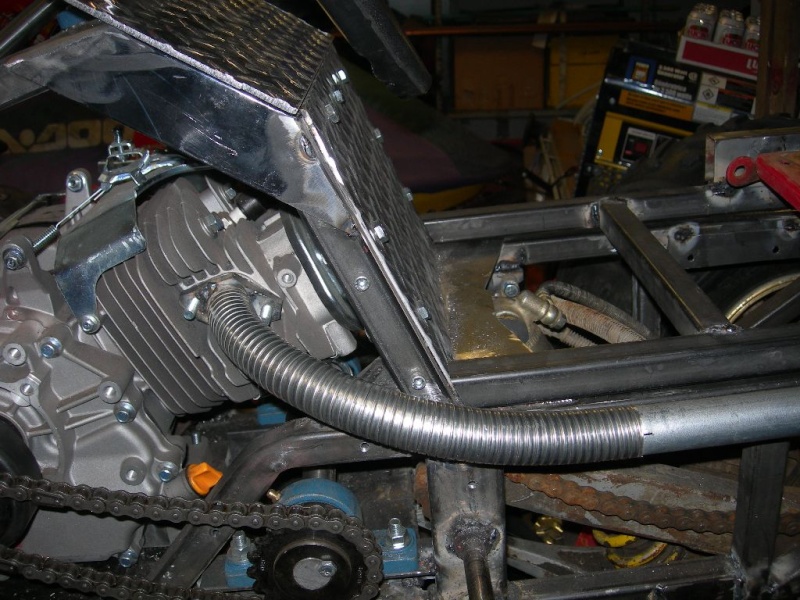 Installed the brake master cylinder and reservoir brackets. 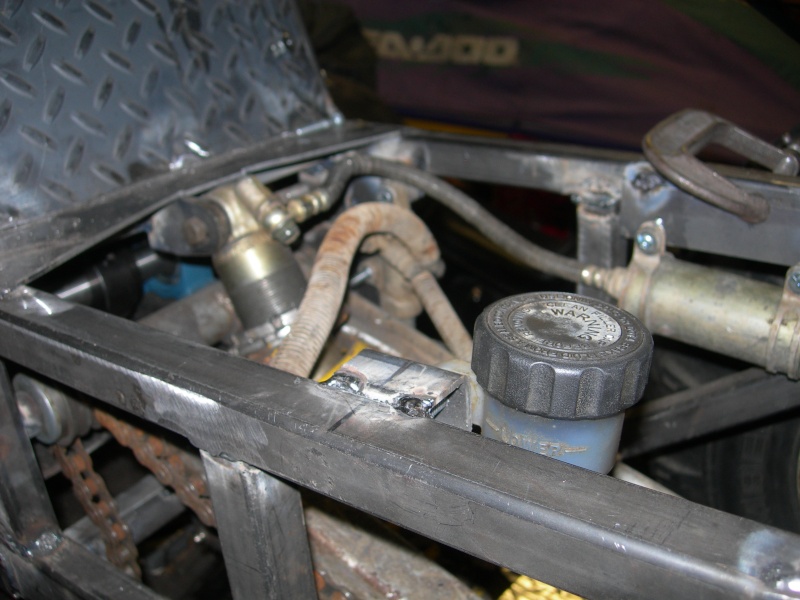 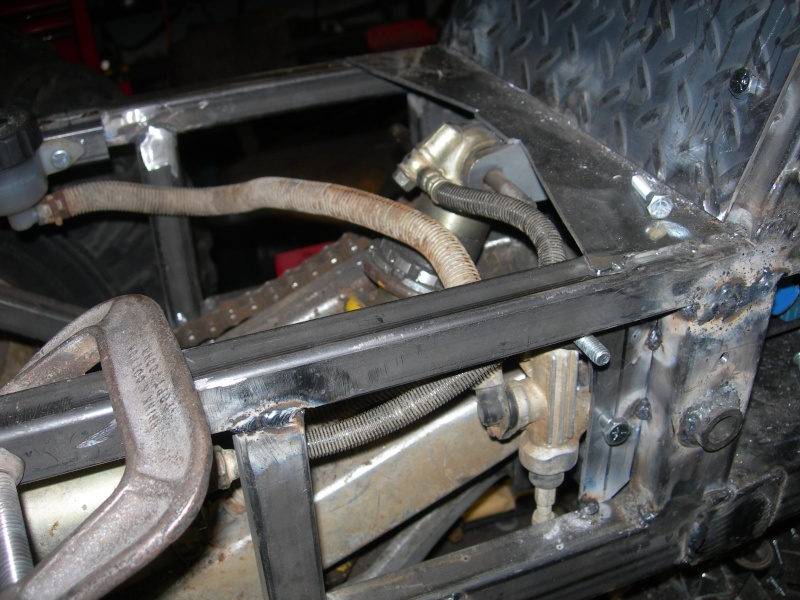 And the reservoir for the rear shock. Once I take it apart for finish welding and paint. I can weld the tabs up completely.  Building the battery box. It'll be a pain to change batteries, but I simplified nose removal as much as I can so its only three bolts, I was hoping to use a small car battery but there just wasn't enough room. As it is, I have to notch out some of the sheet metal between the headlights. It will be coverd by a smoked plexi cover over the headlights. 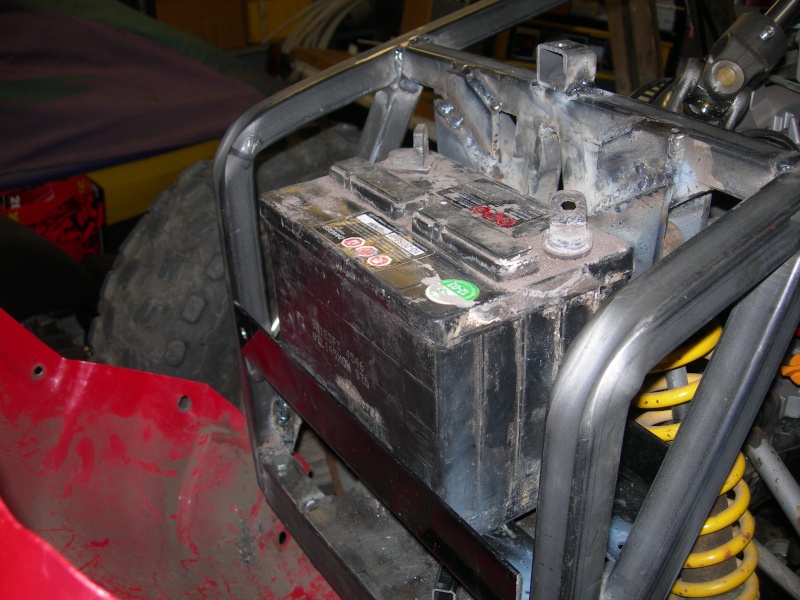 I had to notch the angle for access to the front a-arm bolts 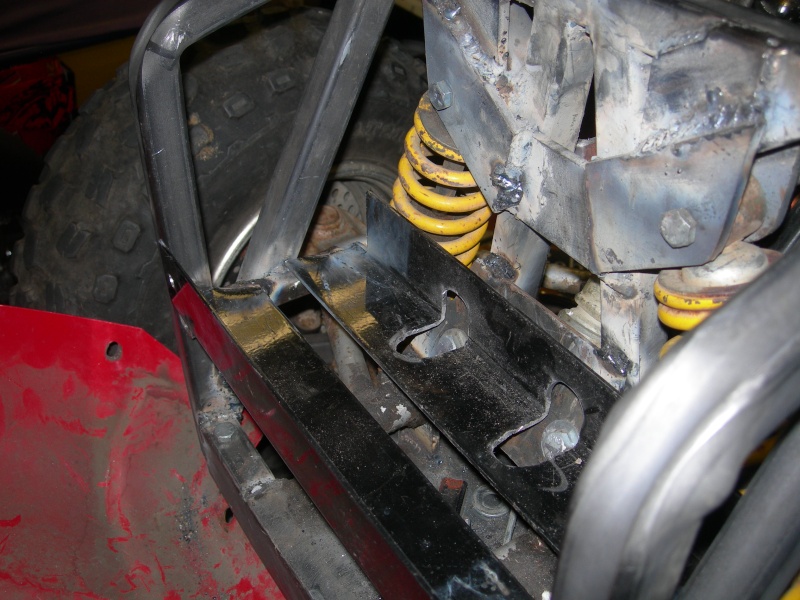 Cleaned out a corner of the shop for new tractor, Hope it gets here soon.  | |
| | | | dangeroustoys56
Veteran Member
Age : 53
Join date : 2010-02-10
Points : 6873
Posts : 1726
Location : Florida, USA
| | Subject: Re: Mastercraft Off road project December 9th 2012, 4:04 pm | |
| Easier way to make the hood removeable is to weld a couple bolts to the chassis - drill them out for pins- couple rubber washers would keep it from moving around . | |
| | | | Chopperhed
Moderator
Age : 57
Join date : 2012-10-14
Points : 5051
Posts : 801
Location : Edmonton, Alberta, Canada Eh!
| | Subject: Re: Mastercraft Off road project December 12th 2012, 11:17 am | |
| The way its set up now is spin off two nuts, and pull 3 bolts and the whole front clip comes off. I'm still thinking about a one piece tilt front end, but i'll have to think on it some more.
| |
| | | | Chopperhed
Moderator
Age : 57
Join date : 2012-10-14
Points : 5051
Posts : 801
Location : Edmonton, Alberta, Canada Eh!
| | Subject: Update Time January 10th 2013, 7:37 pm | |
| Time to post some new pics.... Got a gas pedal . 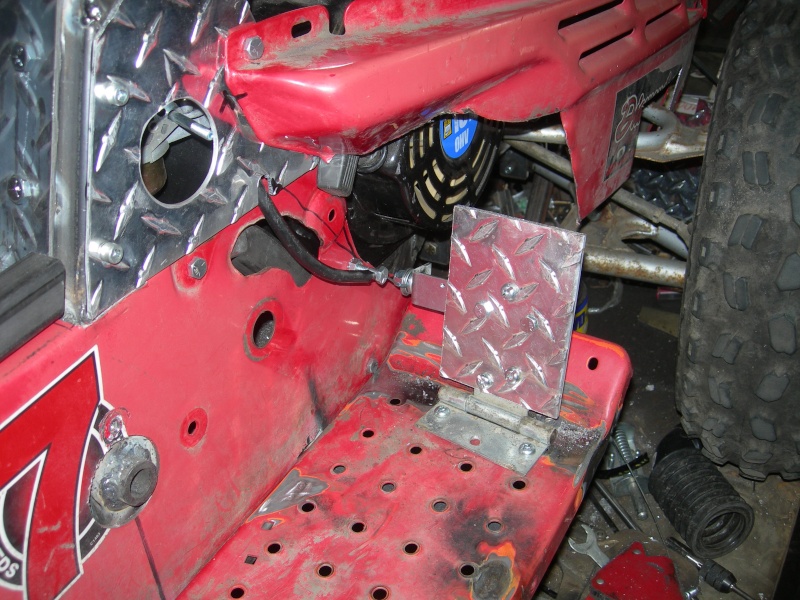 Cut down a motorcycle cable to go to the carb. Has a nice smooth easy movement, but needs a stiffer spring. The honda clone still has the governor till I see how it runs. 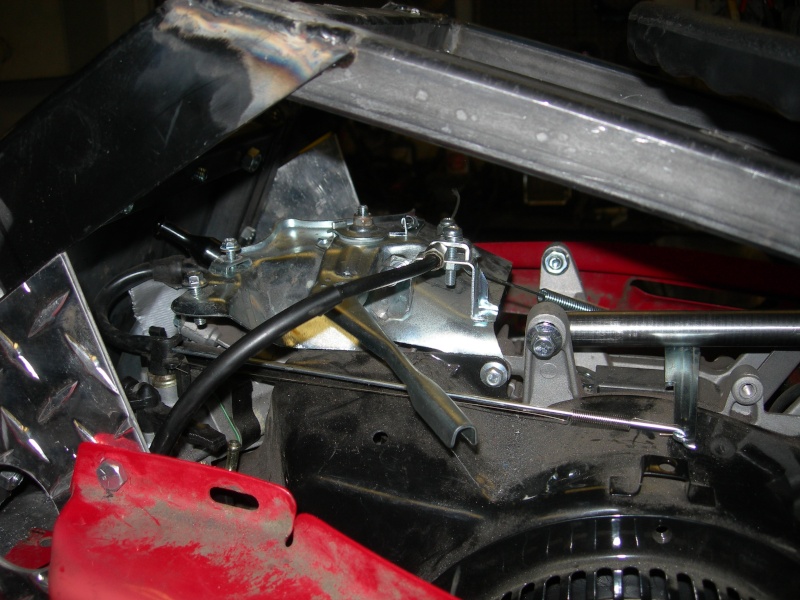 Got it all stripped down, and rolled over for some welding in a few hard to reach spots. Getting it ready for last minute fab work, and frame paint. 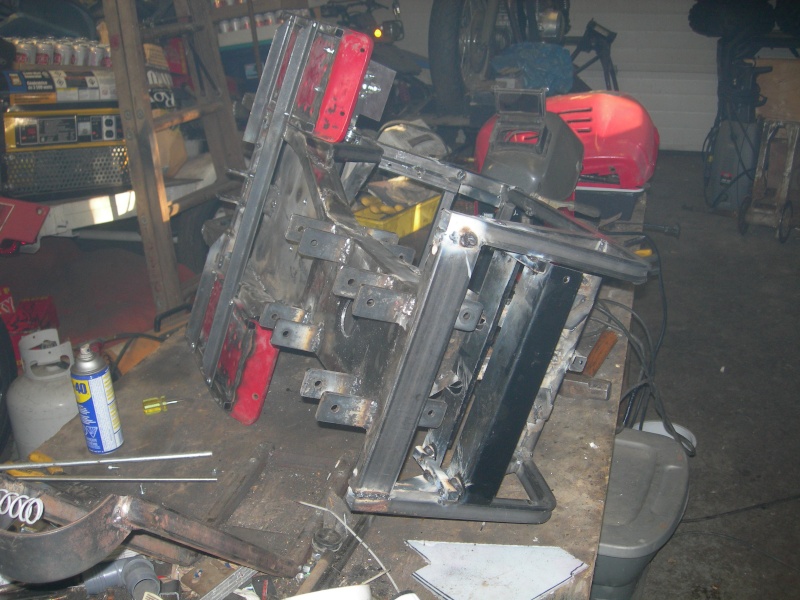 Working on some brakes. Using the stock brake pedal and shaft, with custom made linkage to the master cyclinder. The Rear brake system was removed from the quad withhout loosening any fittings. I don't even need to bleed them. The rear brake is a hydraulic 9" disc. The red parts are stock. Custom stuff is all 1/4" plate steel, Pins will be 1/4" gr8 bolts. I cut the factory plates off the shaft, and smoothed it down so I could slip 1" x 5/8" DOM tubing over the shaft. I made some 1/4" plates and drilled some 5/8" holes in them. I put a plate and a short piece of tube on a stub shaft for alignment. I welded them together, and drilled 1/4" holes for the linkage. The DOM tube bushings are drilled throught the shaft for 1/4" gr8 bolts. All bolts will have a solid shoulder so there are no threads at the bearing surfaces. It will wear eventually, but it will be a simple fix. Been putting some primer on the frame too, i hate bare steel. 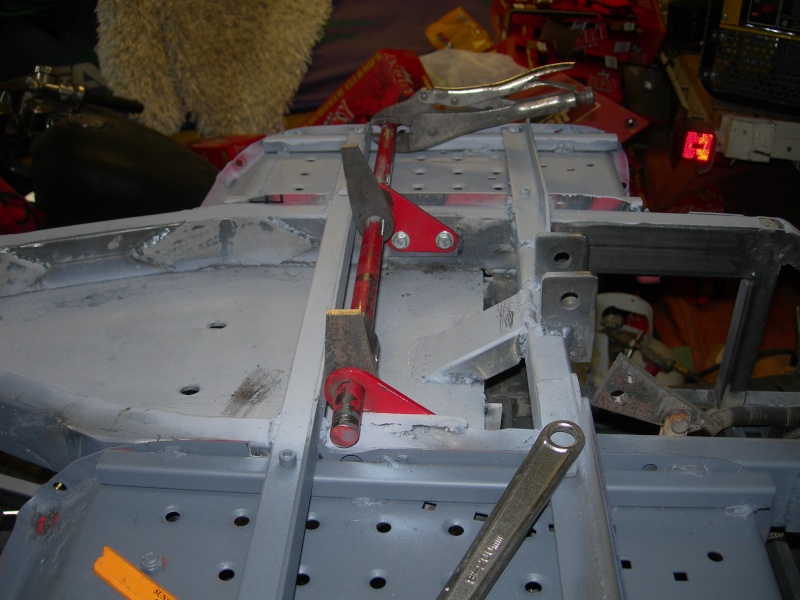 Its only got rear brakes right now. I need to roll it over and figure out something to do with a motorcycle style front master cylinder, for my front brakes to work off the same shaft. I'm thinking of removing the lever and handlebar clamp, and bolting the MC to the frame, actuating it off a pushrod from the brake pedal shaft. 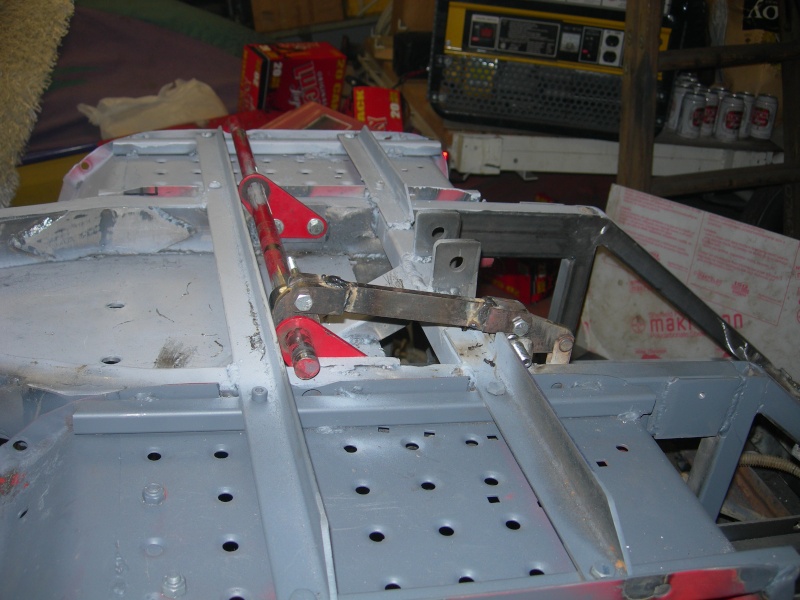 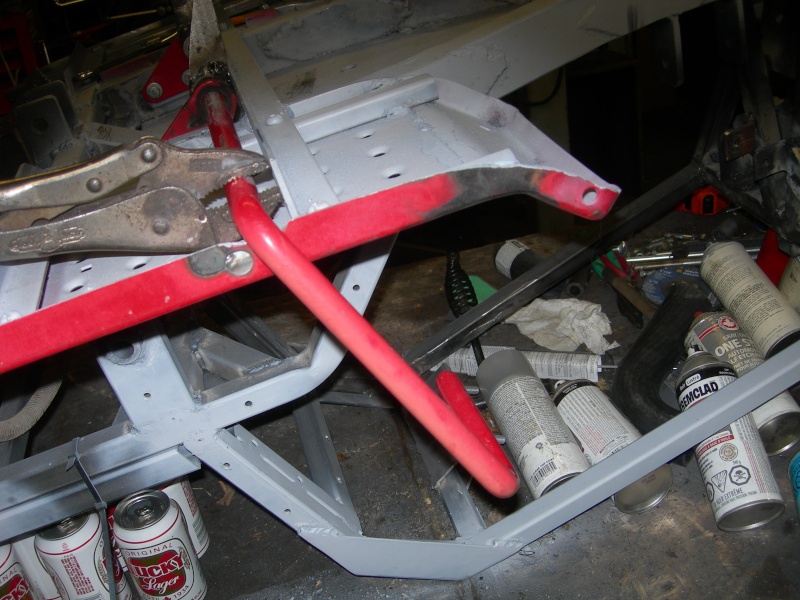 All the parts are still rough steel. Corners will be smoothed etc, when I start the finish process. Right now the idea is to get it right. Tear it down, and put it together painted. | |
| | | | Tractor Man Jeff
Moderator

Age : 29
Join date : 2012-06-26
Points : 4810
Posts : 492
Location : Back in the sticks of VA
| | | | | Stretch44875
Administrator

Age : 49
Join date : 2012-04-05
Points : 5498
Posts : 959
Location : Mansfield, Ohio
| | Subject: Re: Mastercraft Off road project January 11th 2013, 5:52 pm | |
| Some really nice work here, way above most of the mower builds I see. Not so much of a woods or mud machine, but should be very cool, smooth, and fast. Looks bullet proof on the design.
Are you running a dual jackshaft? Looks like an extra gear on shaft in some of the pics.
You have your gearing figured out for top speed? | |
| | | | Chopperhed
Moderator
Age : 57
Join date : 2012-10-14
Points : 5051
Posts : 801
Location : Edmonton, Alberta, Canada Eh!
| | Subject: Re: Mastercraft Off road project January 11th 2013, 6:12 pm | |
| It runs a single jackshaft.
It should be OK in the woods, not really good for deep mud, I will have the air filter up pretty high for water crossings, It should be fast and stable at speed, and small to moderate jumps should be manageable
With the 28" tires at 3800 rpm it is geared for 75+
I'll be running 18.5s when its done., which will get it down to about 55 and up the acceleration, and its doubtful I'd get 3800 rpm out of, apparently most of the clones we get here max out at 3200 | |
| | | | Chopperhed
Moderator
Age : 57
Join date : 2012-10-14
Points : 5051
Posts : 801
Location : Edmonton, Alberta, Canada Eh!
| | Subject: Update Time January 21st 2013, 9:44 pm | |
| Been a while since I added any pics. I've been working on a combination front bumper mount and rock (skid)rail. It will serve as a front bumper mount, rock rail, lower a-arm mount gusset, and rear brake linkage protector 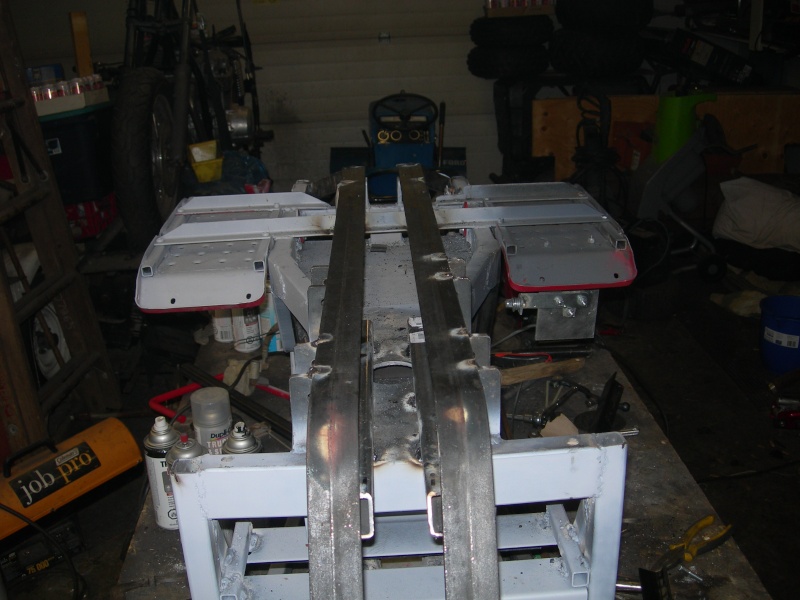 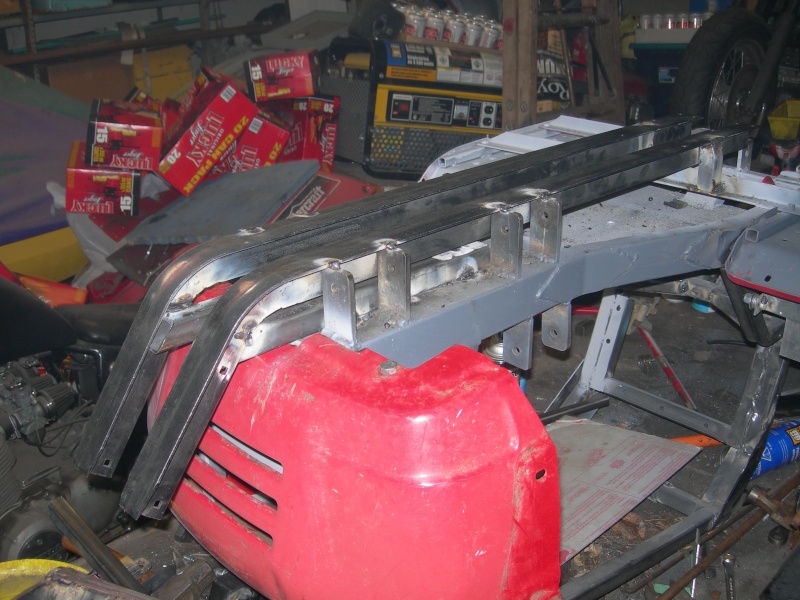  And I can even get the sheetmetal off, LOL, after a quick trim.  Now that I have 95% of the frame done, I've got to start looking at paint options. Also will need to buy tires soon. If I want to race for prizes here. I found Turf tires that will fit the front for racing, but I've been screwd on the rear. I can run ag tires, but i can't get them in my size, so I may have to find an atv tire with an sorta ag pattern and shave the extra bits off. Otherwise. The OL gets a new set on the ass of her quad, and I steal hers. | |
| | | | dangeroustoys56
Veteran Member
Age : 53
Join date : 2010-02-10
Points : 6873
Posts : 1726
Location : Florida, USA
| | Subject: Re: Mastercraft Off road project January 26th 2013, 3:17 pm | |
| Nice work - its best to take your time and do it right like you are- if rushed something might be forgotten and youd have problems.
| |
| | | | Chopperhed
Moderator
Age : 57
Join date : 2012-10-14
Points : 5051
Posts : 801
Location : Edmonton, Alberta, Canada Eh!
| | Subject: Re: Mastercraft Off road project January 29th 2013, 9:11 pm | |
| OK Finished up the frame fab. No more welding on it. Hacked a ATV front master cyclinder to work off of the same brake pedal as the rear brakes. I now have disc brakes all around. I made the linkage for the front MC adjustable so I can change the brake bias. 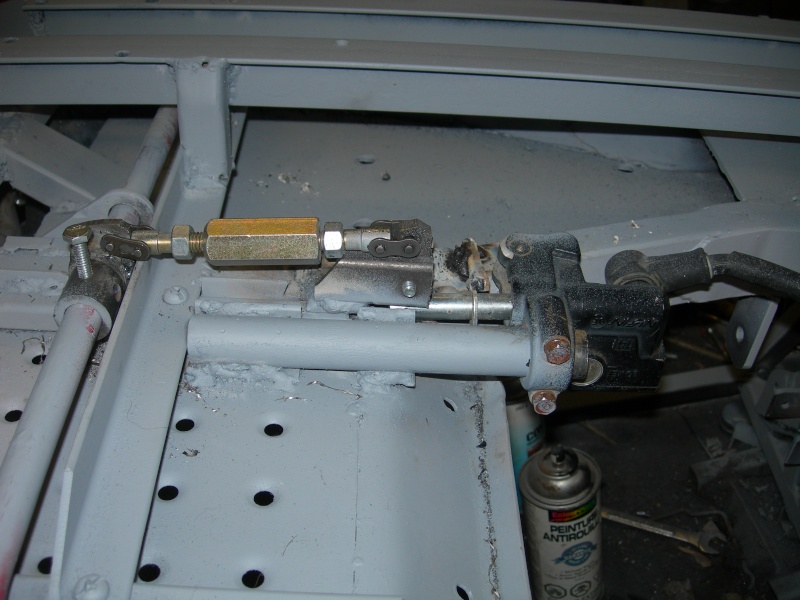 Now I can strip it down, and start painting. Paint is slow this time of year since I can't open up the doors, so 1 piece a night is about all I can expect. Unless it gets really warm for a day or two. | |
| | | | Murray modder
Member


Join date : 2012-11-23
Points : 4598
Posts : 356
Location : Somewher in Va
| | Subject: Re: Mastercraft Off road project January 29th 2013, 10:04 pm | |
| If you have a 4 shocks laying around, build a crash box, this thing is amazing crashes, it's basically a front bumper, attached to 4 (or more) shocks so when you hit something you basically bounce off | |
| | | | Chopperhed
Moderator
Age : 57
Join date : 2012-10-14
Points : 5051
Posts : 801
Location : Edmonton, Alberta, Canada Eh!
| | Subject: Re: Mastercraft Off road project January 29th 2013, 11:22 pm | |
| I'll have to think on that. I want to be able to ride over rocks and trees.
I have a good collection of old mountain bike shocks. as well as springs of various dimension and strength.
| |
| | | | Murray modder
Member
Join date : 2012-11-23
Points : 4598
Posts : 356
Location : Somewher in Va
| | Subject: Re: Mastercraft Off road project January 31st 2013, 10:37 pm | |
| If your considering it, there's a car that's discontinued, but you can still look it up, go to YouTube and look up gum pert Apollo s auto vista fora 4 should be under the hood. | |
| | | | Doug
Site Owner


2014 Build-Off Entrant
2014 Build-Off Entrant
2017 Build-Off Entrant
2017 Build-Off Entrant
Age : 28
Join date : 2012-12-24
Points : 7568
Posts : 3037
Location : Lebanon County, PA
| | Subject: Re: Mastercraft Off road project February 21st 2013, 7:28 pm | |
| Finally read through all of this, looks real good Chopperhed!
Any new progress?  Head Forum Administrator ** Chat Moderator ** Facebook Page AdminATLTF Facebook Page ** Chatbox ** How To Upload Pictures
_X_ FORUM ANNOUNCEMENTS _X_Have a question? Ask me! Type in "@Doug" in your post!
Your ATLTF Staff:
Administrators: @Doug, @MightyRaze, @"Doc Sprocket", @Stretch44875
Moderators: @TheRainbowBoxer, @AllisKidD21, @Brianator, @RichieRichOverdrive
| |
| | | | Chopperhed
Moderator
Age : 57
Join date : 2012-10-14
Points : 5051
Posts : 801
Location : Edmonton, Alberta, Canada Eh!
| | Subject: Re: Mastercraft Off road project February 21st 2013, 8:21 pm | |
| Its torn Down For paint.
The frame got 2 coats of tremclad black, over tremclad primer, with 2 coats of tremclad goss clear.
Working on painting the front suspension now, I'll post a few pics soon. | |
| | | | THE MTD GUY
Member

Age : 26
Join date : 2013-02-15
Points : 4167
Posts : 69
| | Subject: Re: Mastercraft Off road project February 22nd 2013, 8:12 am | |
| looks like its coming along just great! is that all u have to do to her now is just paint and put back togather? | |
| | | | Chopperhed
Moderator
Age : 57
Join date : 2012-10-14
Points : 5051
Posts : 801
Location : Edmonton, Alberta, Canada Eh!
| | Subject: Re: Mastercraft Off road project February 22nd 2013, 9:29 am | |
| - THE MTD GUY wrote:
- looks like its coming along just great! is that all u have to do to her now is just paint and put back togather?
Basically, I'll have to do electrical, and buy/build a fuel tank, but thats about it. | |
| | | | Tractor Man Jeff
Moderator
Age : 29
Join date : 2012-06-26
Points : 4810
Posts : 492
Location : Back in the sticks of VA
| | Subject: Re: Mastercraft Off road project February 22nd 2013, 10:13 am | |
| This will be one of the pro builds. Someone who has the time and money to build these things up "Right". I can't wait to see how this turns out. | |
| | | | THE MTD GUY
Member
Age : 26
Join date : 2013-02-15
Points : 4167
Posts : 69
| | | | | Chopperhed
Moderator
Age : 57
Join date : 2012-10-14
Points : 5051
Posts : 801
Location : Edmonton, Alberta, Canada Eh!
| | Subject: Re: Mastercraft Off road project March 4th 2013, 8:32 pm | |
| Painted frame  Front Shocks. Dis assembled and painted 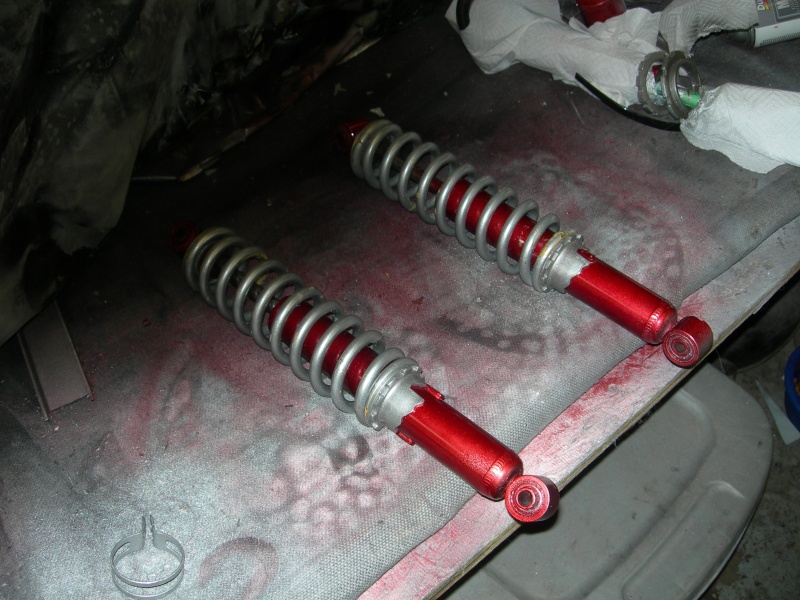 Rear Shock disassembled and painted  Rear Shock Linkage 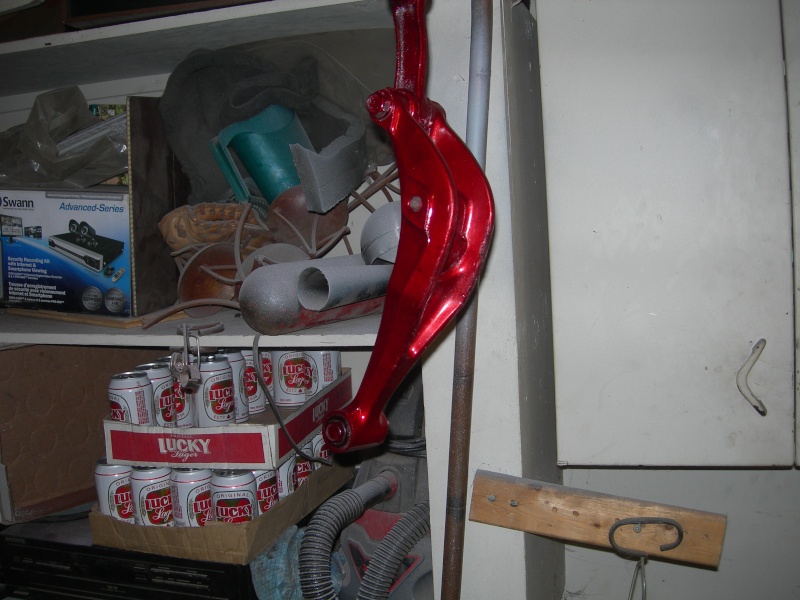 | |
| | | | truckin42
Veteran Member
2014 Build-Off Entrant
2014 Build-Off Entrant
Age : 26
Join date : 2012-10-04
Points : 5300
Posts : 1070
| | | | | Chopperhed
Moderator
Age : 57
Join date : 2012-10-14
Points : 5051
Posts : 801
Location : Edmonton, Alberta, Canada Eh!
| | Subject: Re: Mastercraft Off road project March 4th 2013, 8:41 pm | |
| Various parts, rear brake rotor, sprocket, axle adjusters, brake shaft brackets, etc. 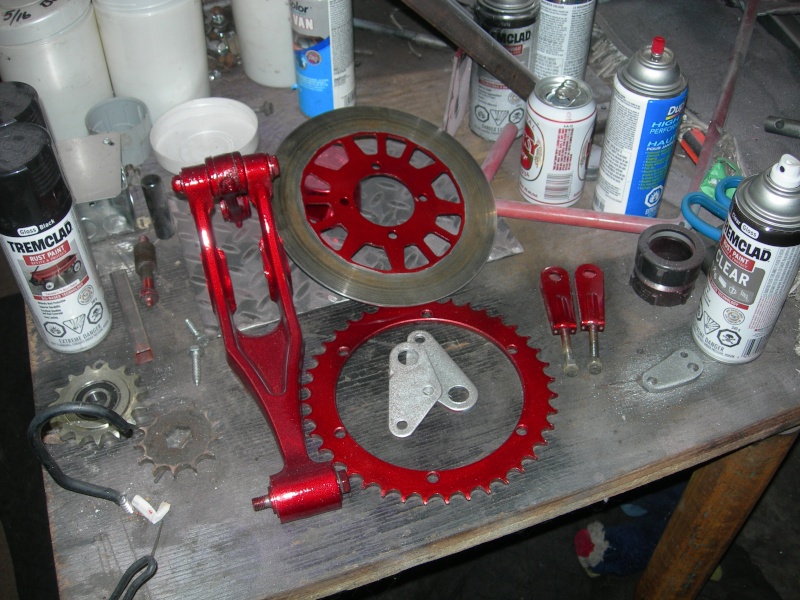 Swingarm 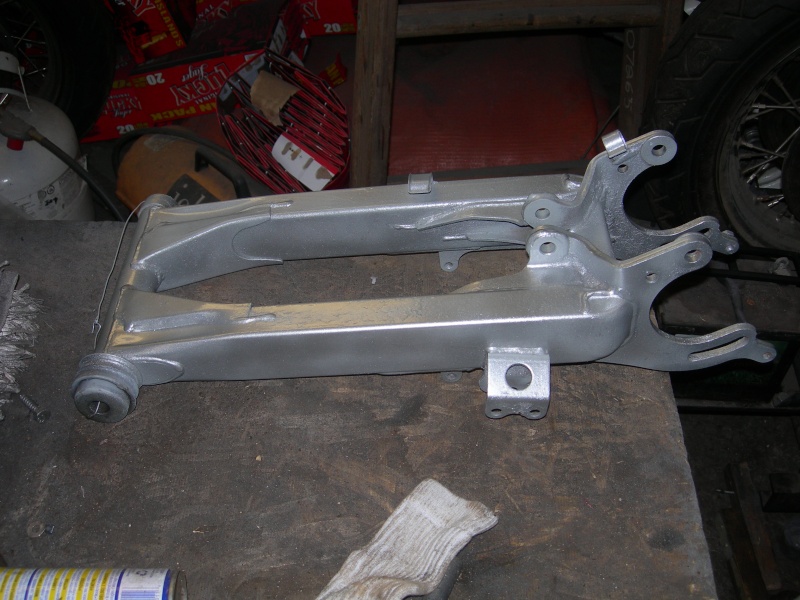 Rear axle assemble in primer, thats as far as I could get it apart, with out a lot of work. its worn, but serviceable. To be honest, i bought the quad originally hoping the arse end was in decent shape. Its not, all the splines and hubs are shot. 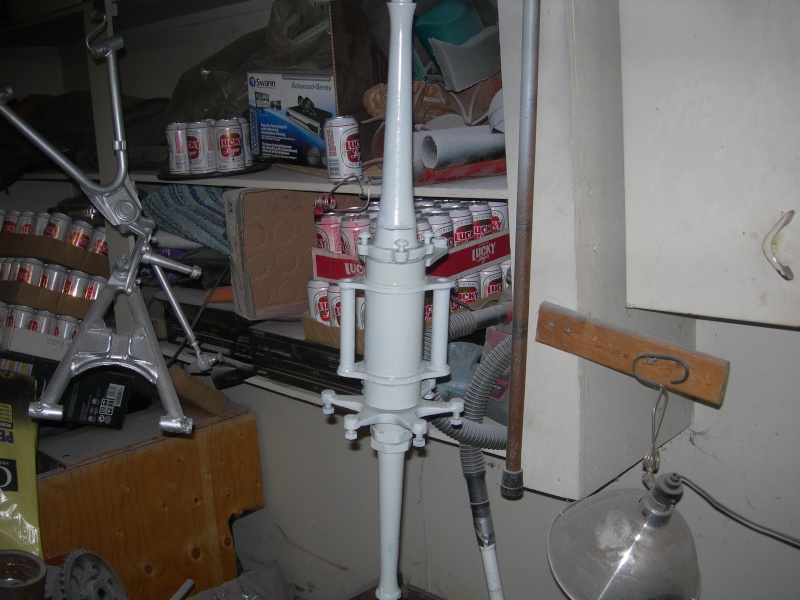 | |
| | | | W1ldyOvvnZ
Member
Age : 28
Join date : 2011-12-06
Points : 5048
Posts : 499
Location : Winchester, ON, Canada
| | | | | Chopperhed
Moderator
Age : 57
Join date : 2012-10-14
Points : 5051
Posts : 801
Location : Edmonton, Alberta, Canada Eh!
| | | | | Sponsored content
| | | | | | | Mastercraft Off road project | |
|
Similar topics |  |
|
| | Permissions in this forum: | You cannot reply to topics in this forum
| |
| |
| | Who is online? | In total there are 14 users online :: 0 Registered, 0 Hidden and 14 Guests
None
Most users ever online was 412 on January 7th 2023, 7:59 am
|
|