Then, I need to drop the transaxle in the rear, clean it and change the oil. While I am at it, finish through bolts and change out the axle needle bearings.
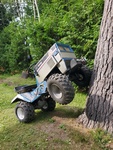
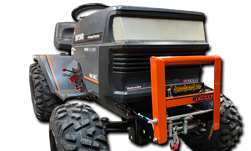
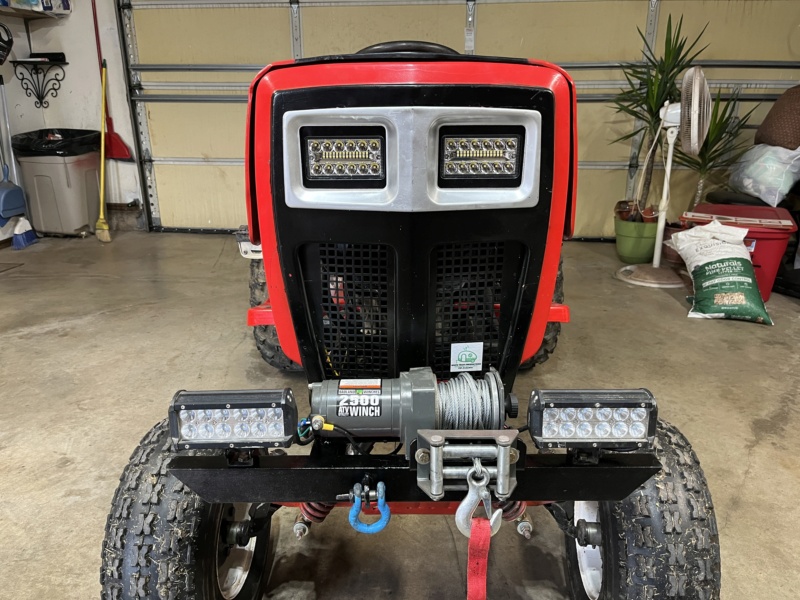
OK, got a lot done this morning when I was taking a break from work. I'm a little excited to show you my upgrade!
As for the front half of Li'l Red, only firing up the engine is left then it is off to the transaxle.
For now, I hope you enjoy these pix!
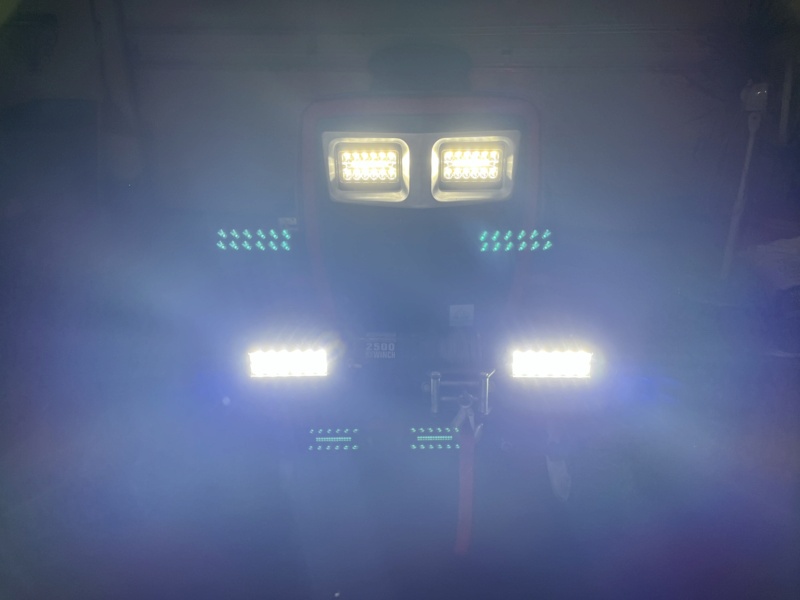
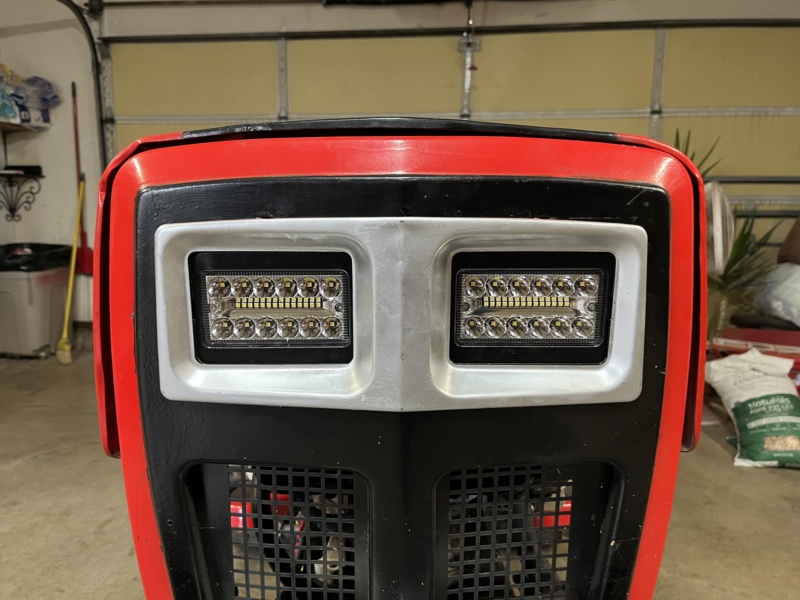
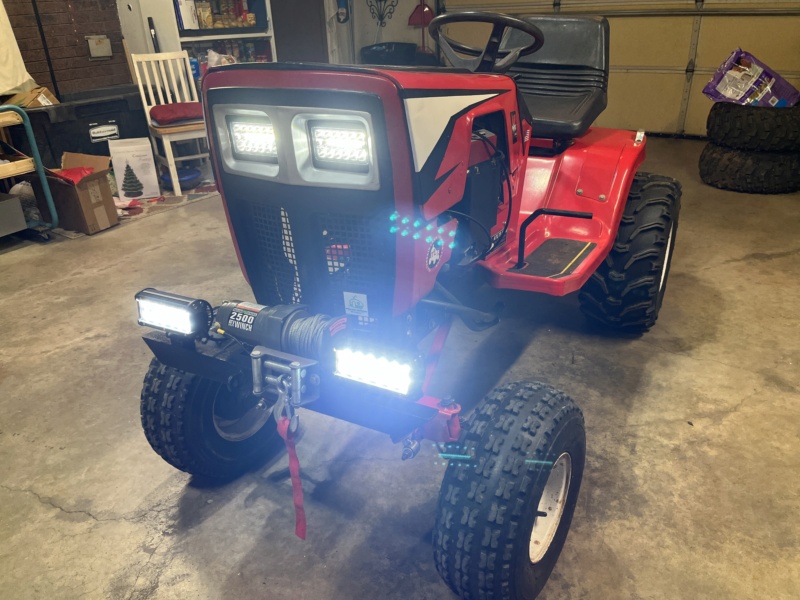
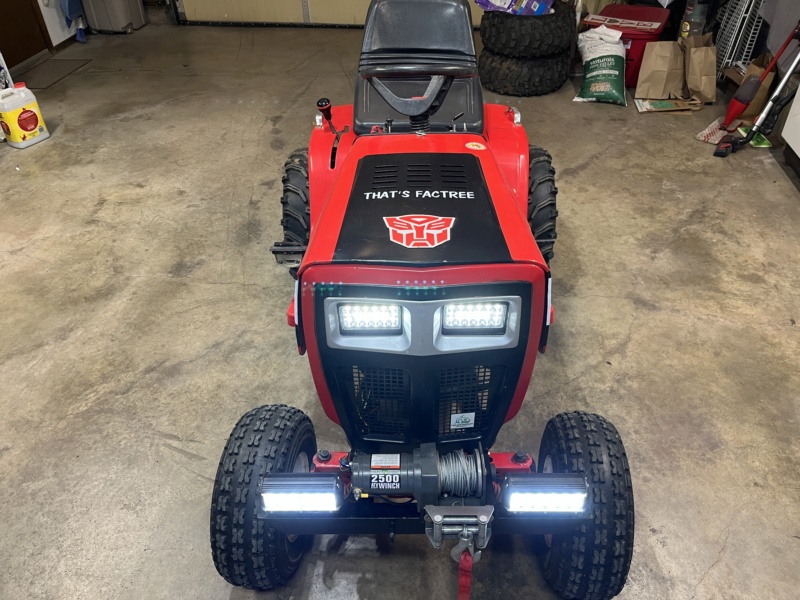
Much better than the fading, yellowing, and getting brittle headlights. I was also able to use the factory tabs with only minor modification to the lights!
SHE RUNS! I threw some gas in it. After turning it over a few times, she fired right off and idled. Rev'd nice too. Almost a little spicy. I did notice this engine had some kind of porting done, either professional or maybe a block update from the factory? I know the ports had some modifications to make the air/fuel route more "direct" from the intake to the valve head. We'll see how this pans out.
The fuel pump works great. Within a few seconds the filter was full. A few more second VVvvrrooom!
It runs!
At first it ran a little "noisy" it had a lot of valvetrain noise. At least at first. Guess the zddp oil treatment I used for reassembly ran off. I didn't have any assembly lube. After about a minute, noise subsided.
Battery with the engine off was at 12.3V, with the engine running 1/4 throttle it was coming in at 13.4. Alternator seems healthy.
It seems like a nice HEALTHY engine. I hope it lasts. Definately power the original lacked.
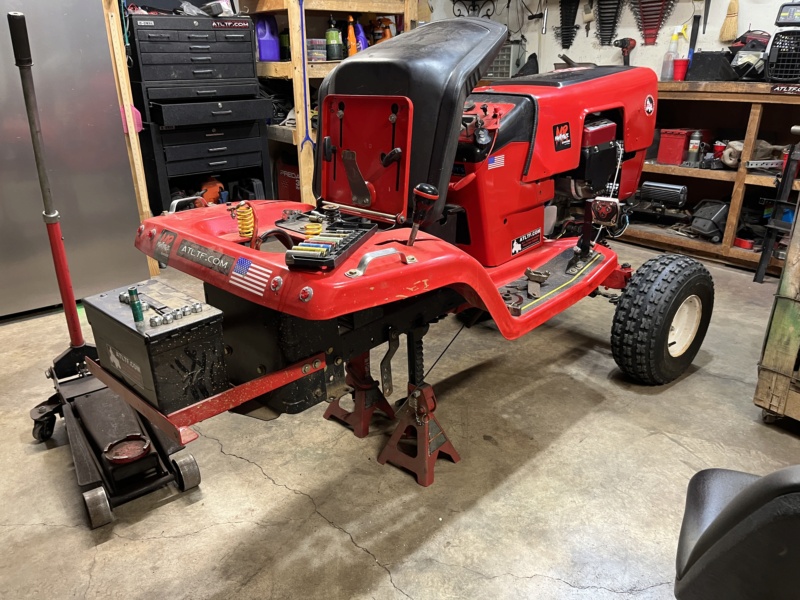
Time to pop off the rear tires and drop the transaxle! I need some bronze inserts and some wheels for bowser. I'd rather not go back to the wheel on axle. I like having the ability to unbolt lug nuts. Plus, they look better. (For Bowser's original tires, I'm taking back the bearclaws)
Well, I am done for a couple days. Time for a break.
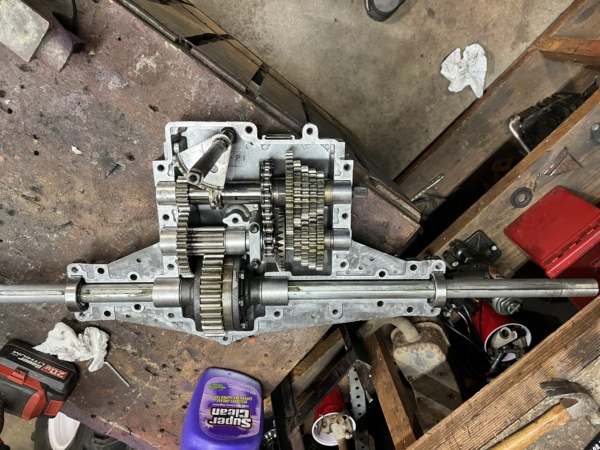
Trans is out.
And if you are interested. Here it is taken apart. Gears and everything look good. Oil looked good and no glitter.
Now to clean it out
Updates to the 820 planned.
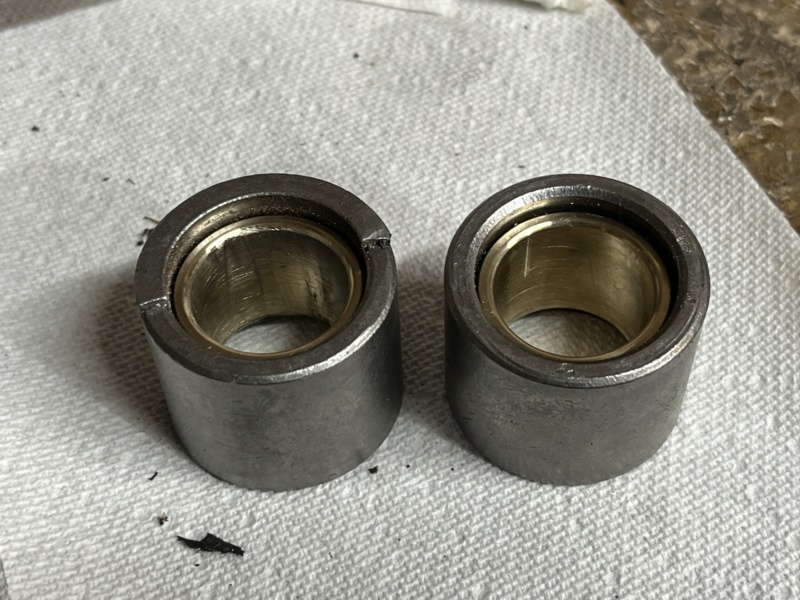
Bronze sleeves
grease zerk for input?
Oil Drain? If I feel crazy. The gear oil is pretty thick so I don't think it would drain "quickly" or completely. So, probably not. Especially since the oil was almost pristine. I actually thought about dropping the gears back into the oil, but I dropped dirt into it. Plus cleaning the old RTF will dirty it as well.
Through bolts. I'm sure since I have had this open a couple times now, I will strip a bolt trying to torque it.
New updates this weekend. Hopefully.
And I saw that silly lifted smart car again today. LOL
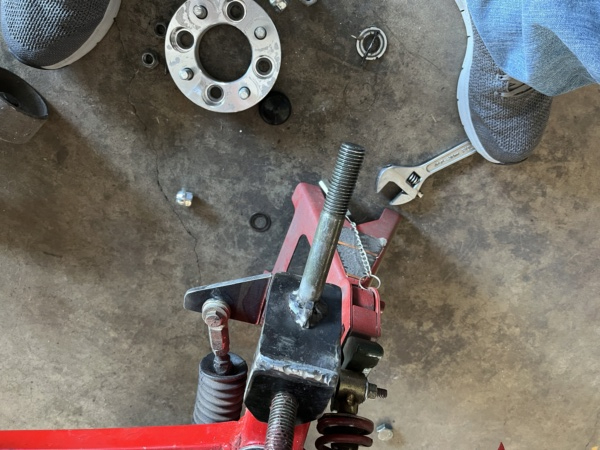
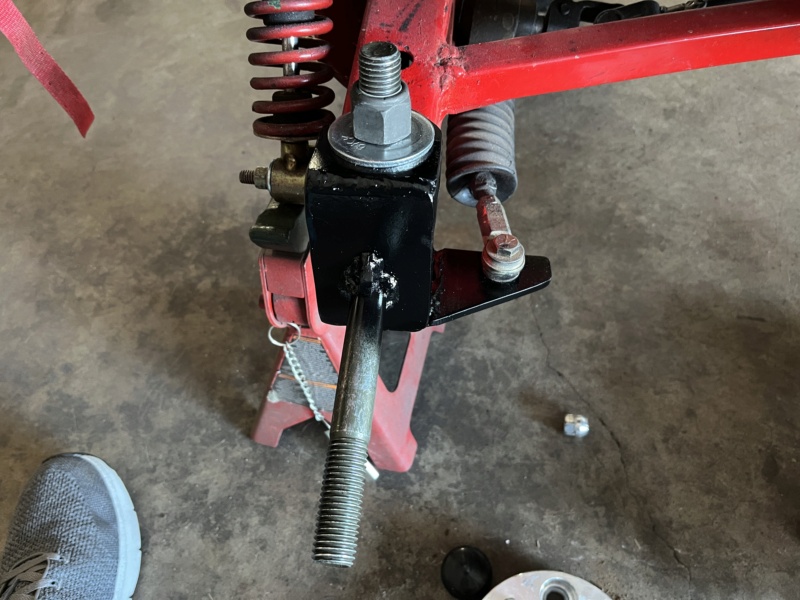
Last update till the weekend. I decided to take the hubs, lock collars, bearings inner and outer off.
Quick inspection, the Jb weld was discolored, and maybe a little dissolved? Uncertain of that. Needle bearing on one side seemed ok but also seemed a little sloppy inside. The other side was even more sloppy and gravelly. It had done some wear on the axle. Didn't look to have gotten hot so no discoloration. Glad I am doing this mod. I should have the bushings later this week.
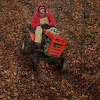
I know I said I was going to wait till this weekend, but I was notified my bushings are due in tomorrow instead of this weekend. So, I took it upon myself to clean up the transaxle, so it is ready for reinstall hopefully Friday.
I even knocked out the needle bearings in the sleeves. I'm 100% ready to install those sleeves, rtv, and add oil.
Well, what I got was an exact fit as the roller bearings.
Was able to knock them in with the same socket I knocked the old bearing out. Axle is reinstalled in the case.
I could put it together right now, but I wanted to put through bolts on the 12 bolt holes that go all the way through to help strengthen the 2 halves. I decided to order stainless for them. :-)
Definately! Want it to last the day, maybe a weekend when I can get it out to play. Making things sturdier and stronger where possible. My biggest upgrade left I would like to do, is a custom front axle. I'd like to drop the front a good 4 inches after the lift from the monolink suspension. Good to see members like @AllisKidD21 or @Brianator building one here on the site for easy reference. I've lost one on FB like 5 times that I was watching.
Engine change - Engine changed to 17.5 Donor engine
Steering - No updates needed right now
Bronze update for transaxle - Updated
Grease zerk on input - Decided it would not be that beneficial
Refresh oil in transaxle - Oil refreshed
Through bolts in transaxle case - Stainless through bolts in transaxle
Replace front frame extension - New one built
gussets for lower shock mounts - Gussets welded on
update headlights - New LED headlights installed
Put Bear Claws back on - Bear Claws back on
Got these updates complete. I decided against a couple of them. Adding a tooth to the steering. I think liquid filling the front tires would be more beneficial. When I tore the transaxle apart, I noticed there was only about 1/16th or less than 1/8th of an inch area between the roller bearing and the needle bearing in the shaft. The roller bearing was sealed, and the roller was getting ample oil penetration. Decided against possibly messing either bearing or cracking the shaft.
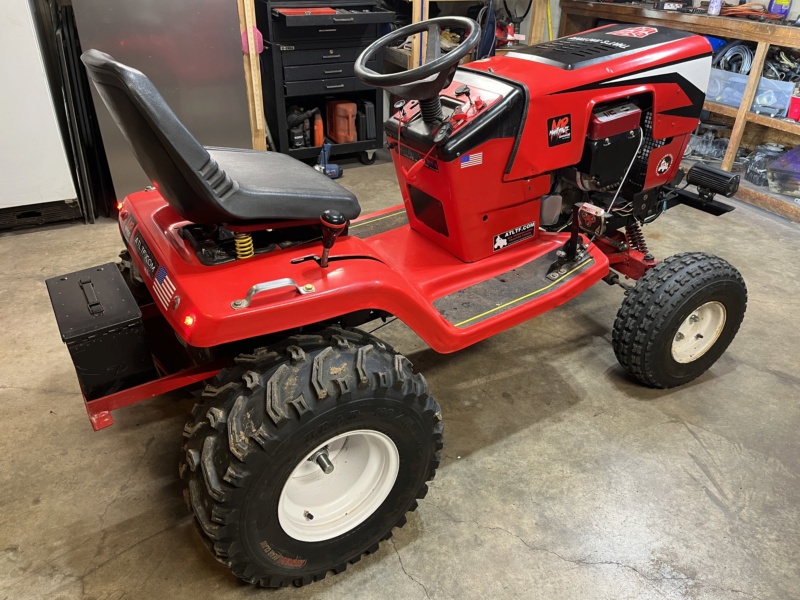
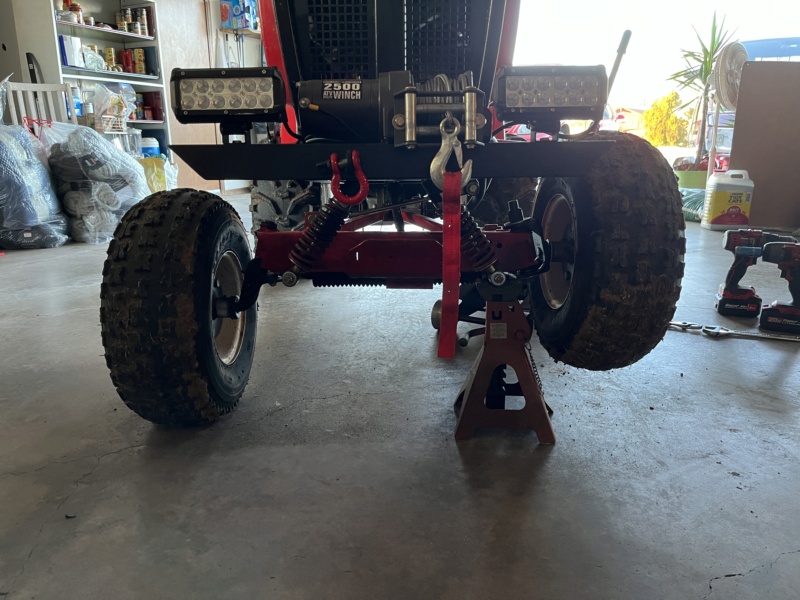
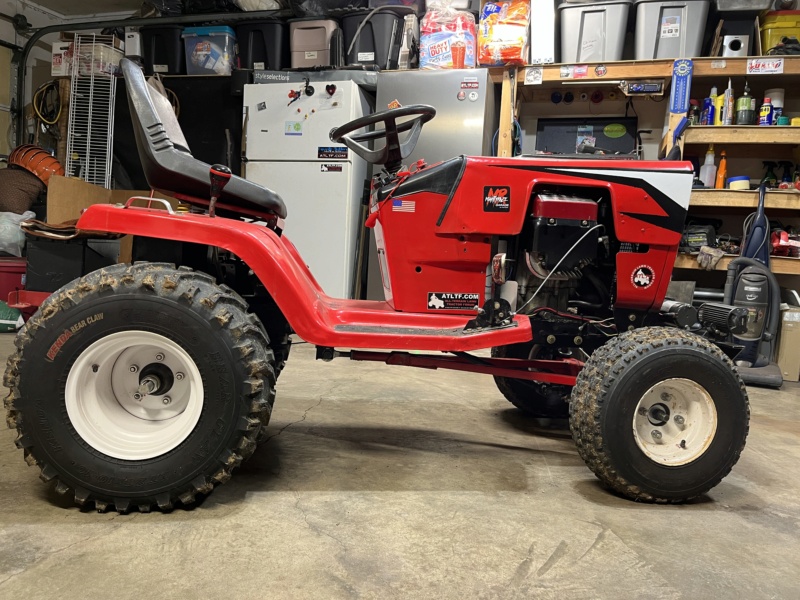
So here are the last updates for now. (Lots of pix)
SO, I have been thinking a lot about the front axle on Red. Instead of trying to reinvent the wheel, why not just change a part of it.
I've discussed building another new front axle for Red. One that would change the orientation of the front spindle axle higher up so the nose of Red would go down. Why not just build a new spindle on the existing axle? Here is a quick drawing of what I had in my head. I wanted to put it down on paper to see if it would even be possible. Now that it is on paper, I think it would be even more possible.
The idea.
I'd probably build it using 1/4-inch plate. I'd also be using 3/4 bolts so I could reuse my front hubs. It'd be gusseted, cotter pin holes, and nuts.
I did some measurements and decided to pull the trigger and start making the spindles. Really helps that I have an extra axle that I can do my building with it on the table and not have to break down the tractor.
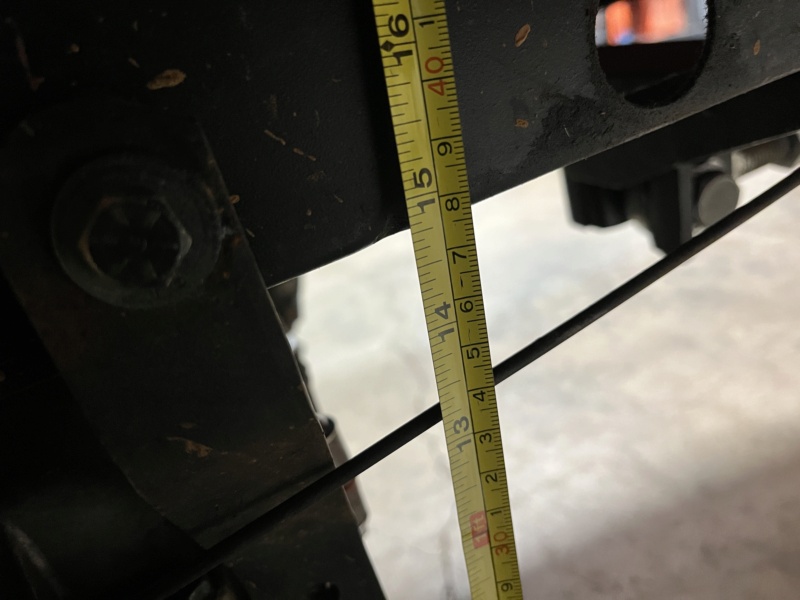
First the measurements. I know after I redid the fix in the front to fix the massive bend, the front got noticeably nose up again.
Measurement of the frame at the back of the tractor was about 14.75 inches.
Subtracting the 1/8th for the extension angle iron the front is about 17.75 inches in height.
That is a 2-inch rise which doesn't sound like much but it's still quite a bit and pretty noticeable.
Got to bust out the big drill bits!!! Old drill they use to slip in the chuck.
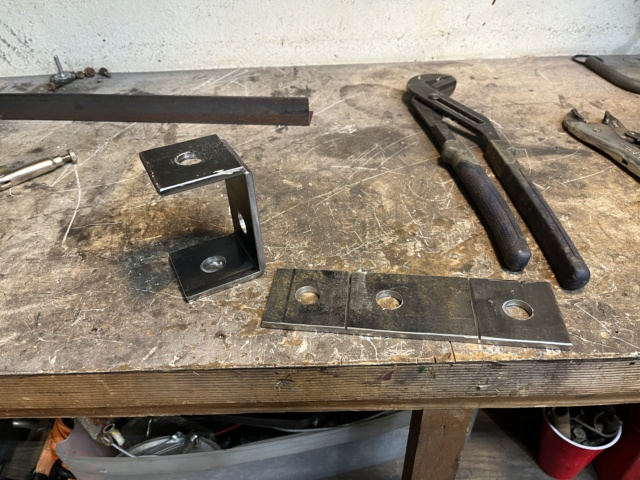
Busted out the big sheet of 1/4 inch. Drew out my "C"s and started drilling out my holes needed. Needless to say, I measured twice then thrice, then a 4th time. I was finally happy with my measurements before drilling. The other lines are for scoring for bending with some heat. I don't have a press for bending. I'll bend and weld the gap.
All cut up and the first one is bent!
Here is that gap that I'll weld. Has a nice V to it for welding.
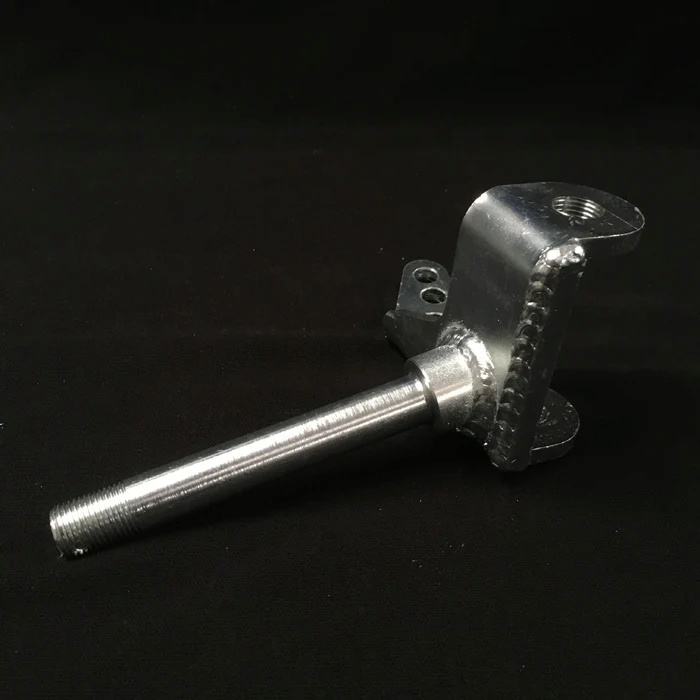
Both bent and ready for test fitting. Both came out pretty square. Funny how taking your time can make your fabrication more "exact".
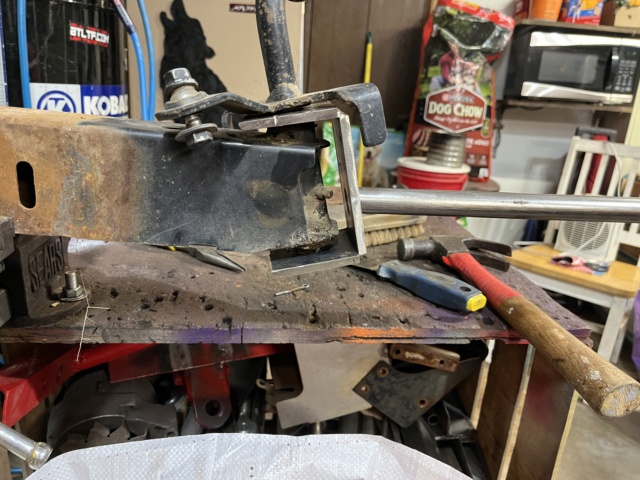
And an initial test fit. I just used the spindle since I do not have a bolt to run though it yet. I also stuck in a piece of 3/4 pipe to check what a spindle axle would look like.
I'm liking what I see. The 1/4 metal may actually be overkill. Perfect!
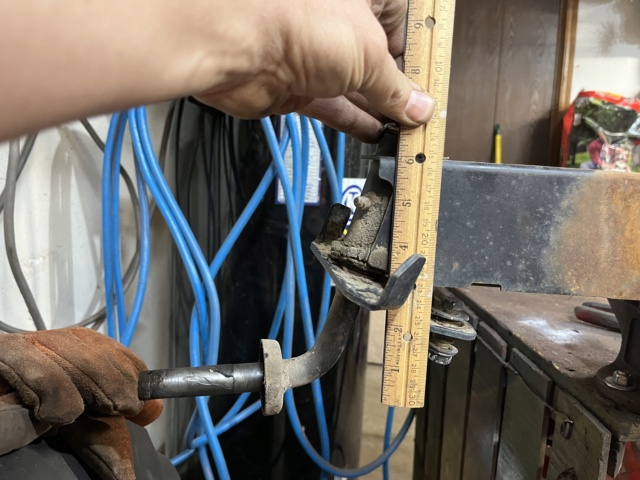
I was curious how may inches this will lower the front. The original spindle is about 5 inches from top of axle to top of spindle axle. I know it says 6, but I was starting at 1 on this pic. Just being wierd I guess.
The new spindle axle will be located about 1 inch lower than the top of the axle.
This will be a nice 4 inch drop. This gives me a couple options. Keep the 2 inch rake in the front, or I can update the location for the shock attachment on the axle. Right now, I am thinking about keeping the front rake. I can flip the new spindle and gain another inch of rake if I wanted, but I am good with the new location that will be made!
Tomorrow I'll start planning up the tie rod links for the spindle and welding the bends of the spindle to shore them up. I don't know if I need to gusset at this time. I may do it anyway just for overkill. Better to do it now than later.
I like it! Definitely gusset now while you’re there… those are the cut corners I’ve learned always come back and bite.
Personally I don’t like the look of a rake, but dropping it 4 inches gives you plenty of room to mess with tire sizes in the rear and maybe bring those down a notch and bring that center of gravity back down a bit. The center of gravity really effects the stability of a machine, which in turn, effects your confidence level on that machine lol.
MightyRaze likes this post
MightyRaze Administrator
2017 Build-Off Finalist
2017 Build-Off Finalist
2018 Build-Off Top 3 Winner
2018 Build-Off Top 3 Winner
2019 Build-Off Top 3 Winner
2019 Build-Off Top 3 Winner
2021 Winner of Winners
2021 Winner of Winners
1st Place Build-Off 2022
1st Place Build-Off Winner 2022
10,000 POSTS!
10,000 POSTS!
2024 Build-Off Entrant
2024 Build-Off Entrant
Age : 49 Join date : 2016-09-06 Points : 15341 Posts : 10809 Location : Oklahoma
Definitely do it now. No sense tearing it apart to add to it later. I was doing some looking and I may have to move my rack and pinion up higher. Not sure just yet. That's just 2 holes drilled, so no big deal there.
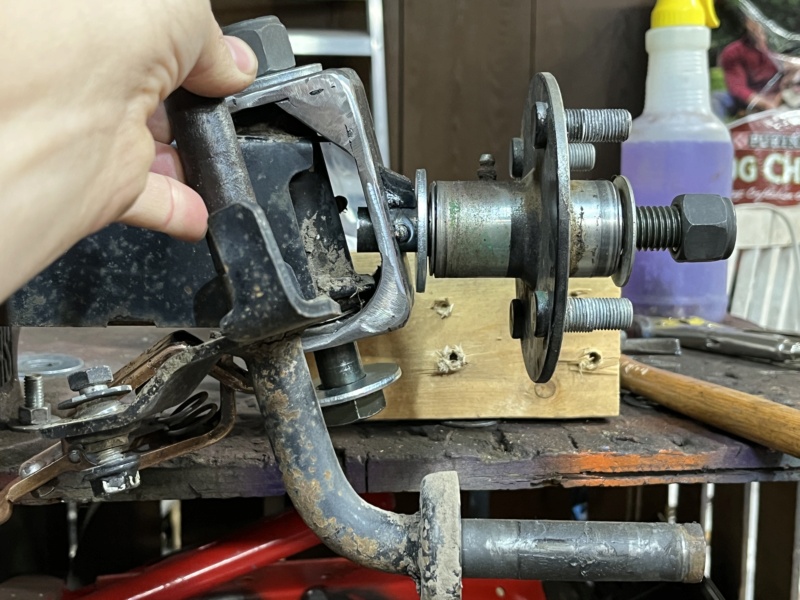
Bolt-axle is tacked in place. It is straight now. I was measuring for a small gusset for a washer to be flat against.
Small gusset tacked. Showing the comparison between the new spindle and the old J-spindle. Looks like the new one will be about 1/8 - 1/4-inch narrower wheel to wheel on each side. I was initially concerned it was going to be wider. Here you can kind of see the difference in ride height!
The angle is a little wrong as it looks very nose down. It is not. This is just a dramatic angle for the drop. Front and back are now sitting 14.5 inches! It's LEVEL! Not sure how I lost 1/4 inch in the rear, but I'll take it.
OK, time for the tell-all on what needs to be fixed or didn't expect.
I realized the J spindles were maxed for tie rod adjustments. New spindles fixed that. I have adjustment again.
I didn't compensate for a little slack drupe in the front spindles. This caused about 2-4 degrees of negative camber. I think I like it.
Only negative I have found at the moment, with the 19" tires on the front with the new geometry, I'm going to need to trim about 2 inches off each side of the front bumper. I can flex it enough to get hung up. Two inches and I think I am good to go!