I already started this a while back but considering I am going to do some upgrades I might as well bundle it up in here.
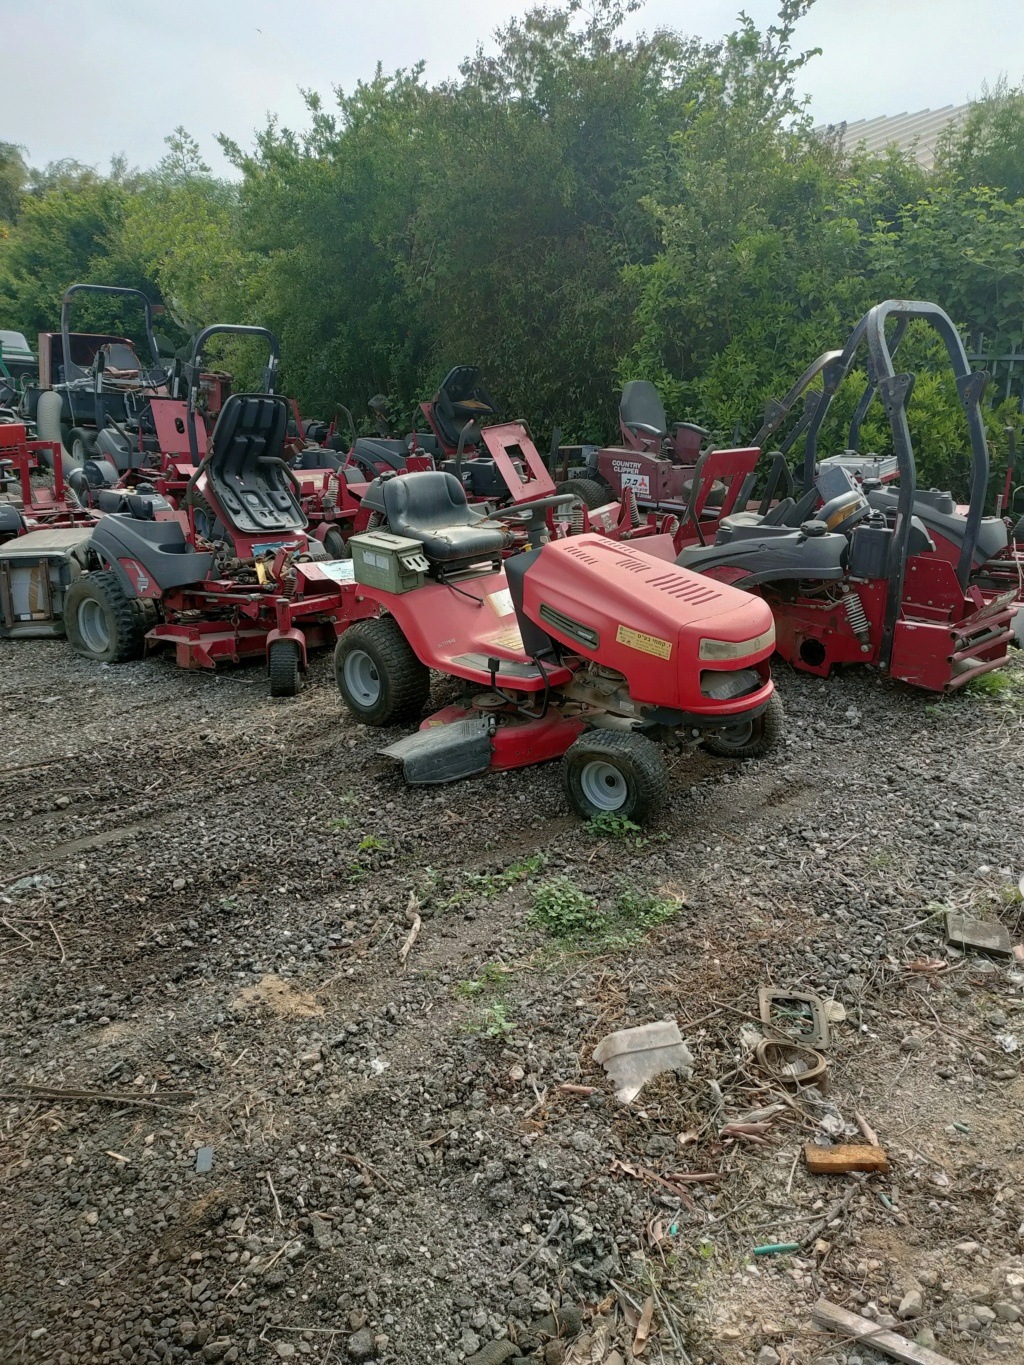
This is where it started, a customer of ours decided that they didn't want to invest money in to it after having it in storage for 10 years
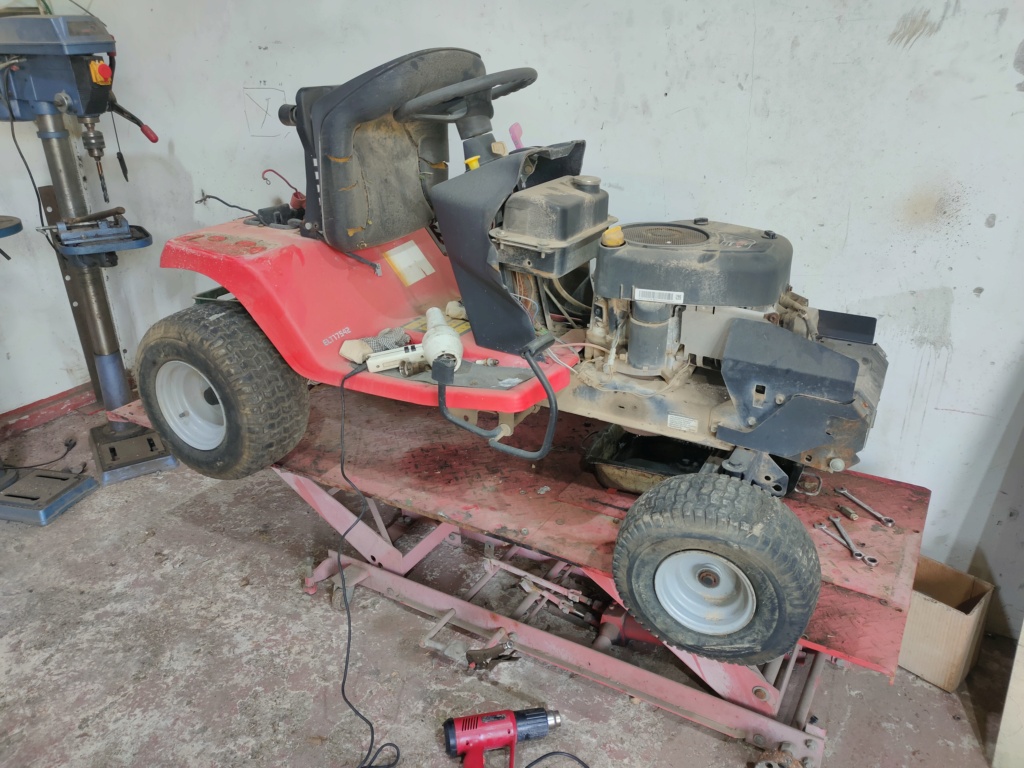
I asked my boss if I could perhaps take it to fix it back up again and so we got her on the healing bench
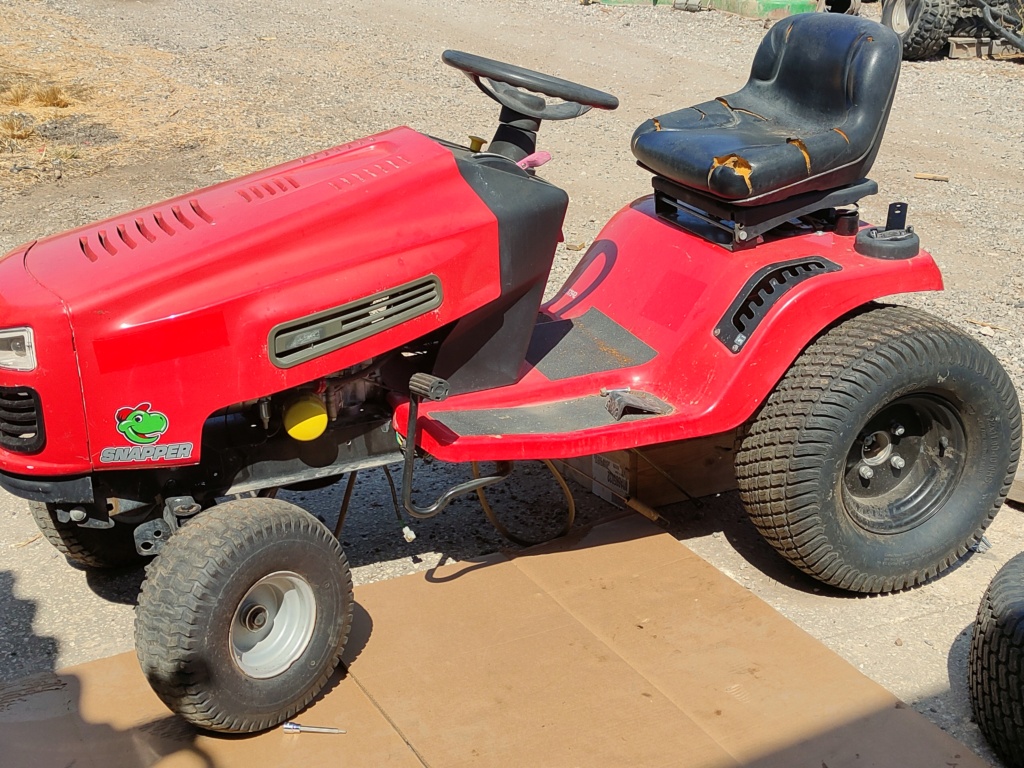
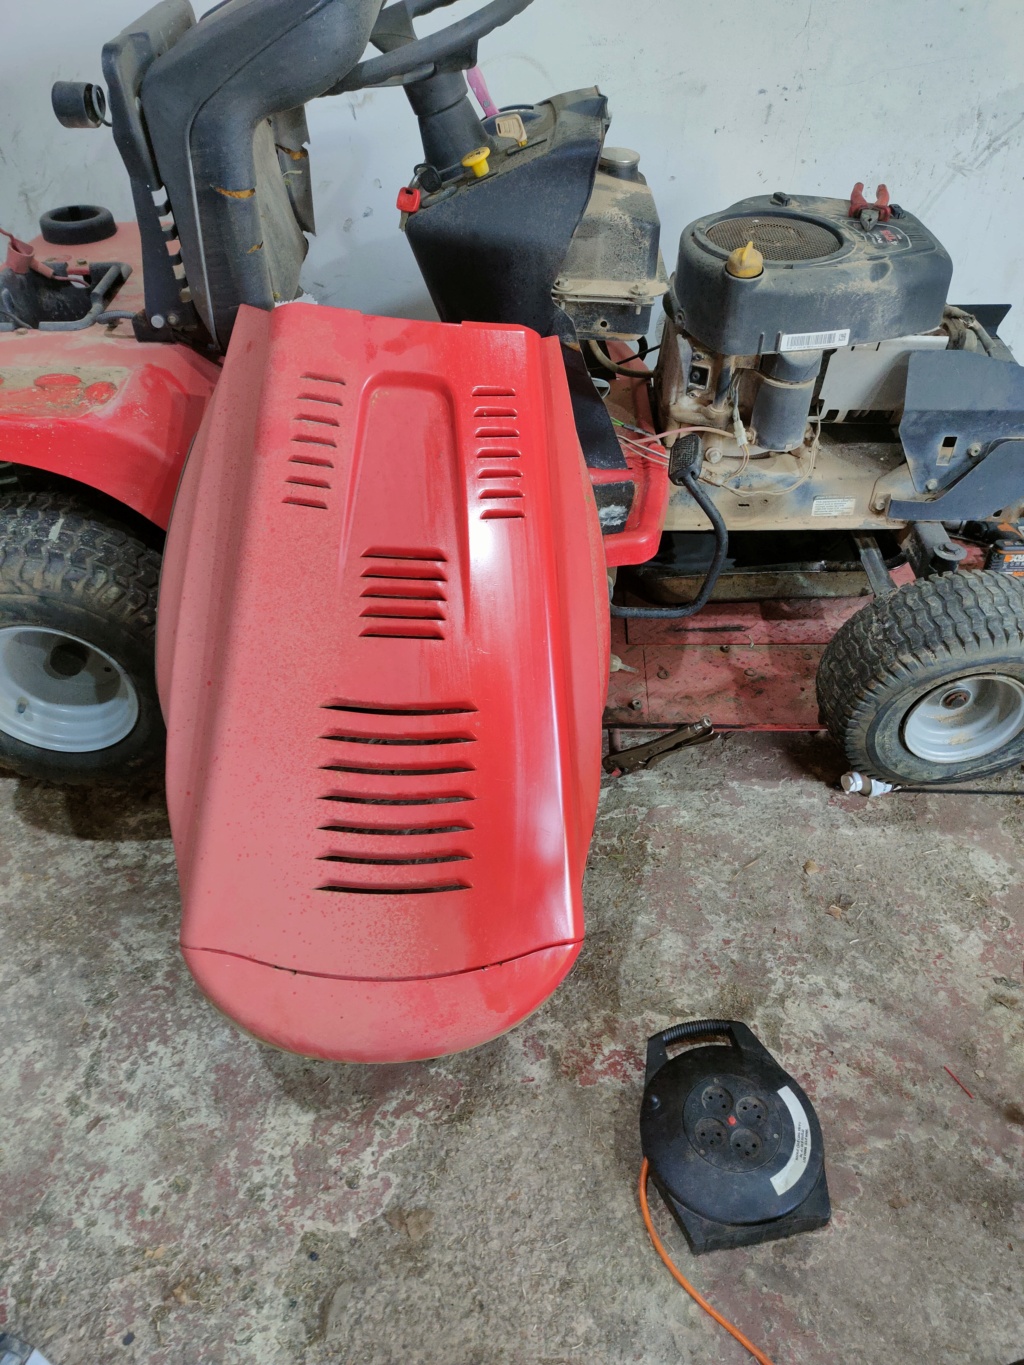
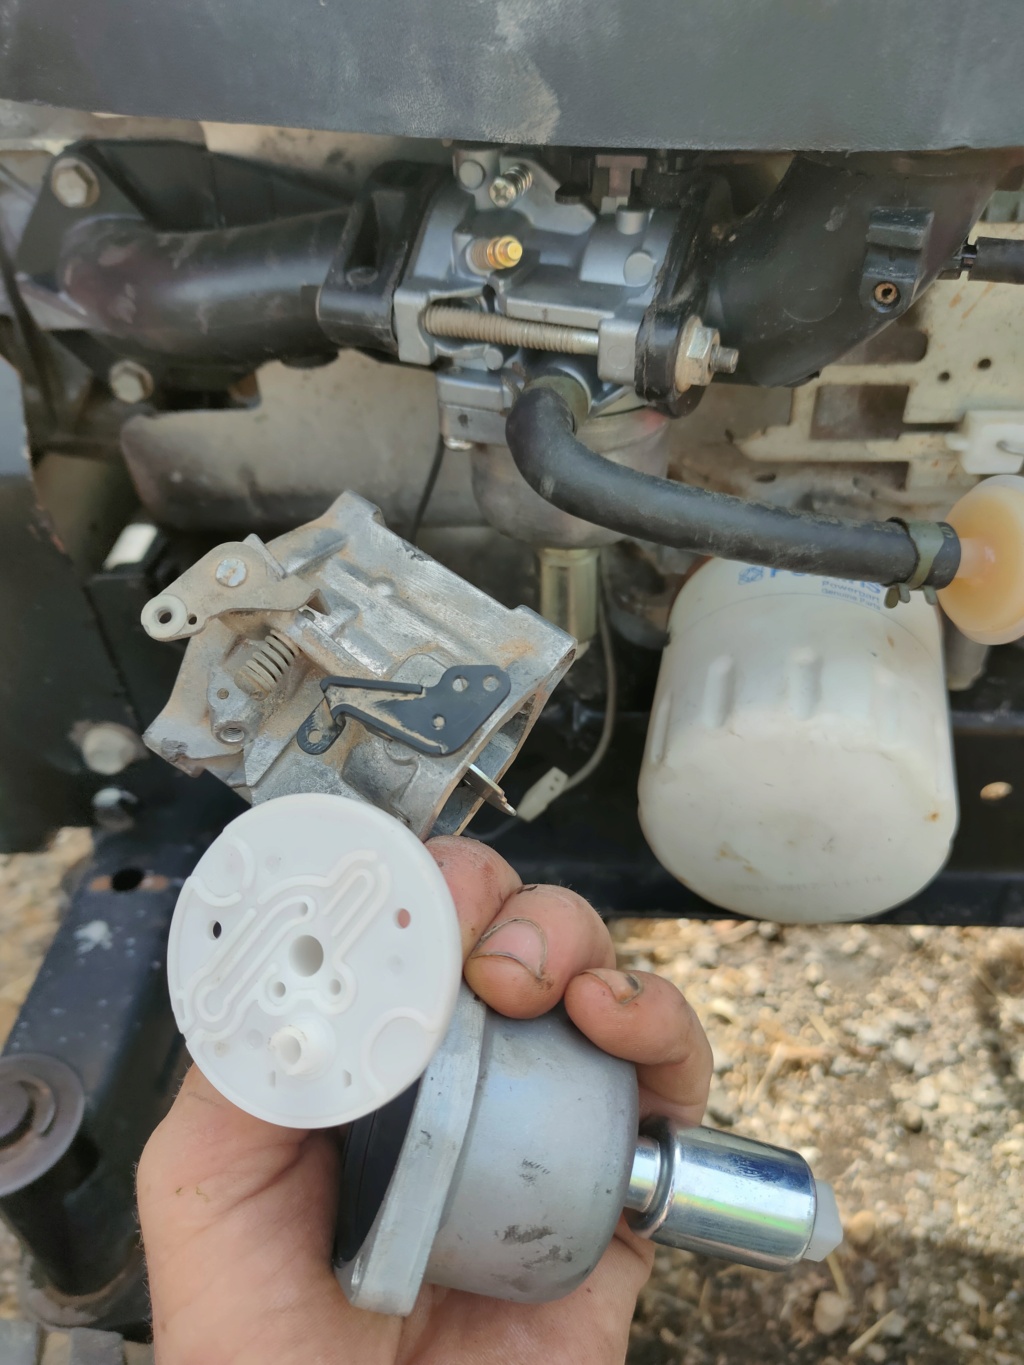
Colour really came back to life.. bit it was going to need some polish. Other than that I got her running just enough to get her home. Carb was absolutely shot after sitting for all those years.
Last edited by fbisurveilancevan on August 26th 2022, 2:41 pm; edited 1 time in total
fbisurveilancevan Member
Age : 38 Join date : 2022-05-20 Points : 1040 Posts : 220
Chinesium carb was sort of a bust but a decent parts donor for 13 USD
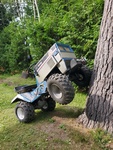
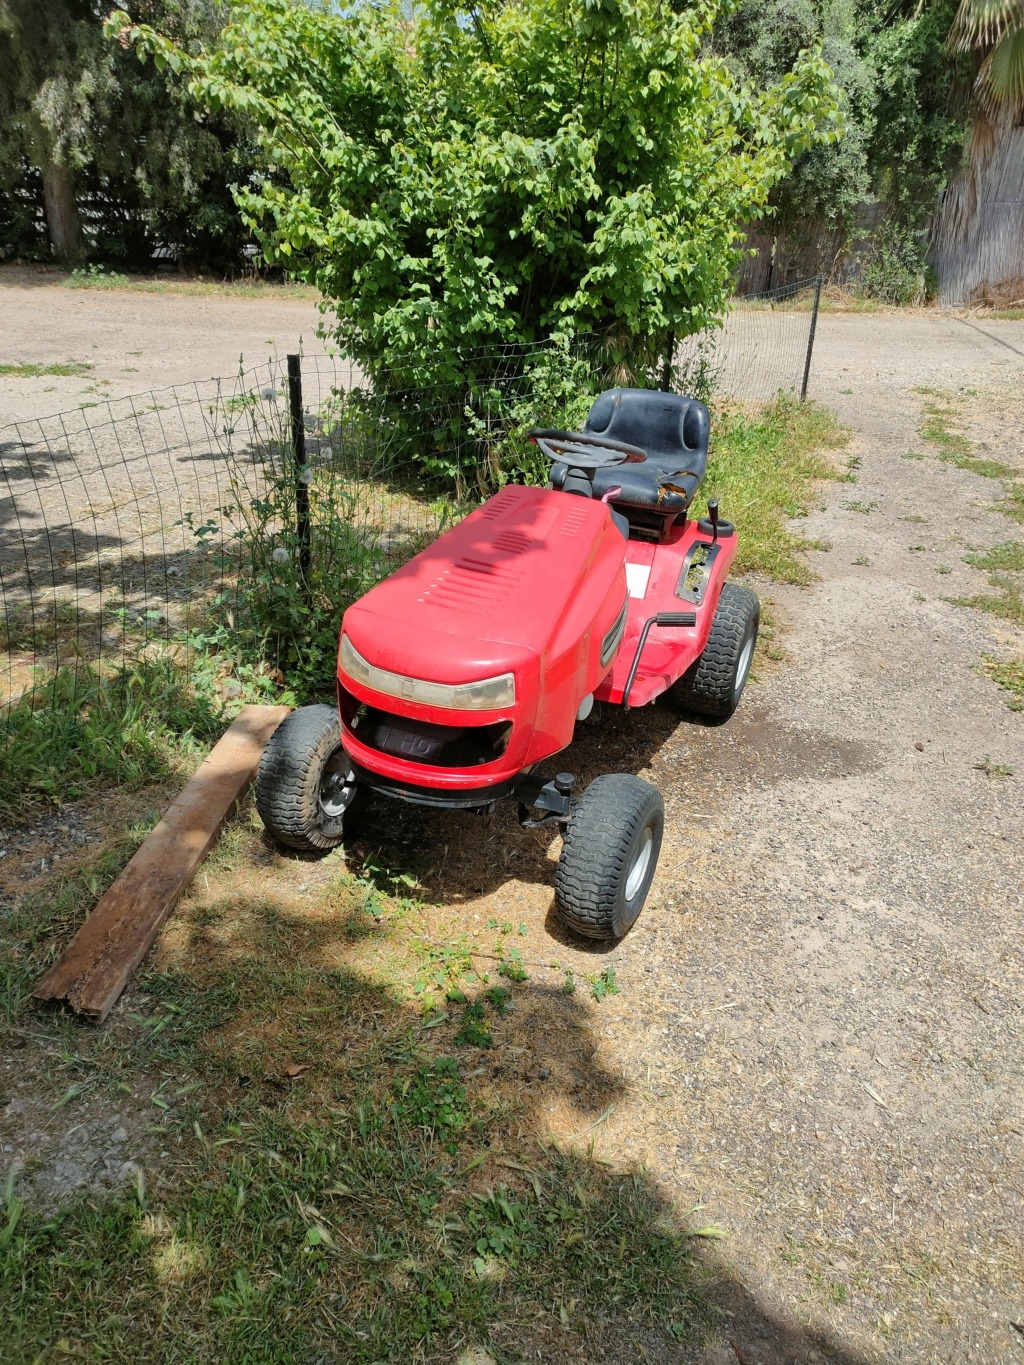
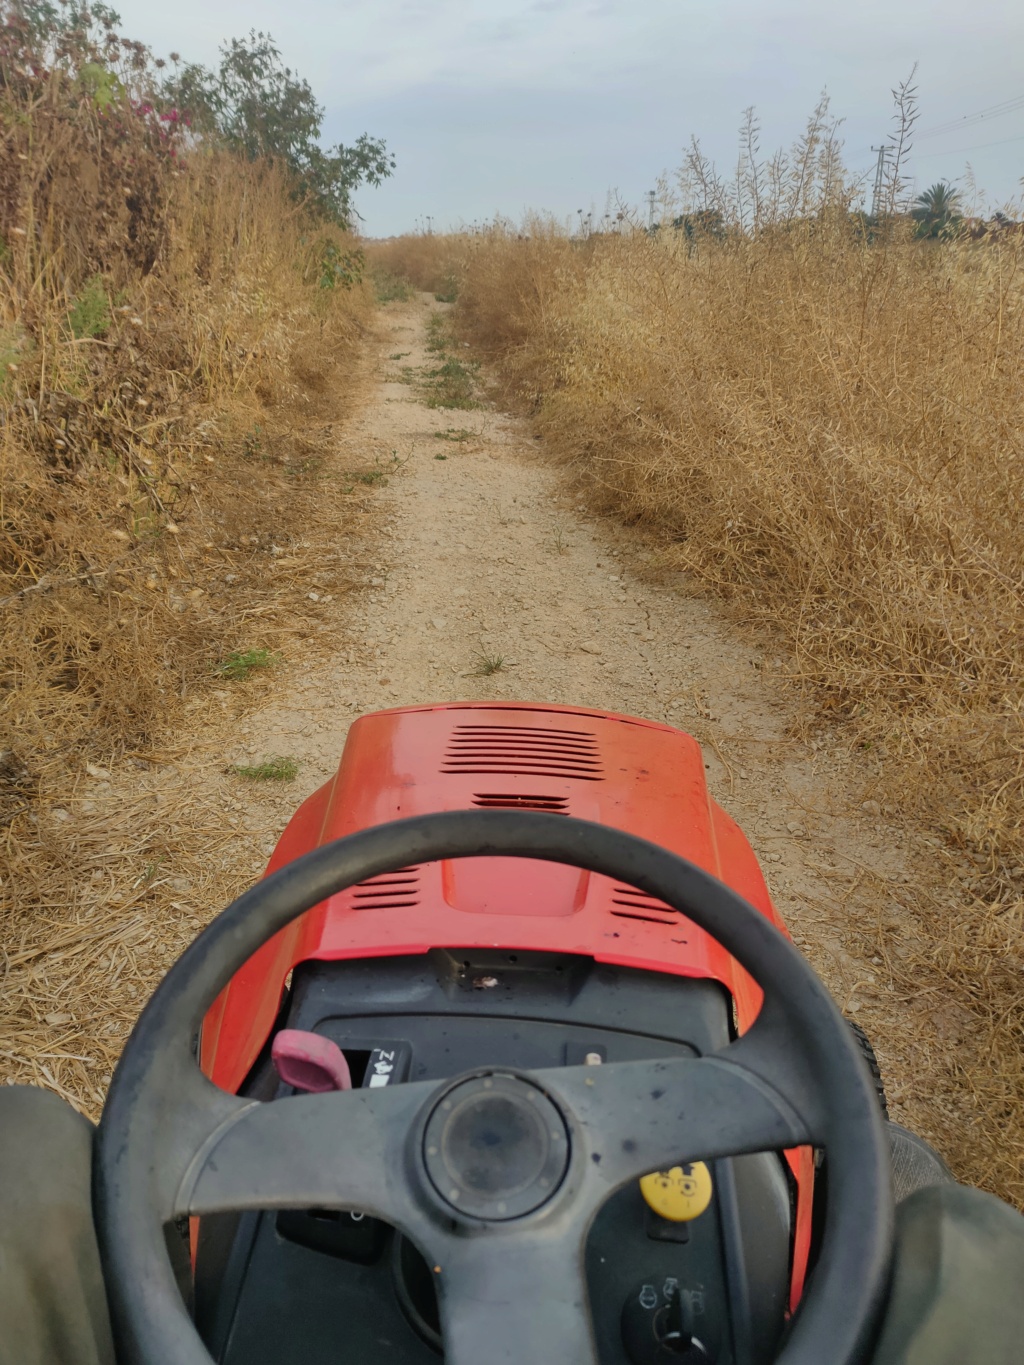
First time out for a proper test drive
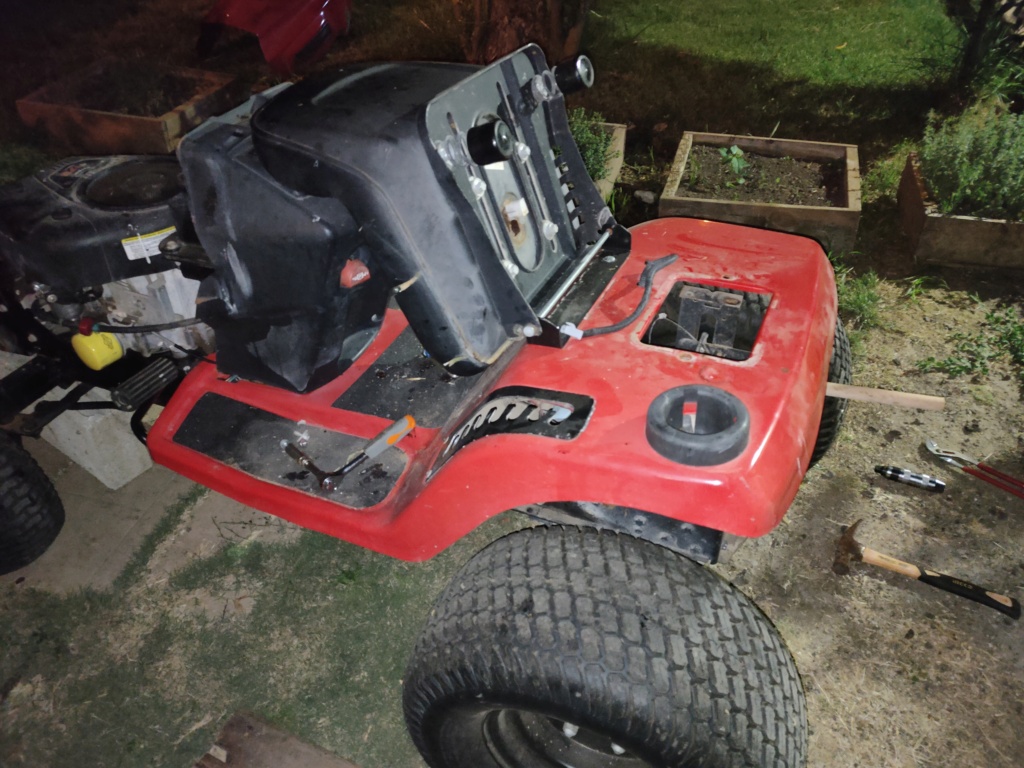
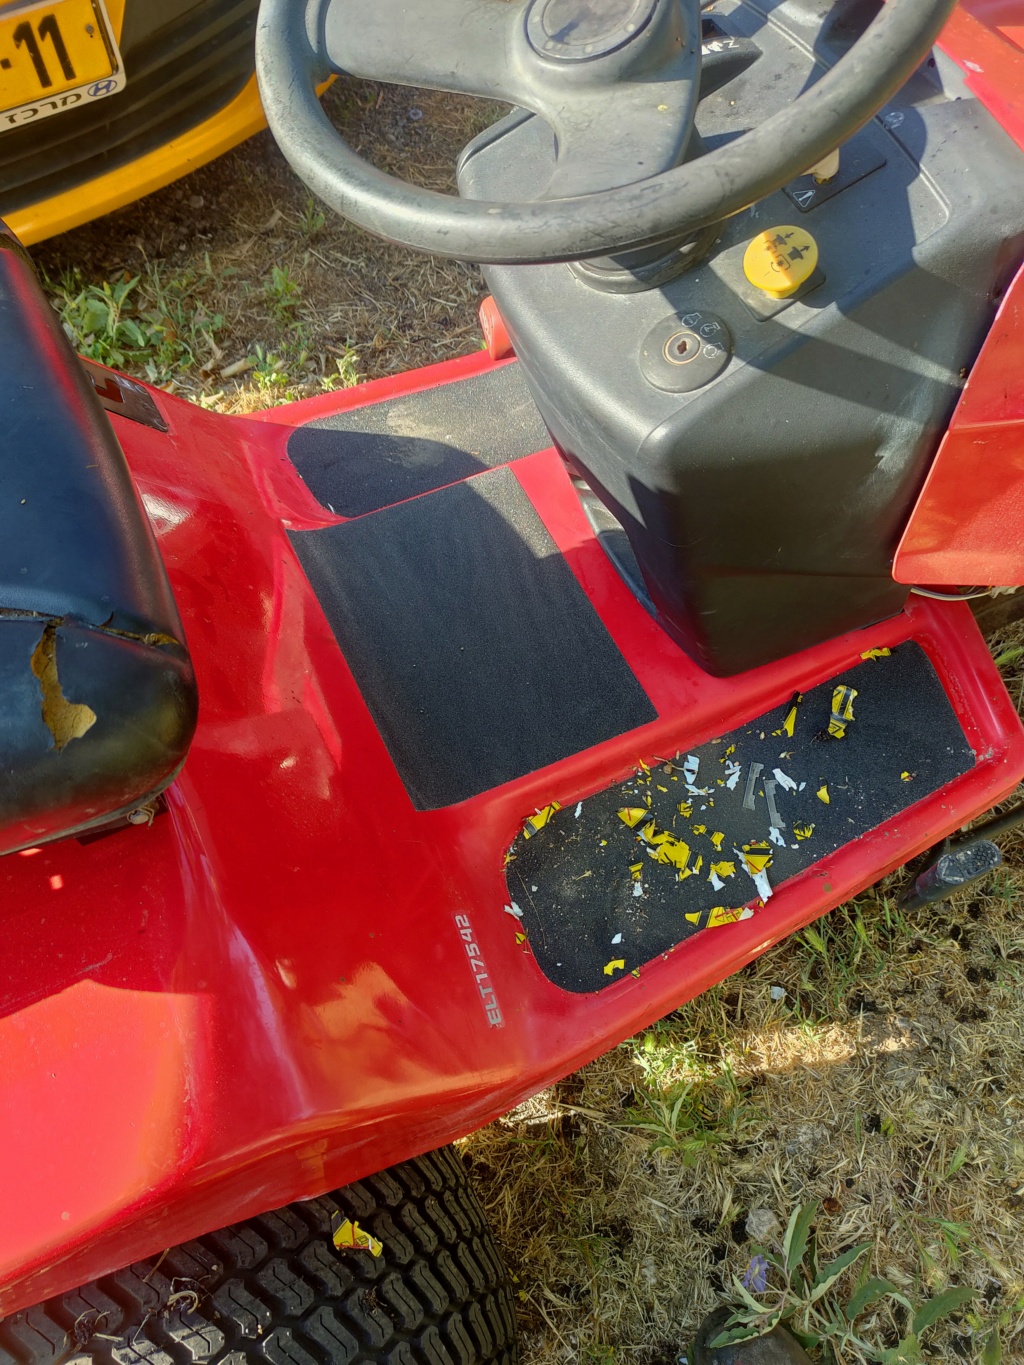
With the engine sorted and not much of a plan I just stuck with atleast fixing the cosmetic issues. Removed all old stickers and replaced the anti slip tape. I also put it in the centre section as it always kind of bothers me that that gets damaged and I could hide some damage that way as well
fbisurveilancevan Member
Age : 38 Join date : 2022-05-20 Points : 1040 Posts : 220
And then I found out about atltf and decided to really turn her in to a proper off-road tractor.
Firstly I planned on fixing the hydrostatic gear and already ordered parts but decided that I would be better off with a peerless transaxle.
So now what?
Well honestly I don't know exactly yet. I do want to keep it a running machine while I work on it so it's not going to be a full overhaul in one go. And looking at the fact that she's really looking nice for a 20+ year old machine I want to keep her in that condition.
What I do know is that I want to put go kart spindles and install shocks in the front. Maybe I want a 4 link anyway but I am not familiar with that and might need some tips and guidance?
Iam still running the crap battery so i want to move a smaller battery to underneath the steering column. The old one sits very high up and is honestly quite big for my needs. That being said I am thinking about moving the gas tank to above where the transaxle sits. Also when it comes to weight I might move the seat down a little more to keep the centre of mass as low as possible.
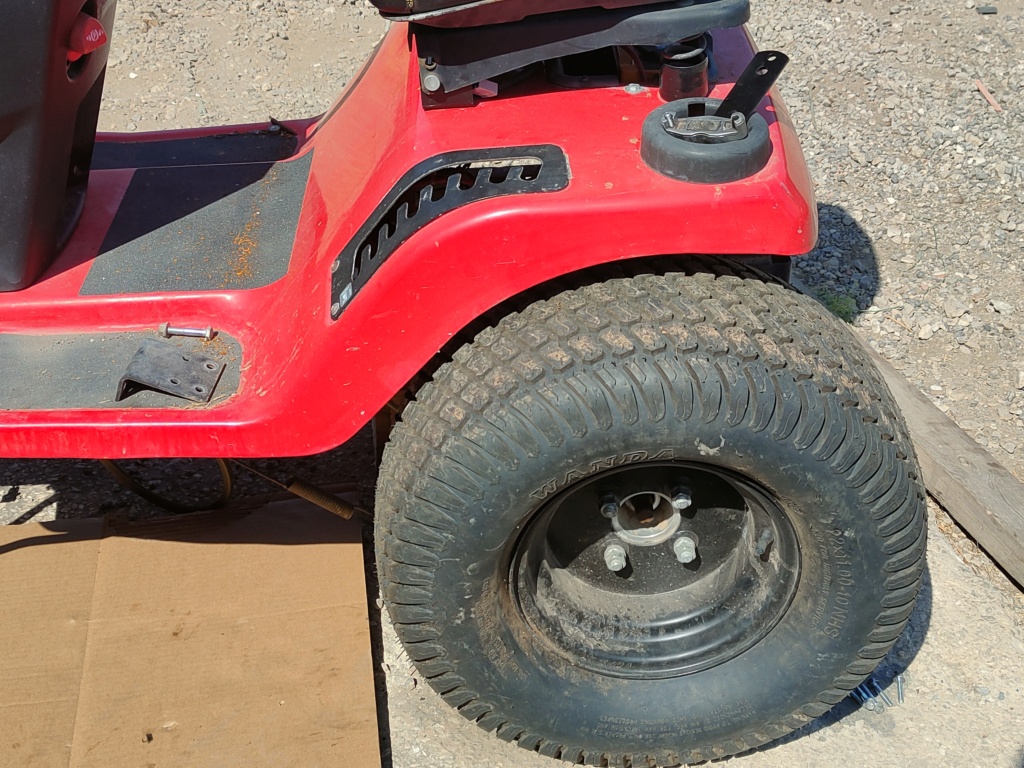
I definitely need a bumper some day as well as these hoods are very delicate
Other than that I am open for ideas and will keep setting goals for the future
fbisurveilancevan Member
Age : 38 Join date : 2022-05-20 Points : 1040 Posts : 220
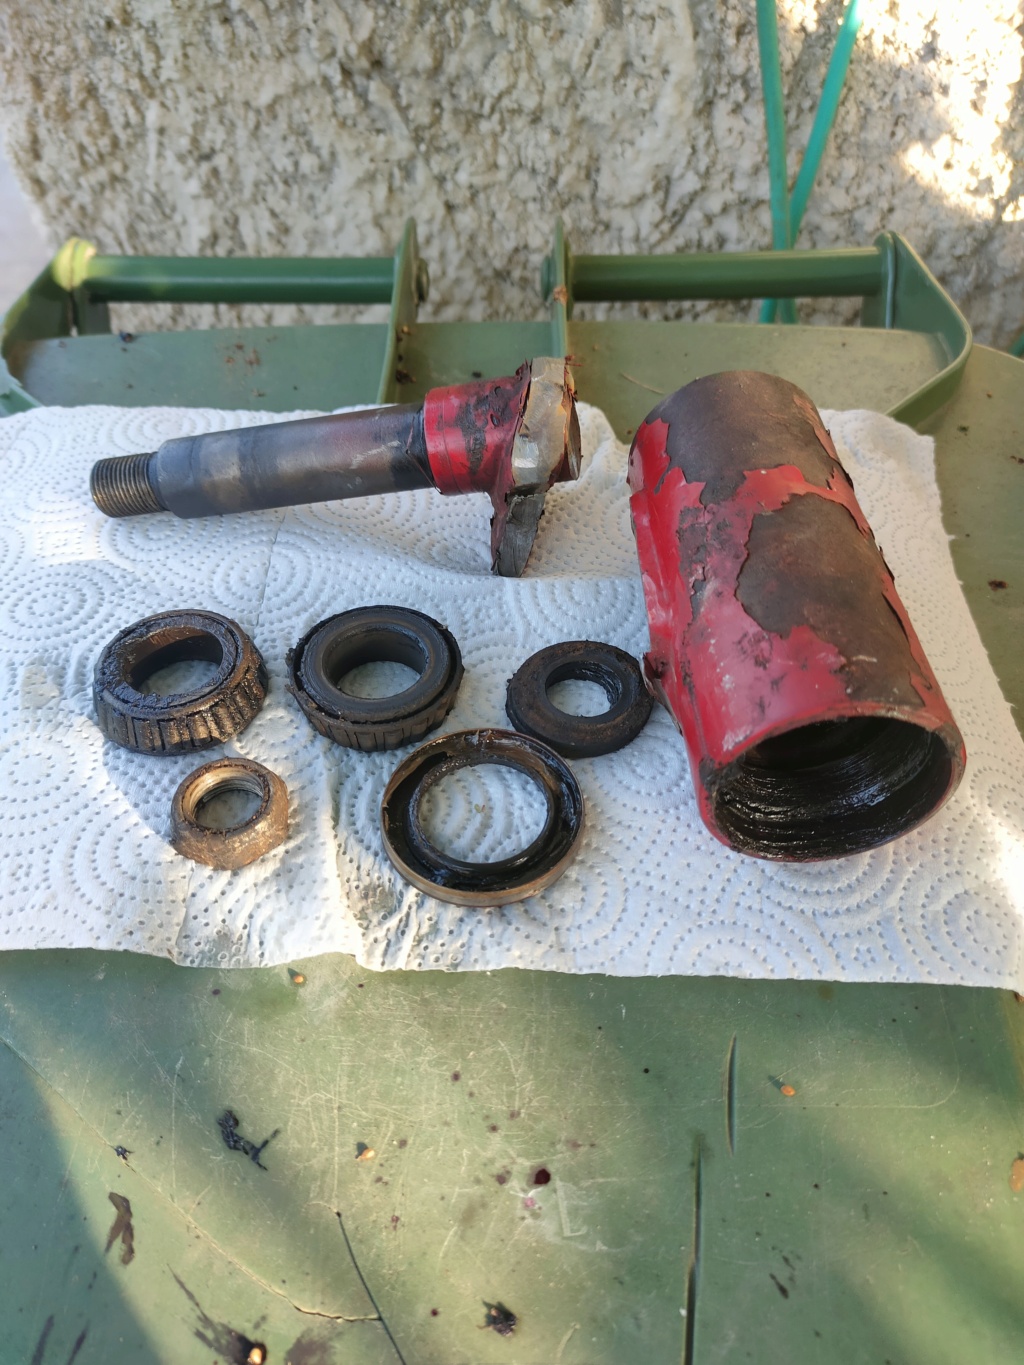
I sprained my back at work so I didn't have too much energy to deal with it but I managed to mostly clear up one side
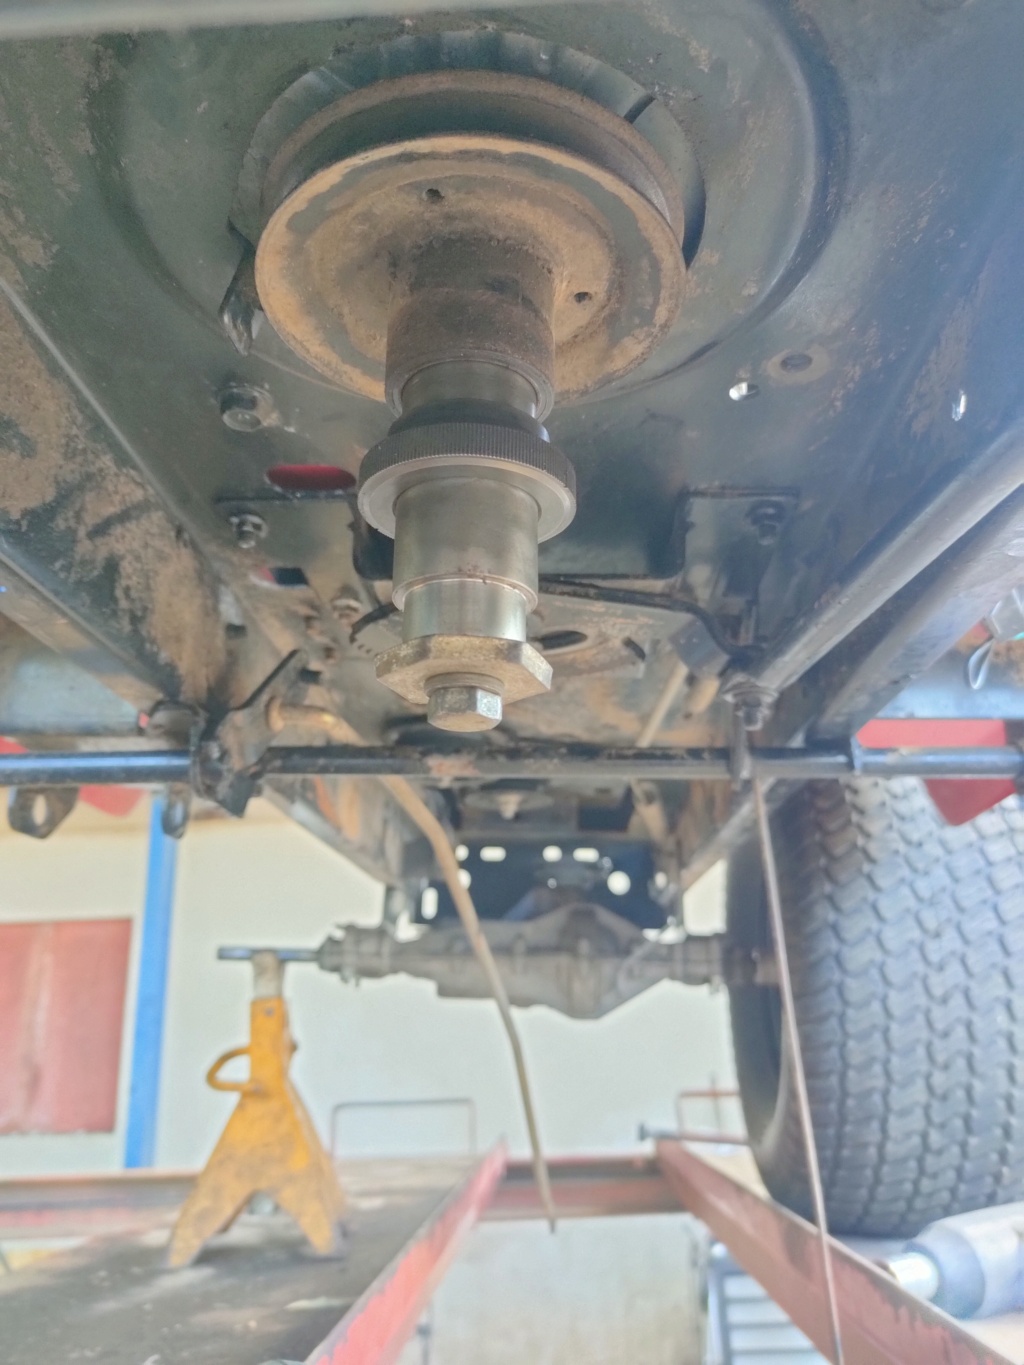
I guess that the best way for me is to send the shaft to a machine shop to just clean it up and cut in a notch at 10 degrees aswell I will be clearing some more metal off before that but at this point iam just not feeling well enough
The other reason I will send it off is because the shaft is rather worn out on the top side so I can kill 2 birds in one stone.
That being said I did find some undersize bearings so that shouldn't be an issue. The price for a set of 4 however is more than some people paid on their tractors however
fbisurveilancevan Member
Age : 38 Join date : 2022-05-20 Points : 1040 Posts : 220
Well the spindles were a bust for now. The spindle shafts did not play well enough and it just seemed like an uphill battle. New plan is to just dump everything out and to find some hollow shaft as a kingpin and mount the axle shaft on the tube as normal. Iam having some issues finding a proper 1" pipe or shaft with a .25 inch wall thickness however in my area so I'll just wait a while with that.
Meanwhile i got some more important fish to fry with the gear but I haven't received any parts yet.
I did find this nice chinesium gel battery for about half the price of a lead acid motorcycle battery.
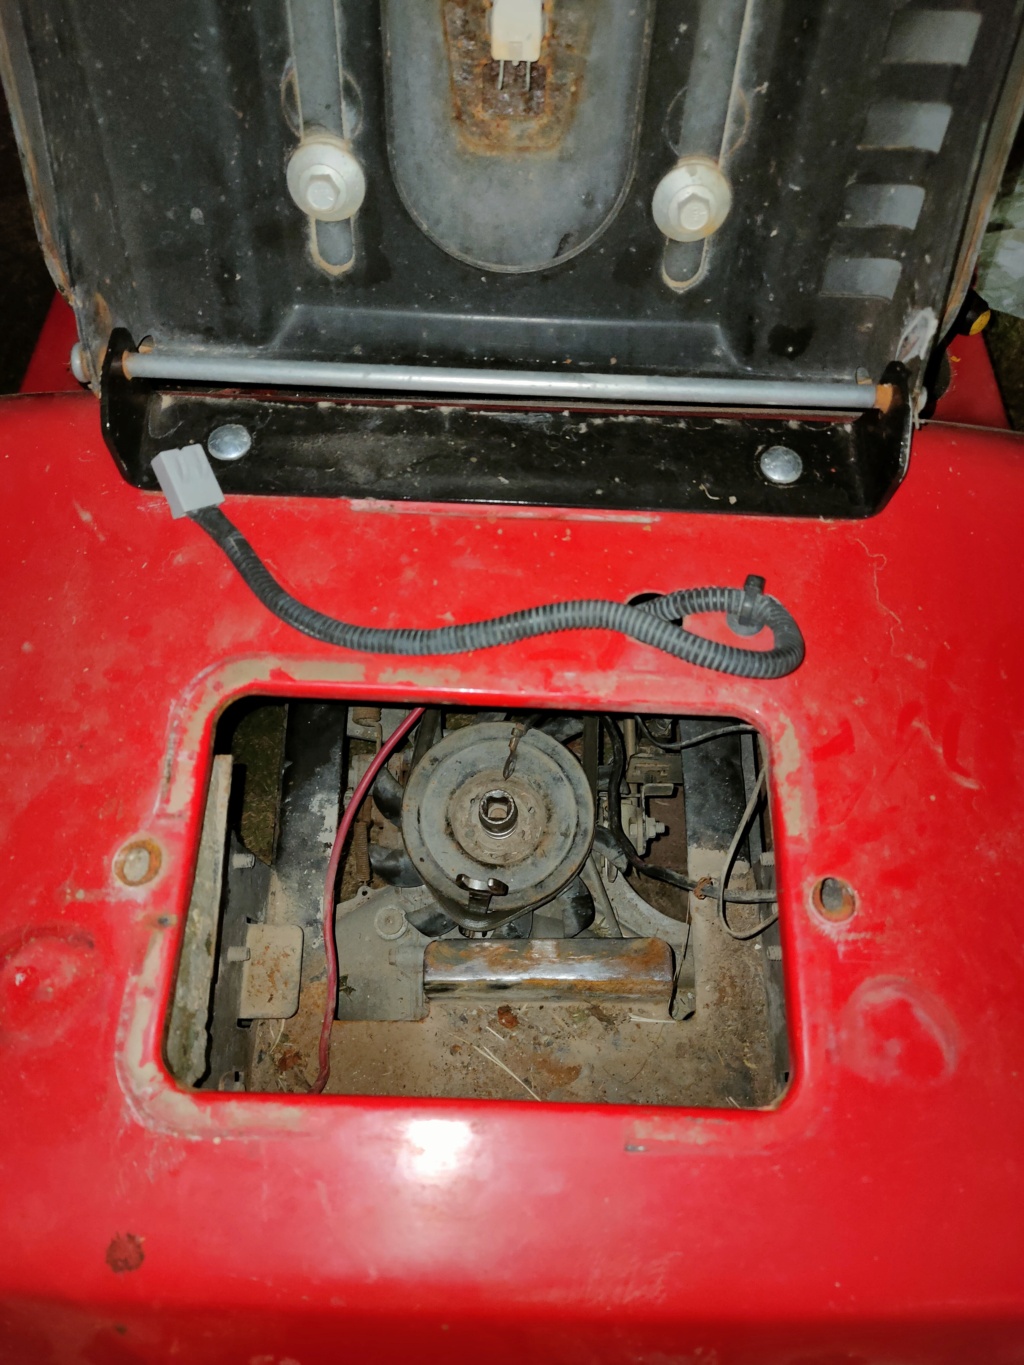
I would like to cram it in here, just need to figure out a good way without accidentally setting the fuel tank on fire. This floor pan is an absolute pita to take out so the battery box is the best way to reach the gear in the future
Well the spindles were a bust for now. The spindle shafts did not play well enough and it just seemed like an uphill battle. New plan is to just dump everything out and to find some hollow shaft as a kingpin and mount the axle shaft on the tube as normal. Iam having some issues finding a proper 1" pipe or shaft with a .25 inch wall thickness however in my area so I'll just wait a while with that.
Meanwhile i got some more important fish to fry with the gear but I haven't received any parts yet.
I did find this nice chinesium gel battery for about half the price of a lead acid motorcycle battery.
I would like to cram it in here, just need to figure out a good way without accidentally setting the fuel tank on fire. This floor pan is an absolute pita to take out so the battery box is the best way to reach the gear in the future
thats a sweet find, and yea anything 1" is a pain in the to find i have been tring to find some wheels that had a 1" bore with bearings for my rideing cart and i was looking for 2 weeks and was only able to find one company that made that rim with the tire i needed. at the moement they are on order but they where 112$ a peice and they are not large by any means they about the same size as a rideing mower tire but 1/2 the width.
fbisurveilancevan Member
Age : 38 Join date : 2022-05-20 Points : 1040 Posts : 220
It is literally a Google search problem, since I've been working professionally with heavy machinery for the last decade I know that 1 inch is actually the more common size.
However if you type in Google 1 inch you get anything from 1/8 to 1 1/4. Amazon is even worse so if I really want to buy from Amazon I'll type in Google shaft 1 Amazon instead and that'll get me a little further.
McMaster car actually has a good selection of tube but they don't ship outside the u.s. and anyone on evilbay asks 30+ usd for shipping
Brianator Moderator
1000+ Posts
1000+ Posts!
2022 Build-Off Top 3 Winner
2022 Build-Off Top 3 Winner
2023 Build-Off Entrant
2023 Build-Off Entrant
2024 Build-Off Entrant
2024 Build-Off Entrant
Age : 45 Join date : 2019-07-02 Points : 4430 Posts : 2384 Location : Ontario, Canada
I couldn't agree more with that statement! I remember the day back in 2016 when I worked in an auto parts store and all of a sudden Google search sucked @$$ and I was having a hard time finding the info and content I used to find with ease... don't know what they changed but it was something!
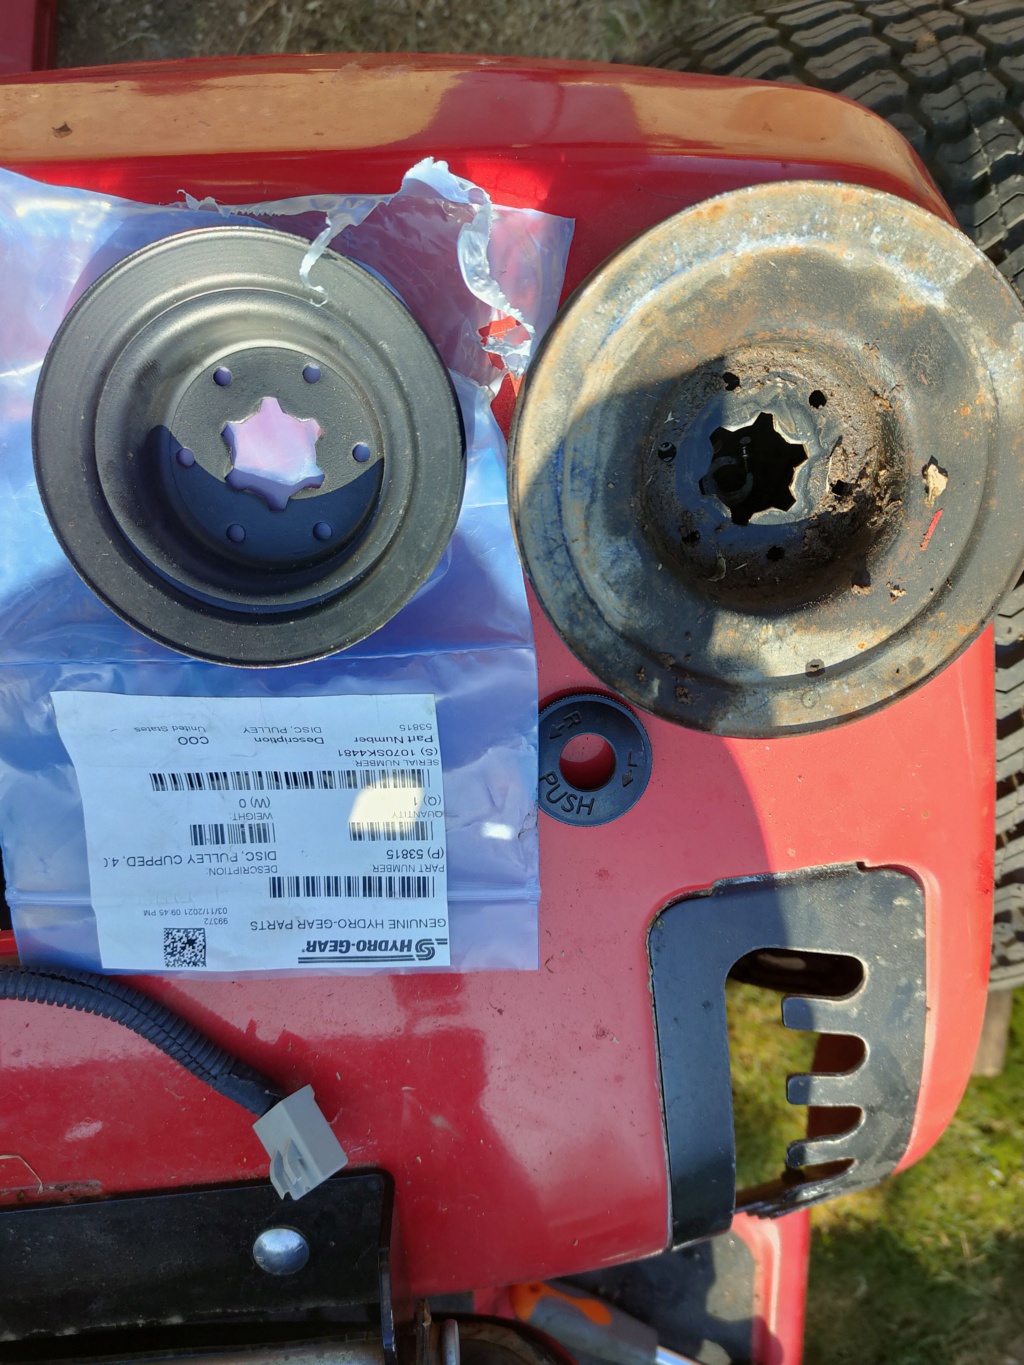
Well I know that I will change the transaxle but I'll have some fun in the meantime. I had ordered a smaller pulley and a belt already and since my belt is 1 stick away from breaking I'll just do it now.
Hydro gear transaxles are actually really adaptable and perhaps even better than most peerless when it comes to parts IF you have experience with them. Also very helpful company if you are looking for advice or parts.
So this is that access hole I was talking about. Even with the steering wheel and shaft out you would still need to remove the entire console and pedal assembly to even remove the pan so no thanks
fbisurveilancevan Member
Age : 38 Join date : 2022-05-20 Points : 1040 Posts : 220
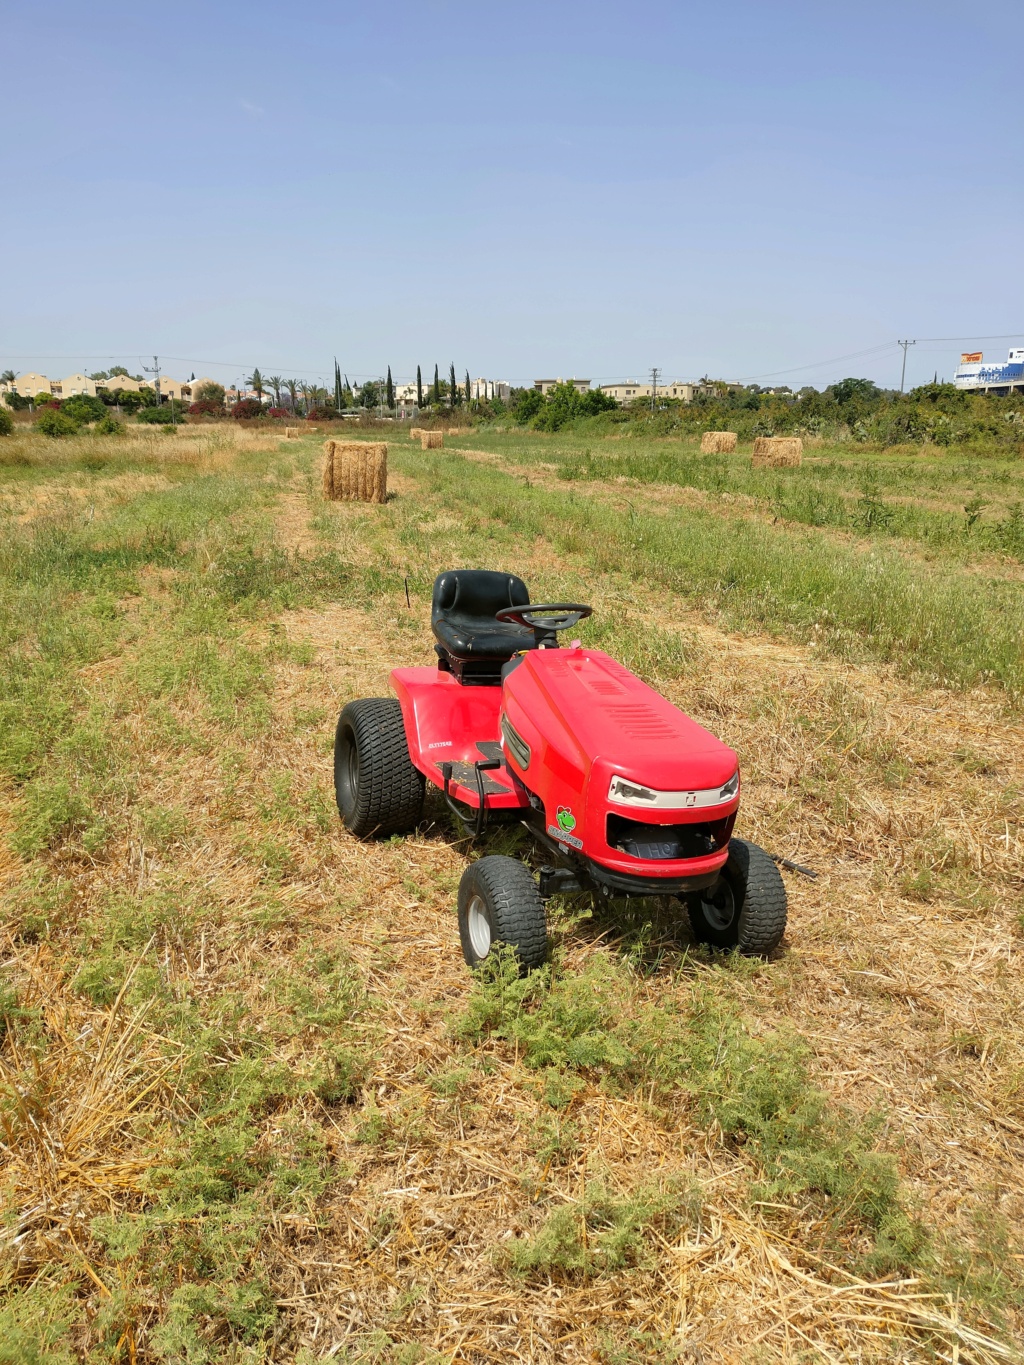
A blistering 10 mph, anyway it's an improvement over the standard 4.5 mph Enough to start wondering what to fix on the steering because she will move all ways except the one I want it to go.
But that's a problem for another day I guess
MightyRaze likes this post
fbisurveilancevan Member
Age : 38 Join date : 2022-05-20 Points : 1040 Posts : 220
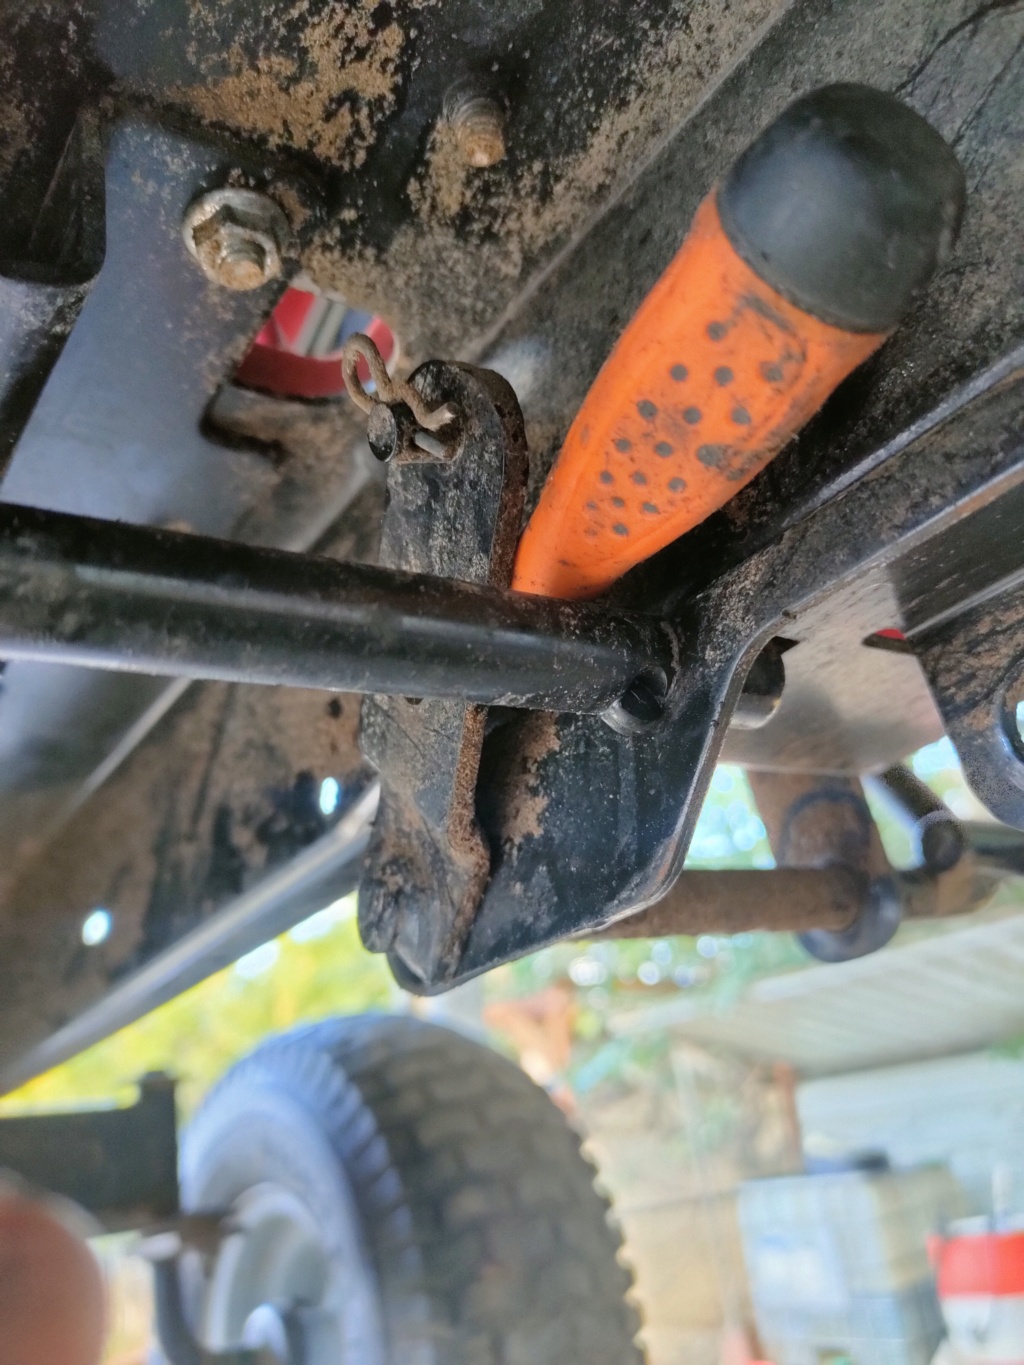
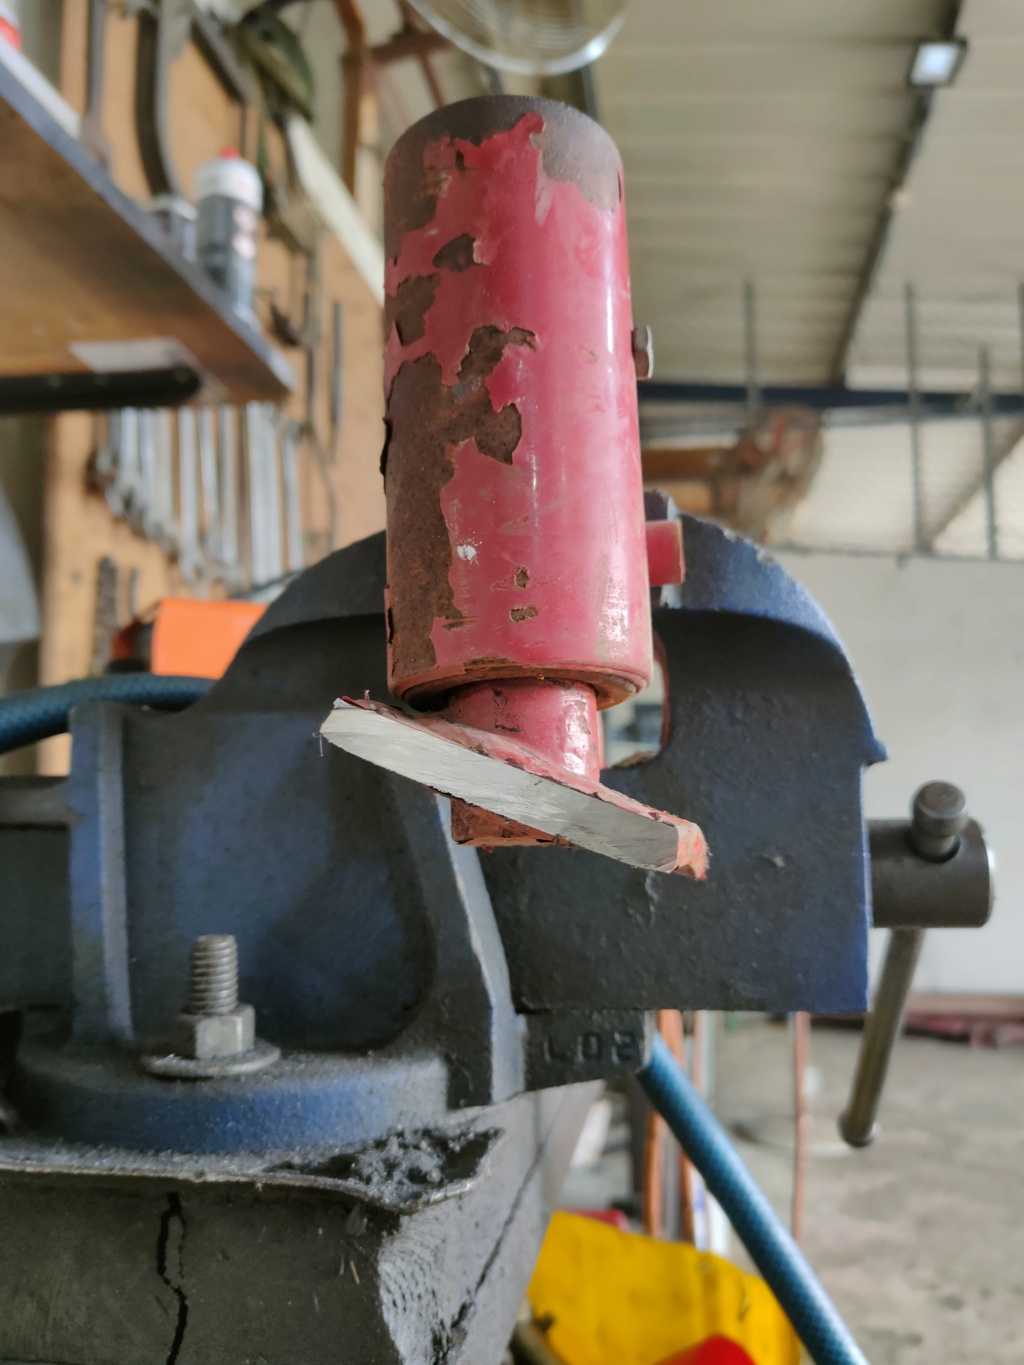
To steer or not to steer that is the question. I have tried to see if there was any hope in the factory front axle and steering assembly but I kept running around in circles.
The front axle is really flimsy sheet metal and the bushing simply cant do much if the rest is this weak So I decided that it's best to just forget about everything and start from scratch
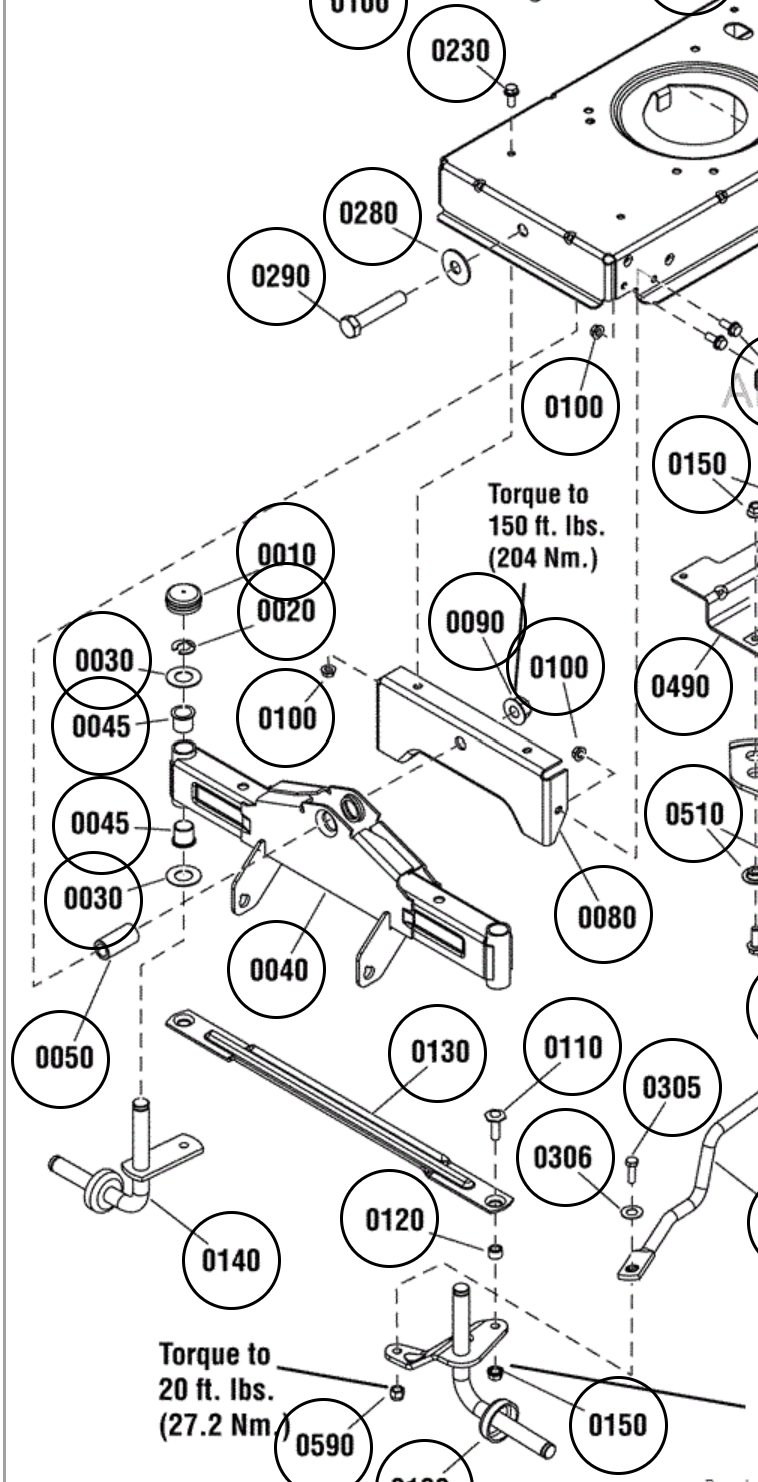
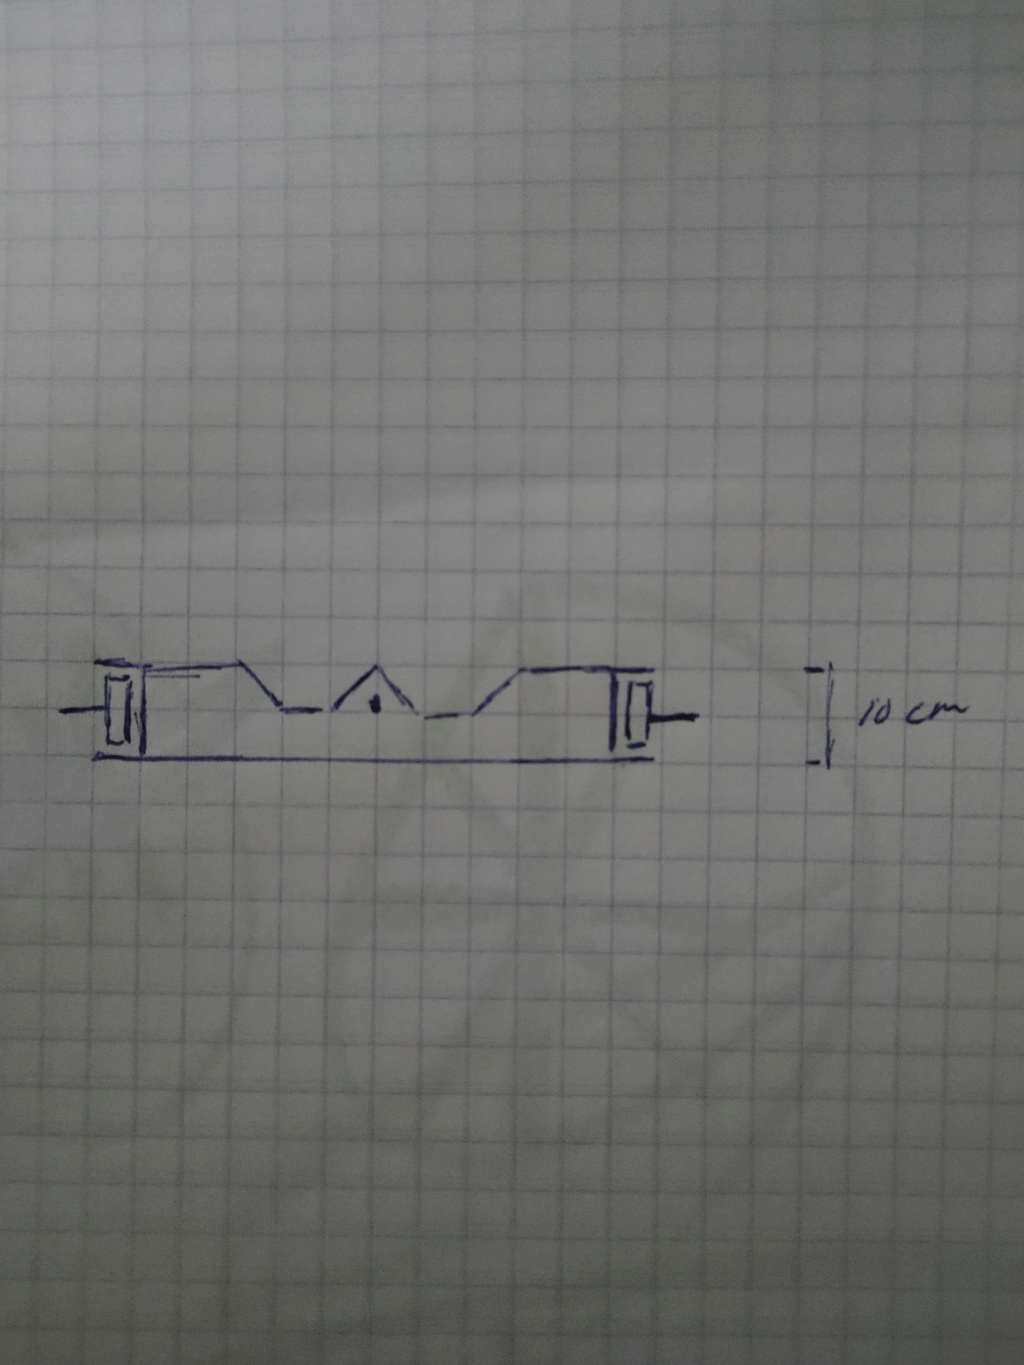
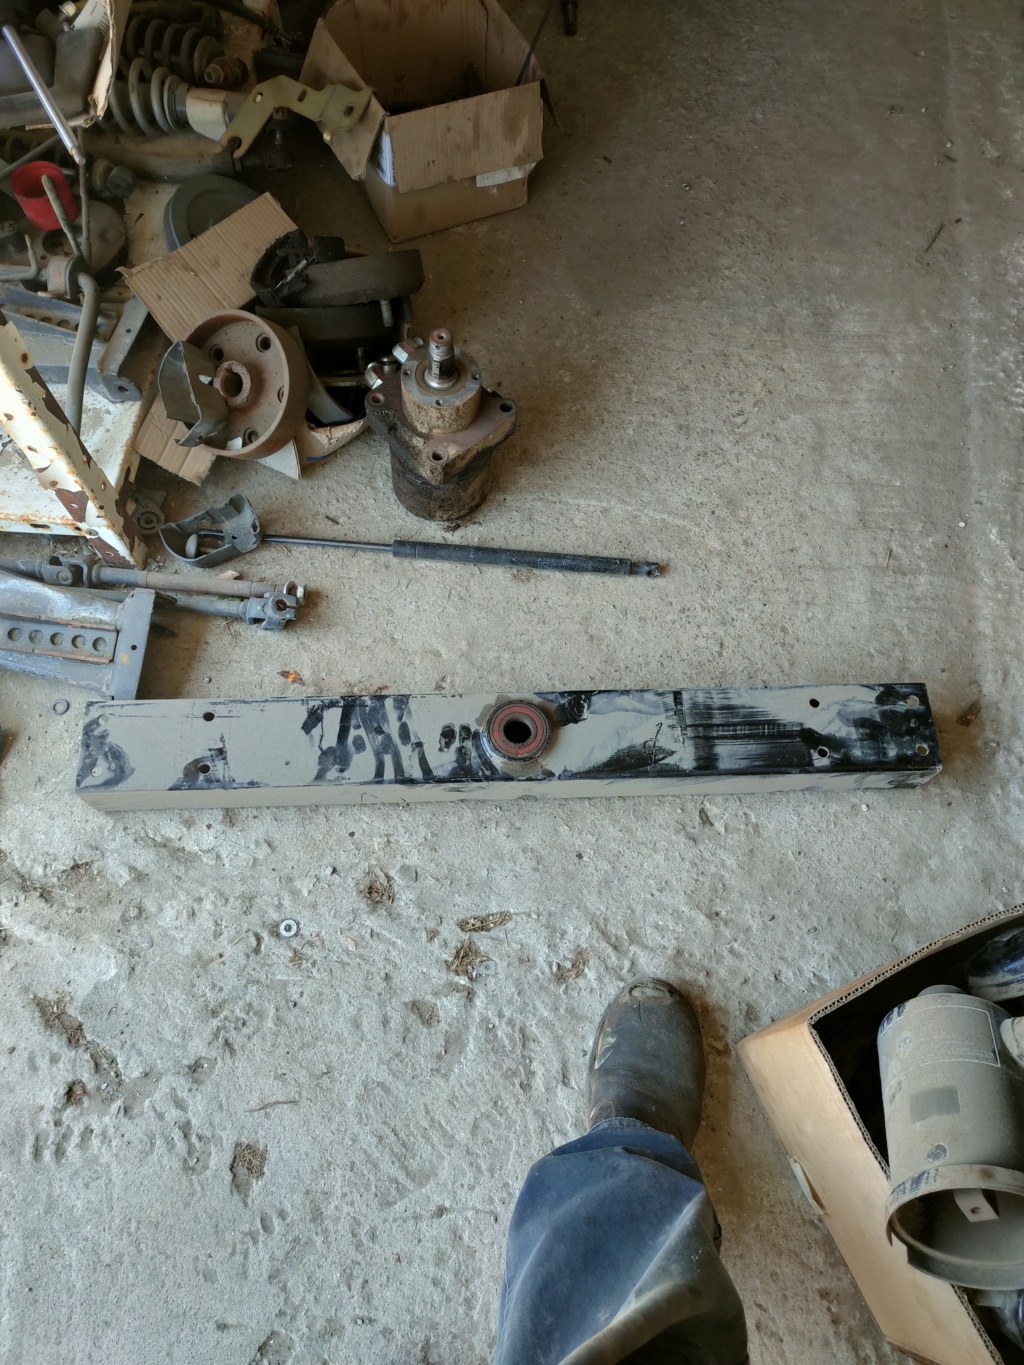
As plate 0080 can be removed it should be easy enough to change that to 1/4 steel and drill the hole Lower. On the opposite side a second plate will also be placed so the arm can be mounted lower In theory this can easily be fabricated outside of the tractor. Below is a very rough mockup of where I will make cutouts and just to get a feel for it, this axle is a 3x4 with a 30mm kingpin Everything is straight, no frills and by the rules of keep it simple stupid
fbisurveilancevan Member
Age : 38 Join date : 2022-05-20 Points : 1040 Posts : 220
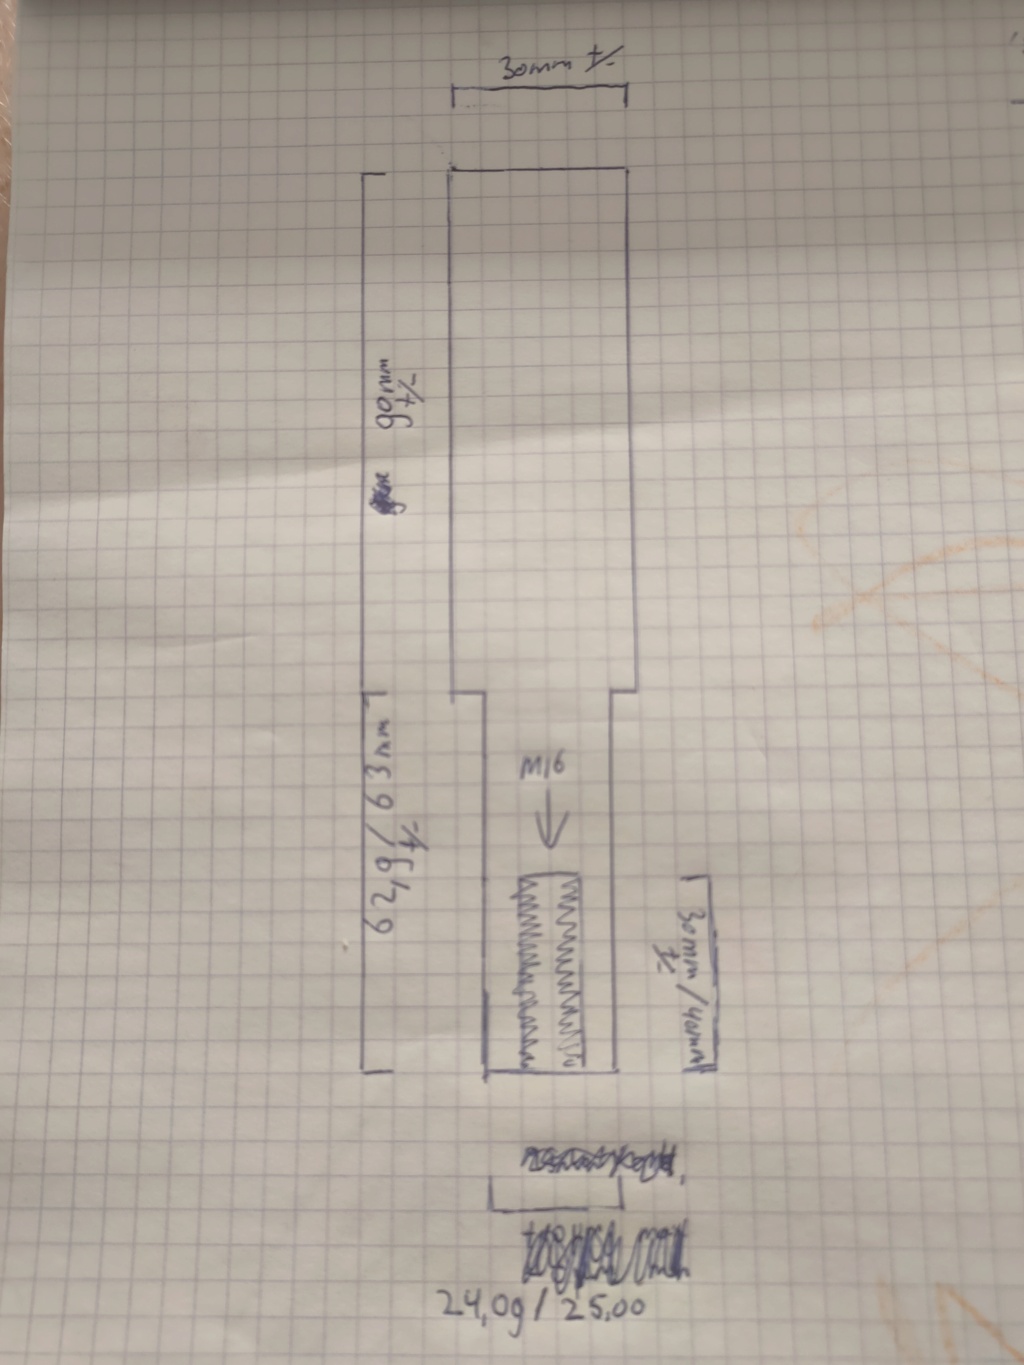
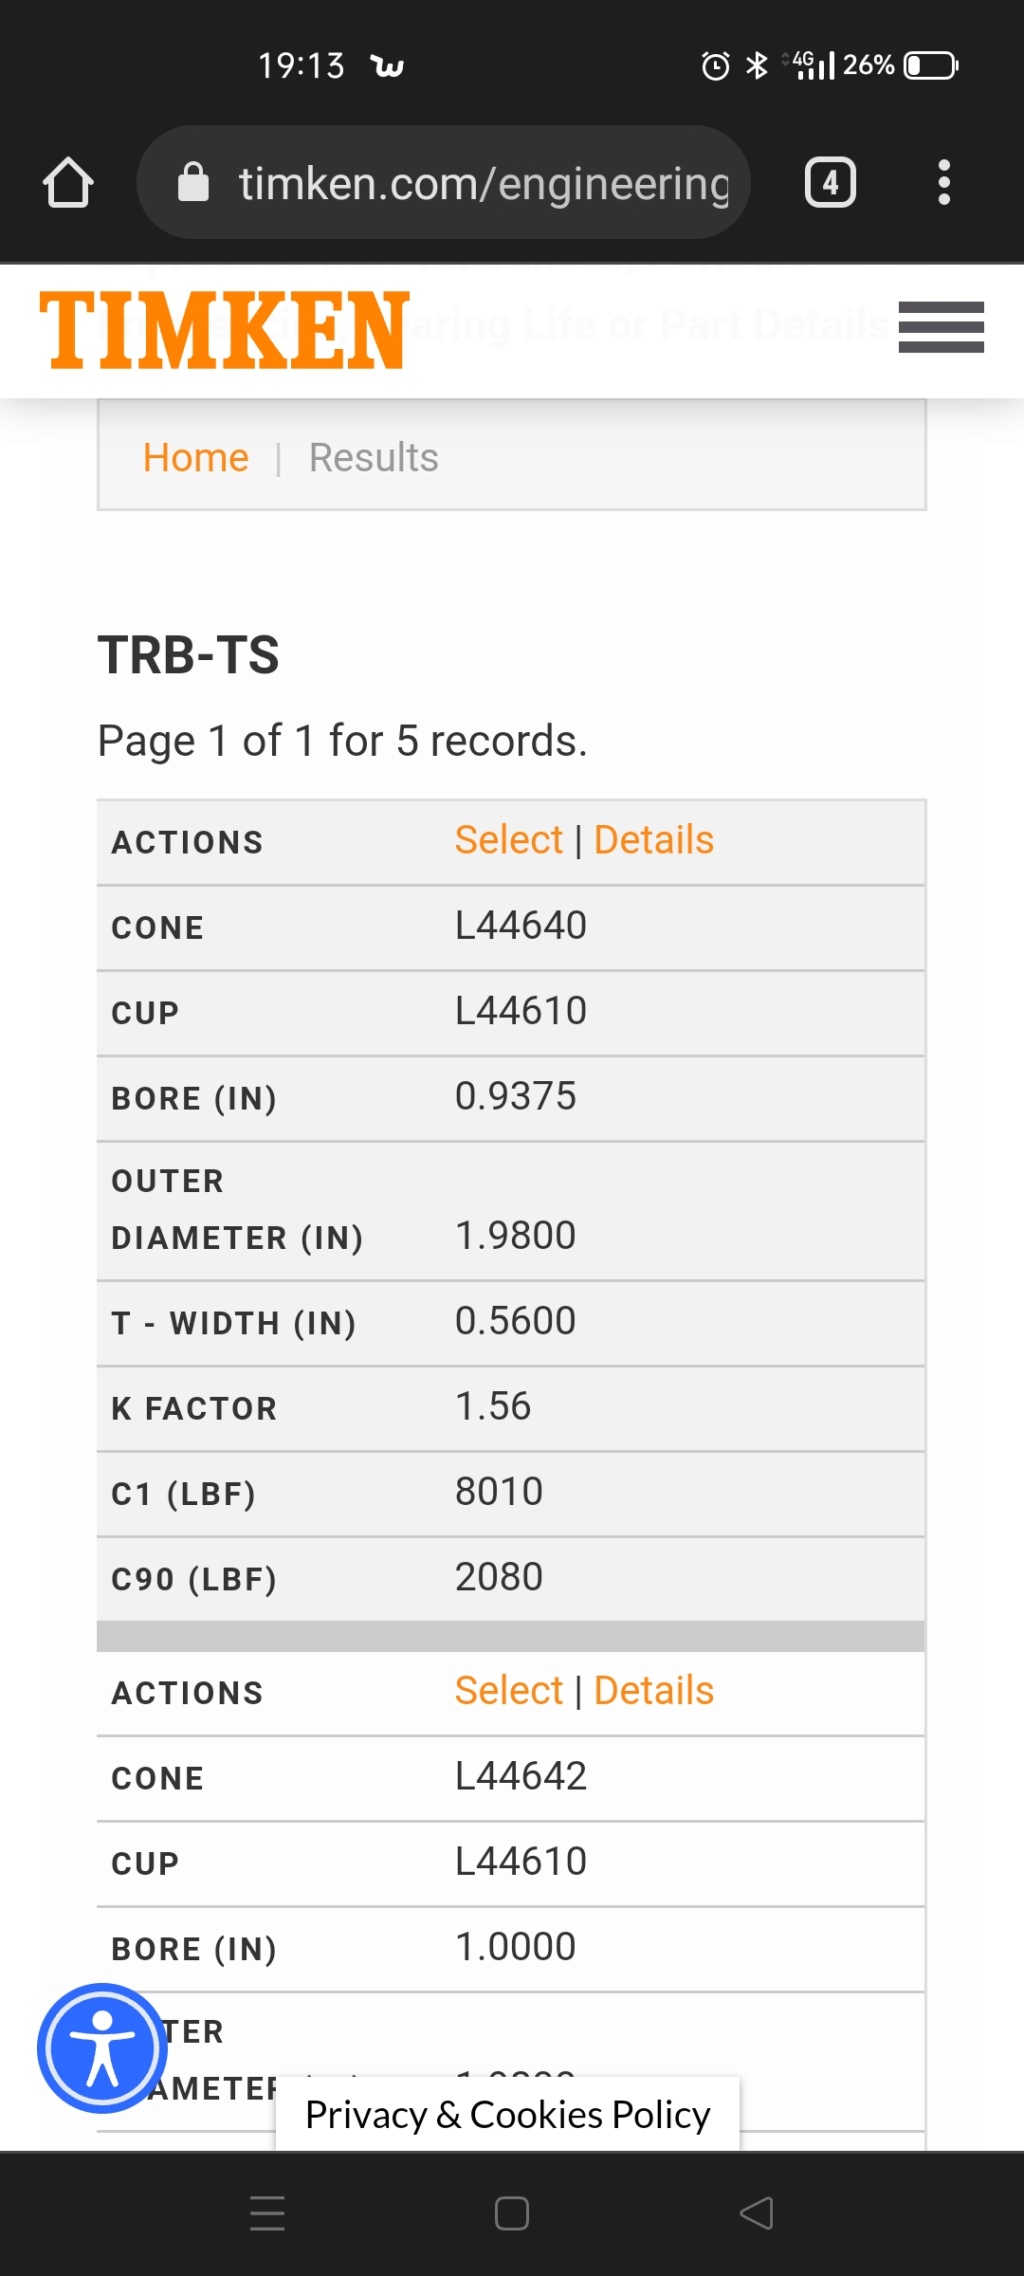
And the sketch for the machine shop so they can crank out the spindles. He asked 90 USD for the pair which seems reasonable considering I can have these made to exact tolerances
Aand as soon as I posted this i see I actually screwed up since I should only have a 0.01 micrometer clearance which would make it 24.99 So ignore my stupidity
fbisurveilancevan Member
Age : 38 Join date : 2022-05-20 Points : 1040 Posts : 220
Been a while, finished the gear a while back but really didn't have any time for it so far Have been working half days because I had too many paid time off so I decided to have a go at it at work.
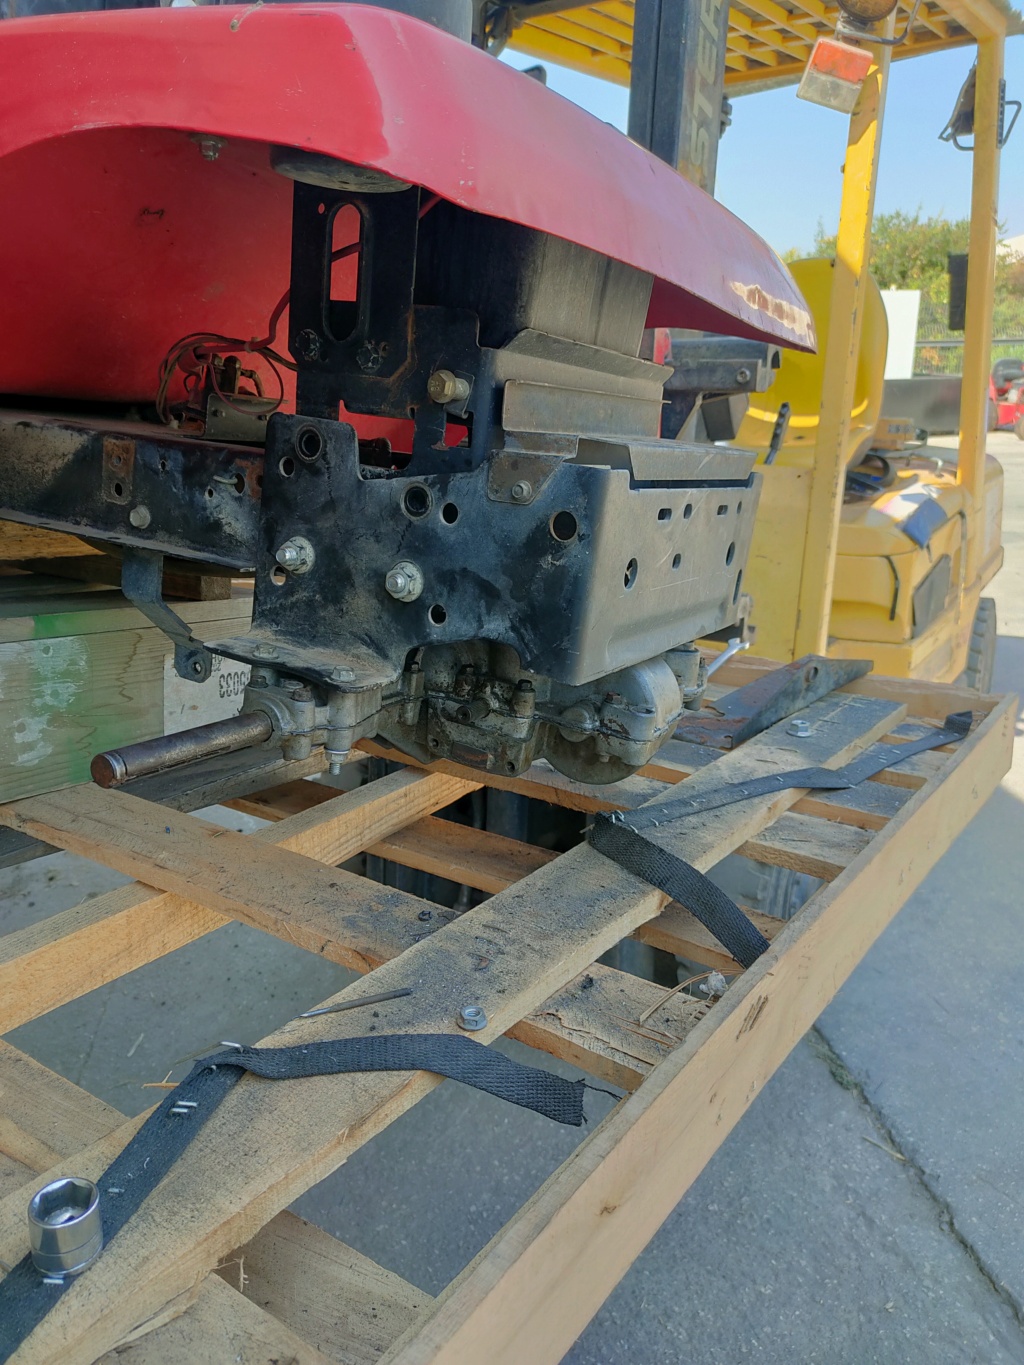
Main issue I had is that this gear wants to be in reverse but the short chassis didn't allow me to turn it. I was pondering over welding something up but my lazy ass couldn't be bothered. Co-worker removed a gear from a Deere x350 and.. wait.. hol up..
Stole the subframe from under his nose, drilled some 12mm holes in the snapper and tada. Needs a little work yet but this should be plenty strong and most of all a good upgrade to the original mounting brackets
diddie and Brianator like this post
fbisurveilancevan Member
Age : 38 Join date : 2022-05-20 Points : 1040 Posts : 220
No updates, just some brainstorming and could use some help trying to figure stuff out.
The original frame has an abundance of little plates stacked together. That original rear end I have already partially cut to fit the gear in. On top of that theres the bracket for the seat pan. Iam thinking about doing away with all that and just make 2 long brackets for the seat pan.
Question is what is really wise and how can I strengthen this the best way possible without adding too much crap again. Perhaps a plate on the top of the rails and extend that to the new subframe and bolt it to the subframe in the rear? These frames tend to flex alot and I just need to get rid of movement here
MightyRaze Administrator
2017 Build-Off Finalist
2017 Build-Off Finalist
2018 Build-Off Top 3 Winner
2018 Build-Off Top 3 Winner
2019 Build-Off Top 3 Winner
2019 Build-Off Top 3 Winner
2021 Winner of Winners
2021 Winner of Winners
1st Place Build-Off 2022
1st Place Build-Off Winner 2022
10,000 POSTS!
10,000 POSTS!
2024 Build-Off Entrant
2024 Build-Off Entrant
Age : 49 Join date : 2016-09-06 Points : 15341 Posts : 10809 Location : Oklahoma
Yeah it's kind of hard to visualize since I don't have any pics before I started hacking
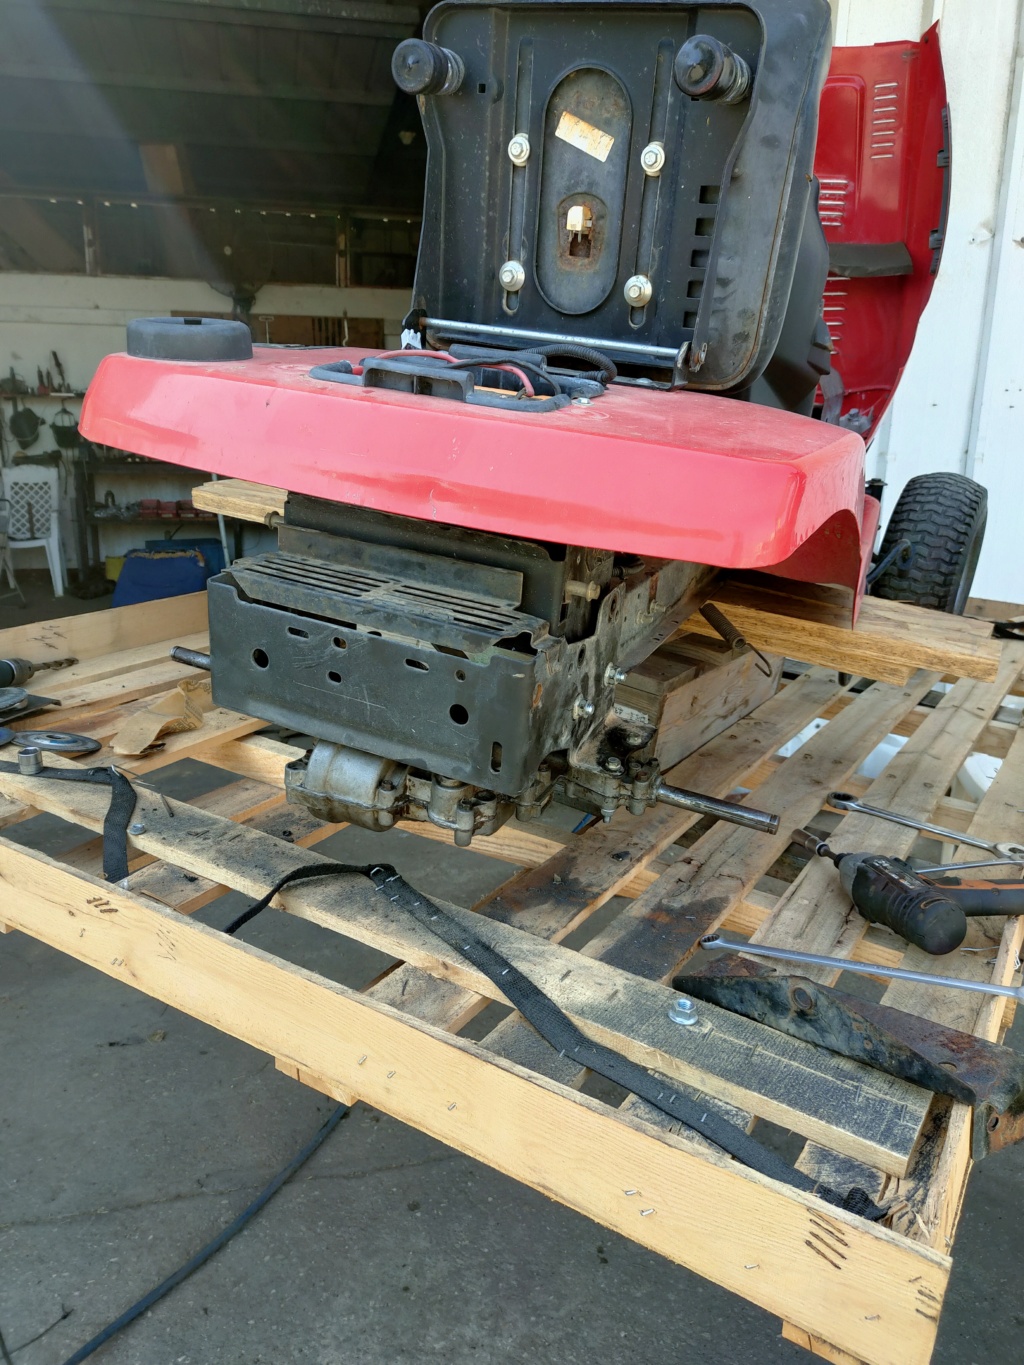
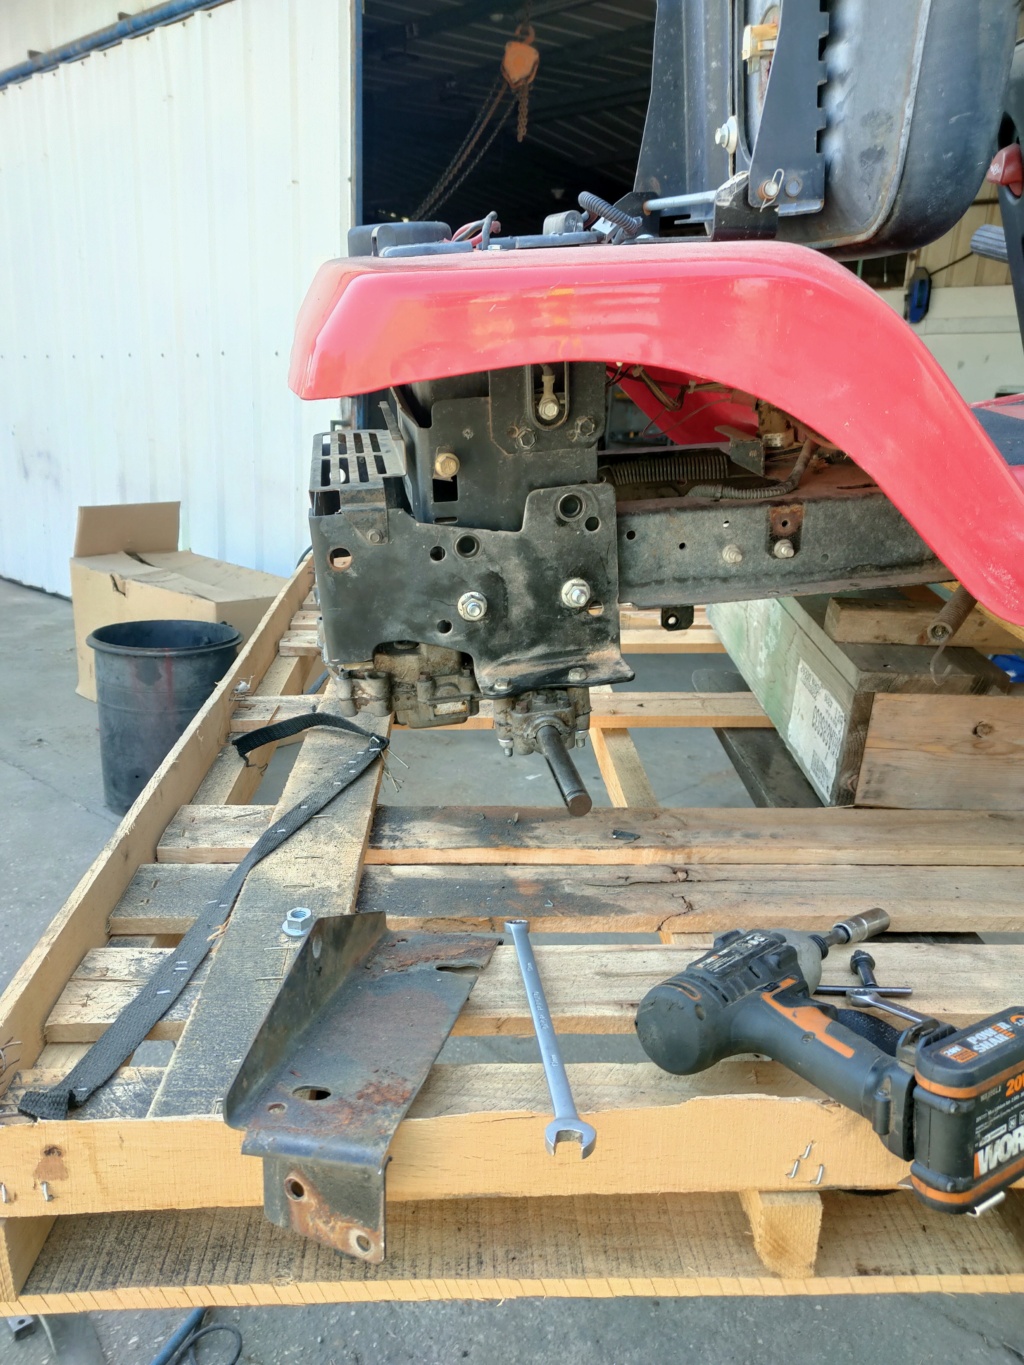
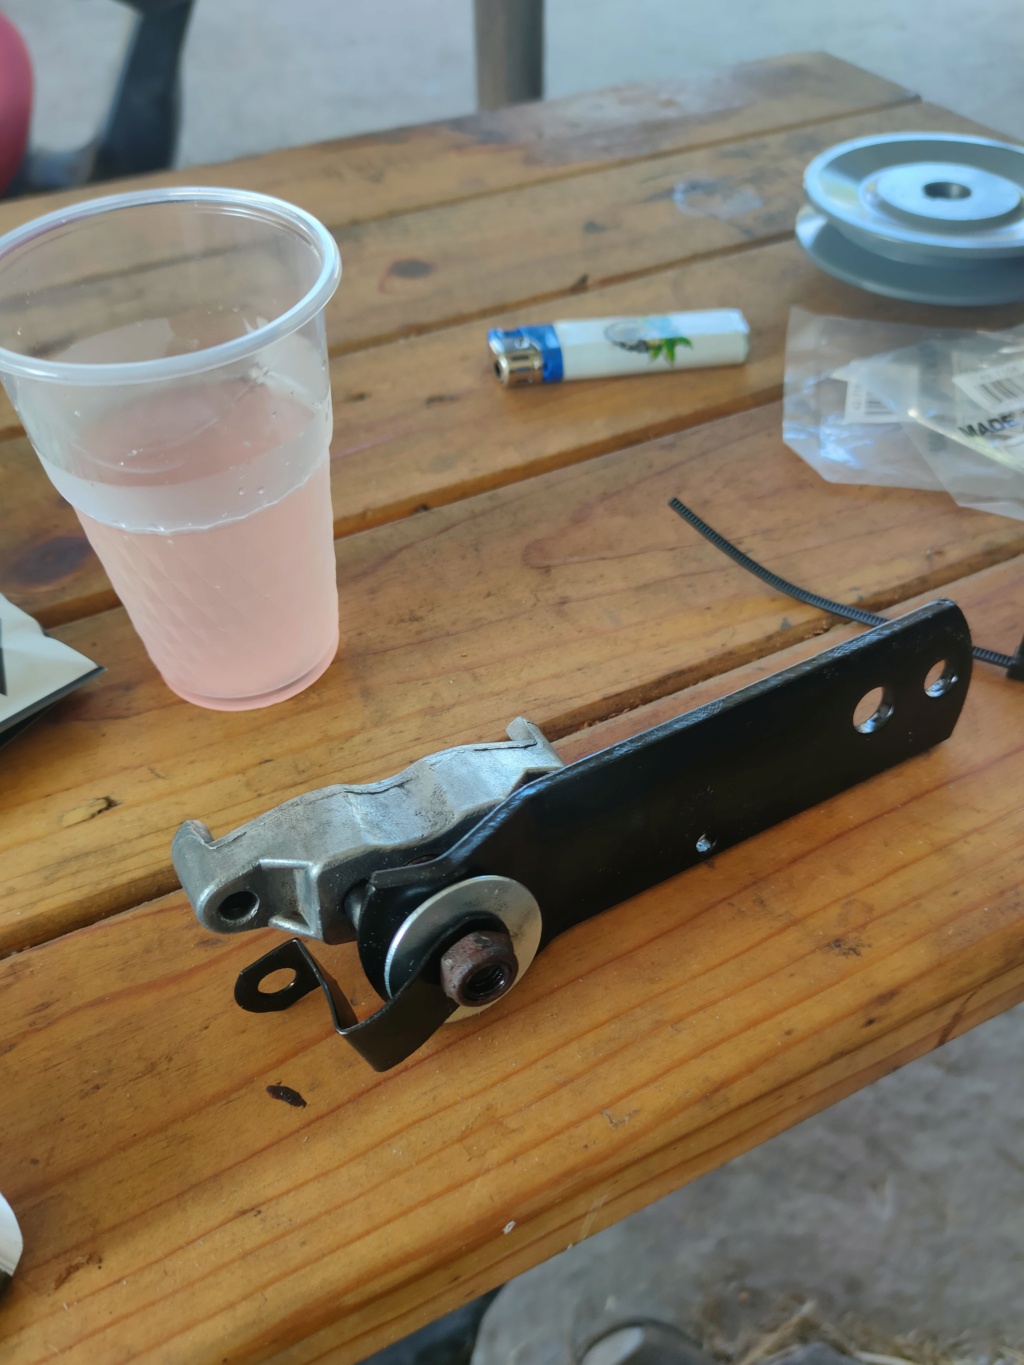
The new rear is in the right way. The old rear I have partially cut to make way for the new gear which sits in reverse and about an inch further back with the shafts.
The bracket for the x350 serves as both a rear support and a transaxle support.
Transaxle is a peerless 915-019 for a Toro rear engine rider Didn't know this at first either but I guess it works a lot better for my controls aswell. Bit of a pain in the butt to get everything in but I am already pretty much sorted except for how to get some more strength in the rear
Brianator likes this post
fbisurveilancevan Member
Age : 38 Join date : 2022-05-20 Points : 1040 Posts : 220
Brake were frozen up as per usual. Cooked the whole thing up and dunked it in oil twice and let it marinate for the night . Pins came out without too much of a fight After a clean and a quick and dirty coat of paint and some silicone she's free again
fbisurveilancevan Member
Age : 38 Join date : 2022-05-20 Points : 1040 Posts : 220
Trying the shoes back on.. There's about a half inch to an inch extra clearance allround so I am pleased with that. Transaxle pulley is on aswell, was a bit of a fight because there wasnt much tolerance built in.
The brake pad on the gear side didn't want to go out yet so I'll try that again when the wheel is off
Other than that I'll probably pick up a belt tomorrow and then I still have to sort out the controls
MightyRaze and Brianator like this post
fbisurveilancevan Member
Age : 38 Join date : 2022-05-20 Points : 1040 Posts : 220
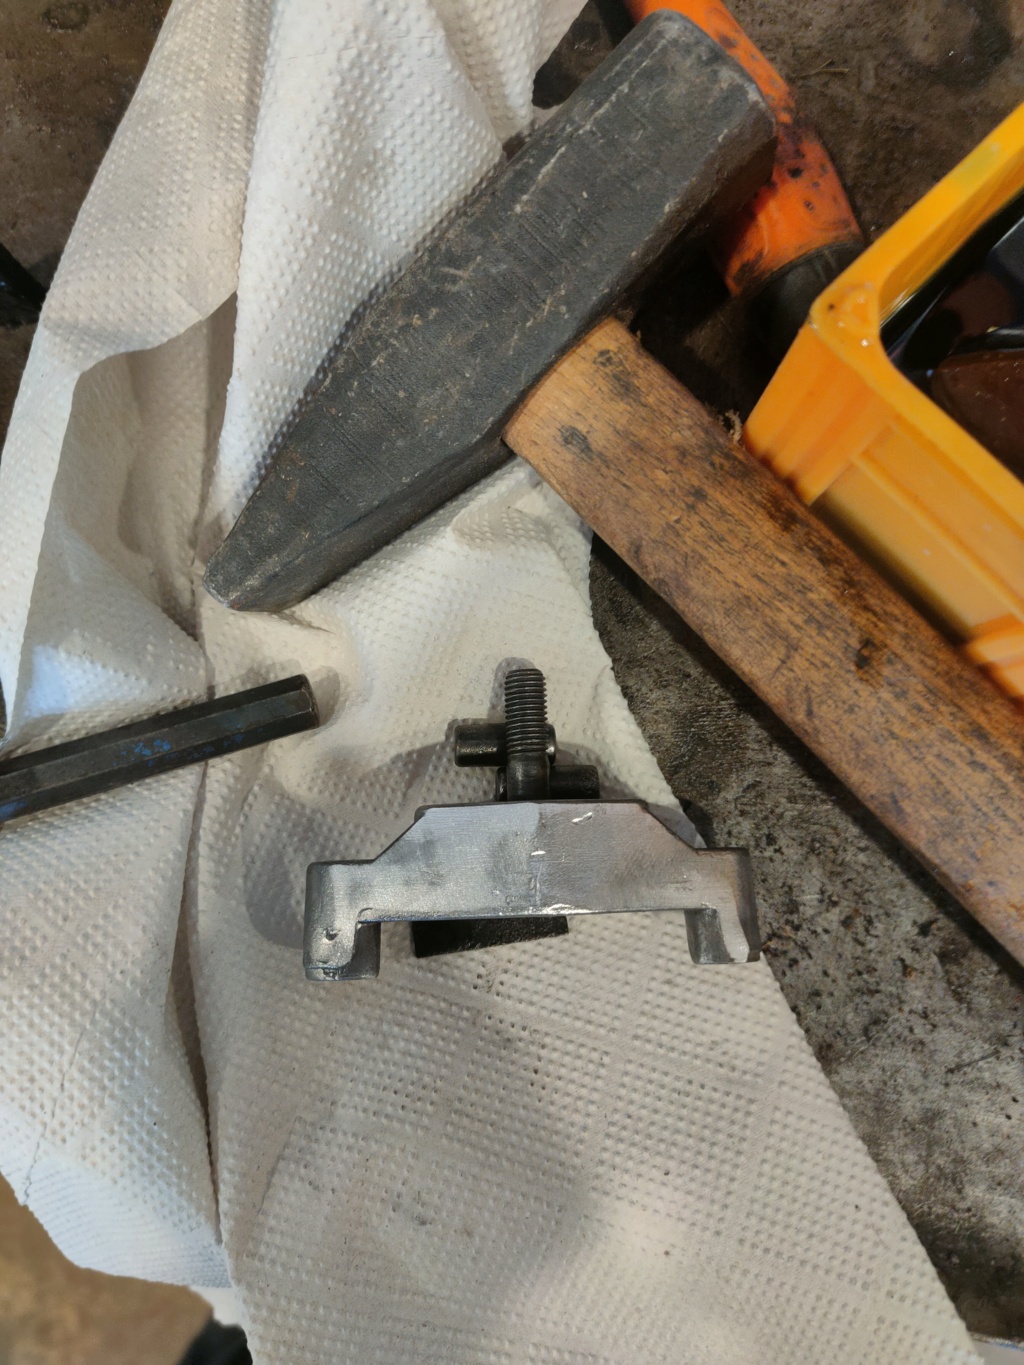
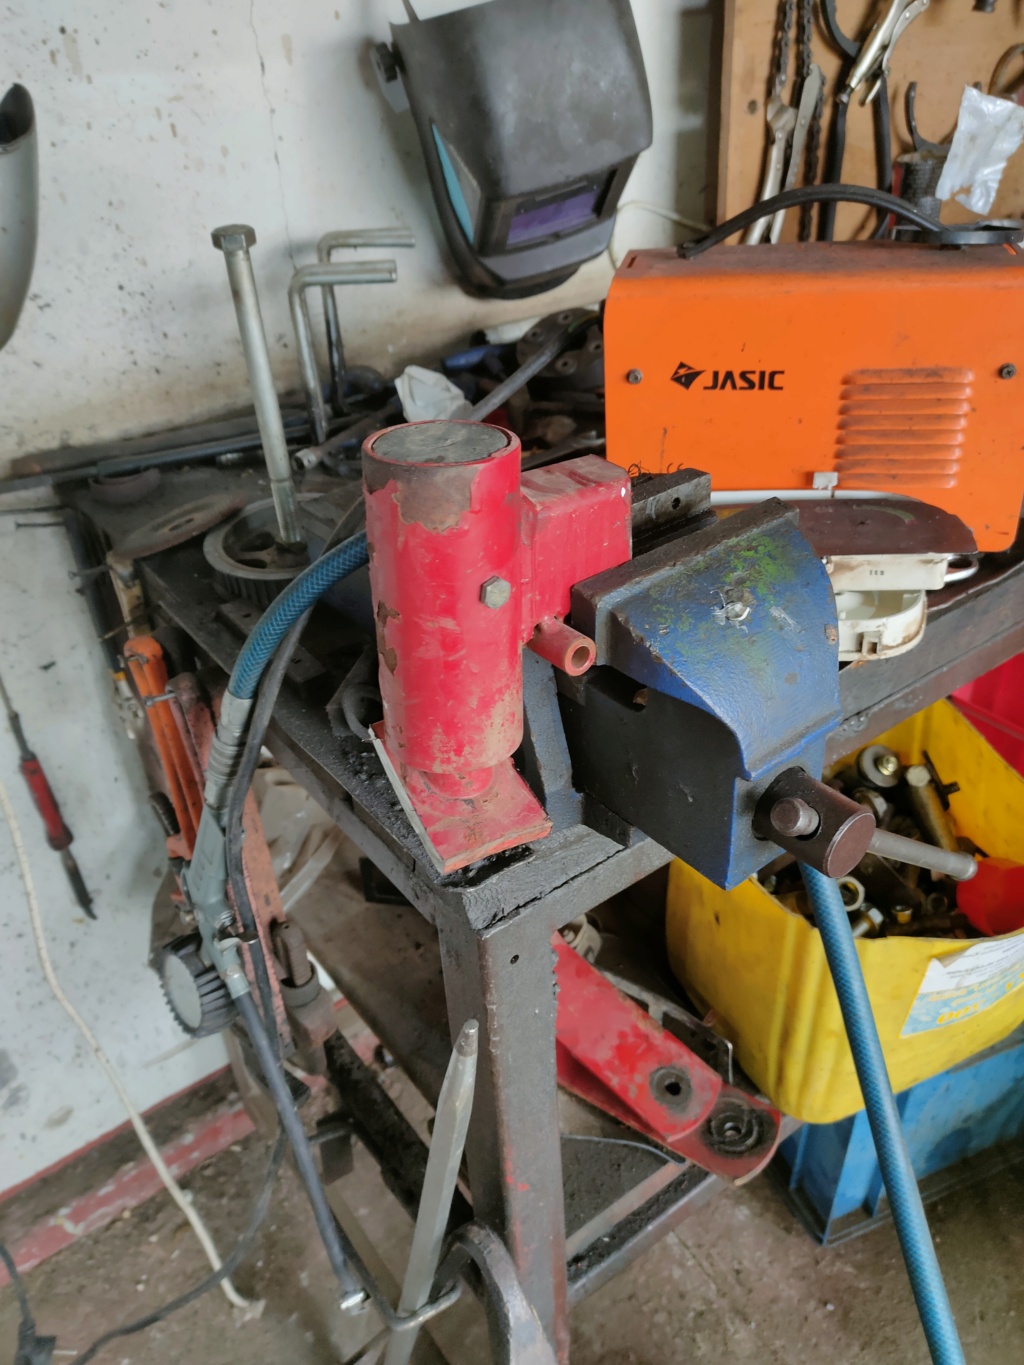
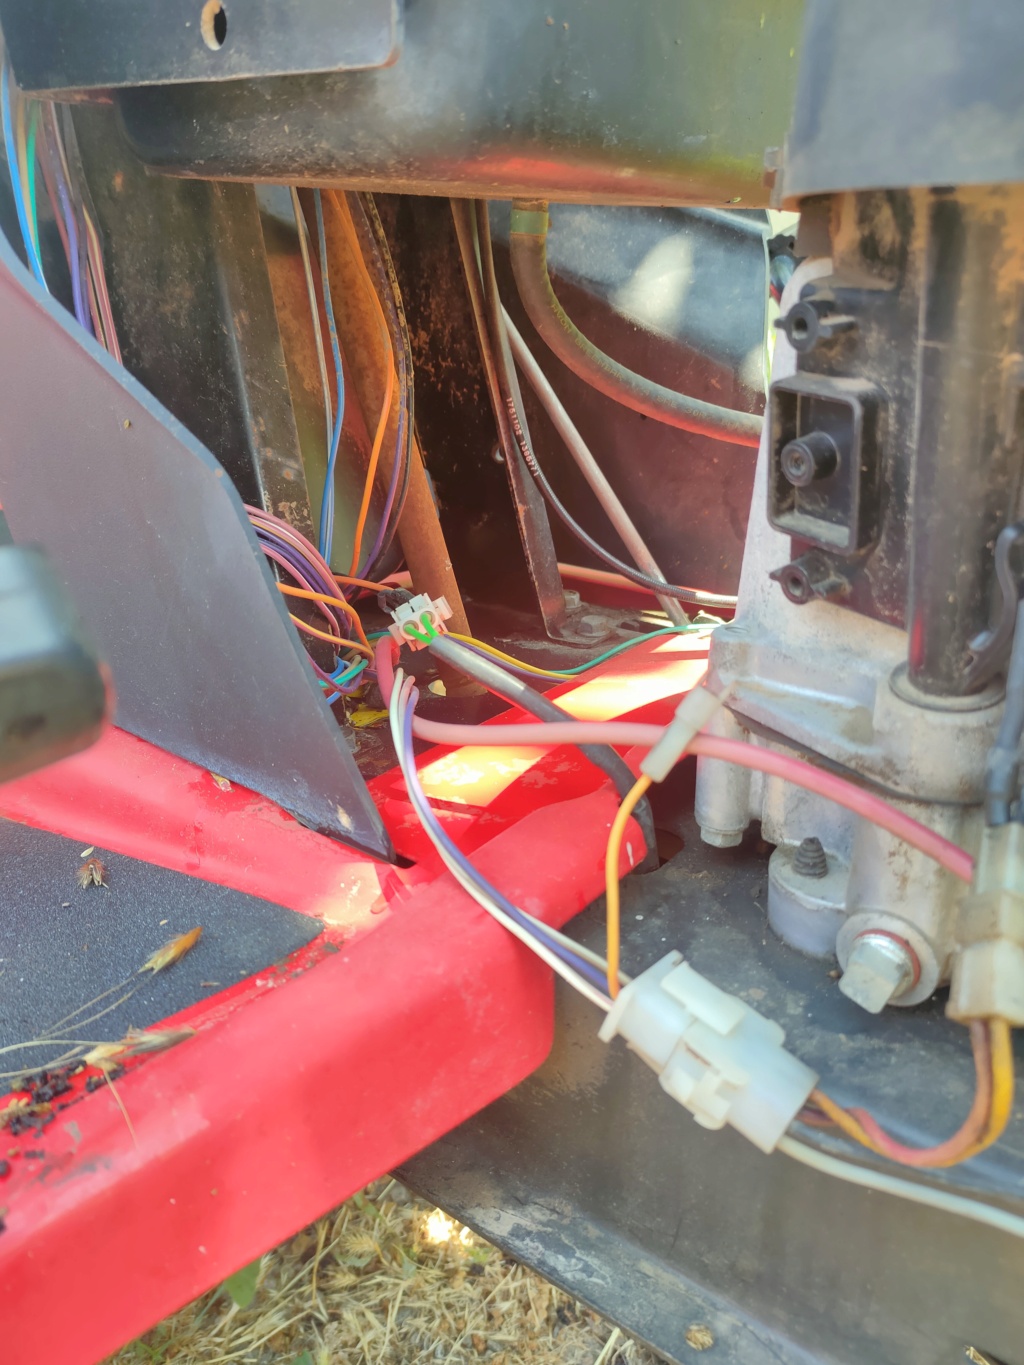
Poor man's PTO delete, simply smashed the PTO to bits for now but I'll order a bolt and shorten it With it being a former hydrostatic transmission I did find a really nice spot for a gas cable so that'll go on the shopping list as well
As far as the belt goes I bought a belt which set me back a whopping 100 usd so screw that, I'll order it from Amazon. The belt didn't fit however but afterwards I wondered if I ever disengaged the clutch. I just have this picture and have been pondering for an hour now wether I didn't screw up. I just wanted to order the parts today but I might have to check again tomorrow.
LAWN MOWER MUDDER Established Member
500+ Posts
500+ Posts
2014 Build-Off Top 3 Winner
2014 Build-Off Top 3 Winner
Age : 23 Join date : 2013-04-08 Points : 5092 Posts : 913 Location : Central Pa
My dad was a Ferris dealer. I build my front ends out of Ferris solid front axles. They fit perfectly in AYP craftsman front ends. Just trim the ends down and make spindles for them. Super heavy duty


 to find i have been tring to find some wheels that had a 1" bore with bearings for my rideing cart and i was looking for 2 weeks and was only able to find one company that made that rim with the tire i needed. at the moement they are on order but they where 112$ a peice and they are not large by any means they about the same size as a rideing mower tire but 1/2 the width.