| | | Homemade tools and stuff from junk laying around |  |
|
+11CraftsmanQuad19 TourMax muckmudd AllisKidD21 MightyRaze frostypaws RichieRichOverdrive MatthewD TheBeal Crazy_Carl prancstaman 15 posters | |
| Author | Message |
|---|
loggers gogert
Member

2020 Build-Off Entrant
2020 Build-Off Entrant
Join date : 2020-02-14
Posts : 202
| | | | | prancstaman
Veteran Member


Join date : 2015-02-02
Points : 4889
Posts : 1412
Location : Cleveland,Ohio
|  Subject: Re: Homemade tools and stuff from junk laying around Subject: Re: Homemade tools and stuff from junk laying around  March 15th 2020, 7:51 pm March 15th 2020, 7:51 pm | |
| - loggers gogert wrote:
- okay.............so............what is it exactly????
LOL. A steel roller. It can make a perfectly round steel ring from flat steel plate. The last 2 pics of the post shows what it does. I can buy a piece of flat steel From say Home Depot. A 2 inch wide by 6 feet long and 1/8 inch thick steel plate, run it through the rollers of the tool, to make a perfectly round ring. That is all it does for now. Later I can make adapters to roll other stuff too. Like round bar or thick square tubing. I made this tool for a project on another thread. I'm making a set of rims and I am wanting to widen the rims. When you widen the rims, you add metal to the rim to be able to widen the rim. This tool makes the metal ring that I will weld on the rim to widen them. I want the metal ring to be perfectly round. Just a part of a whole project I am doing. | |
| | | | loggers gogert
Member

2020 Build-Off Entrant
2020 Build-Off Entrant
Age : 18
Join date : 2020-02-14
Points : 1754
Posts : 202
Location : U.S, virginia
| | | | | prancstaman
Veteran Member
Join date : 2015-02-02
Points : 4889
Posts : 1412
Location : Cleveland,Ohio
| | | | | AllisKidD21
Moderator


2020 Build-Off Entrant
2020 Build-Off Entrant
1st Place Build-Off 2019
1st Place Build-Off Winner 2019
Age : 25
Join date : 2016-07-10
Points : 8380
Posts : 5190
Location : Ontario Canada
| | Subject: Re: Homemade tools and stuff from junk laying around March 15th 2020, 7:59 pm | |
| Looks like the test went pretty well, great work prancstaman!  "This'll either wake you up or put you to sleep forever!"- Red Green "Whatever you do you should do right, even if it's something wrong." - Hank Hill - MTD Off-Road Build
- Ford LT 110 Off-Road Build
- Craftsman GT 6000 Off-Road Build
- Sears LT11 Rat Rod Build *2019 Build-Off Winner!* Garden Tractor Collection: Allis B-110 x2, 710, 716, & 410 - Wheel Horse 655, 953 & 500 Special - Case 444 - Bolens Versamatic, G10 & 1668 Diesel Swapped - Cub 106, 124 & 1000/149 Frankentractor - Ford 120, LGT 125 & 145 - White 1650 Yard Boss - Moto Mower 710-100 | |
| | | | prancstaman
Veteran Member
Join date : 2015-02-02
Points : 4889
Posts : 1412
Location : Cleveland,Ohio
| | Subject: Re: Homemade tools and stuff from junk laying around March 15th 2020, 8:06 pm | |
| @AllisKidD21 Thanks! I'm thinking on what else I can do with it already. I can probably make a pretty cool steering wheel from scratch. Or maybe make the jigs to roll up some T-posts for a frame I plan on building. I'm a thinkin, LOL. | |
| | | | RichieRichOverdrive
Moderator

2018 Build-Off Entrant
2018 Build-Off Entrant
2024 Build-Off Entrant
2024 Build-Off Entrant
Age : 21
Join date : 2016-10-29
Points : 6602
Posts : 3628
Location : Lewisburg, KY
| | Subject: Re: Homemade tools and stuff from junk laying around March 15th 2020, 8:07 pm | |
| It's a metal roller. You can roll rings out of metal with it. You change the radius of the rings by the center roller. You should use one of those bottle jacks to make a sheet metal brake(break?) or something. Something I've made.... let's dig through my phone... Demagnetizer I just finished. Doesn't work all well, but it makes things just a bit less magnetic if you do it right. At least it gets one of my hoarded sewing machine motors off the shelf in the shop. The bearing blocks were fun, had to mount them to the faceplate on the lathe and bore them out.  The belt is an o ring from one of the filters on my dad's truck lol. 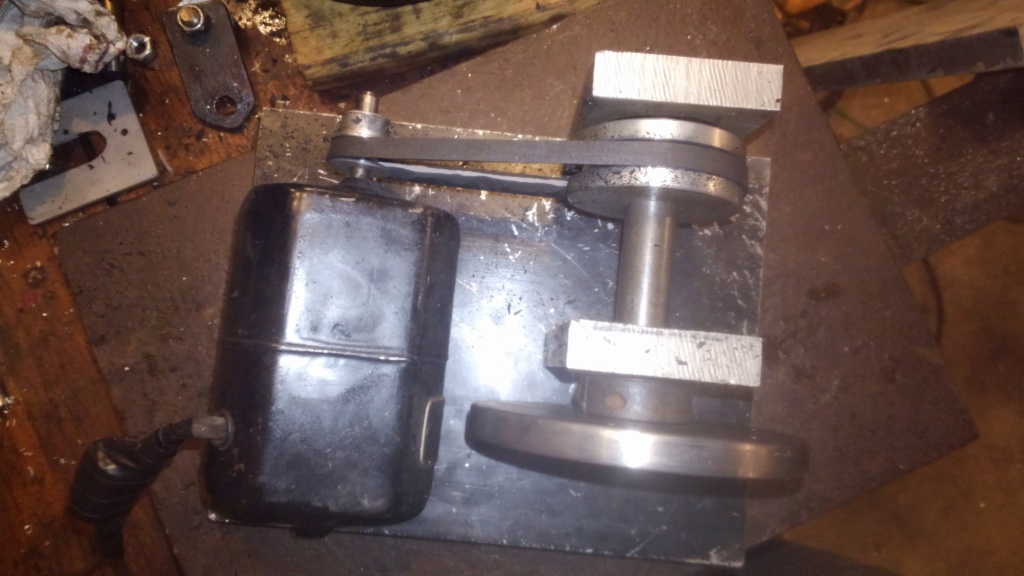 I guess this counts, i did most of it at home. A tap handle from ThisOldTony's video, maybe some of you have seen that vid. 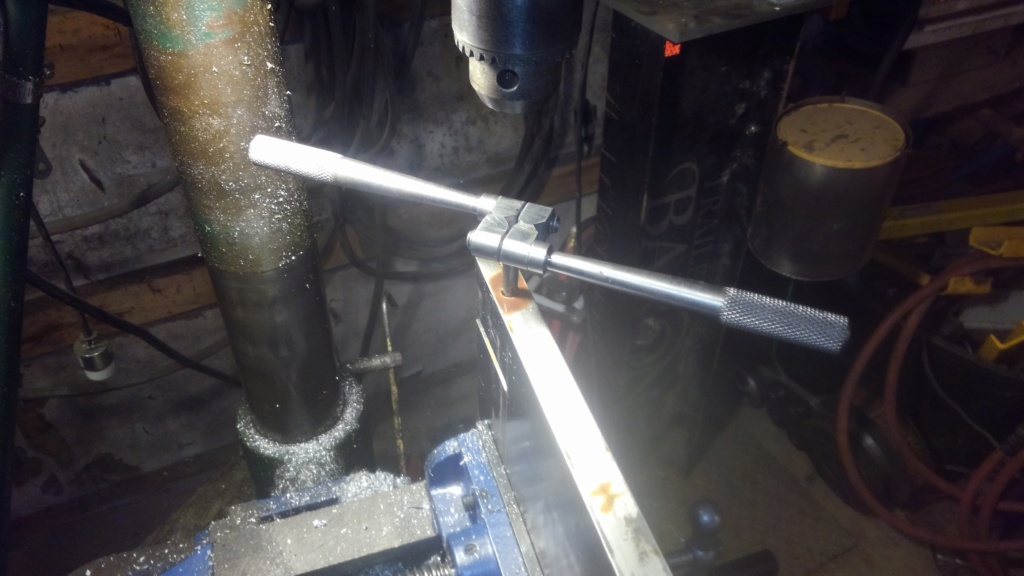 Um here's a hammer handle I didn't put much effort into. 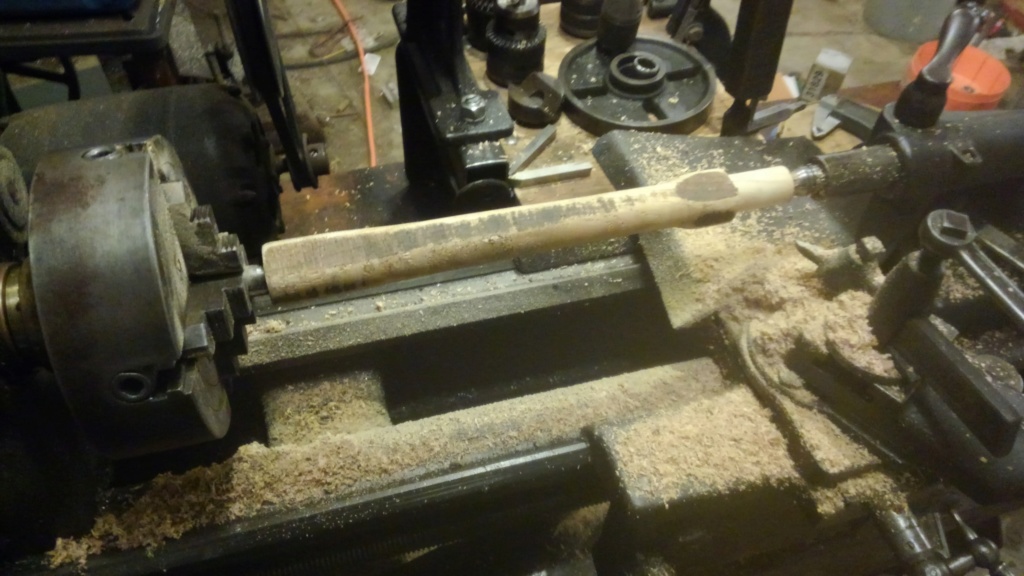 Carriage stop i made for my lathe, almost entirely with my lathe. 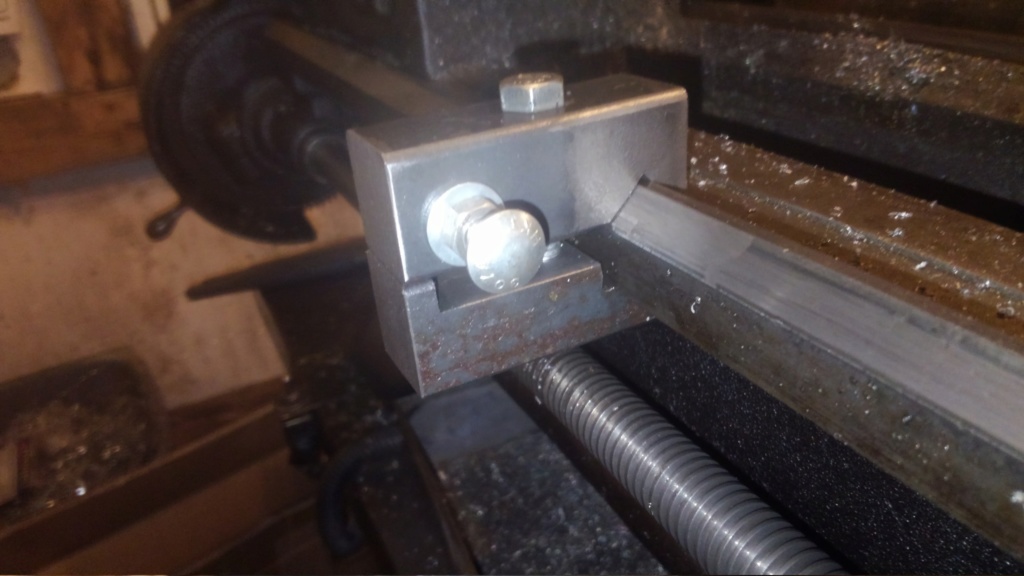 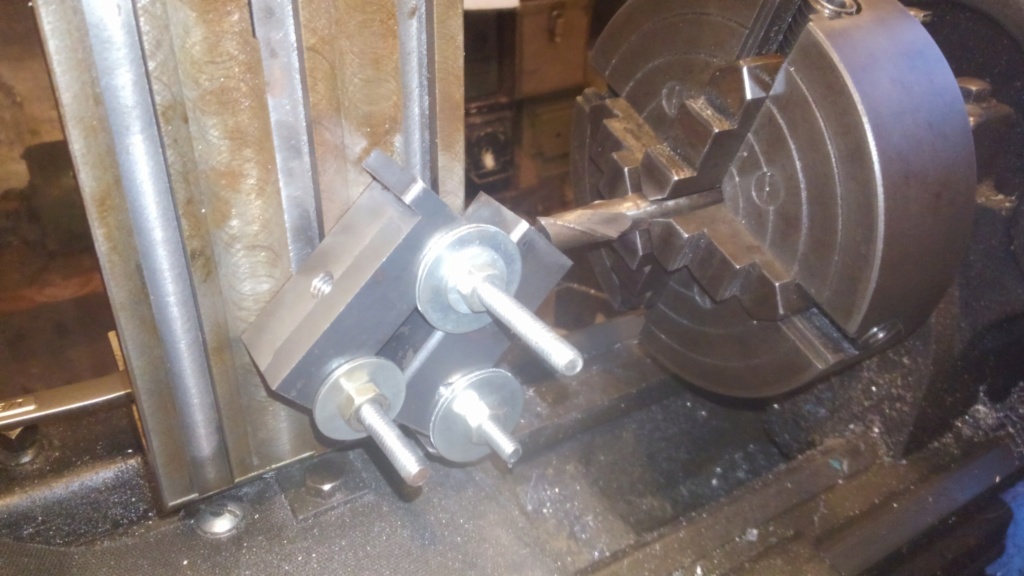 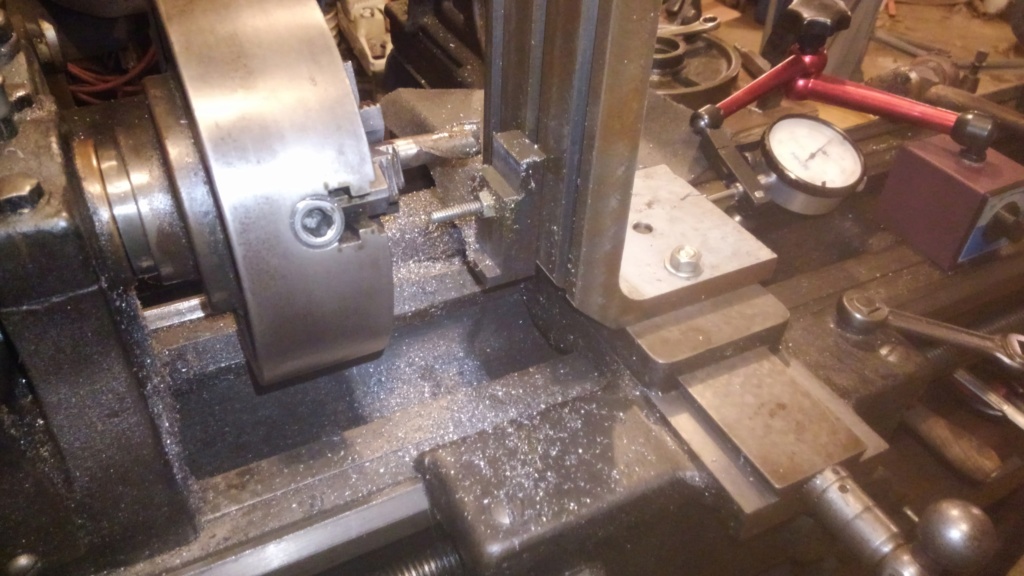 | |
| | | | prancstaman
Veteran Member
Join date : 2015-02-02
Points : 4889
Posts : 1412
Location : Cleveland,Ohio
| | Subject: Re: Homemade tools and stuff from junk laying around March 15th 2020, 8:17 pm | |
| @RichieRichOverdrive Nice projects. I need to make one of those tap handles myself. Vice grips just not cutting it lately, LOL. like the lathe mill setup. I need to make that too. Probably pretty soon too. I got maybe one more project to do before I start the mill project, LOL. Now how does the demagnetizer work? | |
| | | | RichieRichOverdrive
Moderator
2018 Build-Off Entrant
2018 Build-Off Entrant
2024 Build-Off Entrant
2024 Build-Off Entrant
Age : 21
Join date : 2016-10-29
Points : 6602
Posts : 3628
Location : Lewisburg, KY
| | Subject: Re: Homemade tools and stuff from junk laying around March 15th 2020, 8:23 pm | |
| It's just a bunch of neodymium magnets spinning around. I guess it should just jumble the magnetic field of anything that passes by it. By "should" i mean it doesn't very well.
I suppose it'd be good for when you really want a hard drive clean. | |
| | | | prancstaman
Veteran Member
Join date : 2015-02-02
Points : 4889
Posts : 1412
Location : Cleveland,Ohio
| | Subject: Re: Homemade tools and stuff from junk laying around March 15th 2020, 8:30 pm | |
| @RichieRichOverdrive Oh, OK. I was asking because we had something in school that did the same thing. It was a magnaflux machine used to find cracks in parts. and after you tested the magnetized part, you had to demagnetize the part. You had to do it a certain way too and the last step was walking away from the machine till it turned off and that is how you knew the part was demagnetized. | |
| | | | RichieRichOverdrive
Moderator
2018 Build-Off Entrant
2018 Build-Off Entrant
2024 Build-Off Entrant
2024 Build-Off Entrant
Age : 21
Join date : 2016-10-29
Points : 6602
Posts : 3628
Location : Lewisburg, KY
| | Subject: Re: Homemade tools and stuff from junk laying around March 15th 2020, 8:42 pm | |
| That's interesting. I don't really know much about the theory of it. I just have the magnets in reversing polarities A pic of my setup for drilling the magnet holes. I don't think this is how the lathe or indexer were really intended to be used, but it works lol. 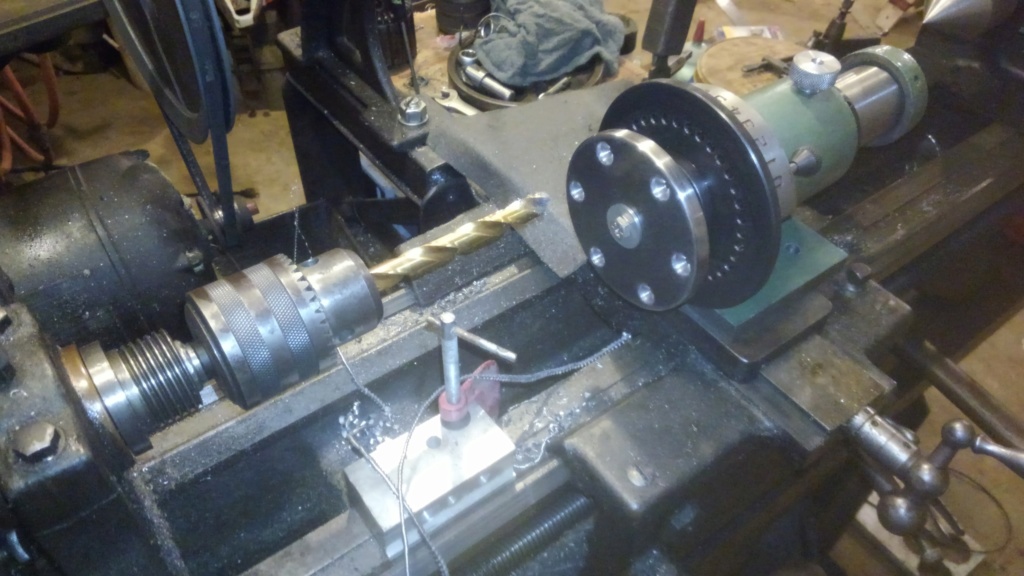 | |
| | | | prancstaman
Veteran Member
Join date : 2015-02-02
Points : 4889
Posts : 1412
Location : Cleveland,Ohio
| | Subject: Behind the 8 Ball Steel Roller part 9, the conclusion March 21st 2020, 9:22 pm | |
| Hay People, Last post on this tool, before I actually use it for my projects. Pretty much a test run on it to see how it works. Thought it would be a good idea to test it that way I know what to expect, Quite surprising for me actually, on using it. So, I can come up with a game plan and don't waste metal and money. I'll be testing it on the same piece of metal I used after finishing it. The 1/2 inch wide, 1/8 inch thick flat steel stock. I just bent it flat to reuse it, LOL. So, right off the bat, the first problem to fix is after the metal is rolled in a small enough circle, the outer roller pops out, LOL. 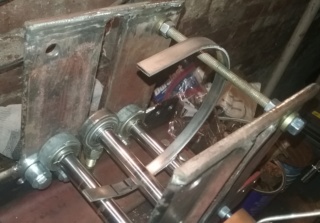 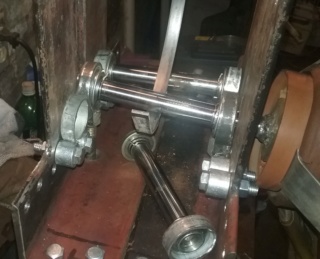 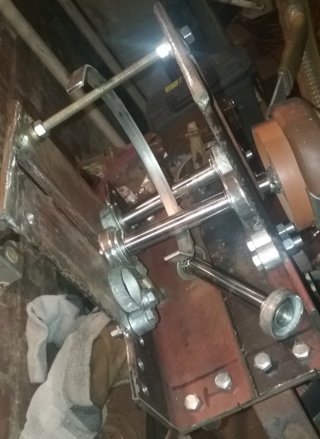 Easy fix. I was thinking to use steel wire but then I would have to replace it every time I change the rollers. I figured I will use hose clamps then. I got enough of them and they were free. I'll use 2 per roller bearing side, for a total of 8 hose clamps. Using 2 to hold the bearing in place makes them really adjustable when clamping something. 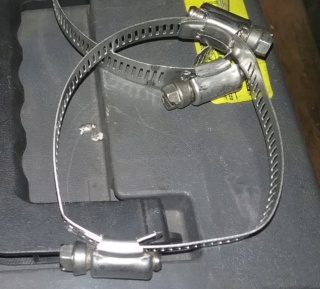  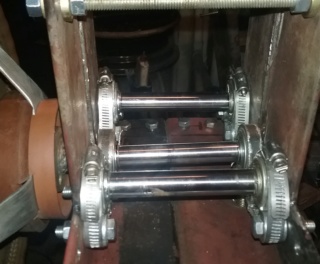 Back to rolling. I can roll it pretty easily. Wheel spins easy. Then when I get to a small enough circle I have to help push it through. No big deal, I expected that since it's steel on steel which there isn't that much grip. Helping to push it through when it's a small enough circle then that's what I'll do then. I keep rolling back and forth till the center roller is all the way down. That makes a 5 inch circle. And the outer rollers are not all the way inward either. I need to roll a 6 inch circle for my rims and I can do it with no problem now. That frame support on the top, I miss hitting it with the steel by working around it. When the steel was close to it, I just bent the steel a little more and the steel missed hitting it completely. 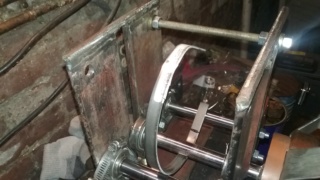 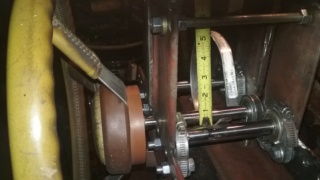 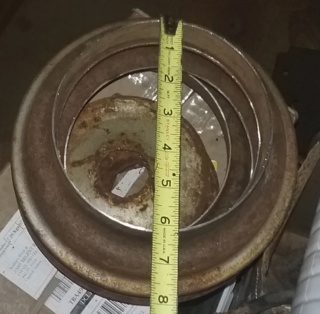 I'm happy. Now I want to see how small of a ring I can make. So I reposition the outer rollers closer in and that makes them higher too, which makes a tighter circle. Here is where using 2 clamps comes in handy. The worm screw gets in the way and all you do is tighten the other clamp to move it out of the way. I know, use a big enough single clamp but not an option right now. In the end it looks fine to me. 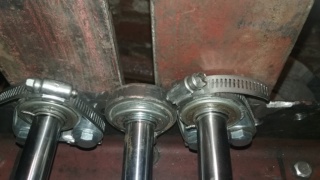 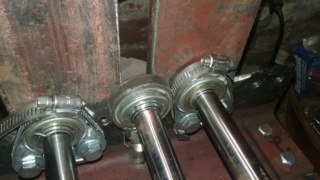 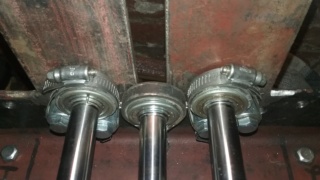 Then I roll, roll, roll, till I can't roll any more. Had to push it through while rolling, ofcourse. When the steel rolled onto itself then I move one end to the side to keep rolling somewhat. End result was a funky coil, LOL. Since I rolled onto itself, I couldn't just pull it out. IT GOT STUCK INSIDE THE TOOL, LOL. Never seen that one coming!! If I wanted to remove the metal without taking apart the tool then I would have to bend the metal, NOT GOOD. So I had to remove the center shaft to get the metal out the tool which meant cutting the wire that held the bearings on. I'll have to use hose clamps in the place of the wire to be able to reuse the stuff to hold the shaft in place. OK. 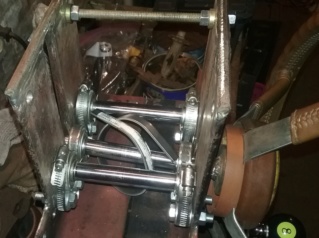 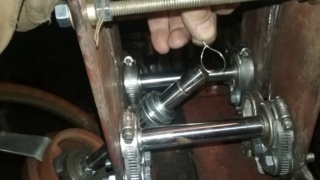 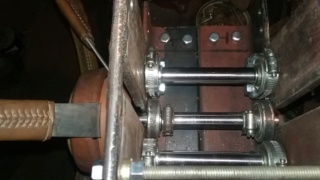 Here is the tightest circle I can make with this tool. Kinda bad for a circle too it not being perfectly round, but still round. Sometimes you just have to mess stuff up to see what happens in order to learn something extra. The max is a around 3 1/2 inch circle. The ends are waste, the straight pieces. The ends get cut off because they are not part of the circle, and are 2 inches long on each end of the work piece, in the tightest circle I can make with this tool. 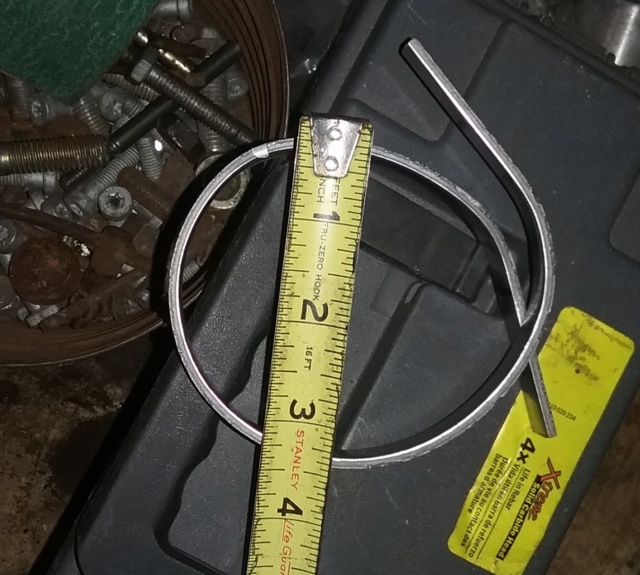 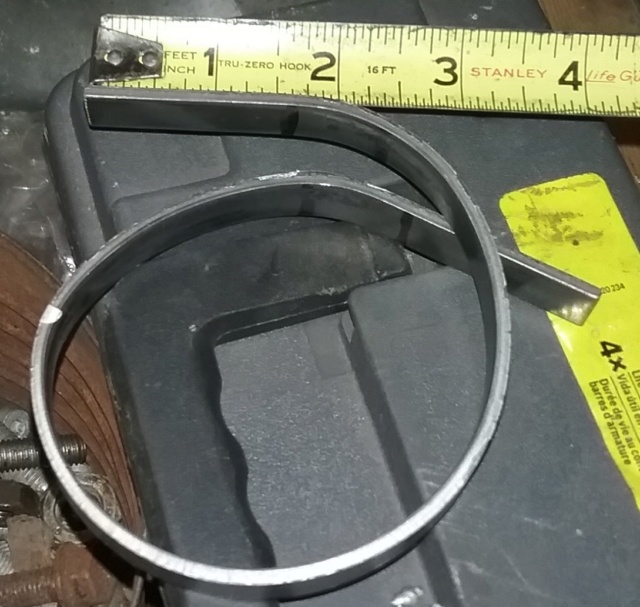 That's it. I learned a lot about this tool. The setup, how to remove the work piece, the max smallest diameter I can make to be a good usable work piece, and what is wasted after. From start to finish. I don't think I ever used one of these before, at least I don't remember. Sometimes it goes like that and the learning or relearning gets to be real fun. If you have fun, then it's never work. OK, that's it for this tool, I'm pretty sure. Later...……….. | |
| | | | prancstaman
Veteran Member
Join date : 2015-02-02
Points : 4889
Posts : 1412
Location : Cleveland,Ohio
| | Subject: Valve spring locks remover/installer July 18th 2020, 12:00 pm | |
| Hay People, It's been a while. Been working on the new Avalanche rebuilding the motor. All aluminum block 5.3L Vortec LS. I got the short block done and working on the heads now. So the tool will be to remove the valves from the head with the head off the motor, but can be used to remove the locks while still on the motor if needed. I started working on it before I thought of doing a rightup so some stuff is already done, LOL. Stuff I'm using- 3/4 inch wrench that I cut up in pieces already for this, a bracket from who knows what that I hammered flat, 2 metric bolts to fit in the head rocker stud holes and the thread for that is 8mx1.25 in the head, and a nut for the bolts but I need 2 nuts (lol) for the tool and get one more nut later on and the nut sizes are 8mx1.25 and 10mx1.5, oh and a flat washer.  I need a pivot point that bolts to the head and needs to be tall. I weld the 2 bolts together so the bolt with the 8mx1.25 is down on the bottom to screw into head and the 10mx1,5 thread is on top to fit into the bracket with the nut on top which is the pivot point. I used the flat washer for the bottom thread that screwed into the head so it don't mark up the head. 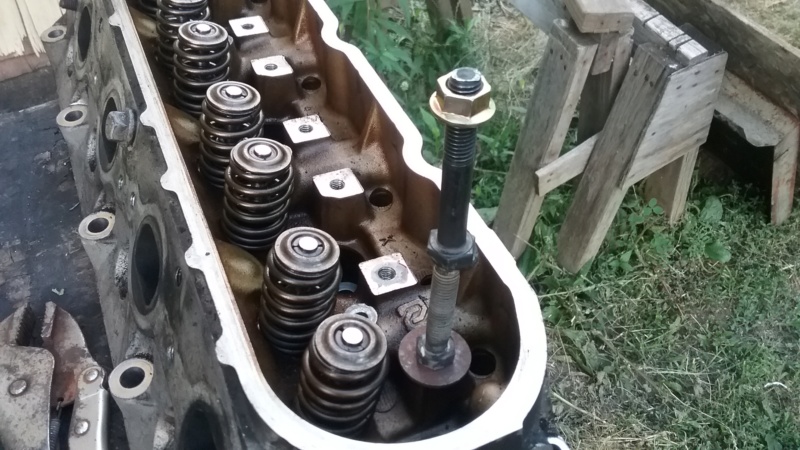 The bracket was a weird shape that I hammer straight. Already had holes and slots in it that I can use. Did one thing to bracket and that was put a bolt in one of the holes to fit the top of the welded up wrench so the top part doesn't fly out while using too. Next I weld up the cut up wrench. I cut the open end and the boxed end of the wrench off. The arm of the wrench I cut the shark fins off and then cut the arm in half. Then weld it together. I use a piece of steel to span the open end of the wrench so it goes lower then the bottom so the tool don't fly out or off the spring when using it. 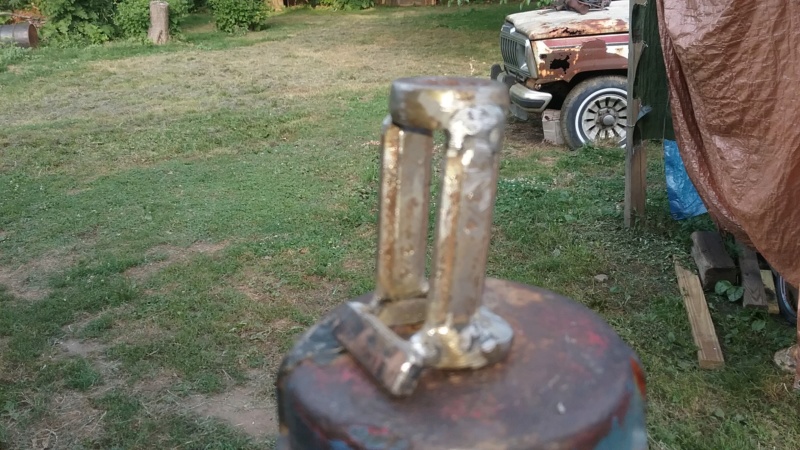 So here are the 3 pieces of the tool. 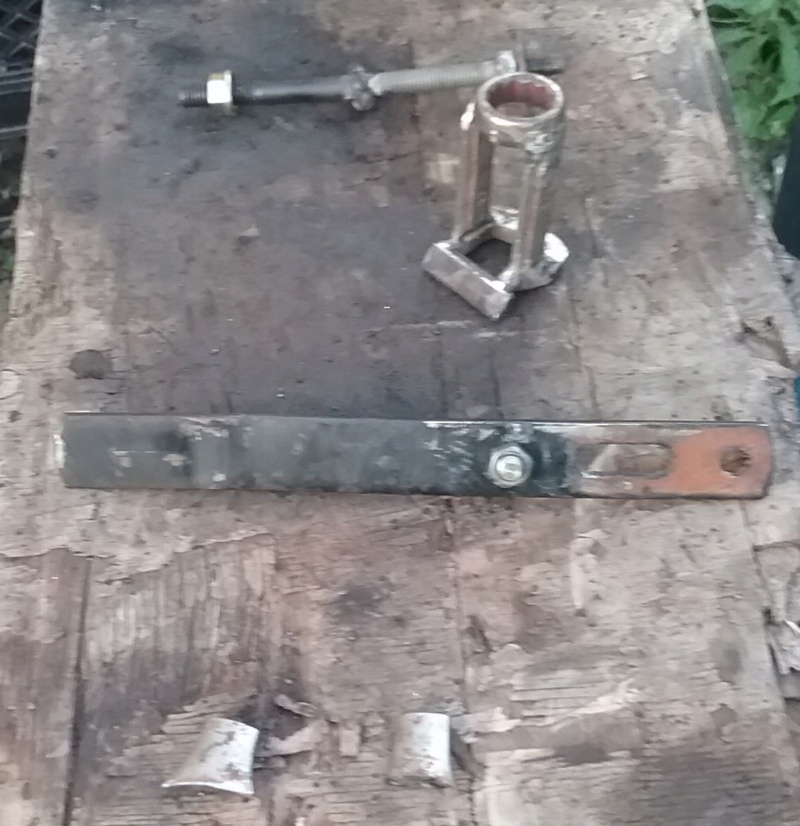 The part for the valve on how it fits on the top of the spring holder. Plenty of room to knock the keys out. 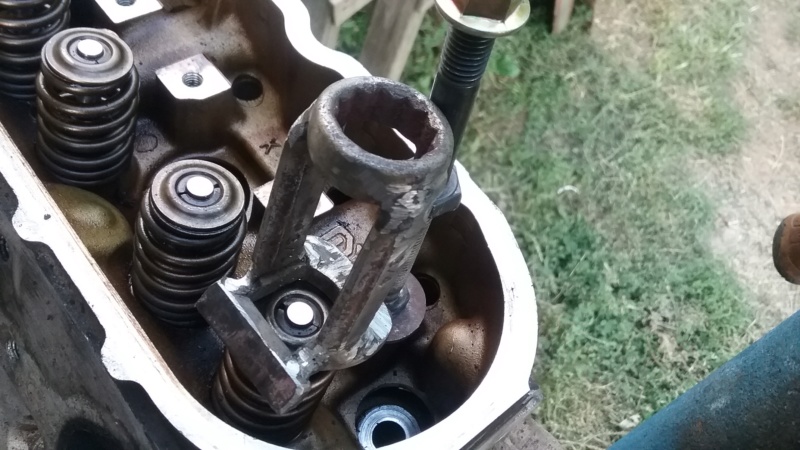 The tool put together in place on the head and it working. 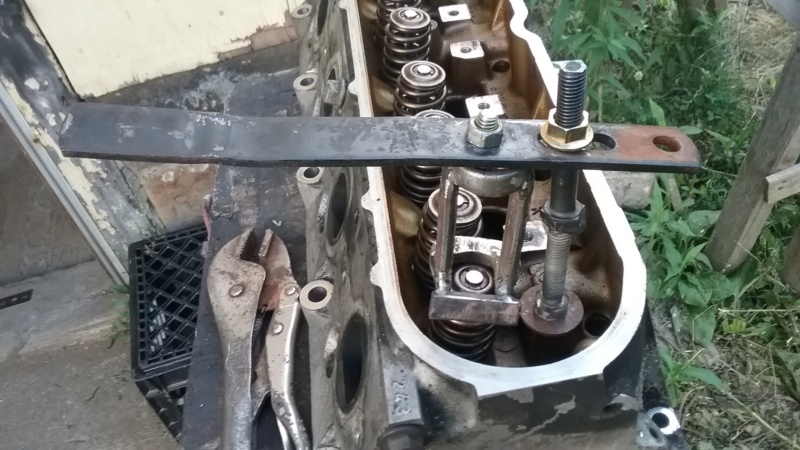 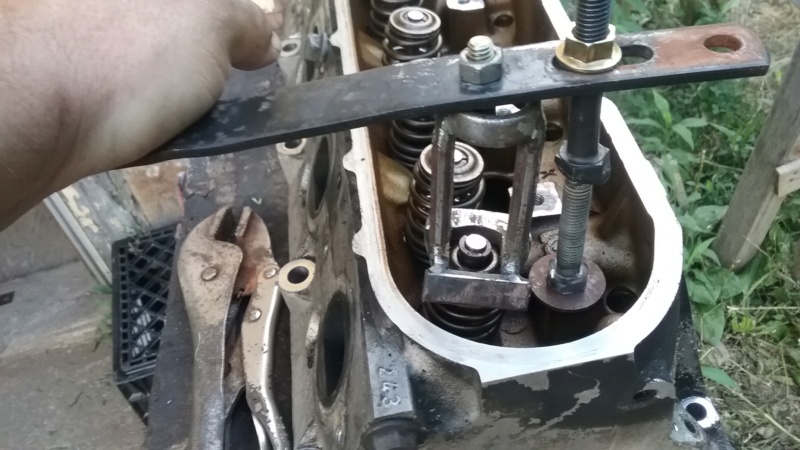 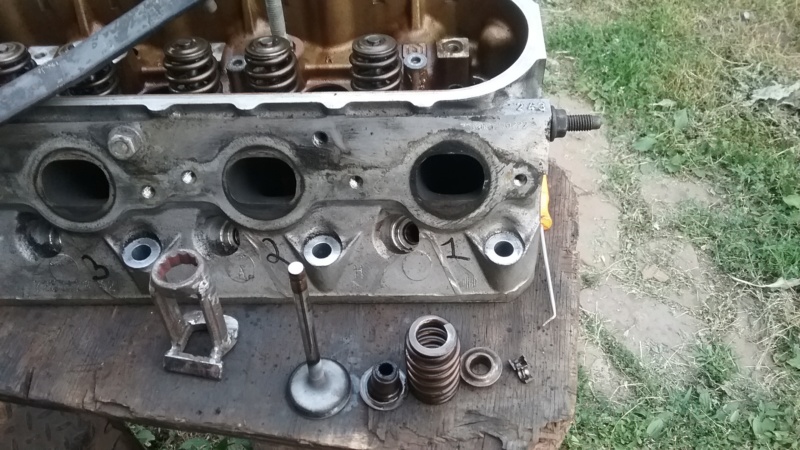 The tool took a couple hours to make. One more thing needed is there needs to be something under the head that fits in the cylinder combustion chamber to hold the valves closed. Pushing down with the tool will want to push the valve open so a socket or extension or a piece of pipe about 3 inches long that fits in the combustion chamber under the head while it sits on the table works great for holding the valves closed. And when I am done using the tool, I can pack it up and hang up in the basement, LOL. 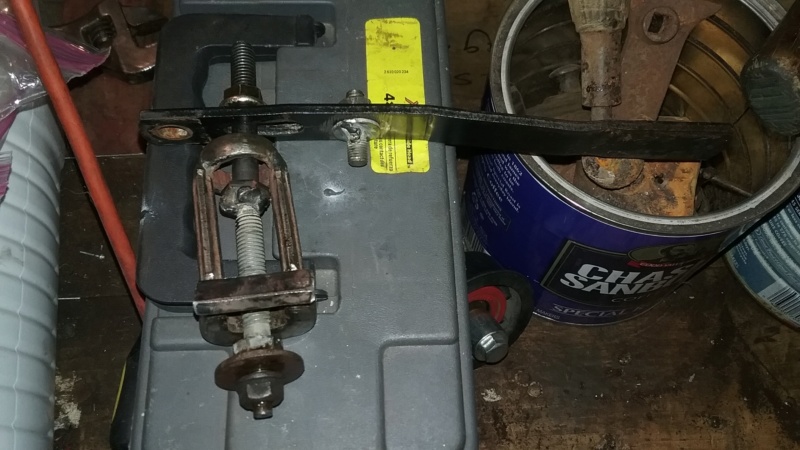 A little overview on the tool. I put the thinking into the wrench part. The bracket and the bolts welded together will change from engine to engine. The wrench part will be used from engine to engine and is the main part of the tool. For years I would use either a set of screwdrivers or a tie rod spreader to do this and pivot off the rocker turned sideways which can get sketchy and keys be flying. This is more controlled but keys can still go flying in whatever you do. I did both head on taking the valves out in under an hour without loosing anything which is a win. Later....... | |
| | | | CraftsmanQuad19
Veteran Member

2018 Build-Off Entrant
2018 Build-Off Entrant
2019 Build-Off Finalist
2019 Build-Off Finalist
Age : 23
Join date : 2016-04-12
Points : 5749
Posts : 2620
Location : Indiana
| | | | | prancstaman
Veteran Member
Join date : 2015-02-02
Points : 4889
Posts : 1412
Location : Cleveland,Ohio
| | | | | CraftsmanQuad19
Veteran Member
2018 Build-Off Entrant
2018 Build-Off Entrant
2019 Build-Off Finalist
2019 Build-Off Finalist
Age : 23
Join date : 2016-04-12
Points : 5749
Posts : 2620
Location : Indiana
| | Subject: Re: Homemade tools and stuff from junk laying around July 18th 2020, 7:39 pm | |
| Ok so the 4th gen version of the L33...whatever that code is haha. I saw it has the 243 heads, same as the LS2 but with different valves. That’s a decent factory spec engine right there | |
| | | | prancstaman
Veteran Member
Join date : 2015-02-02
Points : 4889
Posts : 1412
Location : Cleveland,Ohio
| | Subject: Re: Homemade tools and stuff from junk laying around July 18th 2020, 7:46 pm | |
| The 4th gen engine is the LS2. Pretty hot motor, 310 hp in stock form. Yes, 243 head. Did a compression test before I blew it apart and was 180 psi. It's got some punch in the top end. Should have a little more after the porting, just a few spots to improve flow a bit in these heads. | |
| | | | TheBeal
Veteran Member

Age : 29
Join date : 2013-06-06
Points : 5506
Posts : 1398
Location : Central PA
| | | | | prancstaman
Veteran Member
Join date : 2015-02-02
Points : 4889
Posts : 1412
Location : Cleveland,Ohio
| | Subject: Re: Homemade tools and stuff from junk laying around July 19th 2020, 11:25 pm | |
| @TheBeal Yah, I couldn't justify the expense with how many engines I have done. Those tools are usually a couple hundred dollars for a good one. I would just get by with the pickle fork just about every time, LOL. Same thing with a piston ring compressor, been using a piece of sheet metal rolled up with a couple hose clamps, and works every time. Even made a video on my channel about making one. Can't justify the $20 expense on buying a cheap one when I can make one for free, LOL. | |
| | | | prancstaman
Veteran Member
Join date : 2015-02-02
Points : 4889
Posts : 1412
Location : Cleveland,Ohio
| | Subject: Valve spring locks remover/installer part 2 July 28th 2020, 11:16 pm | |
| Hay People, Little update on this valve spring lock tool. This tool works great most of the time, as long as the cylinder head doesn't move around while pressing down. I hold my breath when pushing down so a sudden breath doesn't push the head sideways and the keys go flying away. Actually happened once and luck was on my side and found the key quick, LOL. But most times it works perfect and the keys pop right in. Here's a few pics on me putting the heads back together. 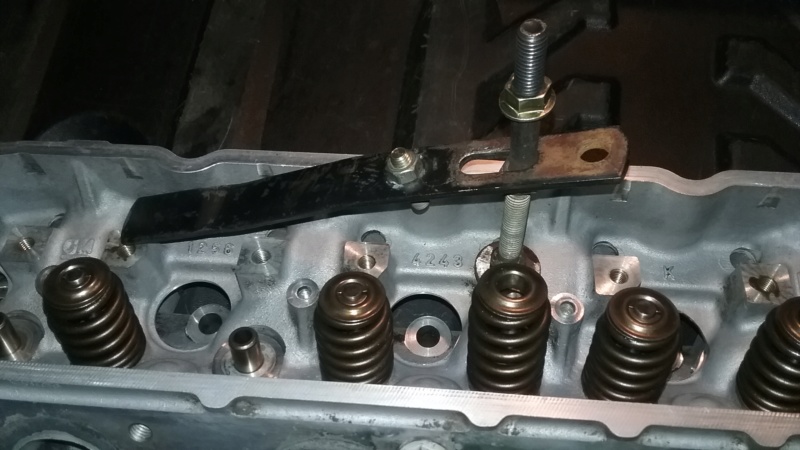 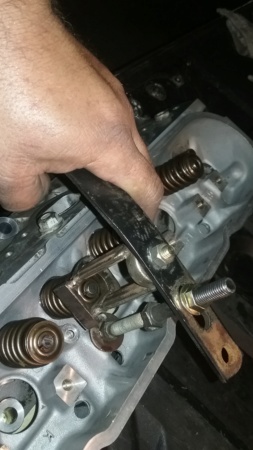 The upgrades will probably come later as I use the tool. Need away to hold the head and push up on the valve at the same time so pushing down on the spring will not push the valve down. Maybe a plate with holes that go through the head bolt holes with adjustable bolts to keep valves closed firmly. Found a strong magnet to use where it will be on a rod to get the keys out when the retainers are pressed down. Just ideas right now. OK, it's late and bed time, Later.... | |
| | | | prancstaman
Veteran Member
Join date : 2015-02-02
Points : 4889
Posts : 1412
Location : Cleveland,Ohio
| | Subject: Homemade scratch start TIG welder part 1 October 18th 2020, 1:26 am | |
| Hay People, Been a while, again. Finishing up the work on the wife's Avalanche. Got it going and runs strong, still some work to do though. Evidently the previous owner drove for a while when the engine was messed up and screwed up the catalytic converters. So, new cats is on the menu. This truck takes the regular ones (cheap one's) LOL. But spent the money on a good name I know will last, Magnaflow. I got those on my truck and worth every penny I spent on them. I bought the weld in cats, not the bolt on Y pipe which I did on my truck. I can MIG weld them in with no problem but my MIG is gasless flux core for mild steel. That means the welds would rust out on the stainless steel pipe. I am so done with my exhaust systems rusting away. So, I'm going to TIG weld the cats in with stainless steel filler rods so the exhaust system will last, hopefully till the truck falls apart and I pull off the Y pipe for the next truck some 30 years from now, LOL. So now, build a scratch start TIG welder, is all I need, LOL. I got all the parts to build it, now to just build it. Figure I write it up here even though everything is bought or modified. Lets get started. This part (part 1) will be on the welder being used. For the TIG welding, I need a power source which is a Craftsman 100 amp arc welder. 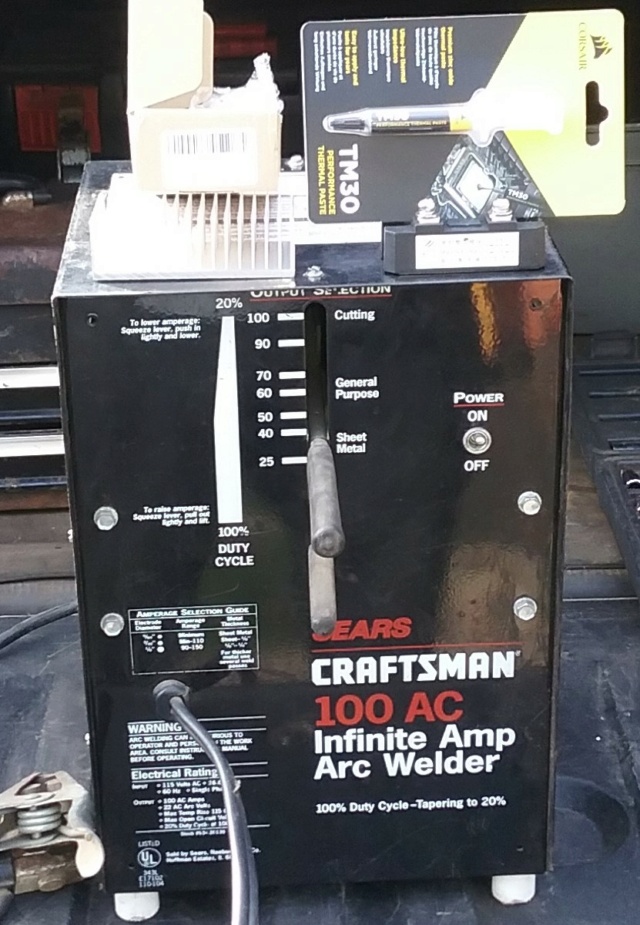 To do the TIG welding, this welder is an AC arc welder and needs to be modified to be a DC arc welder. 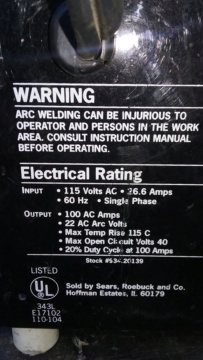 A bridge rectifier will be added to convert the welder from AC to DC output. Plus other goodies to make it work, like the heat sink fins for cooling the rectifier, and the heat transfer compound or thermal paste (same thing) to transfer the heat from the rectifier to the heat sink fins. The thermal paste goes between the 2 so the heat radiates easier through the 2 parts with a physical contact, on how it works. Got the rectifier and fins through Amazon, and the paste at Best Buy. 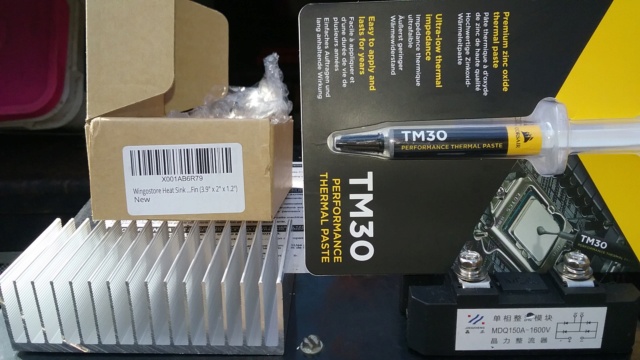 Crack this egg open and have a looky see inside. This is the power input side. 110 v AC in. White wire (neutral) goes to primary transformer and fan, green for ground and goes to the case, black goes to the on/off switch and then to power fan and primary side of transformer which is the power feed wire. The plastic slats in the middle of the transformer is for the power output and slides up and down, blocks something I guess, this is the witchcraft part. Yes, there is stuff even I don't understand so it is witchcraft to me, LOL. I will not be touching anything on this side. Everything is as it needs to be. 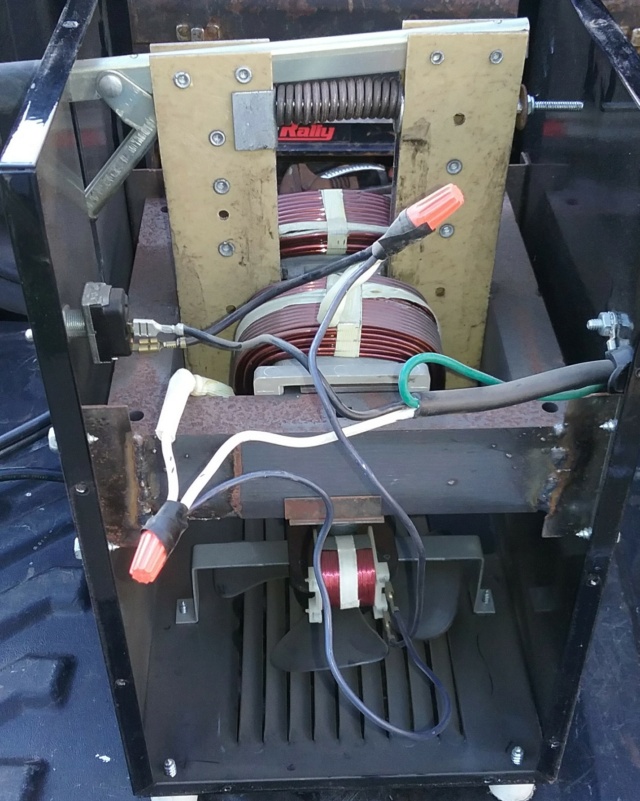 The other side is the business end of things. The output of the transformer from the secondary side of the transformer. This side I will be hooking up the rectifier too. 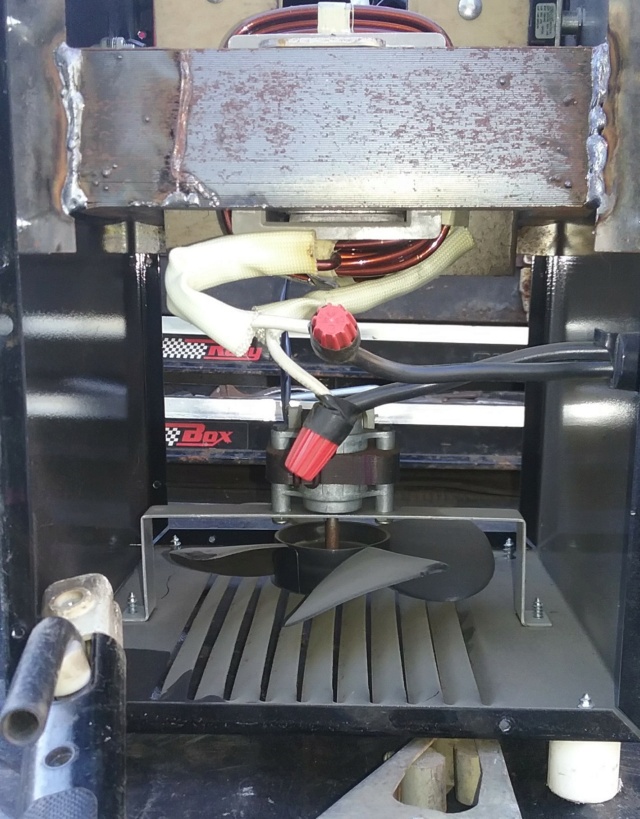 I take off the leads. I want to make a fan shroud too for better cooling. I solder ring terminals on the transformer output and hang the rectifier on the ring terminals.  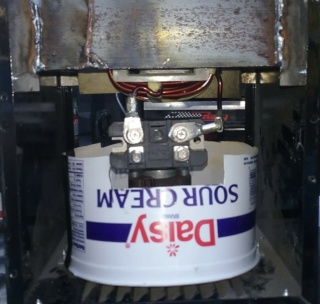 I rework the output leads and solder ring terminals on them. Feed the leads back into the case. 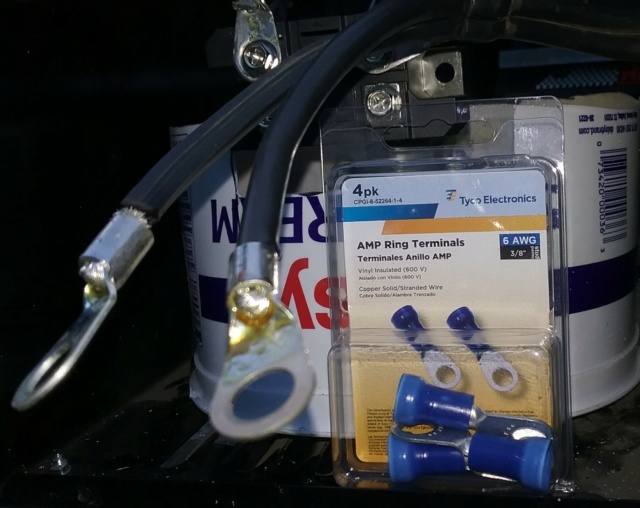 Time to bolt the fins to the rectifier. I want to say I drilled and taped the holes for the bolts but no, I drilled the holes and forced the bolts through and they just happen to make the threads, LOL. I draw an outline on the fins smooth side and paste the thermal paste (heat transfer compound) on the fins and then place the rectifier back on and bolt the 2 together till the paste oozes out the sides. Now how this works is the rectifier has diodes inside that heat up and the heat moves to the metal plate on the under side of the rectifier, then moves to the paste, then from the paste to the fins and is carried away by the moving air from the fan. This is how the cooling part works and is important for reliability on it working for a long time, hopefully.    I bolt in the rectifier. So the rectifier is marked on how to wire it up. For the transformer output, doesn't matter on how to hook it up to the rectifier since the power is AC current and the markings on the rectifier for these leads are the wavy lines. The output for the rectifier matters because the power is DC and is marked as + and - marks. 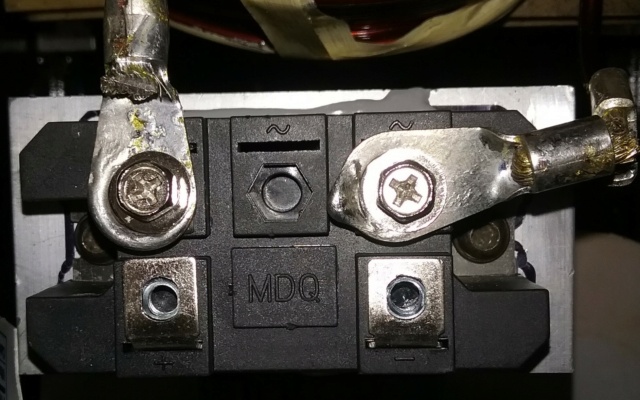 I hook up the stinger and ground clamp leads to the rectifier. The positive side goes to the stinger and the negative to the ground clamp. This will be explained why later, other then the obvious reason. I place a piece of plastic between the leads so no accidental touching happens later on, and is taped in place. 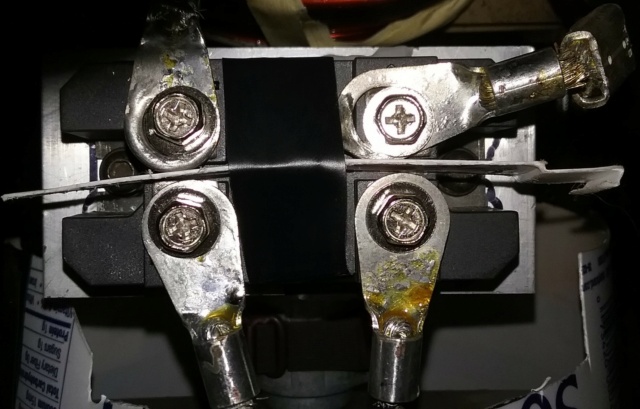 I also make sure that the output from the transformer is not touching anything that will create a short or zap me. 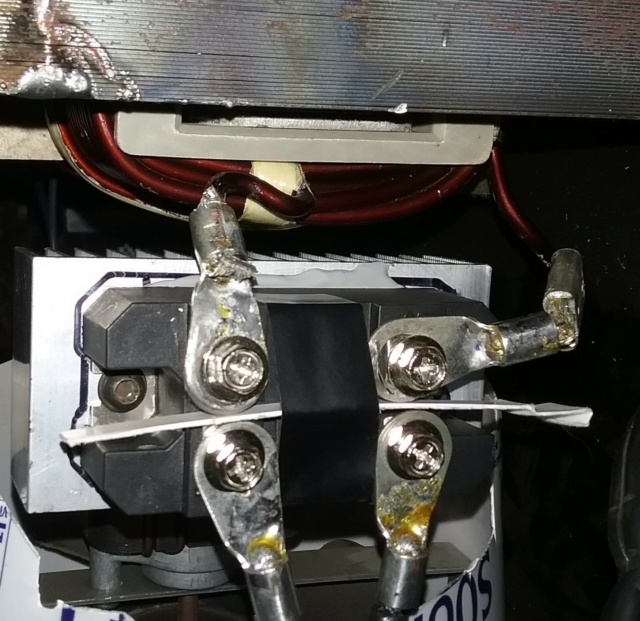 So here's the whole shebang. Everything strapped in and tied in, ready to go. By the way, the fan sucks downward. should still cool fine, I think, LOL. 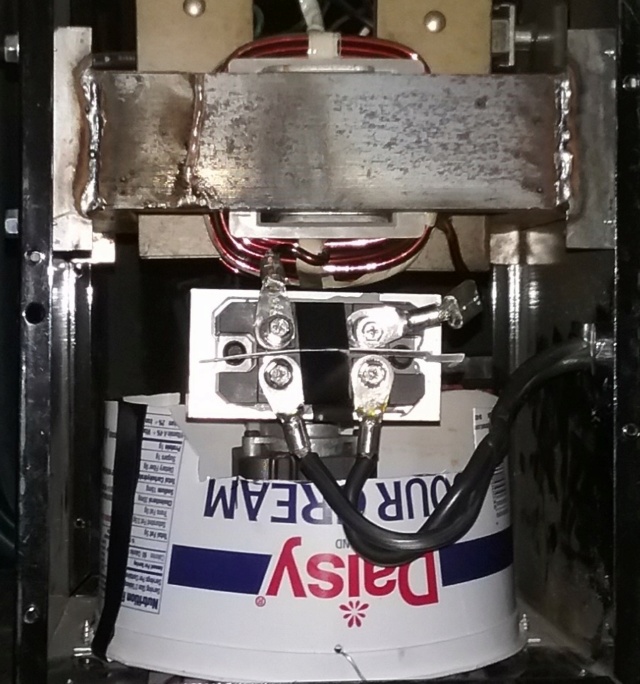 I test the output for DC. It works!! 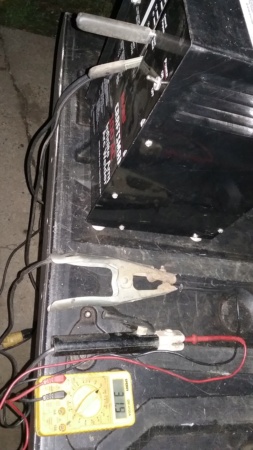 I then test how it welds. It is a welder. Maybe it would make welding with a stick easier. NOPE, I still suck at it! But it does work, LOL. 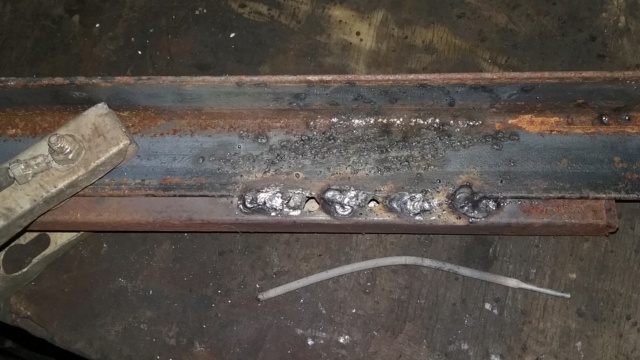 To be continued........... | |
| | | | prancstaman
Veteran Member
Join date : 2015-02-02
Points : 4889
Posts : 1412
Location : Cleveland,Ohio
| | Subject: Homemade scratch start TIG welder part 2 Conclusion October 18th 2020, 10:16 pm | |
| Hay People, The conclusion of this build. Was collecting parts for this build for a while now. Pieced together rather quick since I just had to modify the old buzz box and buy everything else. Had that buzz box like 20 years and was just sitting in my basement since I got a Gasless MIG. I suck really bad at stick, LOL. This was a chance to give it new life. Real easy to modify evidently. I might redo the leads with some jumper wires down the line. These seem a little stiff. We shall see. This part will be showing what I bought. This stuff was collected in under a year. Pretty straight forward to put together. Let's get started. Got the torch head from Eastwood. They was actually cheaper then Harbor Freight this time, and at the time I bought the torch head Harbor Freight didn't have any kind of torch heads for sale separately. It was like a month or two later I seen them in the store and was like $10 more for the same type. But buying a Harbor Freight torch head would mean certain things can only be from Harbor Freight to keep it working (consumables), I hate that. The Eastwood torch head can use anything from anywhere. I would have paid extra anyways just for that. I walked in the Eastwood store and told the salesman what I was doing and he suggested what I bought. This is a torch head for doing sheet metal mainly and up to 3/16 inch plate steel. Max of a little over 120 amps. Perfect for my old buzz box. Is the smallest torch head with the valve on the torch head. Came with a consumable pack of 1 tungsten (gray tip), nozzle cups of sizes 4,5,6, tungsten holders (3) and long and short torch caps on the back end of torch. Screws right into the regulator. And a quick connect for the power cable. Paid like $89 plus tax for it. 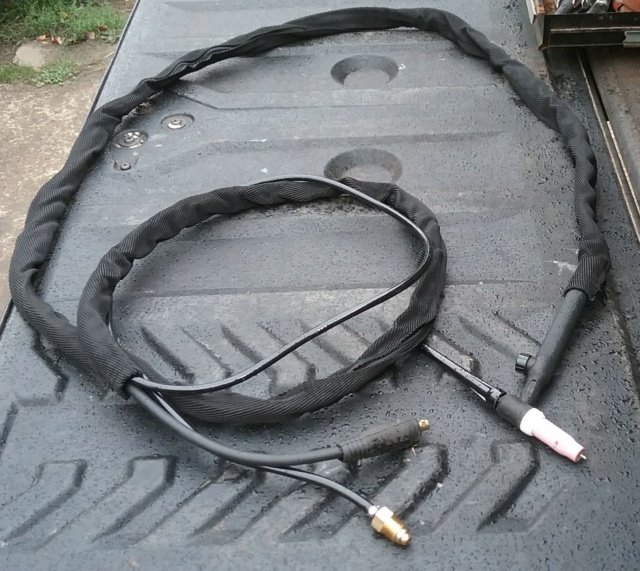 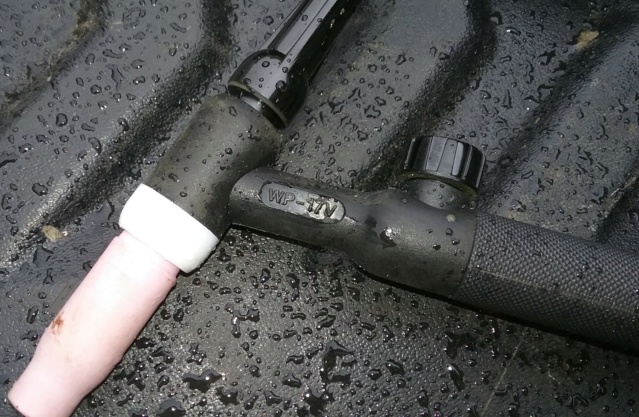  Also bought an Eastwood regulator. This is not a flow meter, there is a difference between the two on how they show what is going on but that is it. You don't need a flow meter regulator and is only favored to have one. It is personal preference for this item. Plus a $60 price difference. The end result between the two is the same, gas comes out of both the same way. I chose a pressure regulator and costed like $35 plus tax. 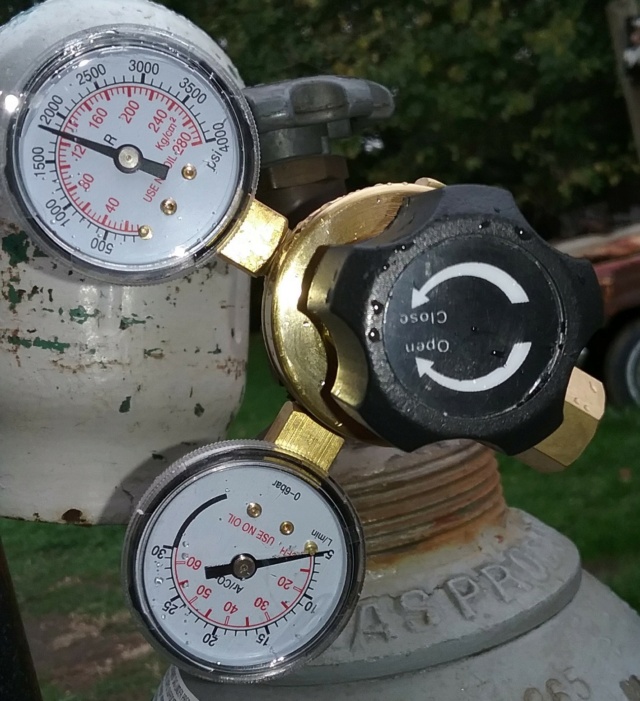 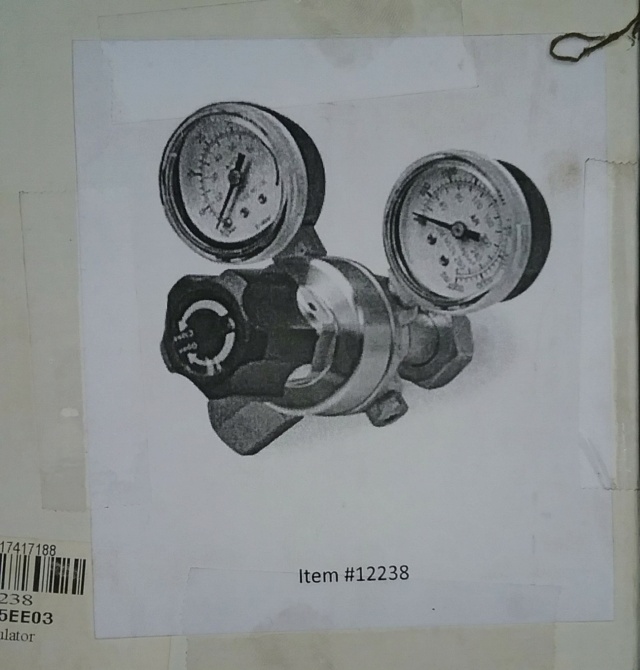 OK, the last thing bought was a tank for the 100% argon gas. It's not too small to where every project I have to fill it, and not too big that I can't move it around. It's a 4 foot high tank, whatever that is, LOL. Found it on offerup from a local guy who sells them and other tanks too. And when bought it is certified for that safety thing, and was full of gas at 2000 psi. I paid $175 for it. Even came with that screw on cap thingy for safety. 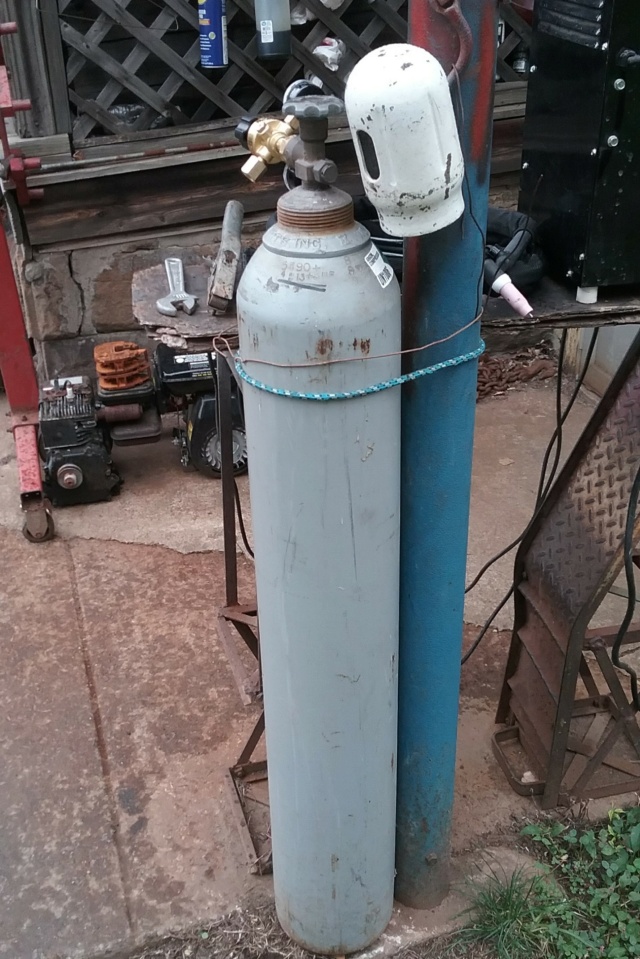 Pretty much screw on the regulator, plug in the welder, screw on the gas line for the torch, connect the leads. The negative lead from the welder goes to the power line for the torch, and the positive lead is the ground for the part being welded. 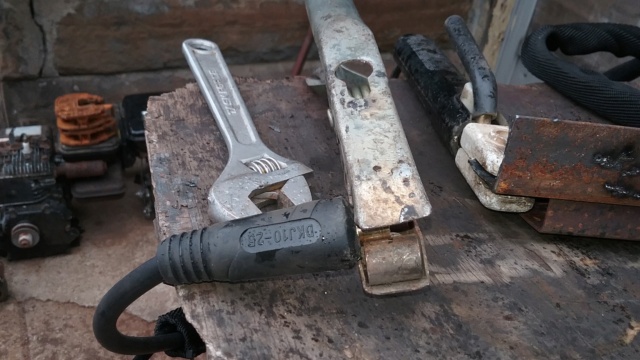  Did one weld pass. Seems to be like striking a stick for arc welding to start it. None the less it welded. It worked, LOL!!! Then it started to rain, great. The weld I did is the long bead in the middle of the metal, the seam weld was done the night before with just the stick welder. Seems I suck at both, looks like I got to change that.  Got it working finally. Got a spot in the basement for it, LOL. Got to finish running power for it. A spot by a window. I can weld inside or throw the leads out the window and weld outside. Should be awesome on what I can weld now. OK, Later...... | |
| | | | RichieRichOverdrive
Moderator
2018 Build-Off Entrant
2018 Build-Off Entrant
2024 Build-Off Entrant
2024 Build-Off Entrant
Age : 21
Join date : 2016-10-29
Points : 6602
Posts : 3628
Location : Lewisburg, KY
| | | | | prancstaman
Veteran Member
Join date : 2015-02-02
Points : 4889
Posts : 1412
Location : Cleveland,Ohio
| | | | | RichieRichOverdrive
Moderator
2018 Build-Off Entrant
2018 Build-Off Entrant
2024 Build-Off Entrant
2024 Build-Off Entrant
Age : 21
Join date : 2016-10-29
Points : 6602
Posts : 3628
Location : Lewisburg, KY
| | | | | prancstaman
Veteran Member
Join date : 2015-02-02
Points : 4889
Posts : 1412
Location : Cleveland,Ohio
| | Subject: Re: Homemade tools and stuff from junk laying around October 20th 2020, 12:05 am | |
| @RichieRichOverdrive A couple reasons I wanted a TIG welder. In high school I was taught oxy/acetylene welding, I want to take it to the next level and rekindle those skills. Upgrading my cheap MIG would make to where I can't move it from work sight to work sight when I need it with a bottle on it. Plus I don't make that much money welding stuff for people to justify the heavier and more expensive equipment by keeping it mobile. But I will be upgrading my Harbor Freight MIG with the same kind of rectifier and adding capacitors to it. Make it into a DC MIG welder. Should be a good cheap upgrade. I'll post that here also. | |
| | | | Sponsored content
| | | | | | | Homemade tools and stuff from junk laying around | |
|
Similar topics |  |
|
| | Permissions in this forum: | You cannot reply to topics in this forum
| |
| |
| | Who is online? | In total there are 18 users online :: 0 Registered, 0 Hidden and 18 Guests
None
Most users ever online was 412 on January 7th 2023, 7:59 am
|
|