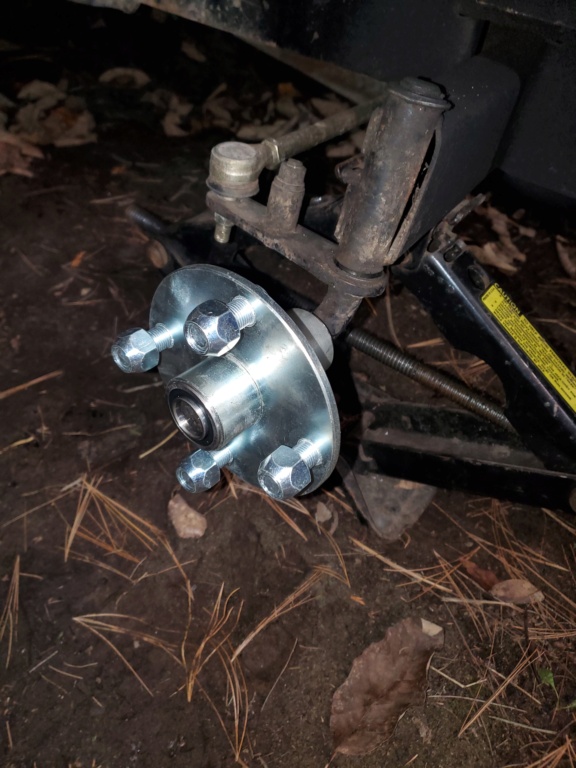
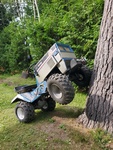
I've finally gotten around to tinkering on tractors after a bit of a hiatus, been pretty busy with work and things that need doing but now it's time to tackle 2 things I've been wanting to: put bigger tires on the front of this rig and find a way to use the hubs I got from GPS several months ago!
I've not been able to use them yet because they're too long for the spindles on any of the tractors I want to use them on but that changes now!
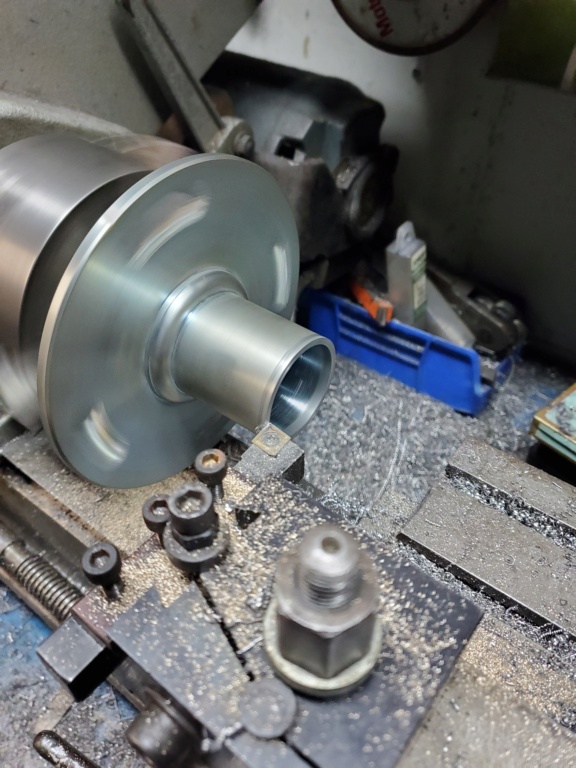
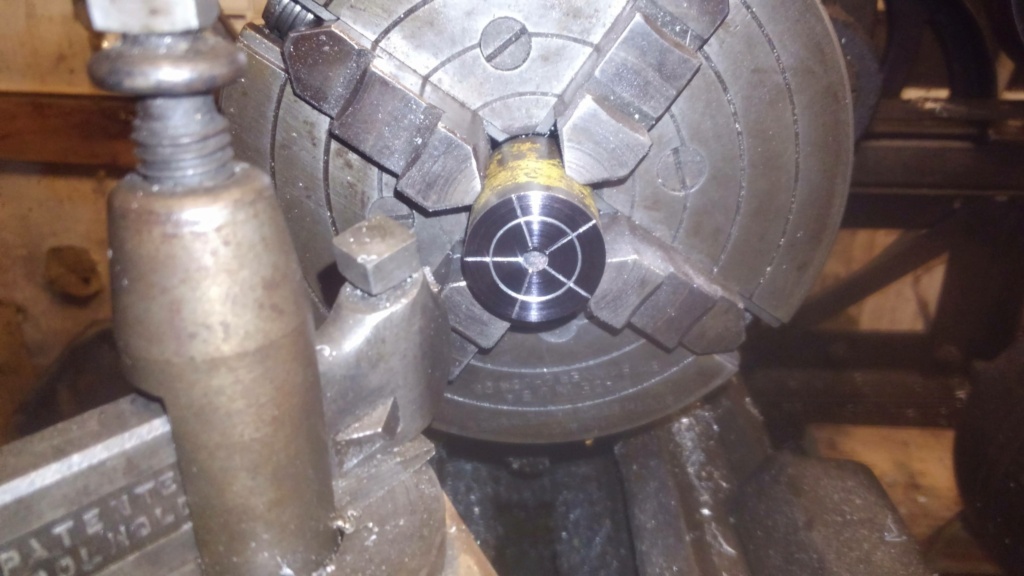
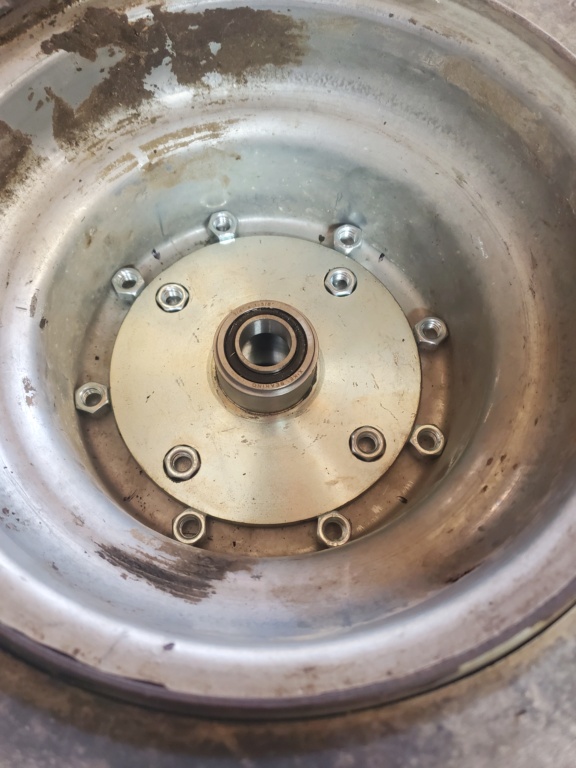
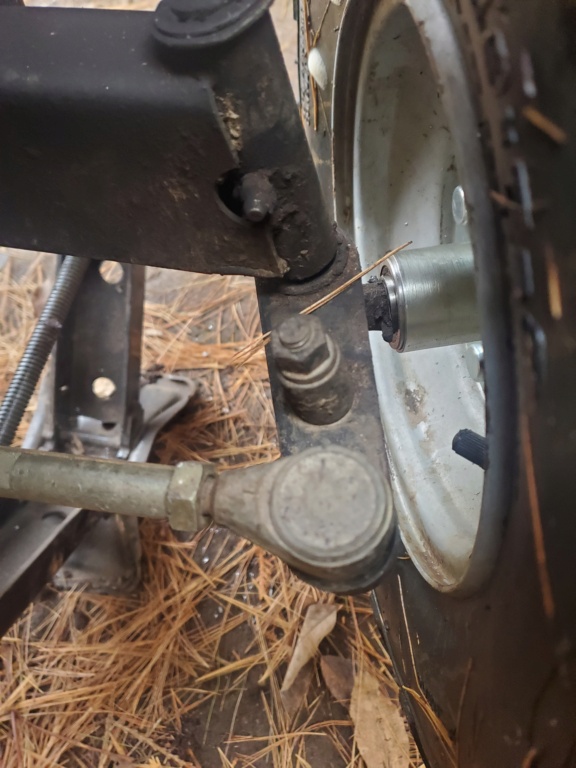
A quick measurement told me I need to take a minimum of 3/8" off for them to work but instead I decided to take a 1/2" (1/4" from each side) to make space for the front washers. After banging out the bearings and wheel studs I chucked them up in the lathe, markered them, scribed a line and had at it!
Looks like I nailed it first time, just enough freeplay for a shim washer if I want to install one. In the future I'll probably add grease zerks and remove the inner seals on the bearings but for now I just want to get them installed.
For my next trick I'll be devising a centering ring that fits over the hub and in the center hole of the wheel so I can mark and drill the new mounting holes cocentric but that can't happen until I scrounge up the right piece of material to do so...
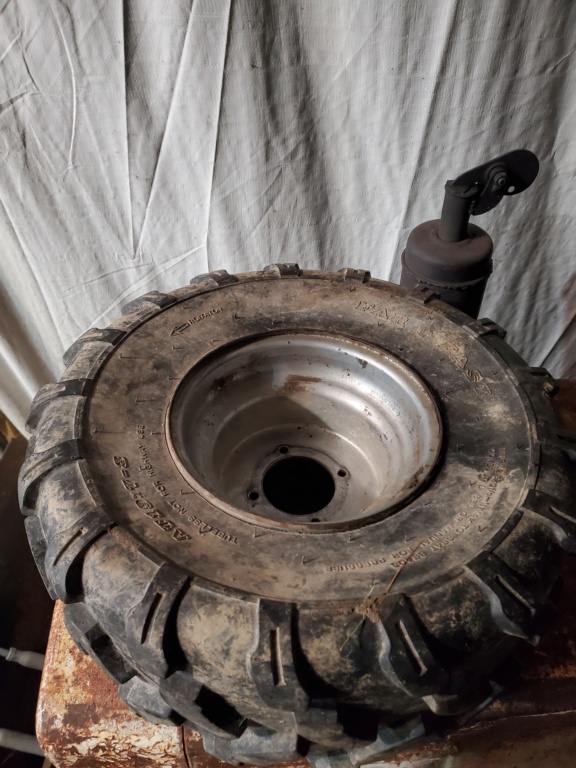
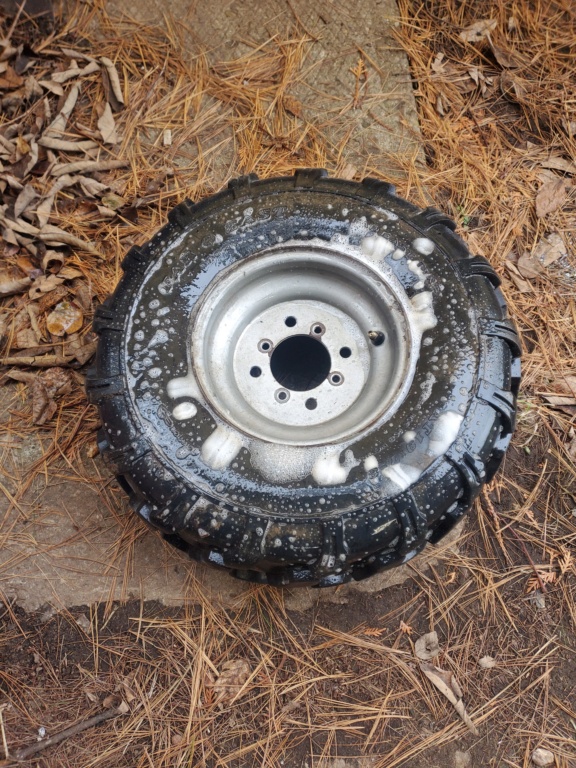
Here's one of the new/used wheels and tires I scored a few weeks ago, got 4 of them for $100! 2 are great and 2 are okay... these are the okay ones.
Something cool about the parts I'm using is that because both the hubs and the wheels both have 2 different offsets each I'll have my choice of 4 possible offsets to play with to really be able to dial in clearance and front width!
Feels good to get even a little something accomplished!
MightyRaze, TechnoChicken, PizzaKitty26 and Hammernco like this post
MightyRaze Administrator
2017 Build-Off Finalist
2017 Build-Off Finalist
2018 Build-Off Top 3 Winner
2018 Build-Off Top 3 Winner
2019 Build-Off Top 3 Winner
2019 Build-Off Top 3 Winner
2021 Winner of Winners
2021 Winner of Winners
1st Place Build-Off 2022
1st Place Build-Off Winner 2022
10,000 POSTS!
10,000 POSTS!
2024 Build-Off Entrant
2024 Build-Off Entrant
Age : 49 Join date : 2016-09-06 Points : 15341 Posts : 10809 Location : Oklahoma
Very nice! Nicer to have equipment to do it right! Never thought about knocking the studs out and redrilling for atv tire bolt pattern. (something I will keep in mind)
Sure I guess you could go that way as well but I knocked the studs out for reasons times 3... 1) to fit them in the lathe 2) to be able to mark the wheels for drilling 3) to be able to flip the hubs around to play with the backspacing before finalizing.
Side note: You fellas in the States are lucky when it comes to these parts, I got hosed on these! After the currency conversion, shipping and a hefty surprise duty fee I paid double what you all would, had I known I never would have ordered them and I never will again
Side note: You fellas in the States are lucky when it comes to these parts, I got hosed on these! After the currency conversion, shipping and a hefty surprise duty fee I paid double what you all would, had I known I never would have ordered them and I never will again
YIKES, that sux. I could just imagine. Doesn't help for this, but looking to use amazon.ca for the B/o prizes.
Sure I guess you could go that way as well but I knocked the studs out for reasons times 3... 1) to fit them in the lathe 2) to be able to mark the wheels for drilling 3) to be able to flip the hubs around to play with the backspacing before finalizing.
Side note: You fellas in the States are lucky when it comes to these parts, I got hosed on these! After the currency conversion, shipping and a hefty surprise duty fee I paid double what you all would, had I known I never would have ordered them and I never will again
A lot of parts in Canada are like that.
Brianator likes this post
RichieRichOverdrive Moderator
2500+ Posts
2500+ Posts!
2018 Build-Off Entrant
2018 Build-Off Entrant
2024 Build-Off Entrant
2024 Build-Off Entrant
Age : 21 Join date : 2016-10-29 Points : 6891 Posts : 3816 Location : Lewisburg, KY
Hub looks good on here! Why not drill the rim's bolt pattern into the hub? That would be a little bit more manageable I think, and you could actually use the lathe to scribe a circle at the bolt circle diameter of the rim, and then you can find a way to index 90° and then scribe four more lines, then center punch and drill the intersections of the four lines with the circle!
I did that exact thing with my south bend a few years back, except with 5 divisions.
But if you don't want to drill holes in your new hubs I guess I'd understand
Lol. You smashed the nail right on the head there @RichieRichOverdrive I don't want to drill the hubs even though I know it's a much easier route, if I was in a panic it'd be done already but I'm not so nope! Lol. I don't like the idea of swiss cheesing them nor do I want to fill those massive holes with weld for strength, I do hope to find stronger wheels with the right bolt pattern in the future plus the challenge of making a centering ring for me is part of the fun!
Excellent advice and I do appreciate it though! Have to say I'm a little jelly of that 4 jaw chuck, one is definitely on my wish list as is a vertical milling plate and making a tool post drill jig.
You should be able to find a 4 jaw chuck pretty cheap, could probably get one of the Amazon ones and be just fine. The nice part of a 4 jaw is the accuracy is all up to you. Back when I did that project I posted I only had a 4 jaw and was always wishing I had a 3 jaw. Better than wishing I had a 4 jaw though. Also a milling attachment is handy, but I’ve just set up an angle plate and clamped pieces where I wanted them cut. I had plans to set up my compound slide with a little vise for a milling attachment but never got around to it before I got the Bridgeport. And by toolpost drill, do you mean a toolpost drill chuck or actually having a powered spindle on the cross slide for off center drilling?
Also if I were using those hubs I’d definitely be bracing them up. I know I’d have those thin plates all bent up pretty quick. Though I don’t suppose your riding style is quite as hard as mine
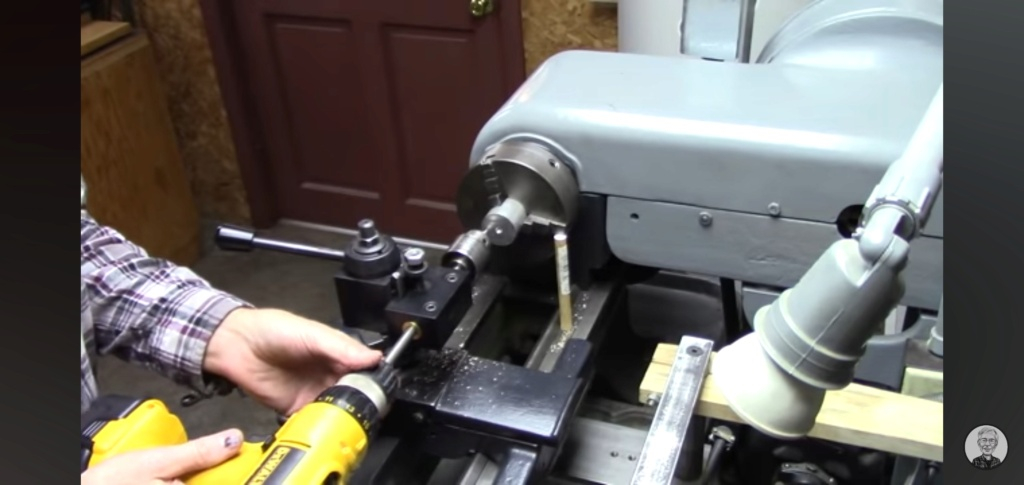
@RichieRichOverdrive maybe, it's a Myford ML10 so the right parts aren't as common but they are out there, not in the budget atm though. The tool post drill jig is for using a drill to drill off center, I like how this fella made one with an existing boring bar holder.
Dude, I don't think anyone's riding style is as hard as yours! Lol. I haven't been TOO easy on my machines and have been slowly building this one up to be able to take a beating, it has a great solid frame, a 633a, I rebuilt the steering to be nearly bulletproof and have other reinforcement mods planned so reinforcing the hubs is a good idea along with adding gussets to the spindles but I haven't really been able to get out much and it's taking the wind from my sails (a big reason I've barely been working on them). It's not too safe going out on your own (or as fun) and my riding buddy moved to the east coast so when I do go out on my own I'm just taking it easy (also not as fun). I really enjoy building but if I can't find people to ride with (I've been trying for a couple years) it's only a matter of time before I give up on it and stick to building up my utility tractors I can actually use and enjoy regularly...
Next summer will most likely be the deciding factor when it comes to that so I'll cross that bridge when I get there.
Just figure out your spindle thread and find a chuck, spindle types have been fairly uniform for about a hundred years now! I can go on ebay and find a chuck or backplate for my 1927 south bend super easy, it's just a standard 1 1/2-8 spindle thread. Yours may be the same!
This roper is definitely a tough tractor! Sears 3/4 spindles seem to have the benefit of usually just bending instead of breaking like wheel horse spindles. Reinforcement is good for them, I seem to remember mr.moo reinforcing the spindles on his baja sears. I think I reinforced the ones on budgie too, that was after dad broke one though
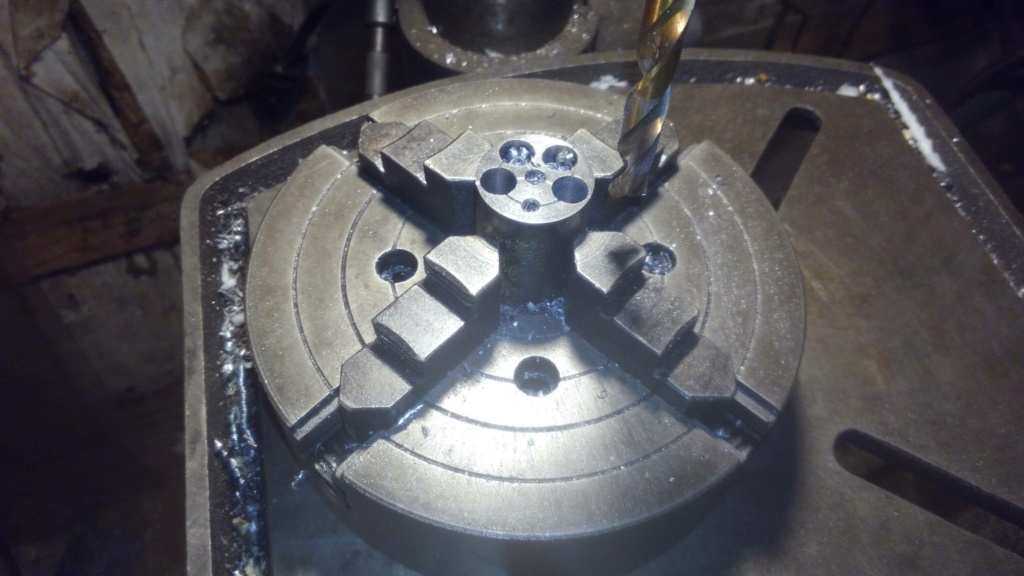
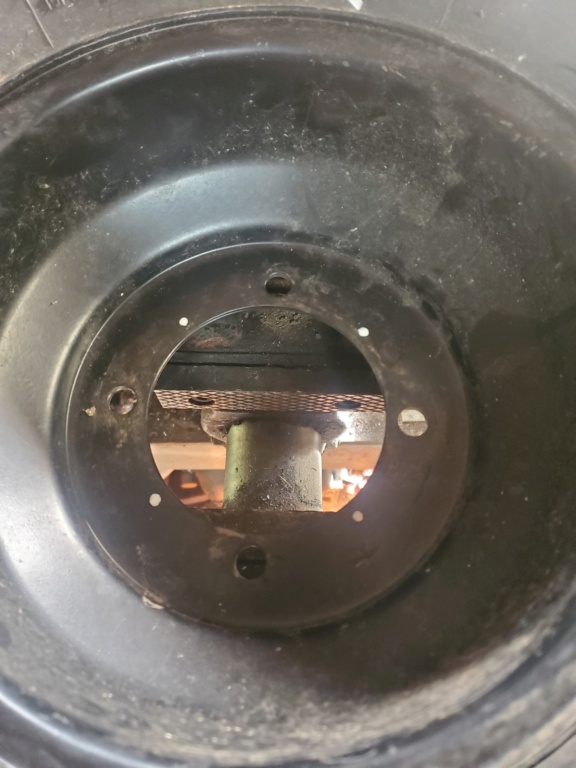
After a couple of evenings of mild frustration trying to find the right piece of material to make a centering ring I ended up going really low tech while getting reasonable accuracy! The 5/16" nuts were a snug fit between the hub and the wheel, the nuts in the stud holes just needed the edges knocked off to fit so I could get good center marks.
The "matching" wheel was not a match! It had slightly different profiles so I thought what the heck I'll just use the nicer rims and tires (that I actually want to put on the Massey) but it turned out the center bore of those wheels is just too big...
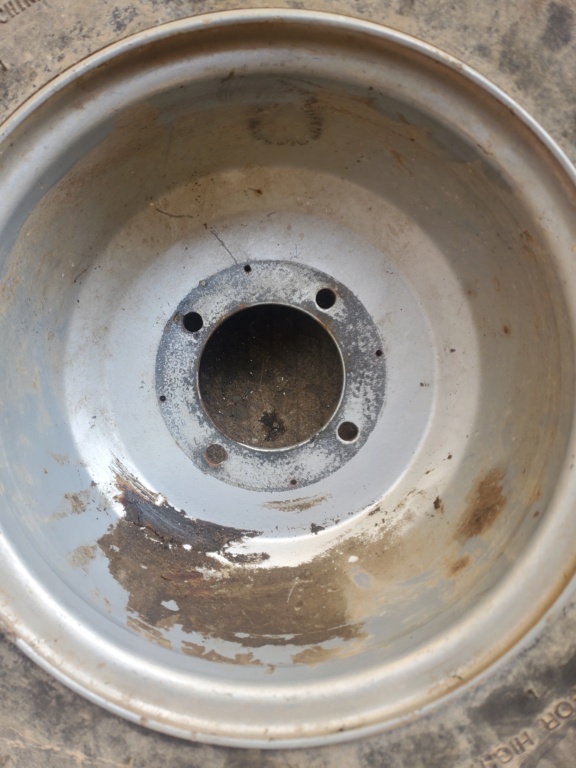
... so I carried on with the others. Based on the location of the pilot holes in regards to the old hub mark I'd say I pretty much nailed it!
Once all the holes were drilled I aired them up and sprayed them with soapy water, wouldn't you guess that the one tire has alot of leaking cracks in the sidewall... the other tire has some small leaks too so I think I may try the "ATF in the tire trick" and if that doesn't work then they'll get tubed!
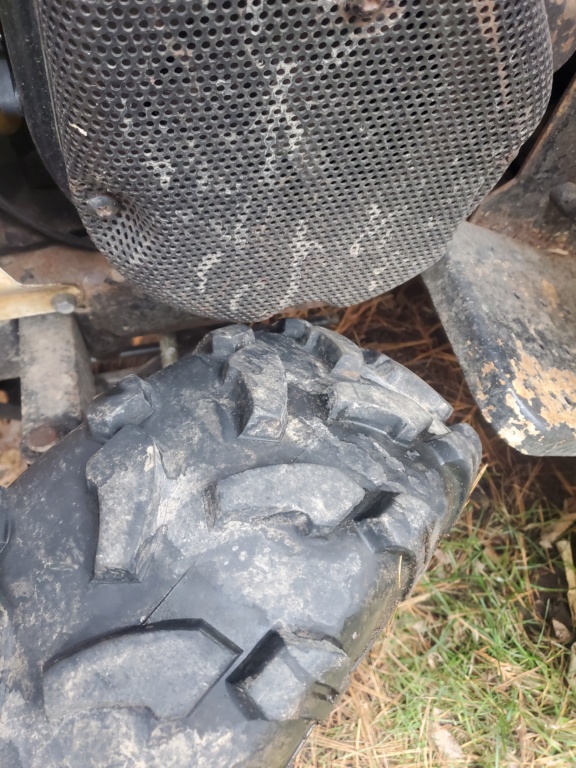
With them on it was time to check clearances. No issues with the footboards but I'll have to either turn the muffler forward or relocate it. At full articulation and turn on one side the tire will hit the frame and on the other side the fan guard but it does still turn pretty tight so once I limit the steering it will be a non issue. In the future I might replace the engine with a Honda clone anyways as that's the only real way I'll get the space needed for a pulley swap and if I do I should regain the lost turning radius.
I might be able to just stack washers on these bolts for the win but I thought that maybe I could make cam style spacers instead by drilling offset holes in round stock so they're adjustable and can be dialed in per side... not a bad idea if I say so myself but I'll cross that bridge another time.
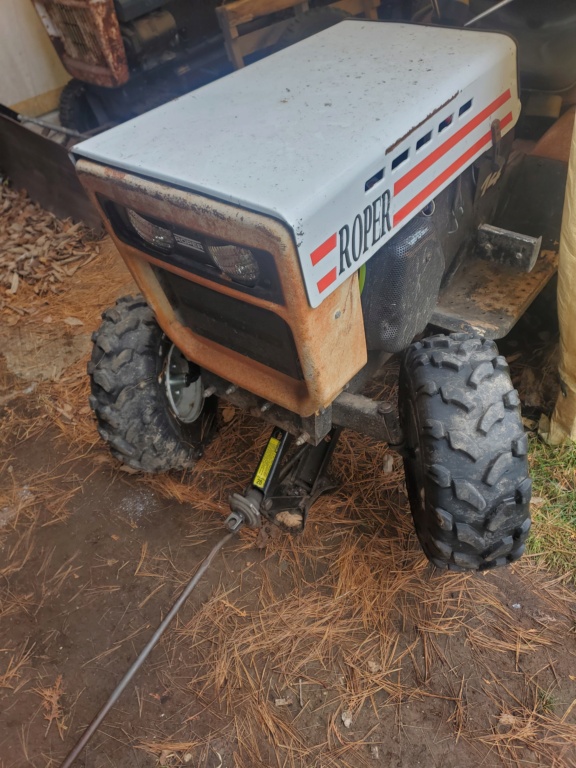
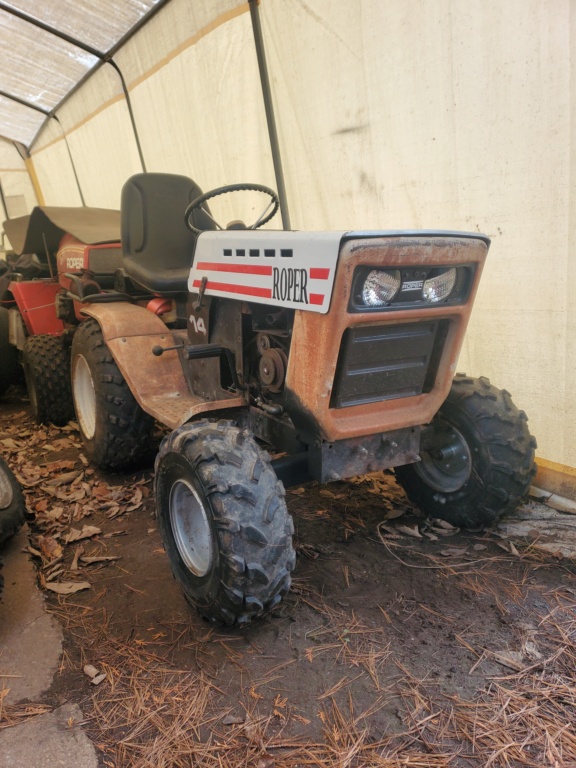
With the new tires on it sits much more level and looks so much better than the snowblower tires that were on it, don't get me wrong they're actually really nice but they're just too small. Here's a before and after.
I'm really glad to have gotten around to doing that finally! Need to play around with rear tires soon!