| | | Homemade tools and stuff from junk laying around |  |
|
+11CraftsmanQuad19 TourMax muckmudd AllisKidD21 MightyRaze frostypaws RichieRichOverdrive MatthewD TheBeal Crazy_Carl prancstaman 15 posters | |
| Author | Message |
|---|
prancstaman
Veteran Member

Join date : 2015-02-02
Posts : 1412
|  Subject: Re: Homemade tools and stuff from junk laying around Subject: Re: Homemade tools and stuff from junk laying around  October 20th 2020, 12:05 am October 20th 2020, 12:05 am | |
| @RichieRichOverdrive A couple reasons I wanted a TIG welder. In high school I was taught oxy/acetylene welding, I want to take it to the next level and rekindle those skills. Upgrading my cheap MIG would make to where I can't move it from work sight to work sight when I need it with a bottle on it. Plus I don't make that much money welding stuff for people to justify the heavier and more expensive equipment by keeping it mobile. But I will be upgrading my Harbor Freight MIG with the same kind of rectifier and adding capacitors to it. Make it into a DC MIG welder. Should be a good cheap upgrade. I'll post that here also. | |
| | | | prancstaman
Veteran Member

Join date : 2015-02-02
Points : 4979
Posts : 1412
Location : Cleveland,Ohio
| | Subject: Homemade scratch start TIG welder update November 8th 2020, 11:44 pm | |
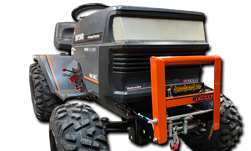
| Hay people, Got the TIG welder up and going. Made a permanent place in my basement by a window. The leads are long enough to throw them out the basement window to weld outside also. I made a stand for the whole setup to fit on.  Labeled the leads with some tape to just know what's what. 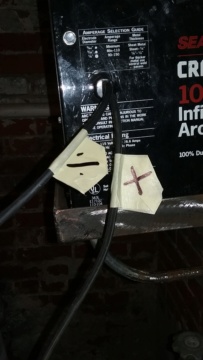 When hooking up the torch to the buzz box, was not ideal, I cut the power coupler off. I then soldered ring terminals on the torch end, power leads from welder buzz box, and also the power coupler I cut off. Maybe later I will buy the right welder and will need this end to plug in the torch to it. Since all the ends have ring terminals, I can just bolt pieces together for what's needed. 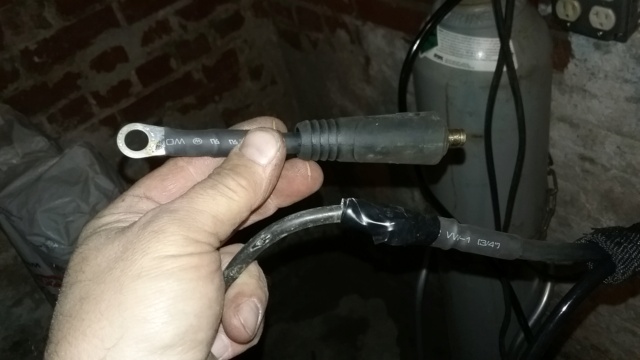 OK, at this point, I am ready to weld. So, it's been over 30 years since I did any kind of torch welding remotely like this. I was taught oxy/acetylene welding for working on aircraft. Very old school kind of welding taught by an old guy in school. He knew his sh$t. Loved every minute of it. Back then in school, was taught the MIG, and TIG, but only from a book perspective. Was considered an expensive way to do the same thing a set of gas torches did and just did the book learnings of them. School couldn't afford the equipment I guess and was a pretty new way of doing things that the aircraft industry didn't fully trust it as a safe way too, back then, was the impression I got also. I got to welding, just turned the stuff on and went at it. Used stuff that came with the torch kit. Was a small tungsten rod, 4,5,6 cups, and the coupler stuff to screw it together. Kept blowing the breaker, so I turned the power down some which worked. Was able to lay a couple beads. The filler rod I used was an old spool of solid steel mig wire I bought by mistake 10 years ago, LOL. Cut it too long and got tangled on the ground clamp while I was welding and started glowing and didn't let go in time, LOL. The whole basement stunk up of burnt flesh. OUCH!! Live and learn, I guess. 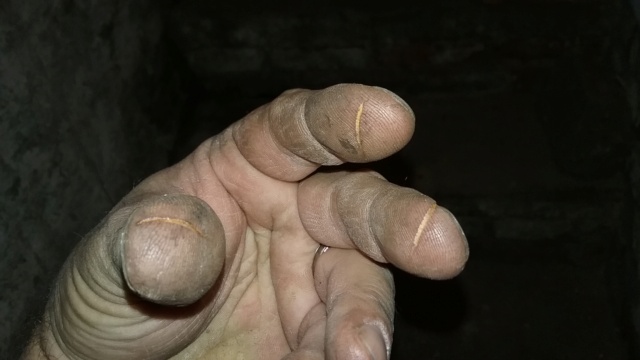 But, layed a couple beads none the less. Used a different filler rod too. I used stainless steel lock wire I bought from Harbor Freight. 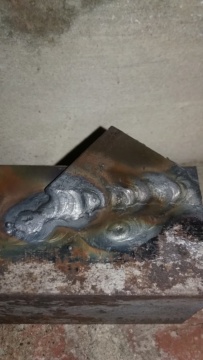 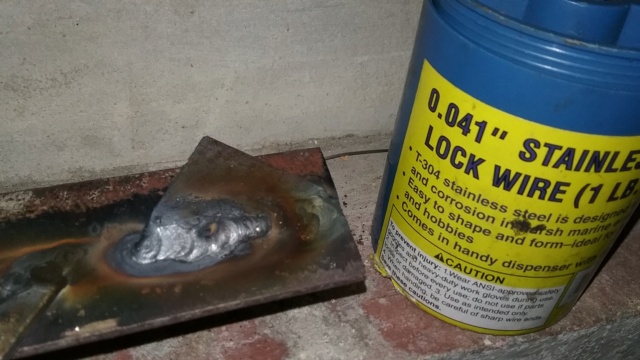 Figured I needed more stuff. Kept poppin the breaker, hard to start the arc, and cup seemed too small (#6 cup). They sold a kit for my torch size. 1 bigger cup (#7 cup) different tungsten (red tipped) for steel and in 2 sizes. with the little stuff to make these parts work. Plus othe stuff. 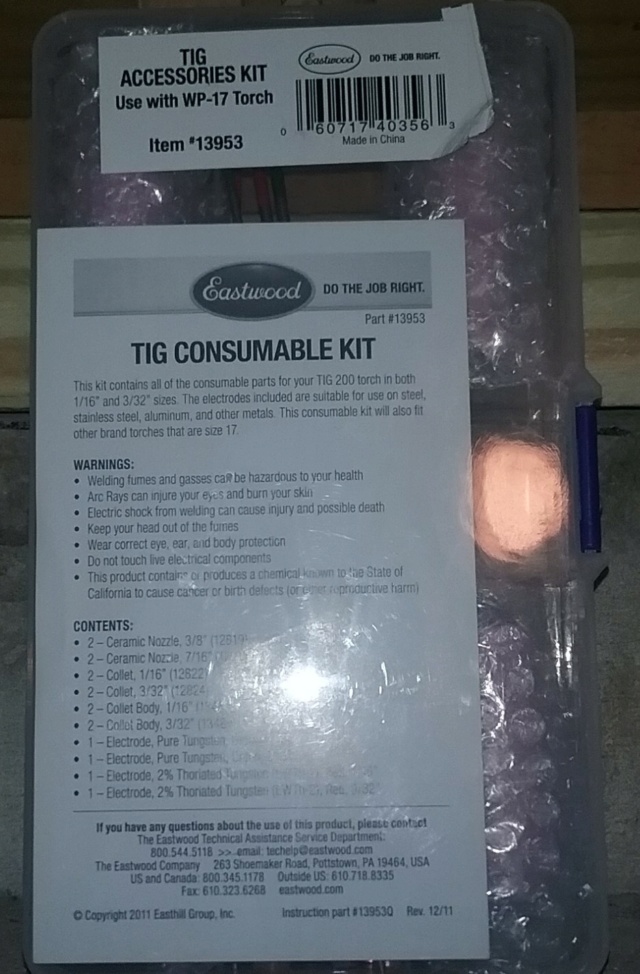 I needed a bigger tungsten rod for the higher amp welding, which was why I kept poppin the breaker. Bigger cup for more gas coverage at the higher amp setting, Could use a bigger cup like a #8 or #9 but that can wait. The red tip tungsten is for welding steel and stainless steel. The ends are painted for how the tungsten is made for welding the different metals. I fired up the torch and laid a couple beads. The new stuff worked great. 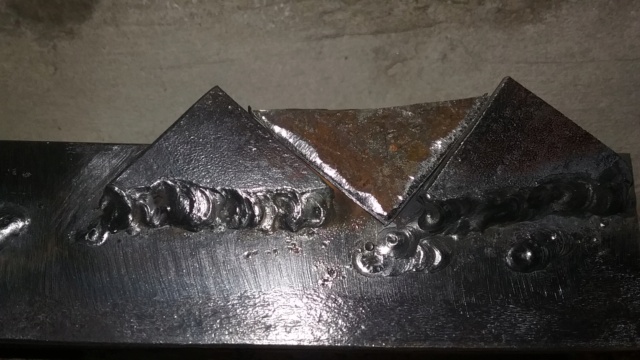 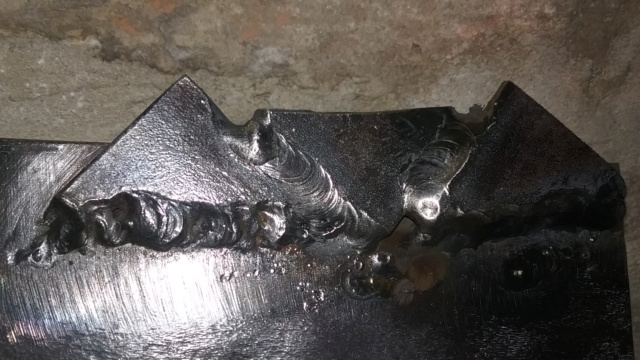 The learnings is coming back to me, on laying a bead with a torch. Seems about the same for what I remember. The scratch starting sucks but I just need to learn it, for what it is. But the scratch starting is like lighting a stick rod off. I always sucked at that. Keep the tungsten tip pointy and clean, then starting is usually easy. Just about every time you start, need to regrind the tip to start it. My bench grinder seems to be used more now. LOL. I got the upgrades for that in a bag hanging from it, upgrades in a later post, LOL.  At this point, got the welding somewhat figured out. It's not like the videos you see on You Tube. They leave a lot of learnings out of the videos, even the good videos. They make it out to be very specific on how to TIG weld. If you do it wrong then the weld is bad. Load of crap, this style of welding is more forgiving then what everyone is making it out to be. From what I have done so far, a bad TIG weld is still better then the weld I lay with my Harbor Freight Gasless MIG, LOL. I'll get to the more forgiving part in my next post on this. Later...... | |
| | | | MightyRaze
Administrator


2017 Build-Off Finalist
2017 Build-Off Finalist
2018 Build-Off Top 3 Winner
2018 Build-Off Top 3 Winner
2019 Build-Off Top 3 Winner
2019 Build-Off Top 3 Winner
2021 Winner of Winners
2021 Winner of Winners
1st Place Build-Off 2022
1st Place Build-Off Winner 2022
10,000 POSTS!
10,000 POSTS!
2024 Build-Off Entrant
2024 Build-Off Entrant
Age : 49
Join date : 2016-09-06
Points : 15341
Posts : 10809
Location : Oklahoma
| | | | | prancstaman
Veteran Member
Join date : 2015-02-02
Points : 4979
Posts : 1412
Location : Cleveland,Ohio
| | | | | diddie
Member

2022 Build-Off Entrant
2022 Build-Off Entrant
Age : 57
Join date : 2016-10-02
Points : 3313
Posts : 411
Location : Indiana
| | | | | prancstaman
Veteran Member
Join date : 2015-02-02
Points : 4979
Posts : 1412
Location : Cleveland,Ohio
| | | | | prancstaman
Veteran Member
Join date : 2015-02-02
Points : 4979
Posts : 1412
Location : Cleveland,Ohio
| | Subject: Homemade scratch start TIG welder update part 2 November 15th 2020, 12:14 am | |
| Hay People, So, where I left off was that I was ready to start welding with the TIG welder. My original plan was to just get the welder setup whenever, to use it for whatever, but things changed. I think my whole summer changed when we got the second truck. So, to get the welder up and running I figure I could weld the new cats in with it. Figured to be way better to TIG them then to MIG them because of the welding wire (filler rod) being used. The OEM exhaust is stainless steel and I want to keep everything stainless steel, even the welds. Sounds extreme, but living in the snow belt, they just dump salt, beat juice, and that other stuff that is way worse then salt, on the streets. There be piles of it on the side of the road pretty much, along with rusted out mufflers too, lol. I would put a complete exhaust system on my Jeep every 3 years. Is how bad it is here. Stainless steel seems to last the life of the vehicle here but does get pretty rusty but still lasts. Pretty much my goal. LOL. The cats I used are stainless steel weld in universal cats from Magnaflow. Love there product, got the California cats and Y-pipe on my truck and work great, yes I have checked to make sure with my scanner and have had them off a couple times for other work and inspected them, all is good for 3 years now. I got the weld in cats because of the money. $110 each (X2) compared to $800 for a bolt on Y-pipe. The Y pipe is in perfect condition except for minor rust and dirt, way thick metal as is way heavy duty for what I'm used to. So that's the situation. Figure I give a tool how to use, for this. All vids I seen are you plug it in and go, being very specific with how and why. You got to use this, need to do it that way, can't do this. Not very helpful and costly at the very least. My input will be more forgiving, LOL. OK. To the job. I slice and dice the Y-pipe up. I took way more pics for reference, for myself. For clock position of the cats (tight fit) O2 holes, stuff like that. I sliced up the cats about 5 inches shorter, to just fit in their places. Very tight fitment, I even had to drill off the heat shields that were on them. The truck has separate heat shields so no worries. LOL. 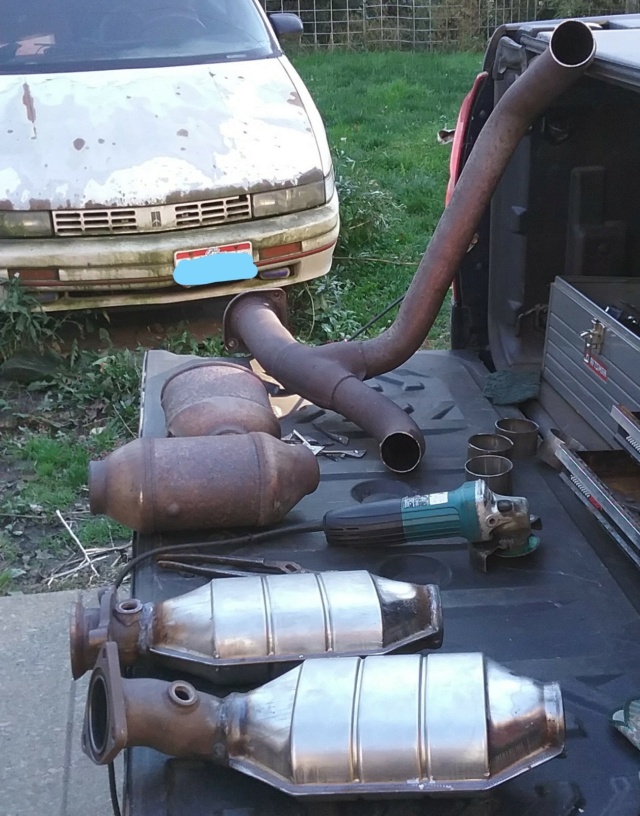 Time to get welding. I use my MIG to tack weld the manifold ends on. I know what I said about the filler rod, regular steel with my MIG. I need something to hold the piping in place to start the TIG welding, they was small tacks in my defense. I'll explain this in a few. Anywho, I got the manifold ends in place where the cats fit in there place, all nice and snug. I lay my first bead with the TIG welder doing a 1 inch section. 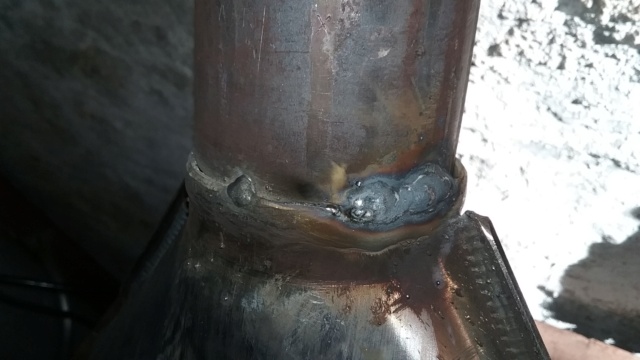 Alot of info here. So, the blue weld is the TIG weld with the stainless steel filler, and the little gray tack weld (see, tiny tack weld, LOL) was the MIG tack weld that is regular steel. You can see the difference in colors. Also, the blue weld don't have too many ripples in the weld, no big deal here. The ripples or stacking dimes is another name for it is not a necessity for a solid weld. The color of the weld, how wide it is, how tall the weld is, the heat marks on the sides of the weld point to a good fusion of the base metal. The ripples that everybody like to see when welding is somewhat cosmetic. The ripples do play their part, but here with welding an exhaust system together off of a 13 year old truck, yah not a necessity. I did good for my first weld of this style of welding. I continue working my way around the pipe doing 1 inch sections at a time. I'll talk about my torch setup. I'm using a red painted tungsten of 3/32 inch thick with a #7 cup and around 80 amps on the old buzz box. That means, the tungsten with the red paint on it is made with specific alloys with the tungsten metal to be able to weld the stainless steel. There is a rainbow of colors to choose from but this is the color that came with the torch kit I got that would weld the stainless steel. I'm sure there is a better tungsten with a different color for doing this but for now this what I got to do the job. The diameter of the tungsten matters also. I am using a 3/32 inch diameter because of the amperage of welding I am using, I'll probably not use a thicker diameter tungsten which will take more then 100 amps to use. The amp range for the 3/32 inch tungsten is around 70 to 90 amps to use. Playing with the setup of amps being used with this tungsten, lower then 70 amps and I just couldn't strike an arc to weld with. The higher then 90 amp setting would pop the breaker in my fuse box or melt off the pointy tip of the tungsten quick and not strike an arc the second time I use it. The 1/16 inch tungsten did the same thing but at a lower range. The 1/16 inch tungsten liked 50 to 70 amps. Any higher in amps and the tungsten rod be glowing like the inside of a toaster, LOL. Along with dull tip and popping the breaker. Cup size is how much you cover the welded area with the gas to form the arc. Any kind of air that gets to the arc will be a bright light through the helmet when looking at the arc. Not good, air melts stuff quick. And remember to turn the gas on when starting to weld and turn it off when done welding, simple as it gets with that part. The tungsten tip needs to be pointy because electricity likes pointy things to jump off of to get to the other side. So sharpening the tungsten to a point on a bench grinder is key and you will be doing it a lot with a scratch start TIG welder. While welding and your shaky hand dips the tip in the melted puddle is bad too. Need to grind the metal off down to the tungsten to be able to stick another arc. No big deal but time consuming to do because you take the torch apart to do this and have to reset it up to start again. You get a lot of practice doing this and you get quick at is too. Another section done. Beveled the pipe. A nice blue finish. 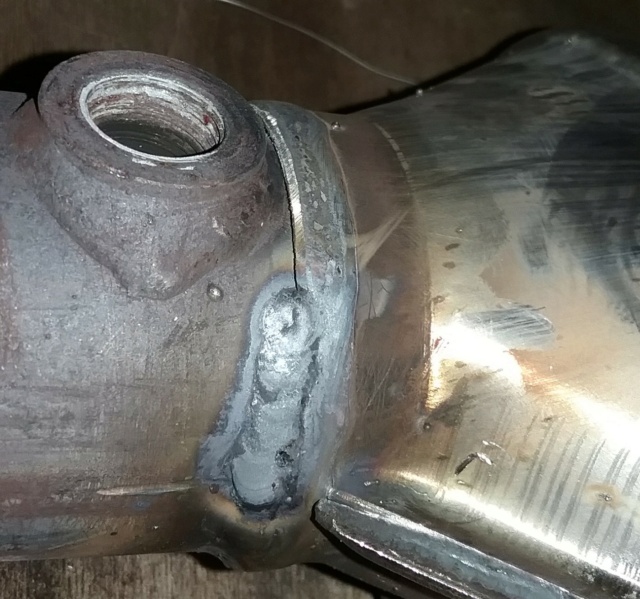 This shows a completed cat welded to the manifold side of piping. Note the 2 welds side by side. One weld is the factory weld probably done with a fancy MIG using stainless steel wire. The other weld is mine with using safety wire as a filler rod. They both look the same. Note the color of both of the welds, both are blue. The rainbow color I see of other people welding stainless, yup not here. Blue is the color here. 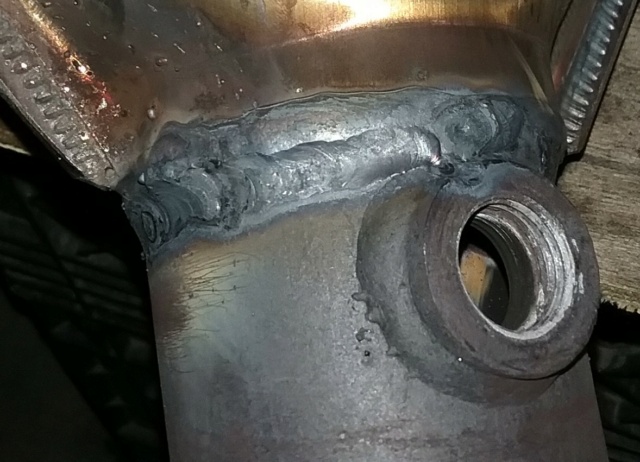 Got both of the manifold sides welded on and looking good. I also seen in videos that when welding pipe or tubing, you fill the pipe or tubing with the gas also while welding it. I never had a problem with not doing that. Welded up easy and looks good to me. 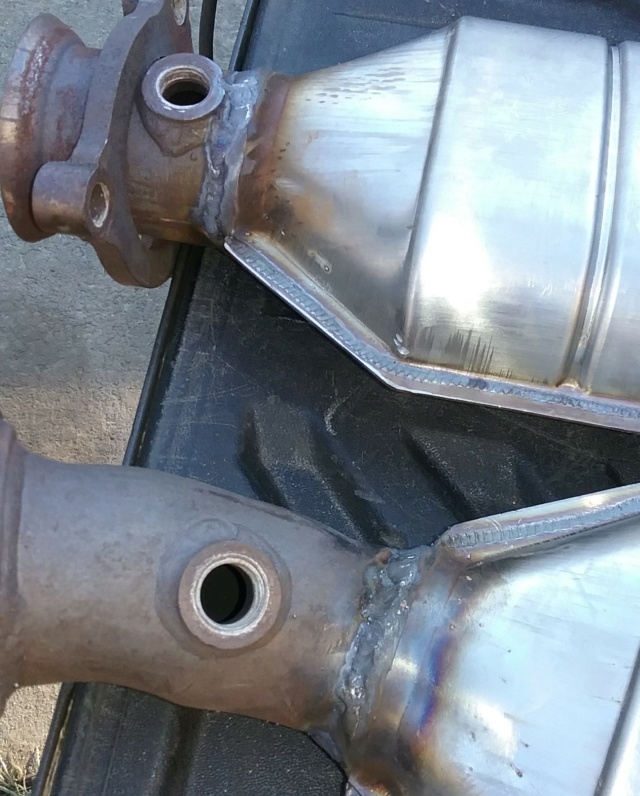 I mounted the cats in the truck. The rest of the piping for the Y-pipe needs to tacked in place onto the cats, so the whole Y-pipe will bolt to the truck with everything lining up on all ends. I use my MIG for this part also. A couple good tack welds here and there, alittle grinding and cutting to make everything snug as best as I can. I then pull the whole thing out without breaking any tack welds (not easy) and hang it in my basement off the rafters to finish welding the whole Y-pipe together. Here I show a part of the piping with a big gap, I cut off a piece to fill in the gap from a piece of scrap from one of the pieces from what I cut off the Y-pipe. A hard thing to do when TIG welding is to fill in gaps. A small gap is easy enough to do like a butt weld with an ideal gap to do it but an excessive gap between 2 pieces is really not doable unless you lay an additional piece of filler in the gap to take up the space which will hold the melted puddle in place. Otherwise the melted puddle will fall through and make a hole. The piece I made to cover the gap so welding it up would be just welding a lap joint basically. 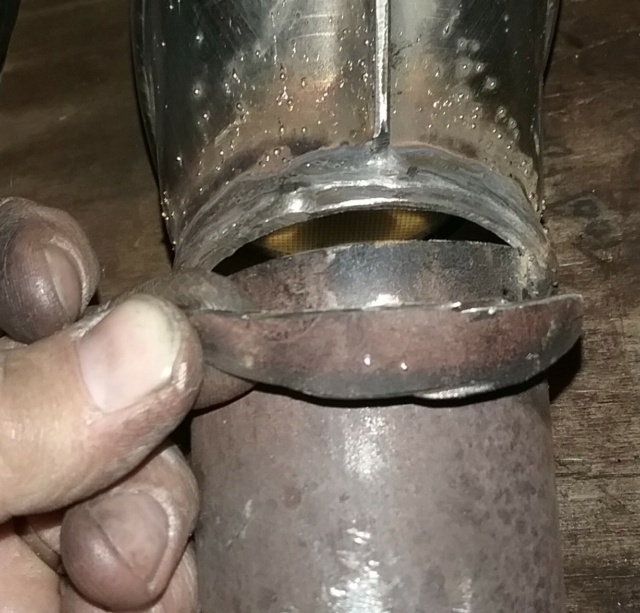  Finished outcome. Not too bad, sticks out the bottom about an inch or so more as compared to the original Y-pipe. Hay, the computer says they are good and the check engine light is off. The only thing that matters.  I'll talk about the tack welds I did with my MIG. Not too big of a tack weld. So when I was TIG welding the pieces together, I just welded right over the tack welds. Since stainless steel is made from regular steel, when I welded over the tack welds, this melted the tack welds into the puddle of stainless steel and mixed with the stainless steel. So the regular steel tacks was turned into stainless steel when I welded over them. No big deal. Things happen a little slower for this style of welding, and is way easier to control the metal. You can weld stainless steel with regular steel (My MIG weld) and have good fusion. Or, weld regular steel with stainless steel and have good fusion. Or an oddball mix of the 2 and still have good fusion. You can do this with a MIG and is limited to what you can do but you get better results with a TIG. Easier to do with a TIG because when you weld you have a puddle of molten metal right there and you add whatever as fill. Learn a little metallurgy and you got a very mini metal foundry. I probably used 3 different types of stainless steels on this exhaust system to give an idea what I'm talking about. I'll talk about the filler rod I used. I used .041 inch diameter stainless steel safety wire. Not the intended use for this. It is used to safety wire bolts together so they don't loosen in aircraft, Loctite is the cheaper equivalent in automotive use. No clue why Harbor Freight has the stuff but they do so I bought it, LOL. Using this wire was just an easy way to use stainless steel filler welding rods. Was cheaper to use also, only by a few dollars per pound though. The diameter was too small. While I was using the wire it would use a lot and use it up quick, being so thin of a diameter. To fix this problem, I twisted up 2 pieces to use for welding. Worked great. To twist it up, took 2 pieces and clamped them in a vise, the other end went in a cordless drill chuck. Then just twisted the 2 together with the cordless drill to a stiff winding.  For other projects, I got like a million steel coat hangers. Just clean the coating off and good to use. Be good for welding steel plate together. As for the tank of gas, the 100% argon gas in a 4 foot tank. It was at 2000 psi when I started (full tank), when I got done the tank was at 1400 psi. No clue what that means but the tank lasted for 1 project with some left over. One more thing to mention. I would have paid the money for the whole Y-pipe with cats from Magnaflow for $800. But think for a minute. I paid $250 for the weld in cats, which saved me $550. The whole TIG setup costed me $450. I still saved money and got a welder out of it. Win, win. Pretty much it for now. Got an upgrade to do already. More on that later. Later.............. | |
| | | | prancstaman
Veteran Member
Join date : 2015-02-02
Points : 4979
Posts : 1412
Location : Cleveland,Ohio
| | Subject: The smallest welding table made from trash November 22nd 2020, 9:51 pm | |
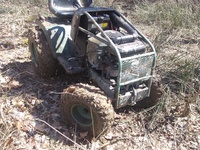
| Hay People, This project was not planned when I was out in the yard cleaning. Was cleaning along the fence and came across my wife's nephew's junk that he had left to rot in my yard. Great, more junk in my yard and it's not even mine. He left a set of those side steps from his conversion van next to my fence by the garbage cans. One side busted off so he pulled them both off. I ripped the metal framing off the plastic steps, busted them up and finally threw the stuff away. Saved the metal and after looking at it, figured I can make a small metal table from the stuff.   Wide C-channel, brackets, and hangers, oh my. I slice up the C-channel for the table top and lay back in the pile. The top right where I am pointing to is the only piece of metal I threw away. I don't need all the pieces of metal either. I'll use some for the table and the rest gets saved for whatever.  Plans change, sometimes in the middle of a build. I planned on using all this stuff for the table top but wasn't needed. Plus, for some reason this metal was a pain to weld. Even after the cleaning prep. 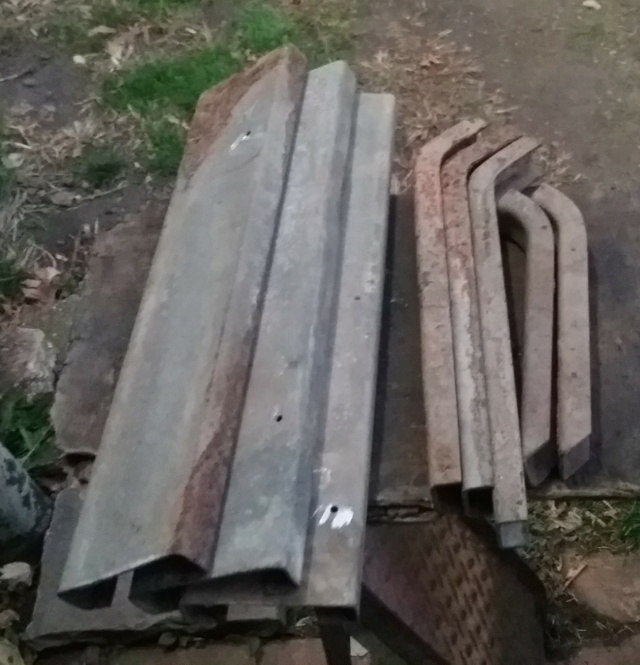 So, I weld the table together with just one center support. After fiddling with it, seemed pretty strong. So I left it like that. You can also see what wasn't used. I left spaces in between the C-channel so I can fit clamps in there. Should work, I guess, I haven't tried that part yet, LOL. 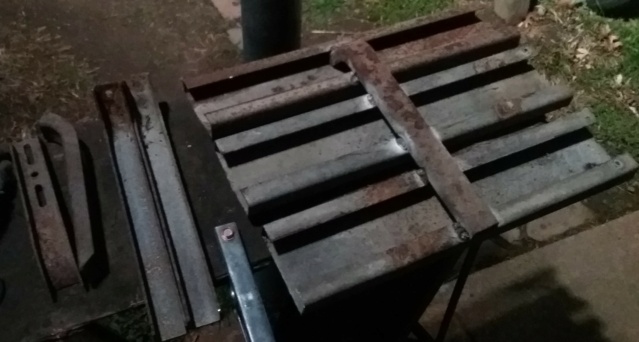 Next is the center leg. It will telescope from 30 inches to over 4 feet high.  For the telescoping feature to work, drilled 2 holes, welded nuts on for bolts to tighten up on inside pole. Then welded handles on bolts. Pretty simple. 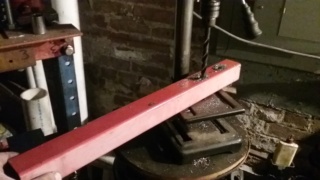  For the base of this little welding table, I got a brake drum from a Dodge pickup. Those things are pretty big and heavy, LOL. Will do nicely. I weld the bottom leg on it.  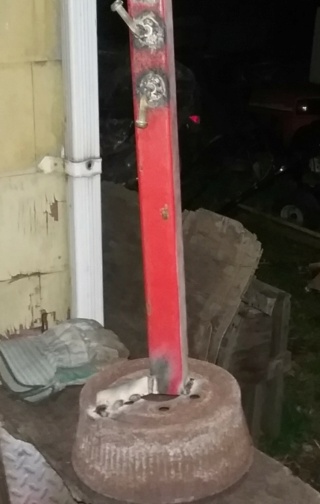 There's my welding table, made from trash. Completely down.  Completely up. 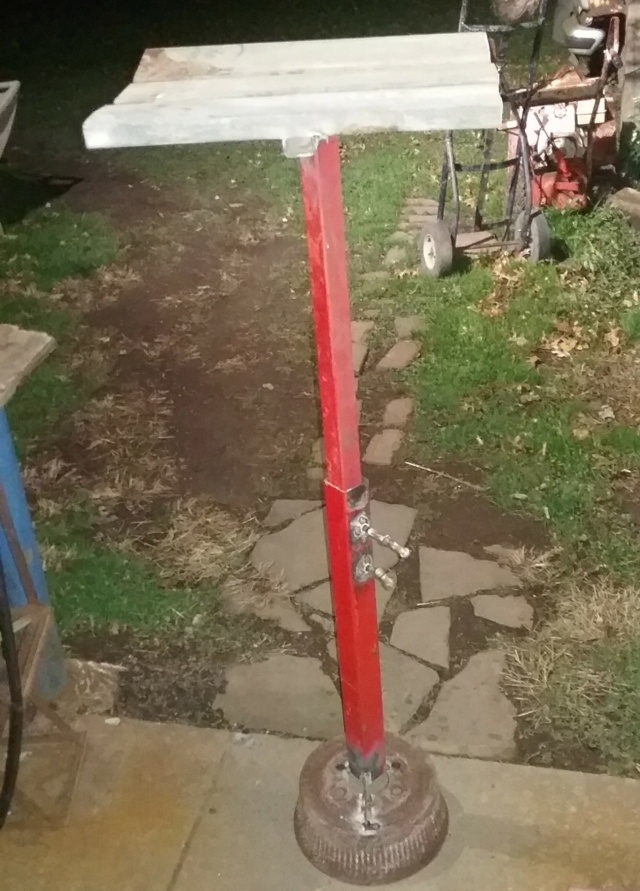 A comparison to what I used for welding that exhaust up on, and what I have now. No more catching the table on fire now. 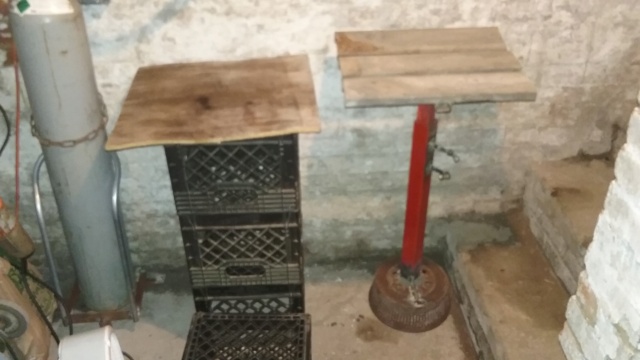 This project took a little over 3 hours on last weekend. Paves the way for the next upgrade for the TIG welder. That will be a pedal. Just for on and off, no amp control. Just need to stop the arc clean, so there won't be a bubble hole at the end of the weld. Here's what will be used for that. More junk laying around. Range wire and a foot push solenoid switch off of a riding mower, LOL. 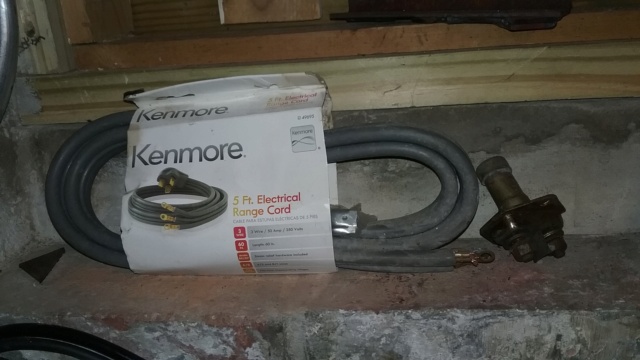 OK, Later. | |
| | | | prancstaman
Veteran Member
Join date : 2015-02-02
Points : 4979
Posts : 1412
Location : Cleveland,Ohio
| | Subject: Grinder upgrades December 19th 2020, 5:13 pm | |
| Hay People, Time to do a few upgrades to the little grinder I made. First upgrade is from a fault in the design. Looky at the pic shows that when I grind something, all the debree gets flung straight down, right into the electric motor. Not good. 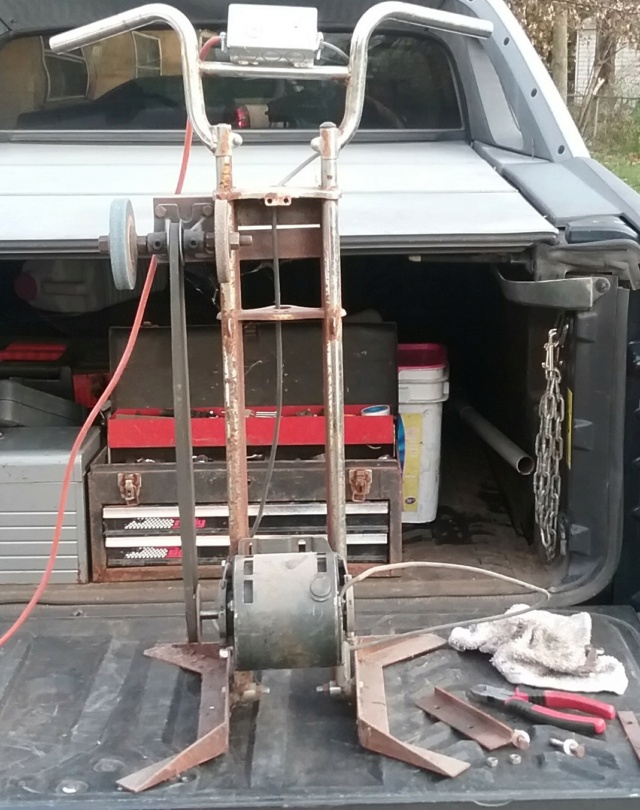 You see the gray dust on the housing, that is the dust from the stone of the grinding wheel plus the metal from what I was grinding also. That stuff will short out the motor, since the motor has holes in the case for cooling and is how the dust gets inside. Blowing it out now and then just delays the shorting out part when it is this bad. 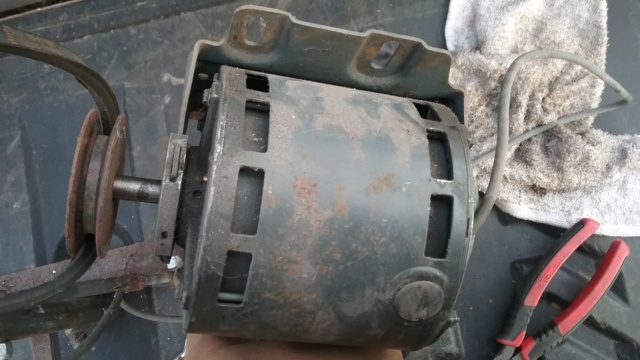 I remounted the motor from behind. Out of the path of the particulates coming off the wheel and getting thrown straight down. This is an almost complete fix for the issue. Later on I will make new mounts for the motor since the belt alignment is off now, with a motor shield to cover the holes so the particulates have no chance of getting into the motor. 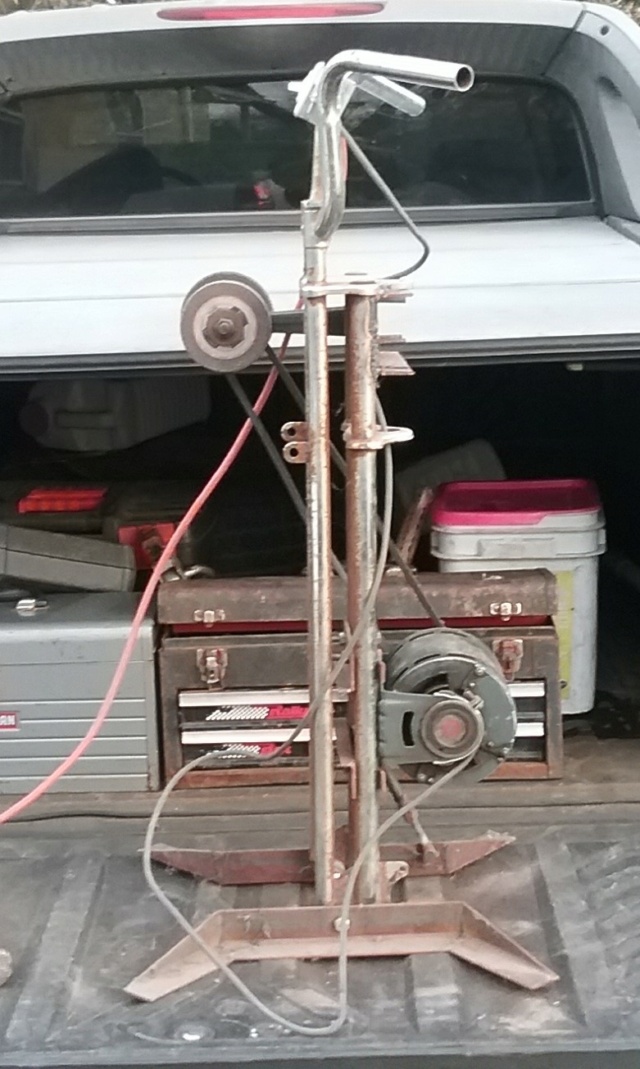 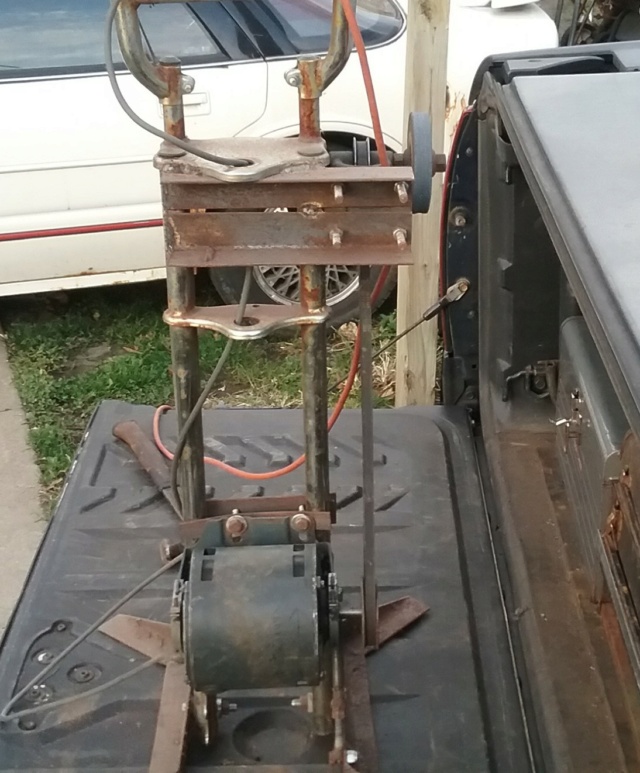 OK, this next one is the shaft of the grinder itself. I had the shaft mounted in the holder wrong. Figured this out when I was taking the stones off. Rooky mistake, but hay, the time I used it the thing work great, LOL. OK, the mistake was, the shaft when I put it in the holder, the threads were going the wrong way. When you put pressure on the grinding stones and if the stones slip on the shaft the nuts would come loose. Good thing I didn't put too much force on it, could have come undone, well maybe, LOL. It would have just slipped on the shaft and been more annoying then anything, doesn't spin fast enough to be any kind of dangerous, thank god. OK, for the shaft threads. Pic, I do think that the pic has the threads in the right orientation to where if the grinding stones slip then the nuts that hold the stones on tighten up. To know by just doing the tightening would be the wrench would be moving upward on both sides to tighten the nuts onto the stones. The stones always spin downwards to throw the debree down towards the ground (always). So the right side has the regular threads on the shaft and the left side has the backwards or lefthanded threads (always). 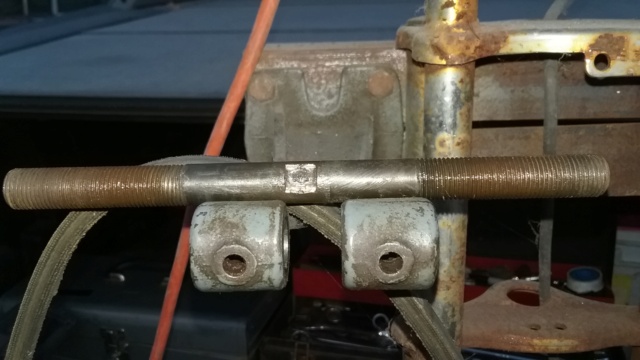 Now, onto the upgrades. I'd like oilers for the shaft instead of grease. The holes for the grease fittings I took out are 1/4 inch holes. I got some tubing to shove in the holes and bend up. The tubing would dump all the oil in at once, so I shove a Q-tip in the tubes to act as a wick. The wick touches the shaft but holds the oil till the shaft spins and rubs the oil on while spinning slowly and stops when the shaft stops. For the most part any ways. Just top off the tubes now and then to keep it going. Spins real smooth when the shaft is oiled. 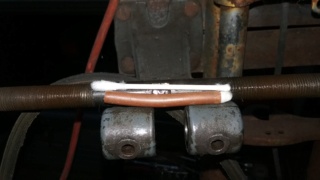 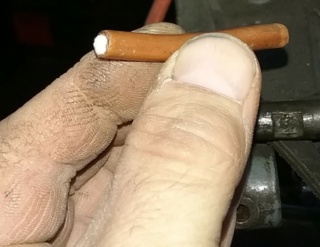  Next upgrade will be a shroud for both wheels. Yah, having it on just one wheel seems eye catching dangerous for the whole idea. I mentioned just covering up one side in an earlier post, after using it yah, bad idea. The shroud will cover both sides. No tool holders though, Don't see a need for them right now, maybe later. For the shroud I use the rear fender from the mini bike. Pretty tough of a shape so I think 1 mounting spot would do. I need to clearance for the handle bars a bit. Keep the fender tight against the bars when mounted. 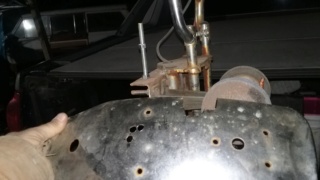 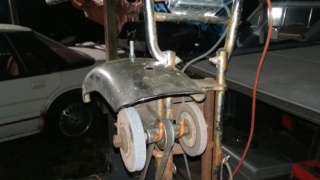 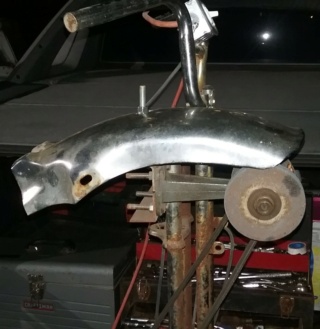 Next upgrade is a light that turns on when you turn on the switch for the grinder, turns off when you turn off the grinder. I got the stuff for rewiring a lamp with a couple LED bulbs for the socket. Don't want too much power going to the bulb to bog down the motor. They run sorta cool too so it won't melt the plastic light housing. I use the headlight from the mini bike for the light housing.  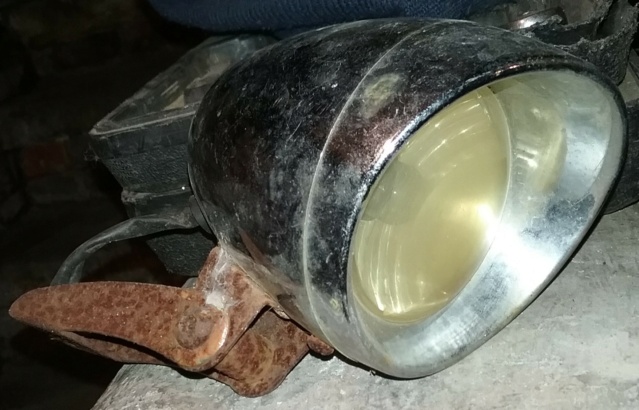 I gut the light, take the lens out and leave it off since it is faded beyond repair. Jam the socket holder into the lens to hold the bulb. Run the wiring through the light housing and tie a knot so no tugging rips it out. Then the fitting for the flexible steel wire covering. I shove 3 coat hanger wires into the flexible covering because it was wobbly to stiffen it up and stay put to aim the light. The flexible covering is not working too good, might switch to conduit later on, maybe.  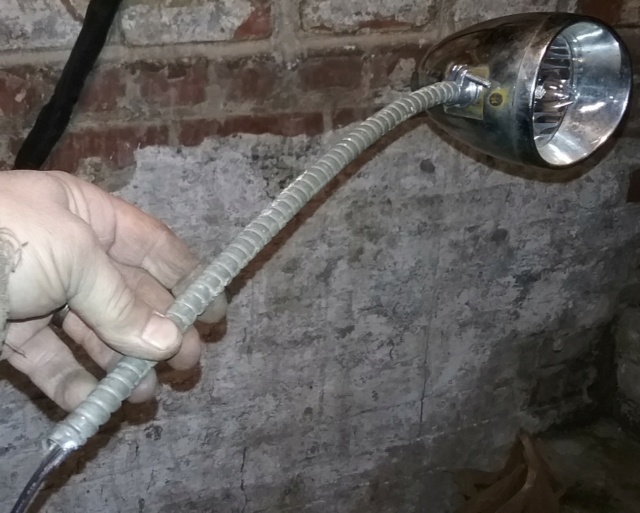 Connect the light to the box and wire it in. 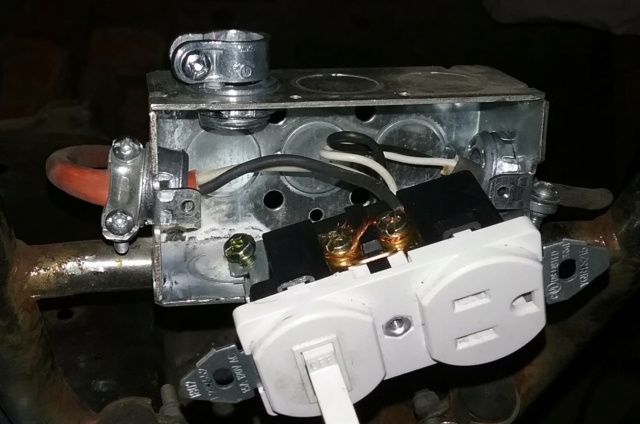 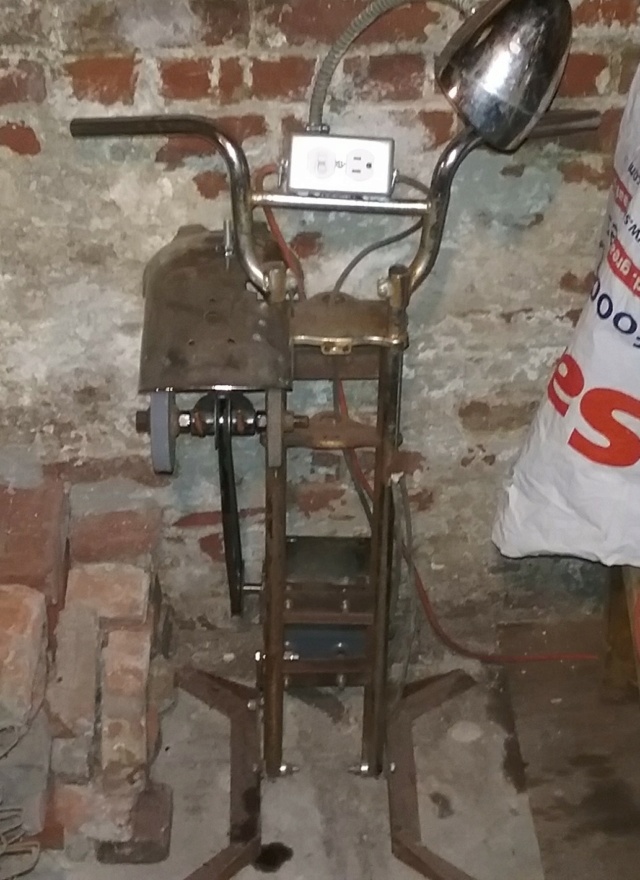 Still not done but yah. Oilers work great for the shaft. Still need to fix belt alignment which will be making new mounts for the motor. And I don't know about the flexible light, got to use the grinder too see. Is kinda wobbly to get it to stay in place still. So, more to come on this tool.  | |
| | | | prancstaman
Veteran Member
Join date : 2015-02-02
Points : 4979
Posts : 1412
Location : Cleveland,Ohio
| | Subject: Metal cutting bandsaw (the start of it) part1 January 3rd 2021, 9:46 pm | |
| Hay People, A start of a new project. I need a metal cutting bandsaw. I'm not paying a bunch of money for something I have to rebuild because all I can afford would probably be a beat to hell one that is past it's time of working. I'll just build one from scratch, LOL. At least building it from scratch I know everything will work and won't be hard to replace a broken piece when it gets to that point. Plus, the expectations of the tool would be met without a dought. I'll probably be beating the crap out of this one, no dought there. OK, I'll talk about what I want from this tool. The frame needs to be real rigid, simple drive wheel, wide table area, tilting table is a maybe. RPM's need to be around 200 from what I gather. Should be able to mount any size bandsaw blade (a must). I actually got a bandsaw for cutting wood, one of those $100 deals that is a Craftsman. Works good for one to cut wood but the framing and other area's are made of plastic. Converting it to a metal cutter seems ridiculous at the very least. I'll keep it as a wood cutter. I do wood work from time to time anyways, LOL. So, today after doing what needed done, I started work on this project. I have no clue on how I will be doing the framing. I just started cutting metal, LOL. I grab a rim and figure the center needs to come out of it. So I do that. It's a Dodge rim and is made kinda weird to just to be able to cut the center out. The outside bead is part of the hub area so I cut the bead off and the center comes out. OK, whatever, LOL. This thing is crusty and rusty, man. Had one of those chrome covers over it and when I pulled it off, way back when I pulled the tire off, had all this rust under it. A bad rim that I am giving new life too! After cutting the hub off, I beat the hell out of it with a hammer to knock the rust off of it. Good to go. 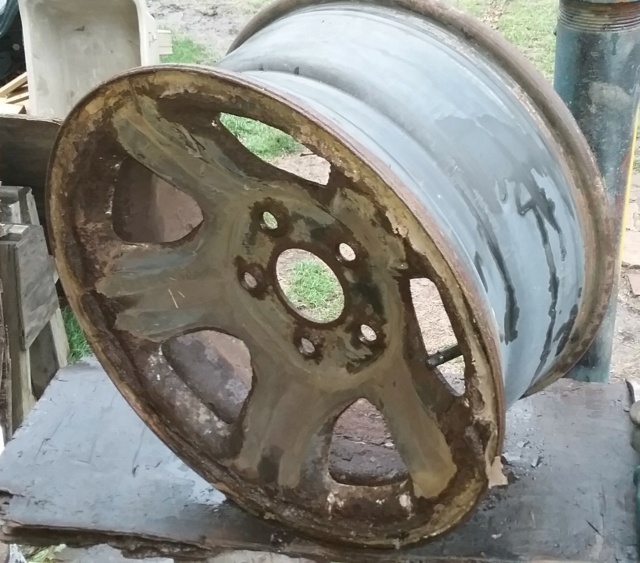  I go to my pile of square tubing. Yup, been gathering this up all last summer while working on the trucks. I got plans for all of it and probably goona need more.  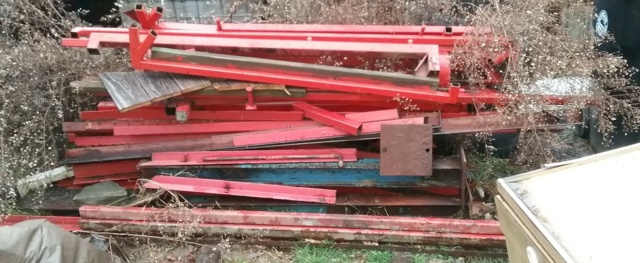 I grab this piece out of the pile without the pile falling on me, that was a trick. It don't look it but that pile if 4 feet high and 3 feet thick. This piece is about 5 1/2 feet high for the back bone . Capped on both ends but needs cleaned up a bit.  That's all I did for know. Not too much done, but a start none the less. 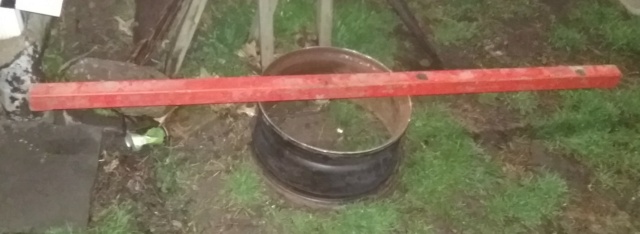 OK, here is what I bought for this project. Been sitting around for atleast 6 months. I bought 2 dolly tires because they have bearings in them and 2 metal bandsaw blades. One blade is 94 inches and the other is 64 1/2 inches. This bandsaw needs to be able to fit both of them and anything in between and even bigger or smaller. Reason being, I want to be able to buy what ever I can to keep using the bandsaw. From an industrial blade to a small easy and cheap to get blade. The electric motor is an induction 110v motor from a washing machine, LOL. Saved a couple of those through the years and are easy enough to get since I got a couple of them. 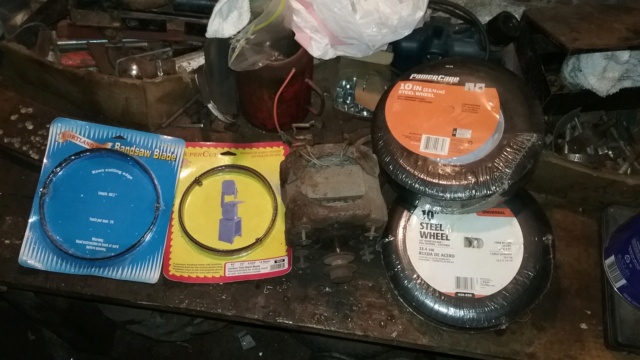 I guess after posting this I will be on You Tube seeing what everyone else did on building a bandsaw. Edumacation time, I guess. I know how to do the blade tracking thing because I rebuild, maintain, and modify those polishing lathes at my job. Easy enough. I just need to see how to do the framing. Maybe get some ideas on a little coolness too, LOL. Later......... | |
| | | | mr.modified
Veteran Member

2015 Build-Off Top 3 Winner
2015 Build-Off Top 3 Winner
2016 Build-Off Top 3 Winner
2016 Build-Off Top 3 Winner
2018 Build-Off Finalist
2018 Build-Off Finalist
2022 Build-Off Entrant
2022 Build-Off Entrant
1st Place Build-Off 2014
1st Place Build-Off Winner 2014
2023 Build-Off Entrant
2023 Build-Off Entrant
Age : 34
Join date : 2013-11-02
Points : 7046
Posts : 2906
Location : New Jersey USA
| | | | | prancstaman
Veteran Member
Join date : 2015-02-02
Points : 4979
Posts : 1412
Location : Cleveland,Ohio
| | | | | RichieRichOverdrive
Moderator


2018 Build-Off Entrant
2018 Build-Off Entrant
2024 Build-Off Entrant
2024 Build-Off Entrant
Age : 21
Join date : 2016-10-29
Points : 6891
Posts : 3816
Location : Lewisburg, KY
| | Subject: Re: Homemade tools and stuff from junk laying around January 10th 2021, 1:14 am | |
| If that's a hazard fraught cheapo blade, do not expect it to cut straight or last long. They tend to walk towards the inside, towards itself. I just realized a while ago that TSC carries my size blades, a bit more expensive then HF, I'm gonna try them and see if they're NFG or not. I hardly use the bandsaw anyway but when i do i prefer not to waste an inch of material from the blade walking. | |
| | | | prancstaman
Veteran Member
Join date : 2015-02-02
Points : 4979
Posts : 1412
Location : Cleveland,Ohio
| | Subject: Re: Homemade tools and stuff from junk laying around January 10th 2021, 11:53 am | |
| @RichieRichOverdrive Thanks for the heads up! Yes, the blades are from Harbor Freight. Yes, I cringed when I bought them, LOL. Figured to use them for the size mostly. The performance of the blades wasn't too much of a concern. I'm actually going to TSC in an hour and since you mentioned it, will be looking at the blades they got then. I mostly will be looking at the size on how big I can get them. I figure the bigger the longer they will last. That's actually one of the goals of this bandsaw, to use anything I can get ahold of. Sounds like you have a bit of a challenge to get the right size blade for your bandsaw. We shall see. Thanks again. | |
| | | | RichieRichOverdrive
Moderator
2018 Build-Off Entrant
2018 Build-Off Entrant
2024 Build-Off Entrant
2024 Build-Off Entrant
Age : 21
Join date : 2016-10-29
Points : 6891
Posts : 3816
Location : Lewisburg, KY
| | | | | prancstaman
Veteran Member
Join date : 2015-02-02
Points : 4979
Posts : 1412
Location : Cleveland,Ohio
| | Subject: Re: Homemade tools and stuff from junk laying around January 10th 2021, 5:11 pm | |
| Couldn't find them (bandsaw blades), must not carry them at these stores. They didn't carry the pulleys either. It's only certain stores that carry the pulleys because I asked. Oh well, I'll just order online then. I went to 2 stores too, like 70 miles all together driving. | |
| | | | prancstaman
Veteran Member
Join date : 2015-02-02
Points : 4979
Posts : 1412
Location : Cleveland,Ohio
| | Subject: Metal cutting bandsaw part 2 January 11th 2021, 6:53 pm | |
| Hay People, Yup, after a lengthy drive to 2 TSC stores, I was not able to find bandsaw blades and pulleys. Oh well. I got other sources for this stuff anyways. OK, figure I test the motor, make sure it will last, and that it don't blow up, LOL. I test the motor with a cord plug. Plug it in, touch the wires on the motor. IT WORKS!! Thank God!!  I pull out the blades and wheels. To figure out how to make the framing. Got a few ideas on how to achieve what I want. The bigger saw blades will use the x2, 10 inch wheels. I try to see how the little blade will look with the x2, 10 inch wheels but I think I will be using smaller wheels for that. I want to keep about a 12 inch work space in any setup, seems reasonable. 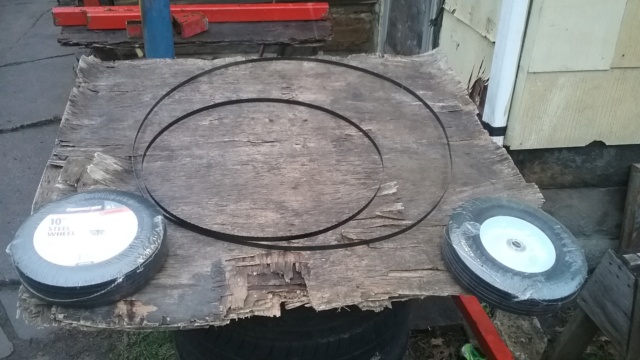 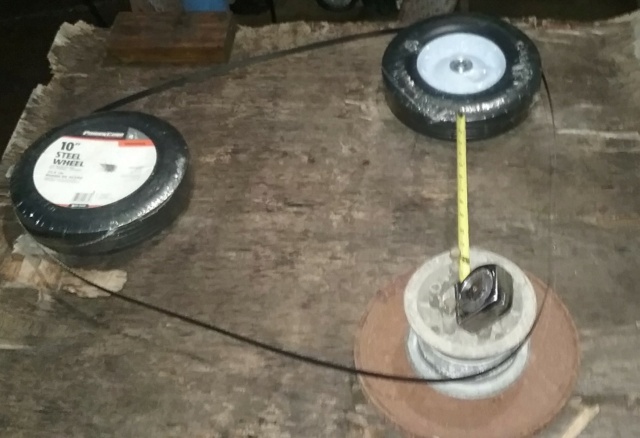 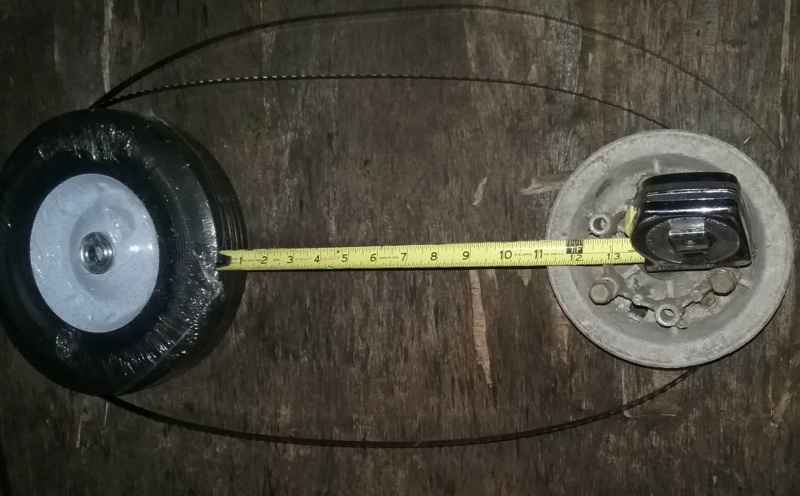 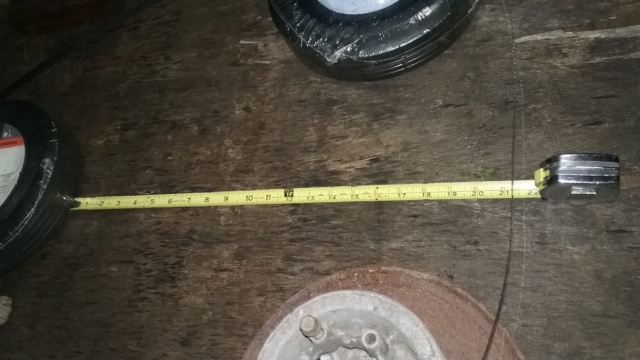 Ignore the go cart wheel. It's there just for reference. I got a different wheel for the drive wheel. OK, That's it for now. Now I can figure out the framing to make. Later.......... | |
| | | | TheBeal
Veteran Member

Age : 29
Join date : 2013-06-06
Points : 5599
Posts : 1401
Location : Central PA
| | | | | prancstaman
Veteran Member
Join date : 2015-02-02
Points : 4979
Posts : 1412
Location : Cleveland,Ohio
| | Subject: Metal cutting bandsaw part 3 February 25th 2021, 8:46 pm | |
| Hay People, Everybody Keeping warm? LOL. The weather finally broke and got alittle more done Wednesday. I welded the main frame together. Plus, made an improvement on the rim base I always use. I'll start with the frame. A basic C frame to mount everything to. A long tube from the rim base that goes up about 5 feet and is off center too the left. Then a top horizontal tube and a mid horizontal tube around 2 1/2 feet long. I prep the horizontal tubing by squaring off one end on both pieces of tubing. Did it with a hand grinder and a carpenter square. Set the square on the end and see what was the high spot and then grind it down to the lowest spot. Tedious work, but helps with the music blasting, just like GnR is playing while I type this up, LOL. 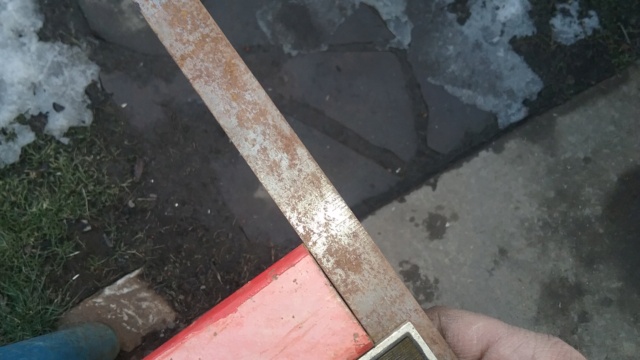 I then clean the paint off and bevel the tubing for some deep welding. 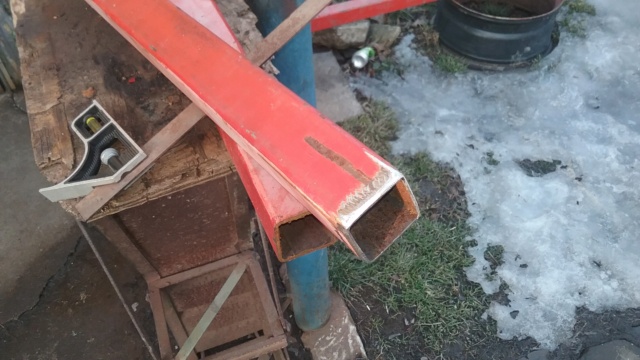 I clean the main piece of tubing where the horizontal pieces will be welded at. The top one is almost to the top, for some reason that I can't remember, maybe I'll remember later. Then the mid piece of tubing will be 27 inches from the top tube. 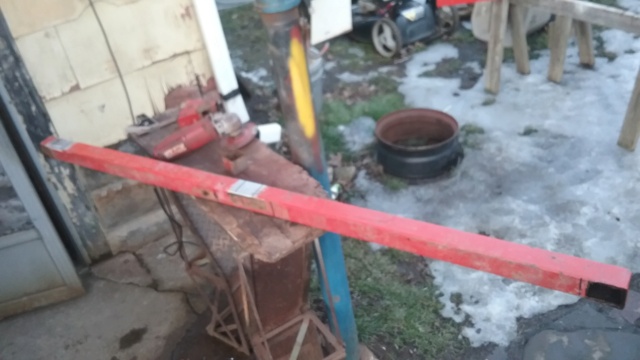 Time to burn them in. I lay the main piece down on the concrete and set the top piece in place and use a big angle to make it , well sort of square. Doesn't have to be perfect for how i will be setting the saw blade up. That part will be explained later on. Just would like it as close as possible. I could get it to work fine even if it warps and can't set it square but setting it as close as possible will make setting up the saw blade easier.  Both pieces welded in. 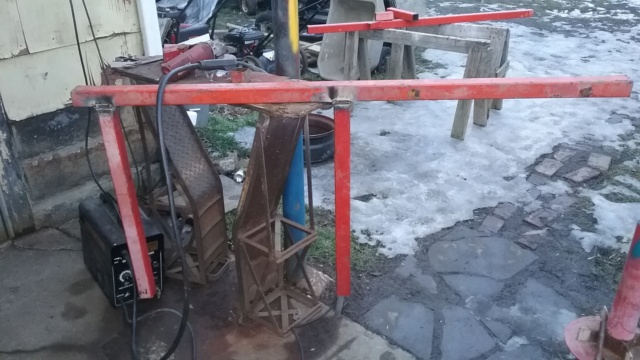 I got them pretty close, but I did have to bend the mid tube a little. To bend it straight, I set the top tube end on a high spot, the other end of the main tube on a high spot and stepped on the mid tube, to bend it into shape. Doesn't matter if the 2 horizontal tubes are perfectly horizontal. I'm happy with the results. 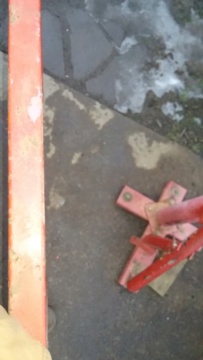  I make a nice little addition to the rim base, to keep the tool from weebble wobbling on my basement floor. Apparently my basement floor that was pored over 120 years ago isn't flat at all, LOL. I'll probably do this addition to the rest of the tools already made later on. Seems to be aggravating, when working with something that wobbles and freaks' you out thinking something is going to fall over, LOL. OK, I drill a hole in the bead of the rim that sits on the floor. Well 3 holes evenly space, sort of, close enough. I take a bolt with a nut on it and weld the nut to the rim with the bolt going through the hole. I weld the washer to the head of the bolt for a handle to turn the bolt. Did that 3 times. The threads of the bolts go past the bead of the rim enough to keep the tool from weebble wobbling, plus long enough to level the tool also. Very nice addition. 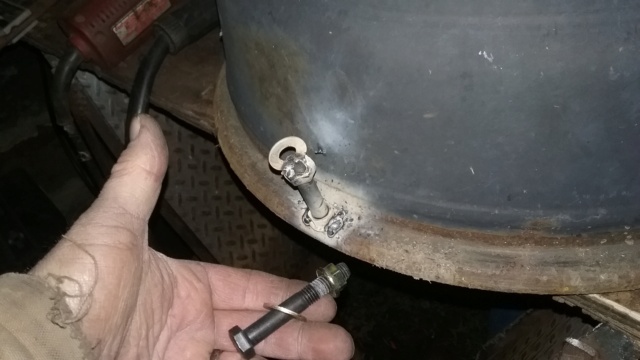 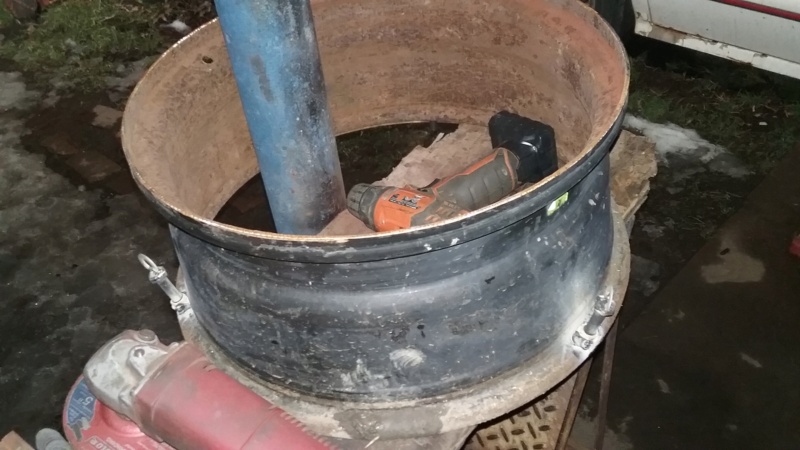 That's as far as I got. The 27 inch spacing between the 2 horizontal pieces of tubing on the open end, will be the work area for cutting. Will shrink and open up to that depending on the saw blade being used. I can't imagine me cutting anything more then a foot tall on anything. So plenty of work room to deal with. Next, will be attaching the newly made C frame to the rim base. That's it, Later........ | |
| | | | prancstaman
Veteran Member
Join date : 2015-02-02
Points : 4979
Posts : 1412
Location : Cleveland,Ohio
| | Subject: Metal cutting bandsaw part 4 March 6th 2021, 9:31 pm | |
| Hay People, Still cold but sunny today, LOL. Got more stuff done. Welded framing to rim base and started the clamps for the wheels to mount too.  Squared up by tacking the bottom and bending it till straight. Burned in the rest of the way. Frame is squared to the rim while sitting on the flat concrete. Good enough since I have the adjusters on the rim base to level out the frame however. 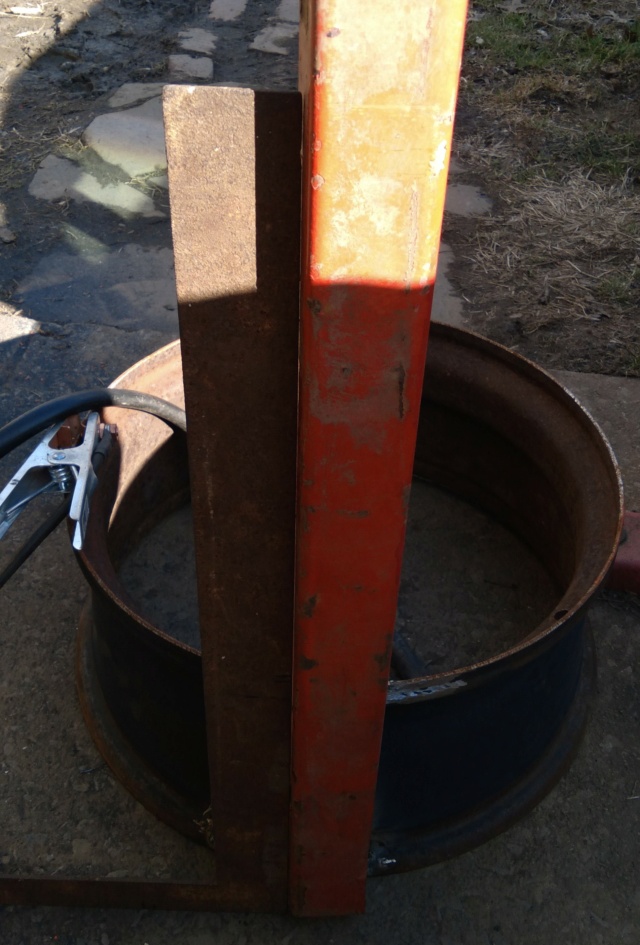 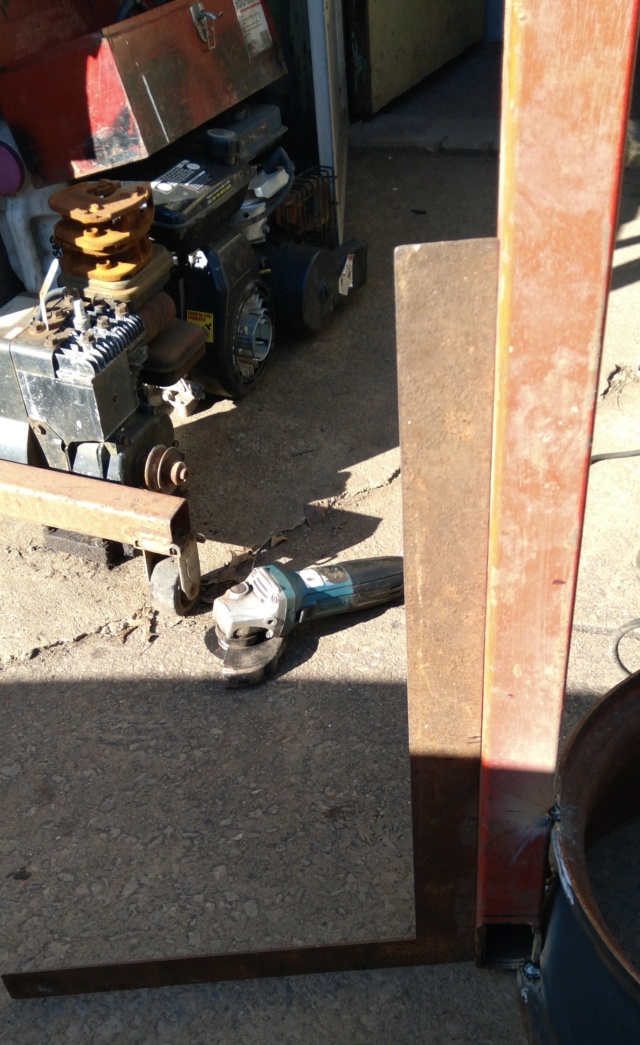 OK, now to the crap work. This is why I mainly want a heavy duty saw for cutting metal, pretty much to cut steel mainly. Need to do alot of cutting and using a cutoff wheel on a hand grinder has it's drawbacks. Costs alot to use, sparks, and metal dust goes everywhere. Here is what I will use to make clamps that hold the wheels to the framing. The clamps will move across the framing for adjusting the sawblade tension and blade tracking. Angle iron that is around 1/4 inch thick. 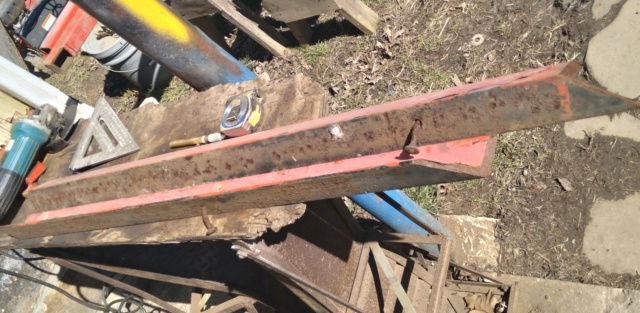 Marked them up into 4 inch pieces. Cut up 12 pieces. 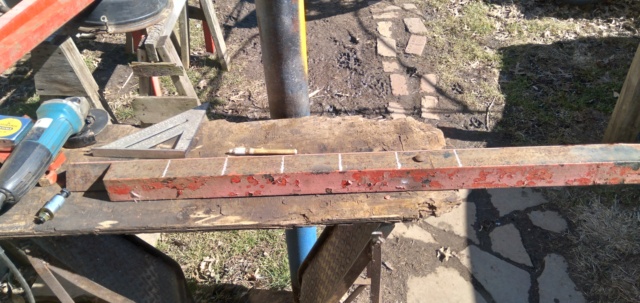 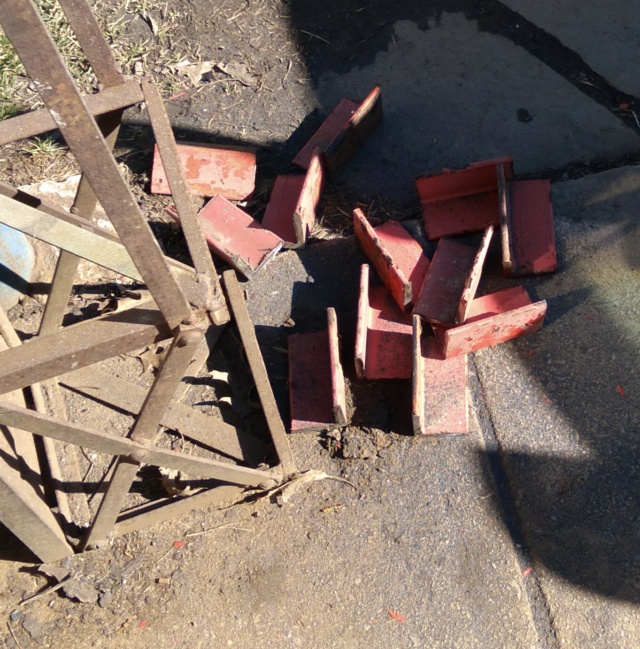 Then, I need plates for holding the wheels on. I use bigger angle iron that is 1/4 inch thick. I cut 3 pieces out of the angle iron and then cut the 3 pieces into 6 pieces going long ways. 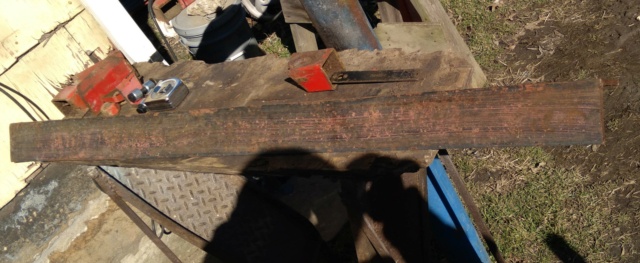 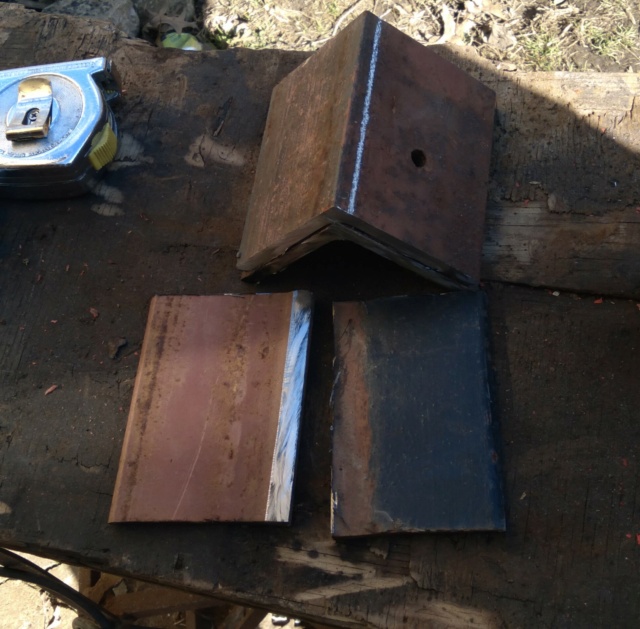 Main pieces cut up. 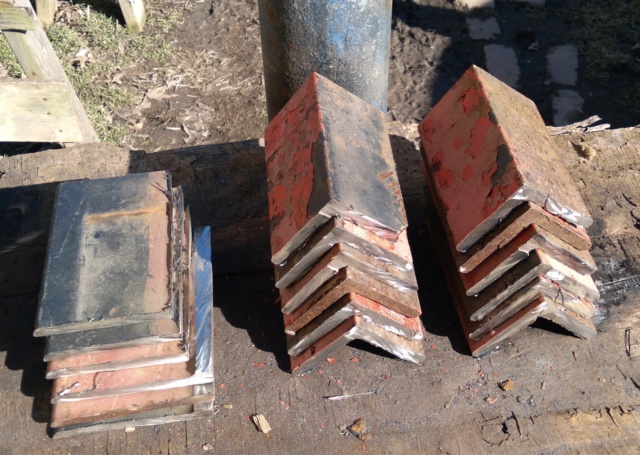 Time to weld up the clamps. I use a piece of frame tubing to build the clamps. Weld on 2 spacers for the bolts so they squeeze onto the tubing. 4 bolts on this one since it will have the drive wheel for the sawblade. 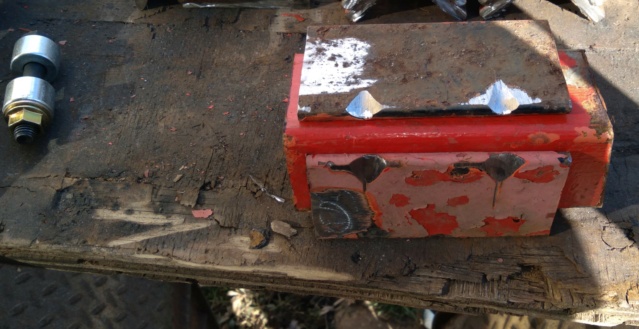 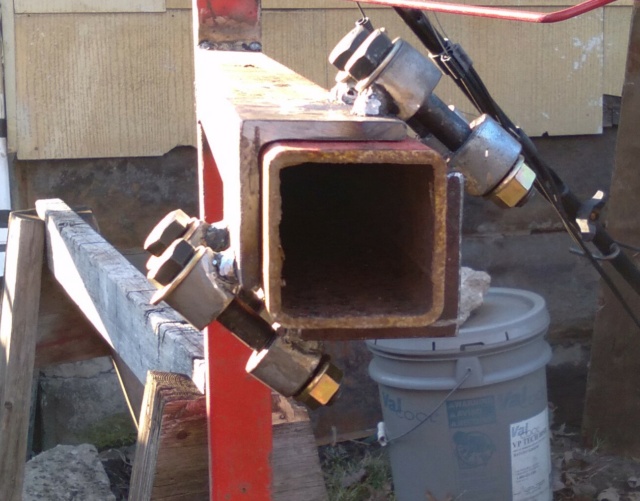 I put it on the tubing here just for the pic. Later on I will weld a piece of tubing going down for this clamp 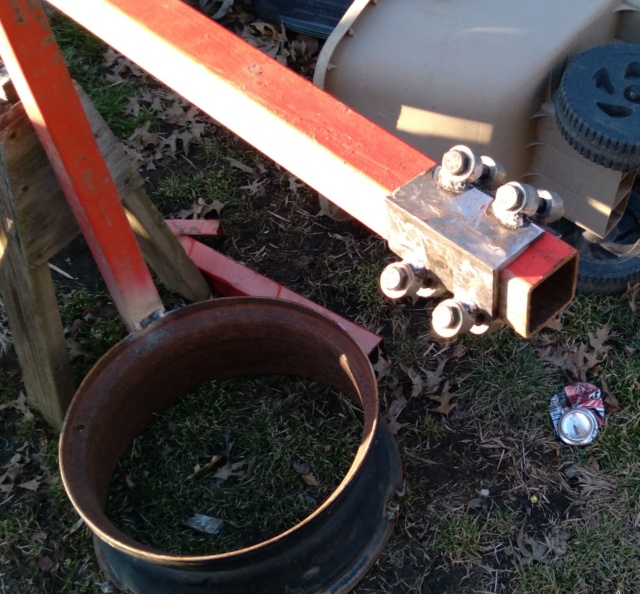 Need to mount the plate that holds the wheel. This will also have the adjustment bolts for blade tracking. 3 points of contact will do. Drill the plate also. 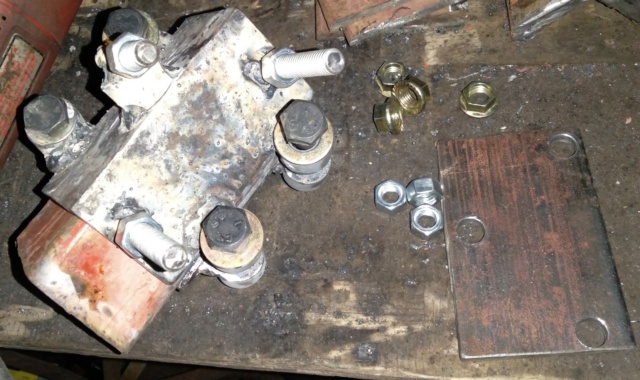 Mounted for mockup. Plenty of adjustment for the drive wheel. This drive wheel will set the spacing away from the framing and is the main adjustment for sawblade tracking also.  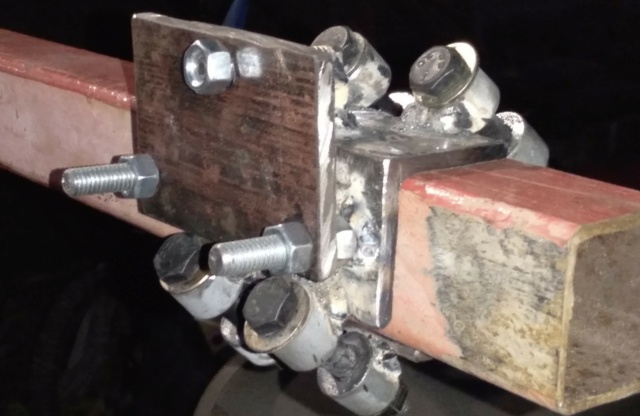 I will be making 2 more clamps that will be similar for the idler wheels. with the addition of some way to tighten the sawblade tension. Got a few ideas on how it will be done. We will see. Later.......... | |
| | | | prancstaman
Veteran Member
Join date : 2015-02-02
Points : 4979
Posts : 1412
Location : Cleveland,Ohio
| | Subject: Metal cutting bandsaw part 5 March 23rd 2021, 10:24 pm | |
| Hay People, Welcome to another installment of Homemade tools and stuff from junk laying around! Work continues on the bandsaw. I finish the clamps that hold the idler wheels and drive wheel. Then do a little mock up to show my idea on the concept. Enjoy the read.  First off, making the clamps. I'll have 6 halves that all look alike. While making them, I mark the sets of 2 by grinding little slots on one side of each half that line up for the set. At some point I will have all the pieces apart and need a way to match them up easily.  All 3 clamps are made with the plates bolted to them. The plates will hold the axles of the wheels and will handle the blade tracking and wheel alignments with the axles. 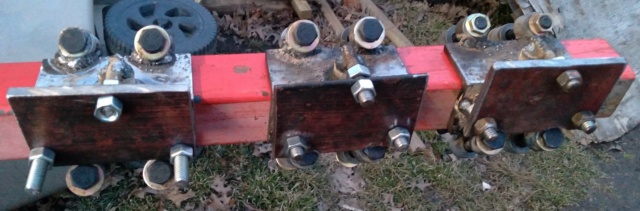  Went to Tractor Supply for 2 more smaller wheels, a pulley, hardware to use for the axles, and lock nuts. The hardware is 1/2 inch bolts that are about 6 inches long for the axles. They are that long to shift the wheels in and out by using washers and spacers. The bigger wheels from the earlier post use 5/8 inch bolts about 6 inches long, sorry no pic but yah. The smaller wheels I bought have bearings in them so they last, just like the bigger wheels. The wheels used are 2 dolly wheels and 2 push mower wheels with steel rims. Should be tough enough for this. The drive wheel will be the smaller wheel here and the pulley will be connected somehow to the rim by bolts or welding it. 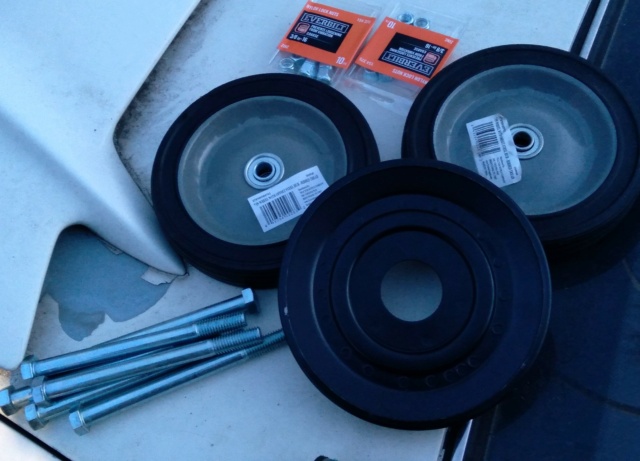 I weld the bolts to the plates for axles. I put a pipe and a pulley on, held by a nut, to pull the bolt tight to the plate so it will be straight out, and to keep the weld spatter off them. 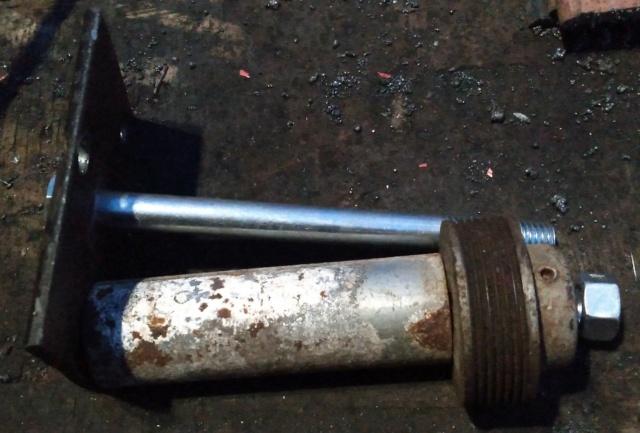 Wheels are on. So, there are 3 clamps that hold 5 plates for a combo of different wheel setups. The bigger idler wheels will be for the bigger blades. The smaller idler wheel will be used for the smaller blades. Or any combo of bigger idler wheels and smaller idler wheel to fit the blades on. As I mentioned before, one of the smaller wheels will always be the drive wheel.  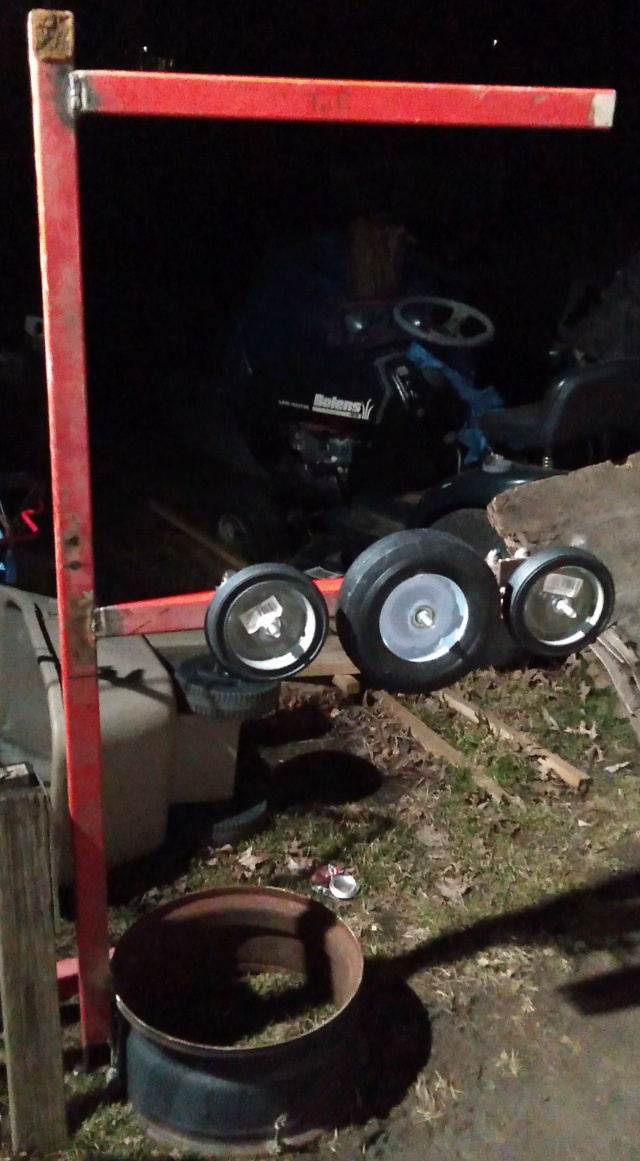 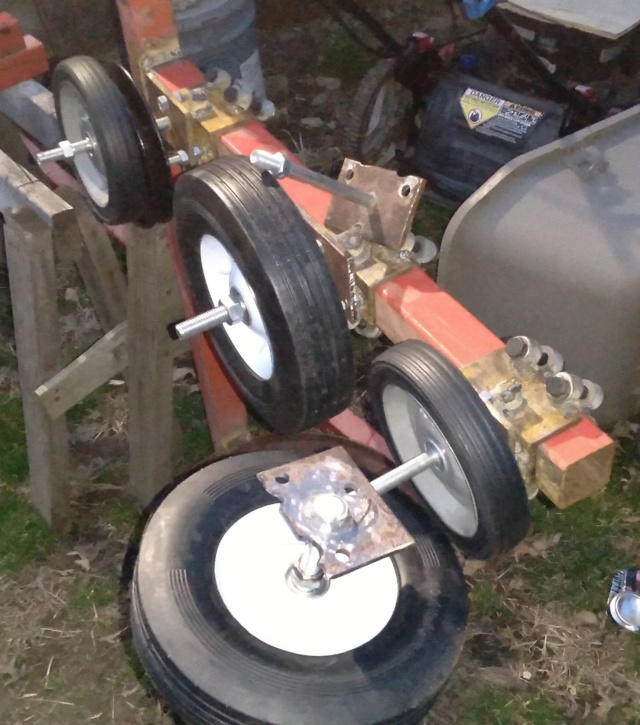 OK, mockup time. I still got things to make for extending the reach of the idler wheels, but you will see the idea on what I am shooting for. Just looking for a work area of about 12 inches high. Should be doable.  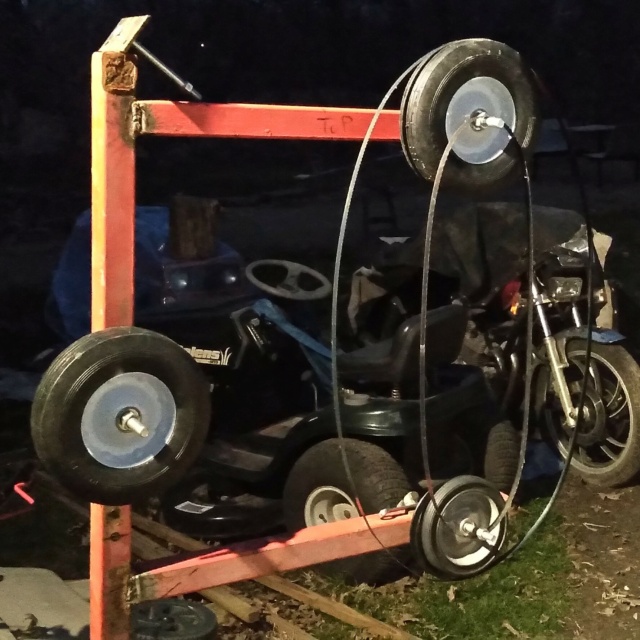 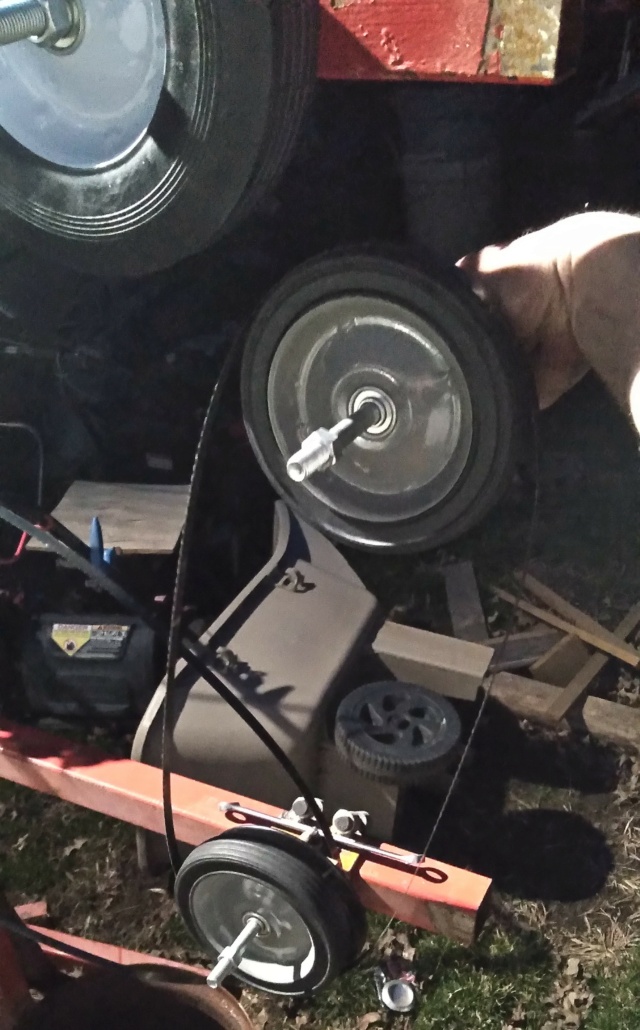 I think I will need 3 more clamps with 2 of them being extensions of the framing going inwards. And tensioners for the idlers made from the other clamp. OK, it's late here. Later................. | |
| | | | prancstaman
Veteran Member
Join date : 2015-02-02
Points : 4979
Posts : 1412
Location : Cleveland,Ohio
| | Subject: Metal cutting bandsaw part 6 April 19th 2021, 10:49 pm | |
| Hay People, As always, real busy doing other stuff, Finally found time for this write up. I'm listening to Motley Crew, of all things, LOL. Wow, I kinda remember the days when the band was new, LOL Kinda! Man I'm old!! Anywho!! Next on the list of things to make. Start with the drive wheel for the saw blade. Made from a steel 7 inch push mower wheel that has bearings in it. Need to mount a pulley on it. I use a piece of fence post to make a spacer for inbetween the pulley and wheel. Mount it in a vice. I need the piece to be square so there is no weeble wobbling going on while it is spinning. I use a huge pipe cutter. They cut perfect circles, which is how they work. I cut a 1 inch long piece off the pipe. 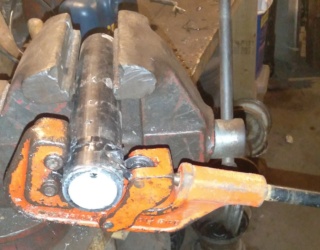 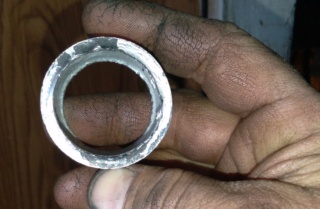  I set the spacer on the wheel and the cut from the pipe cutter chokes enough to kinda center it on the wheel, grind the paint off, and tack weld it in place. Yah, these wheels, the metal is super thin and blew a couple holes in it. Tack, tack, tack it up the best I could. Next is the pulley. Lay it on the spacer and figure eye ballin it won't work too good, so I stand some angle iron up around the pulley and wheel (both the same size), and tack the pulley onto the spacer. Final weld the thing together. Came out pretty straight actually. 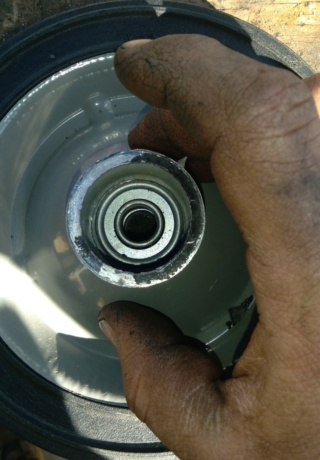  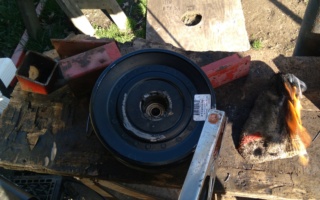 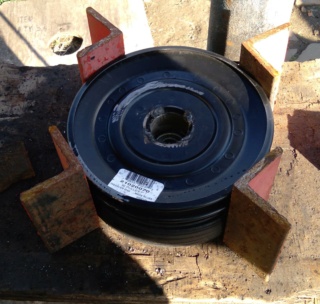 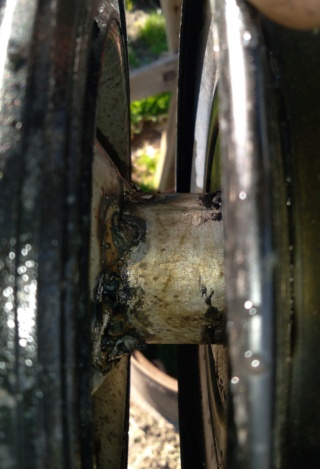 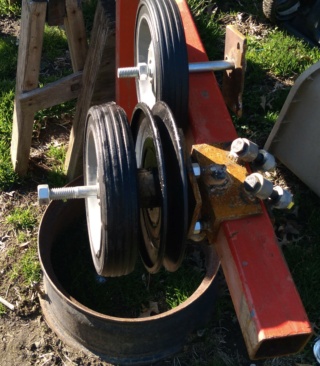 OK, here is where I start fitting the saw blades. Plan is, to be able to fit any kind of saw blade on this thing. Maybe. I'll explain. I noticed that the smaller Harbor Freight blade in the last post, the teeth are facing the opposite direction for cutting, when compared to the bigger blade. Could be just made wrong, maybe, but I won't be able to use this kind of blade on this machine probably. Would mean I would feed the blade from the opposite side (back side and pushing towards the front, which means the motor would be spinning in reverse. Yah, to much setup for that, not going to happen. I'm hoping the blade was just made wrong. All the vertical bandsaws I seen when doing research, was that the blade came down to cut and kicked to the left on the bottom wheel, then up on the left side (not the right side). Big difference there. Must be a China thing, for a machine to be built backwards like that, and would have to buy only their blades. Be weary of that when looking at bandsaws People! OK, to make the blades fit how I want them too, I need to put all the idler wheels on tubing that extend inward and the drive wheel to extend downward when needed. So, more clamps are needed with tubing welded to them. 3 total. Different lengths too. Moving the Idler wheels on these extensions will make it possible to fit the blades on and run the blades out of the way when using the bigger blades with both idlers in a triangle shape. Then with the top idler only, for the smaller blades. I am shooting for about 1 foot of work area going up and down, then about 2 feet to the side using the bigger blades. The small blades, I don't know yet, but I have a surprise for that. 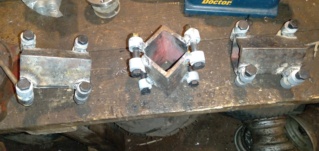 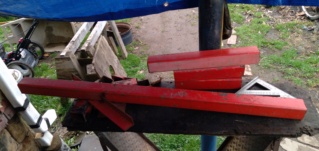 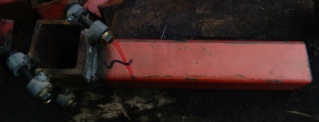 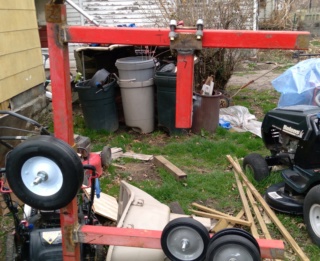 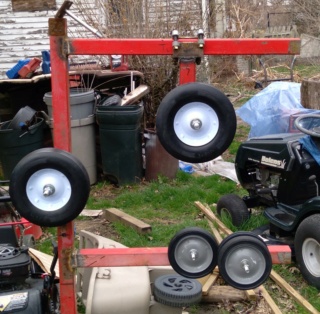 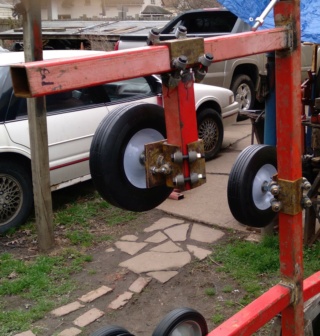 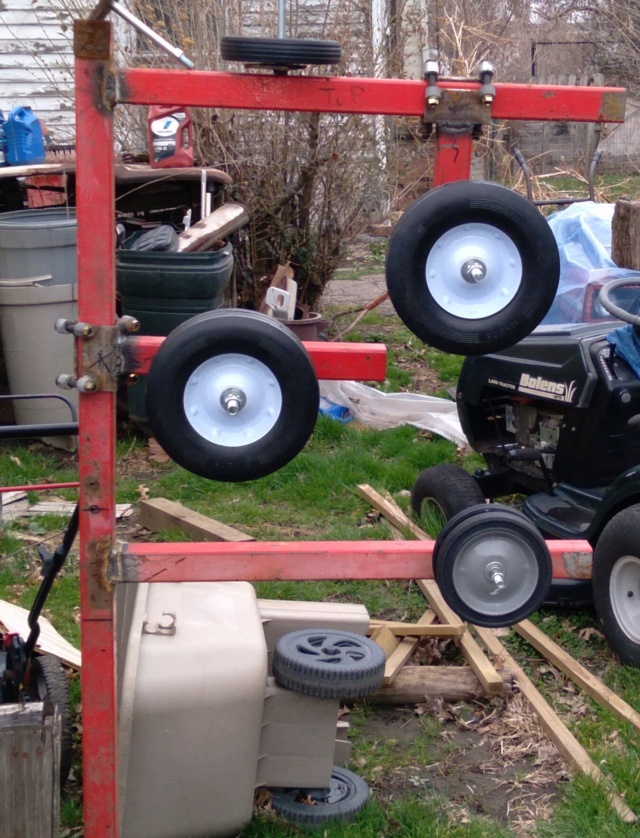 Blade fitment.   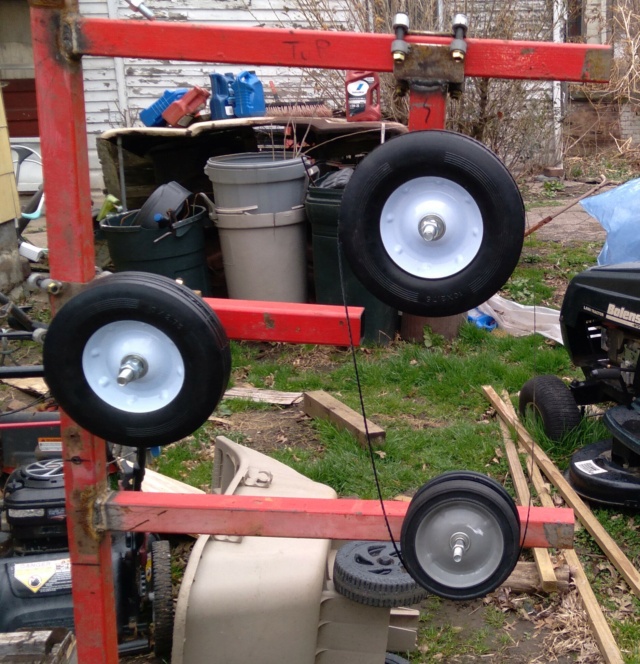 Playing with the setup, worked great! Was able to spin the blades and adjust the wheels for tracking, to keep the blades on the wheels. The above pics don't show the drive wheel on an extension but the next set of pics on the drive wheel will have the extension in place. I need to make spacers for the drive wheel and small idler wheel. I buy a box of 1/2 inch washers and use piping conduit for the spacers with washers welded on the ends, and the washers will be added to fine tune the spacing more. The big idlers use 5/8 inch nuts for adjustment of the spacing in and out for these wheels. 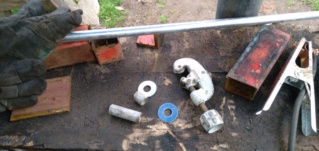 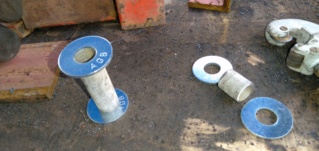 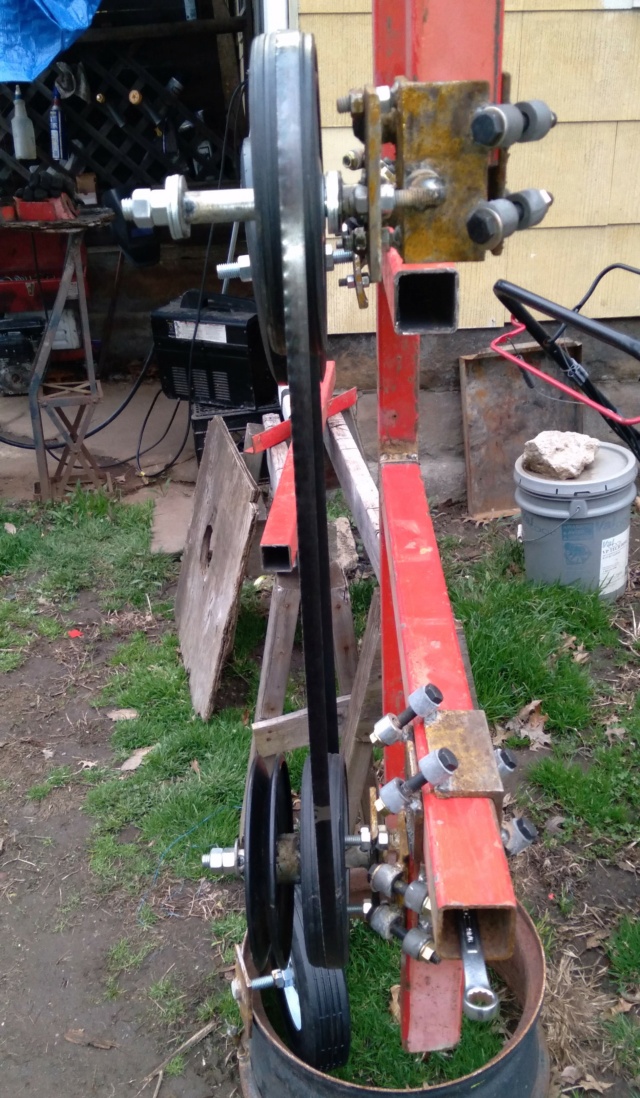 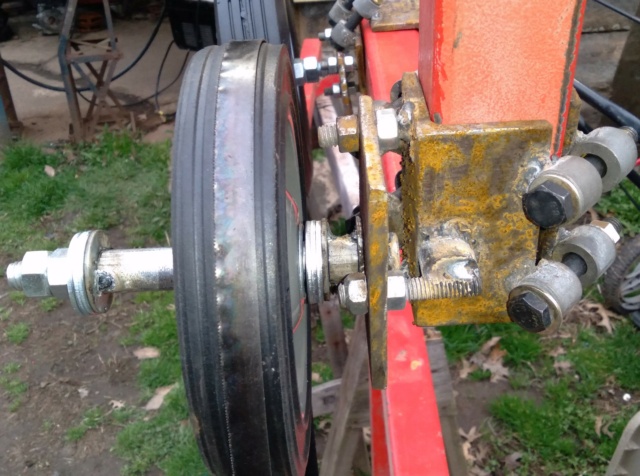 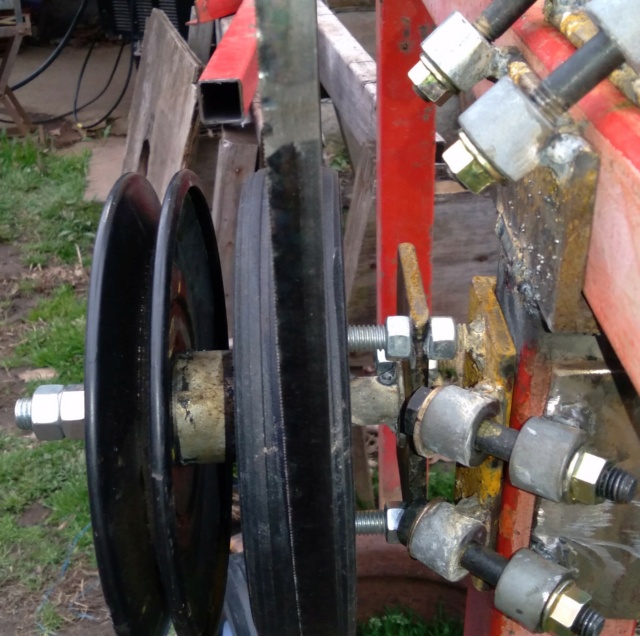 That's it for this post. Got more pics on my phone to download and edit for the next post or two, LOL. Just have to find time, you know, busy busy busy. Even got a short vid too. OK, gotta go, dogs are crying to go out. But after I finish listening to "I'll never let you go" by SteelHeart. LOL. Later.......................... | |
| | | | prancstaman
Veteran Member
Join date : 2015-02-02
Points : 4979
Posts : 1412
Location : Cleveland,Ohio
| | Subject: Metal cutting bandsaw part 7 April 20th 2021, 11:24 pm | |
| Hay People, I'll focus on part of the drive assembly in this post. Starting with building the jackshaft. I am pretty sure that the washing machine motor has an rpm of about 1750 rpm. Usually a typical speed for an AC induction motor. It's a guess, LOL. This is too fast of a speed for cutting metal and will dull the teeth real quick. RPM of the blade should be around 200 RPM, pretty slow but keeps the heat down so the teeth keep cool and last. So, with this said, an ideal ratio on the pulleys would be 9 or 10 to 1 ratio on the drive wheel when compared to the motor output. I think I said that right, LOL. So every one turn of the drive wheel, the motor will spin 9 or 10 times. OK. I look around for an idea to make a jackshaft. I could use go kart parts but I would have to buy stuff, no thanks. I need something that has 2 bearings, a shaft to fit the bearings, a housing, and pulleys. I scrounge around my shed in milk crates and dig out a deck spindle off a riding mower. Rusty and crusty, perfect! A good start for something to work with. I know what parts are used to rebuild these and I have most of those. Only thing I don't have is a big pulley to fit the shaft right, I'll explain that in a minute. 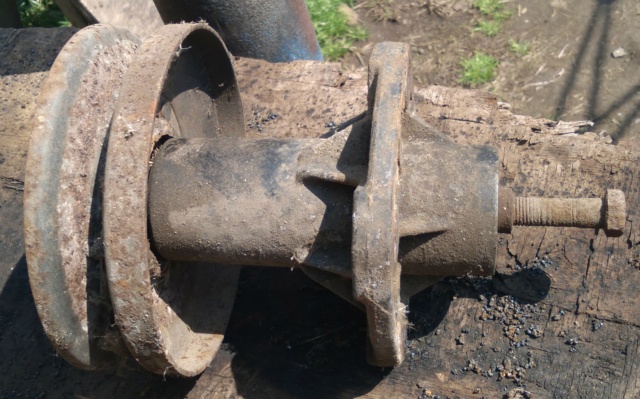 I know these things don't use go kart parts. The parts used on these are more of the automotive stuff. Which means for example- the shaft measurement diameter is .885 inches. That is .010 inches bigger then 5/8 inch go kart shaft. Then the bearings match the shaft at .885 inches I.D. and 1 3/8 inch O.D. as compared to a go kart bearing that measures .875 inches I.D. and 1 3/8 inch O.D. There is a .010 inch difference between the two on the I.D. As for the pulleys, I have an Alternator pulley for one end of the jackshaft that fits the shaft perfectly, and a set of front alternator bearings to replace the seized bearings in the spindle. Yup, the front housing bearings on an old 10si GM alternator are a perfect match for the spindle bearings. Which explains why the Alternator pulley fits also with an I.D. of .885 inches on the pulley. The only thing I have that is not a matching part is the big pulley which came off a transaxle riding mower and has a I.D. of .875 inches. I'll make it work, you'll see, LOL. Time to take this spindle apart. I use my press, not a good idea. I mount it in the press pretty sketchy, pump it up, the next thing I know stuff is shooting out of it. Lost a socket and busted the housing too. Oh well. I don't need the mounting holes anyways. I take it apart the good old fashion way. A hammer and a bolt while mounted in a vise. LOL. 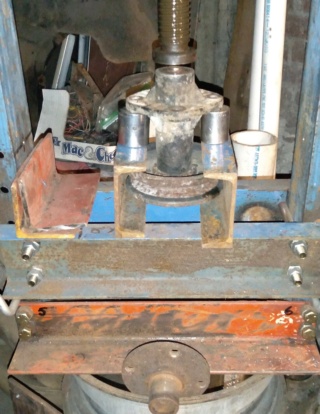 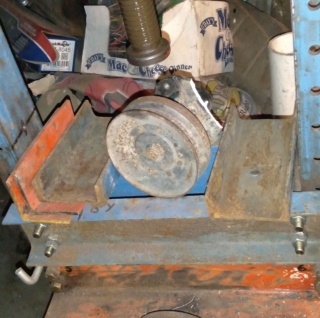 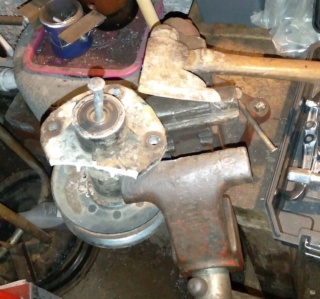 Finally get the shaft out and the other bearing is rusted on so I grab the grinder and make some sparks till it falls off. Then someone thought it was a good idea to weld the pulley to the shaft, LOL. I cut that sucker off too. 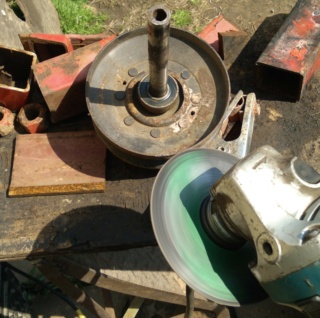 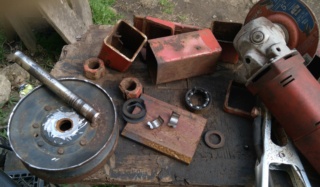 Here's the main parts, minus the housing. 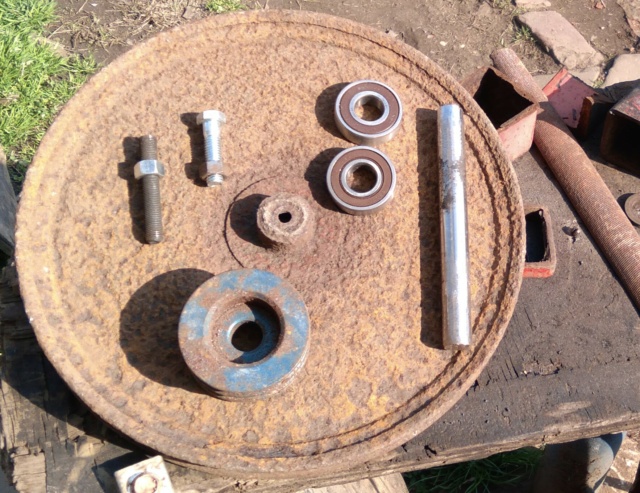 The shaft. I weld a bolt to one end of the shaft. The other end has threads in it and I thread in a stud. Now I have threads on both ends so I can take the jackshaft apart whenever it is necessary to service it. I clean the shaft up with a file so it slides through the bearings easy.  A little mock up. I need to make a spacer for inside the housing. The pulleys get squeezed inward by the bolts and the spacer will give a connection from one bearing to the other bearing so there will be no binding. The inside spacer is a bicycle seat pole, LOL. There are no keyways for the pulleys, so tightening the bolts squishes the pulleys together tight so they don't slip on the shaft. To fit that big pulley onto the shaft, I put a little bevel on the end of the shaft and the pulley gets pushed into the bevel and pretty much gets jammed on the end of the shaft which means it is only on a fraction of the way since the I.D. of the big pulley is .010 inch smaller. The jackshaft might get a smaller pulley on this side later on. I got a feeling that the blade will be cutting a little too slow with this huge pulley on and I also would like to use this pulley for another project. We shall see. 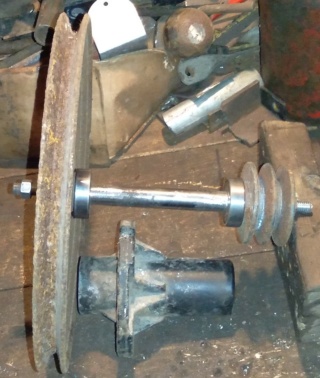 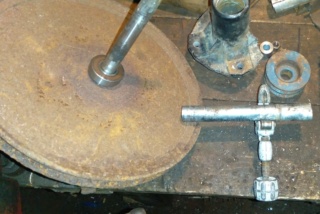  The finished jackshaft. 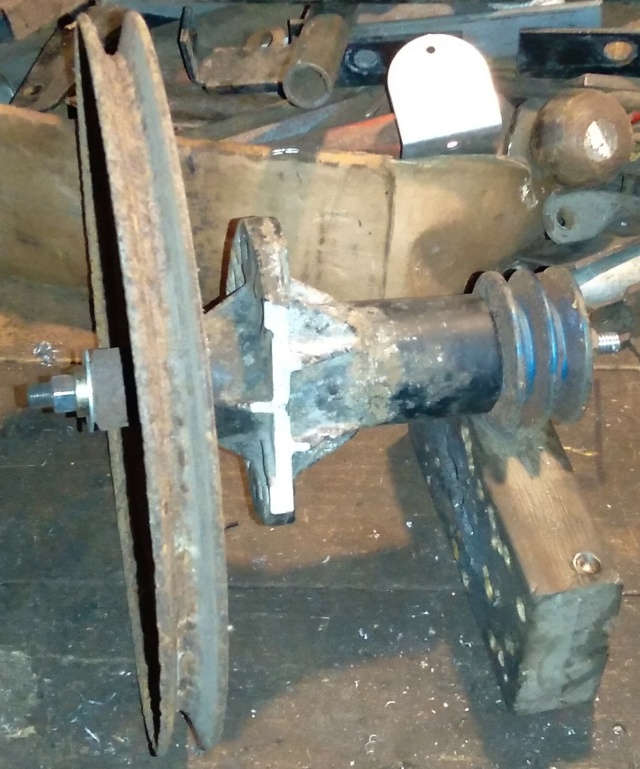 Next, I want to reinforce the drive pulley. The push mower wheel is made up of some pretty thin metal and I think as it is will rip the pulley off after a while of use. Strength can be gained here with bolts being welded in. Bolts will go through the pulley and reach over to the wheel on an outer diameter. The further away from the center, the better the strength. 3 bolts spread out evenly. I drill holes from the pulley to the wheel on my drill press. Then weld them in. 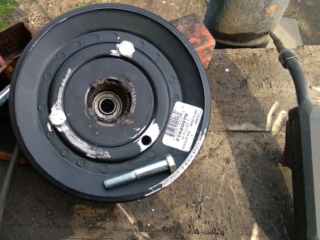  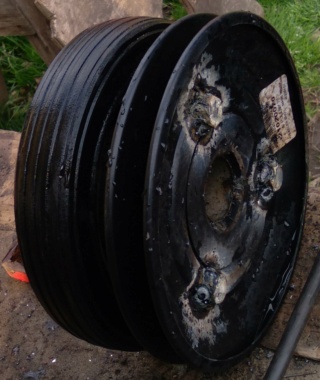  Here is the finished assembly. The wheel will be on the inside and pulley will be on the outside. Mounted on the axle that is on the clamp. 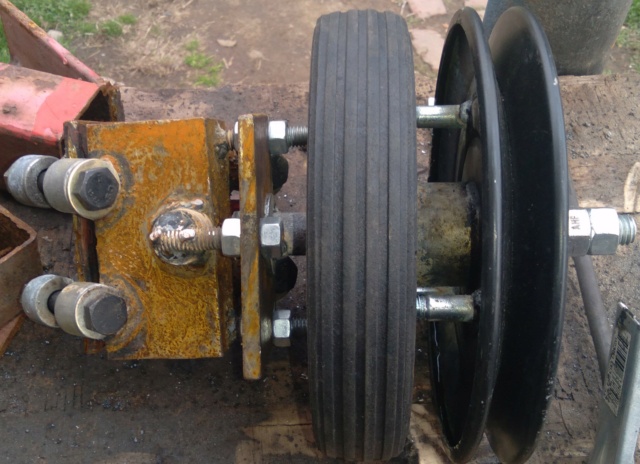 OK, that's it for now. More tomorrow, maybe. Later........................ | |
| | | | prancstaman
Veteran Member
Join date : 2015-02-02
Points : 4979
Posts : 1412
Location : Cleveland,Ohio
| | Subject: Metal cutting bandsaw part 8 May 12th 2021, 10:08 pm | |
| Hay People, On to the next part of this project. Mounting the jackshaft. I'm going to attach the jackshaft and motor to the clamp that has the drive wheel on it. That way when the drive wheel moves then the whole thing moves to where I don't have to adjust anything every time I move the drive wheel. I got enough adjustments on this thing, a little simplicity won't hurt, LOL. I cut a tube to extend sideways and weld to the clamp. The main piece to attach everything. I notch the tube so the clamp's bolts can still be used.  I weld 4 bolts on the tube for another tube to fit in between them and the tube is on a slight angle. This second tube will hold the jackshaft on the bottom end with a U bolt. The bolts will hold a plate that when tightened, the plate pushes into the second tube to lock it in place. 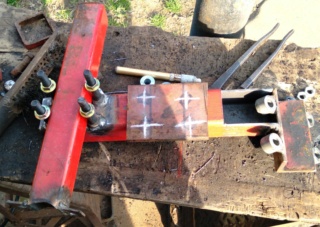 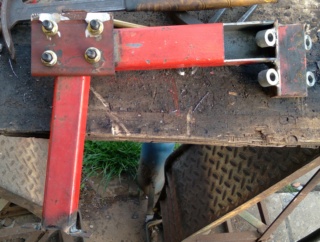  I make a U bolt from a piece of angle iron and welded 2 bolts to it. I can then be able to move the jackshaft forward and backward for belt alignment after grinding some of the webbing off the spindle housing that was used for the jackshaft. I find a belt from my box of belts and hook everything up. 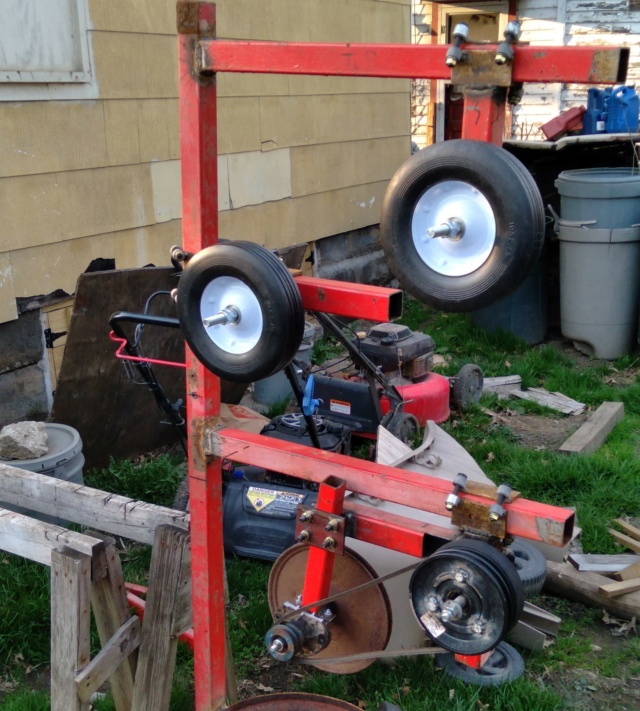 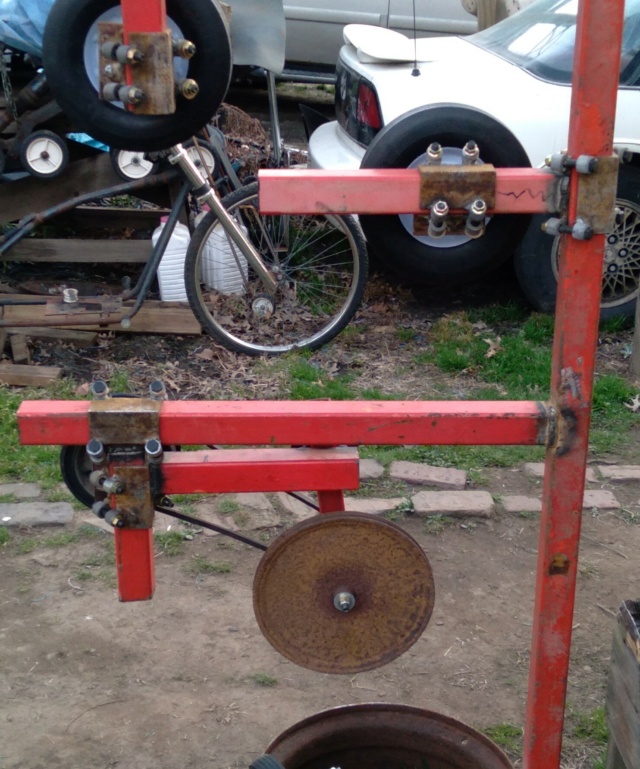 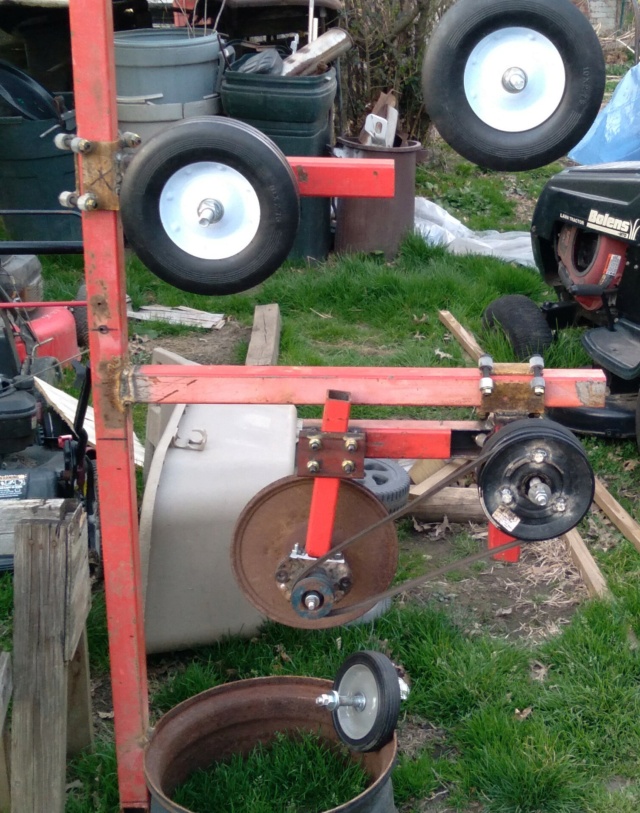 I fit the big blade on and see how the thing works. Blade stays on with a little adjusting. No sweat. 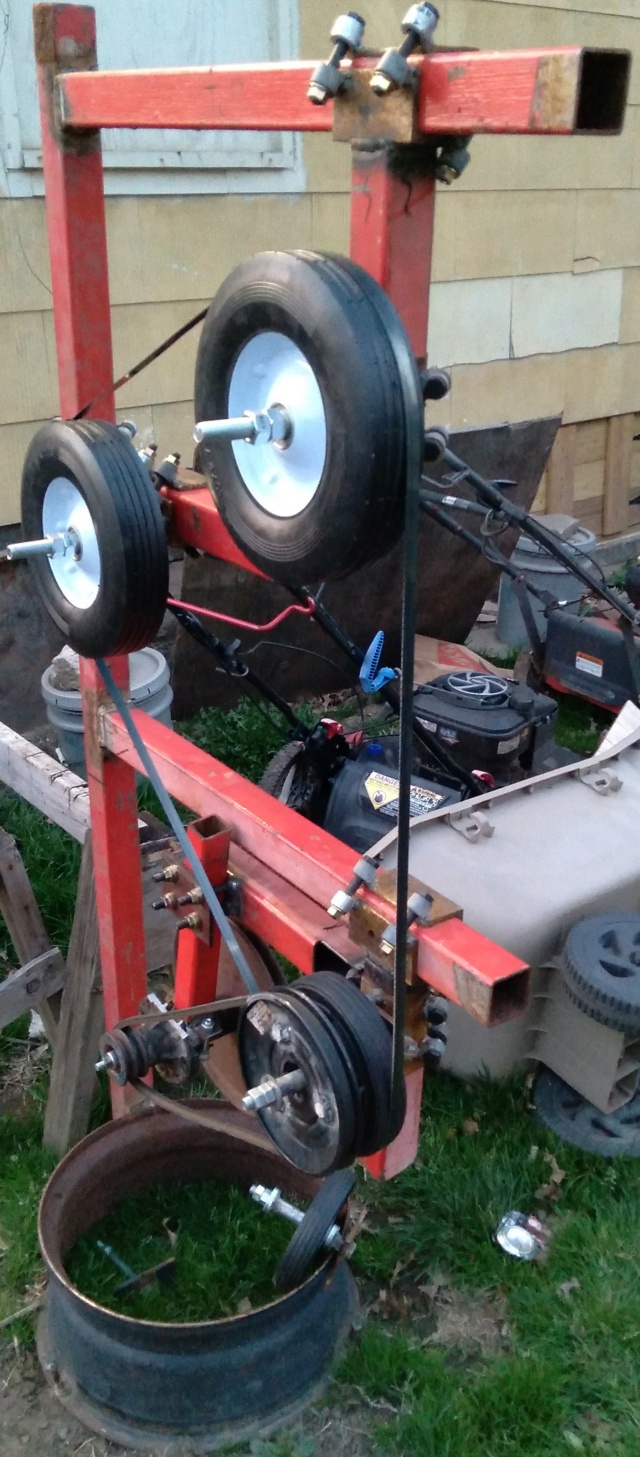 Made a couple short vids of the sawblade spinning on the wheels. Got to upload it and then post it later on. I figured out the small sawblade, on why the teeth was pointing in the other direction, what it was for. That blade is for the horizontal bandsaw. I am making a vertical bandsaw. Evidently the 2 machines, the blades are NOT interchangeable. Oh well. It would be too much doing, to make both blades to work on this machine, but not imposable. Maybe later I will do this mod, just not now. OK. Later................. | |
| | | | prancstaman
Veteran Member
Join date : 2015-02-02
Points : 4979
Posts : 1412
Location : Cleveland,Ohio
| | Subject: Homemade cylinder hone September 7th 2021, 12:08 am | |
| Hay People, So, it will be a minute till I get back to the bandsaw project. Been fixing this car up for my kid to use a daily driver. It's a 1972 Ford Maverick. Has the 302 ci plant, C4 trans, with a 8 inch rear end. Inside has a heater, ashtray, and an AM radio. Oh, and power steering, LOL. That's it. Someone wanted to go fast, it's a factory drag car.  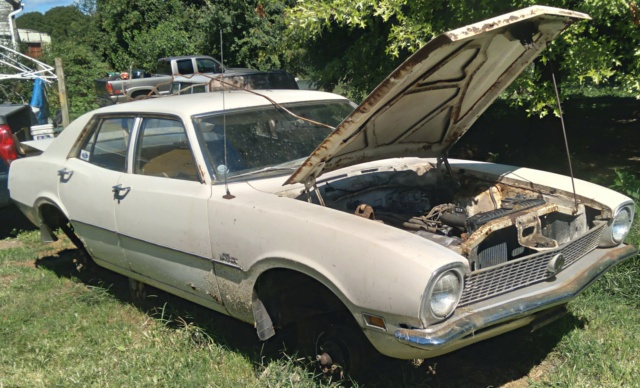 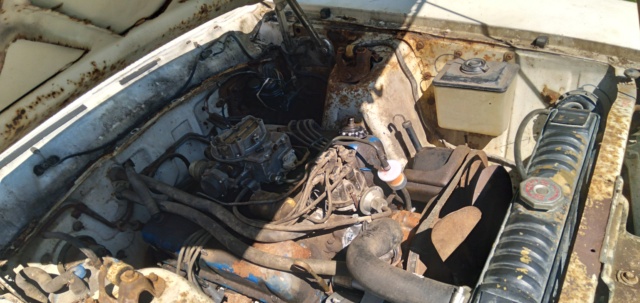 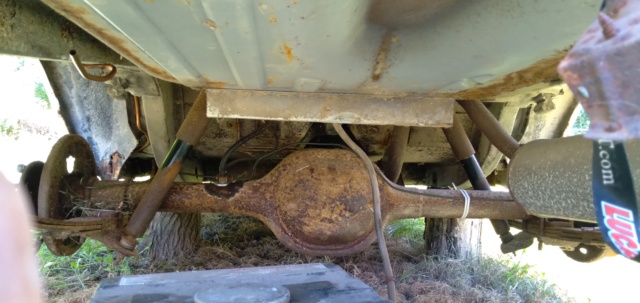 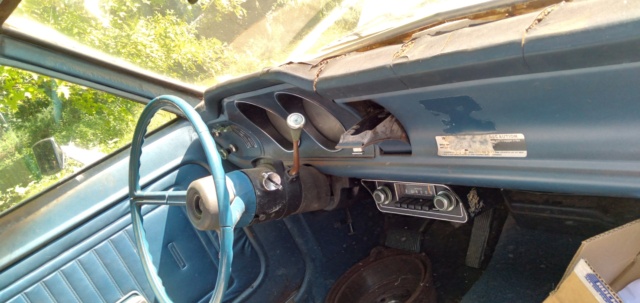 OK, I am on the brakes now. Drum brakes all around. And the car has been sitting for a looong while. which brings me to this post. This will save a few bucks on tools and parts. About $70 I figure. So, I'm pulling the brake cylinders off to tear down, clean, and reinstall because they are all locked up. Which will involve honing the cylinder bores. Could buy the tool if I had the time and money, about $15, but why buy it when I can just make one in about 5 minutes. Here is what is needed- a metal coat hanger, sand paper of the grit you choose (120 grit), any kind of drill, and a pair of pliers. The lubricant is optional for what you are doing. 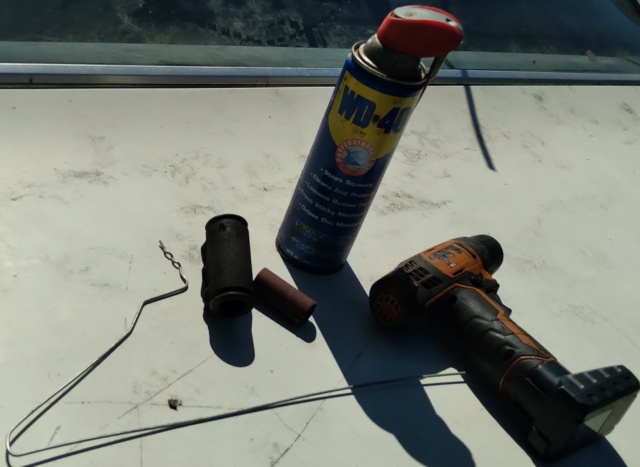 Cut the coat hanger to length. About twice as long as the bore you are honing. 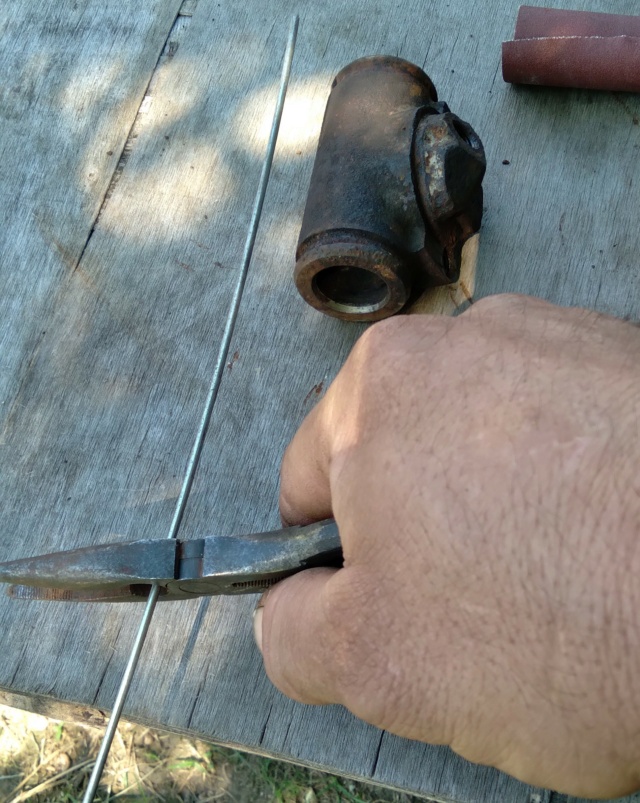 Bend one end over onto itself about an inch or so. Squeeze tight with the pliers. This end will hold the sandpaper. The other end will fit into the drill. The coat hanger should be strait for the most part since it will be spinning in the drill when used. 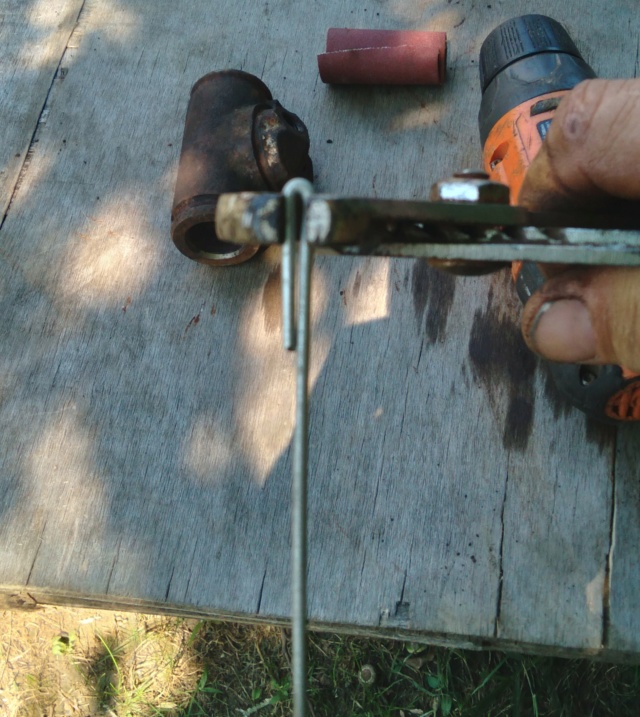 Fold the sandpaper in half going longways and insert the sandpaper into the bent end of the coat hanger. 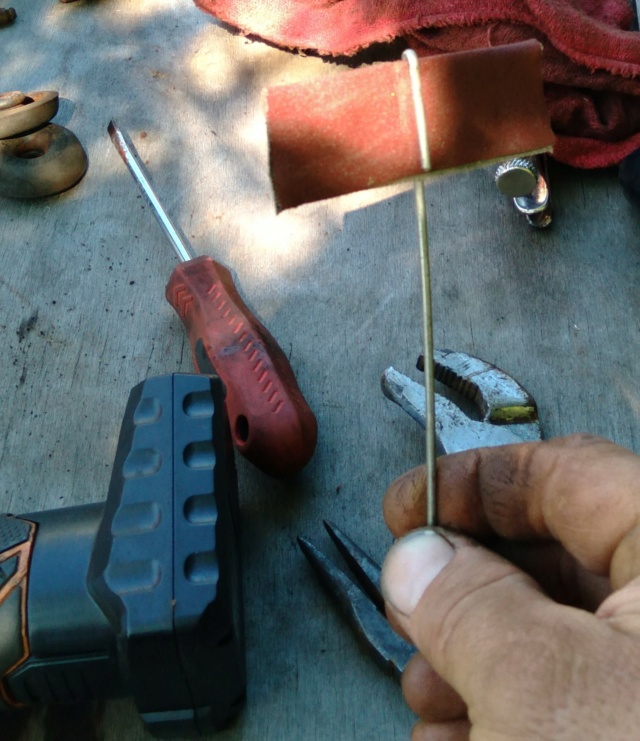 Put the other end in the drill chuck and tighten it. Then put the sandpaper in the palm of your hand and spin it slow. This gives it the shape to spin in the cylinder bore.  Shove it in the cylinder bore and then you are able to hone it. The sandpaper will want to straighten while it is spinning. You can also push it to one side for those stubborn spots. The coat hanger might break by the chuck, if it does, just spit out the broke piece and stick it back in and tighten the chuck. Then keep going as needed. 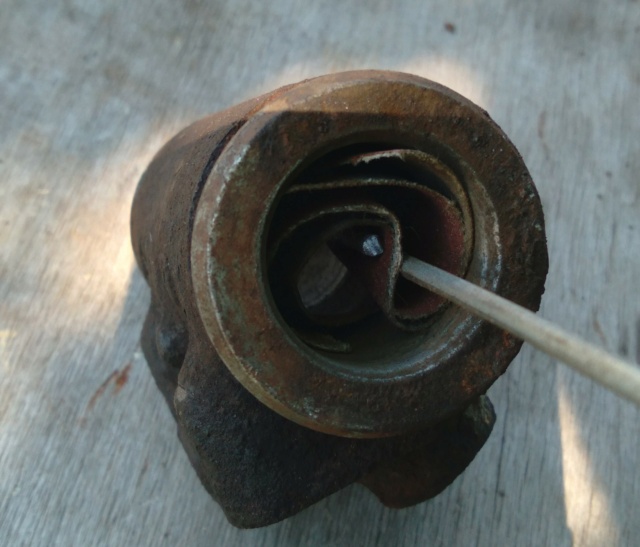 An after shot of the honing of one side done. 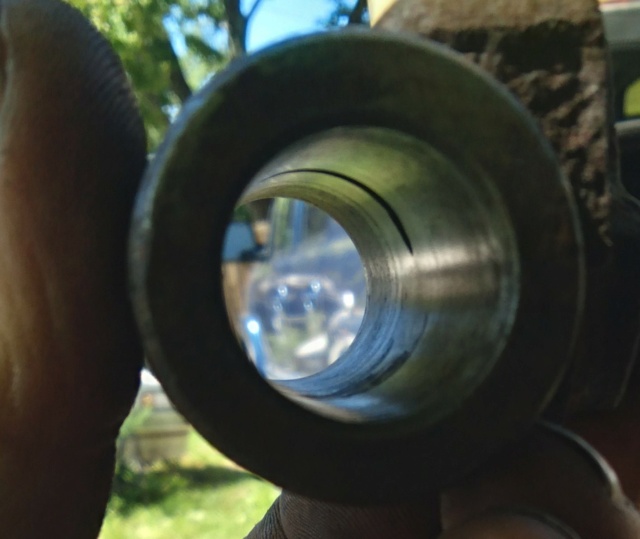 Here is a before and after shot of another wheel cylinder (front) of a 1 1/8 bore.  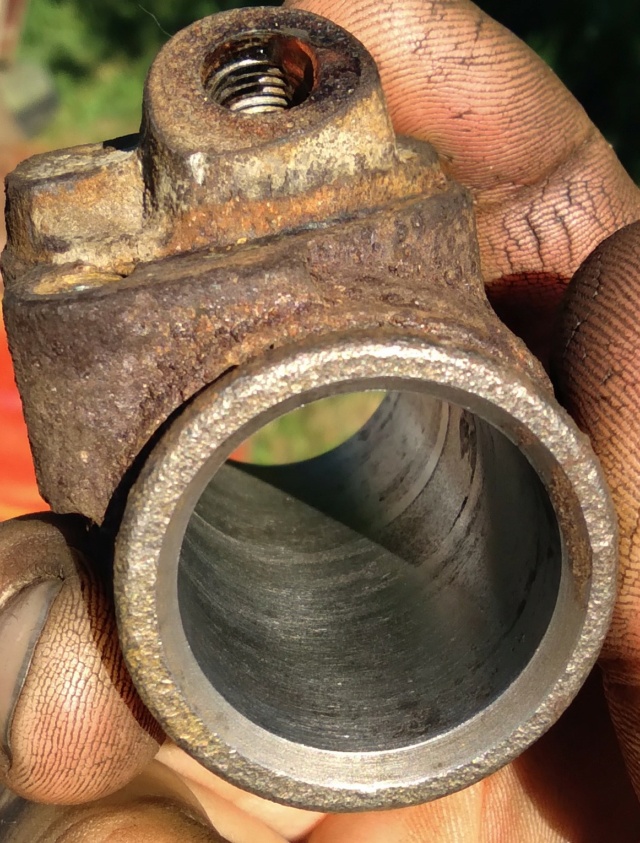 Here are a couple more how too's for the rest of the work on the wheel cylinders since I'm on the subject. The bleeder valves were clogged, just take a drill bit and drill the crap that is clogging it out of it. I used a 1/16 inch drill bit for these. 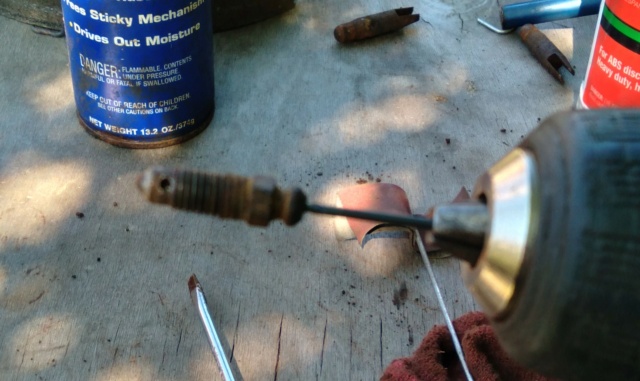 I'm sure you all know this one. A busted bleeder valve, weld a nut on it with your MIG welder with the wire speed set for slow motion. The slow motion of the wire will put a ton of heat into it and break free the rust to remove it. 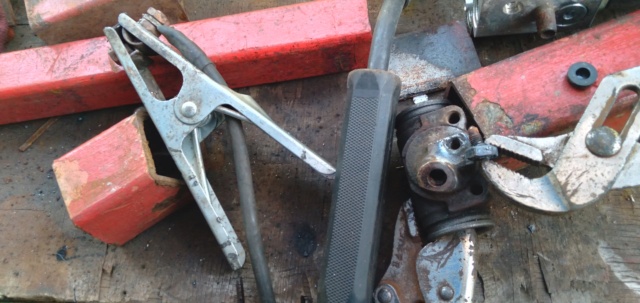 Be kind to the next guy doing work on the car. Put anti seize on the mounting bolts for the wheel cylinder. 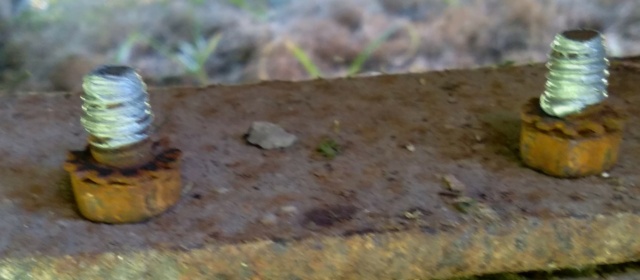 Here is a tip that nobody knows. I have proved it myself many a times that it does work. The bleeder screws, after you get them out, then replace them with new ones or good used ones, and you reinsert them into the wheel cylinder or caliper. How do you get them back out 5 to 10 years from now? I have had my vehicles that long to actually test this situation. To keep the bleeder screws from seizing from rust, you wrap the threads in Teflon tape. Yup, the Teflon tape seals the threads from moisture so they don't rust in place. Take the Teflon tape and wrap the threads of the bleeder screw with one wrap of the Teflon tape in the direction that it doesn't unwrap when you screw in the bleeder screw. 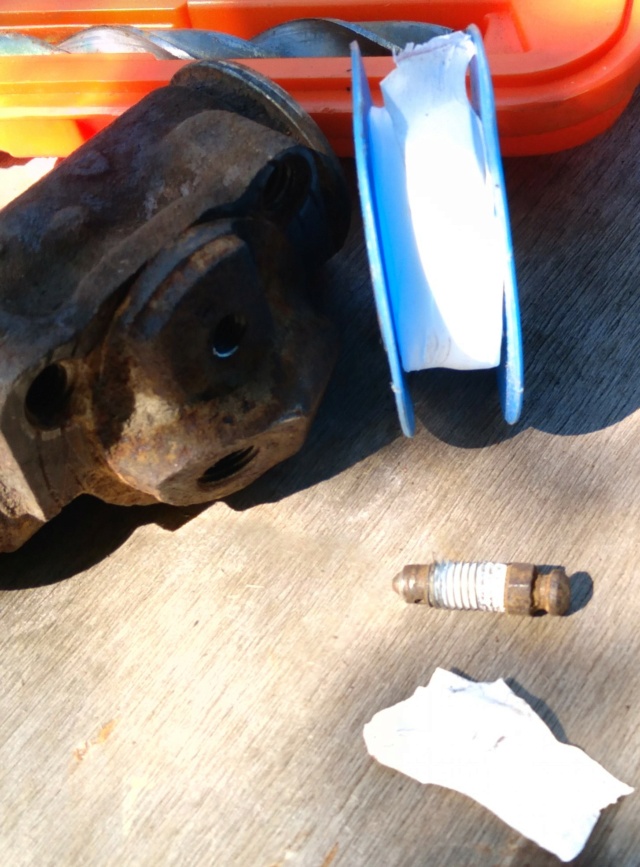 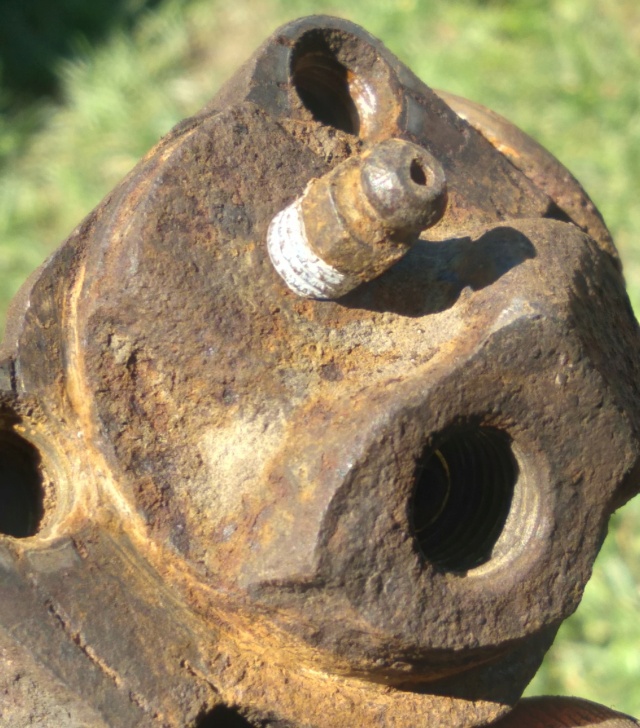 That's it for now. More later when I have time. Later............. | |
| | | | prancstaman
Veteran Member
Join date : 2015-02-02
Points : 4979
Posts : 1412
Location : Cleveland,Ohio
| | Subject: Metal cutting bandsaw part 9 November 28th 2021, 11:14 am | |
| Hay People, Been a while. I think I got junk done around here for now to where I can do some work on my projects, hopefully. So, getting the ball rolling would be this post, LOL. I actually did the work for this post, according to the time stamp on the pics, back in June so I probably forgot alot about the pics tooken. I'll be showing how I made the sawblade guides. How the sawblade stays on the saw is by the wheels when spinning. The sawblade guides job is to keep the sawblade on the wheels when cutting something because of the sideways force when you push whatever into the sawblade. Also, the guides help keep the sawblade from turning to help get a straight cut along with the tension on the sawblade helping with this part also. A tensioner will be made later on. Onto the pics. Here I show the main materials used. I bought bearings from Ebay, measuring 10mm I.D. and 13mm O.D. Some cheap bearing, I only cared about the I.D. of the 10mm for the bolts being used. And angle iron cut into 4 pieces. 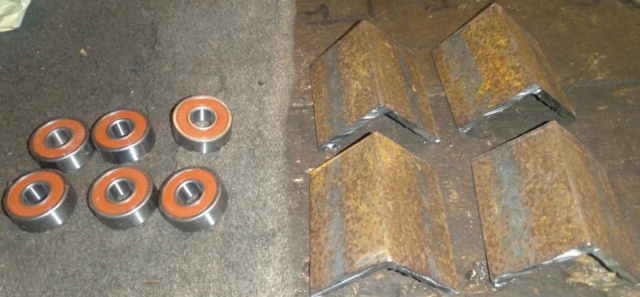 I match up the angle iron into 2 sets. Since I will be hand making these guides, I need to mark each set so when I pull them apart and have them layed out, I know which pieces are for each set. This is done with lines cut into the faces with a cutoff wheel. A diagonal line for one set and a straight across line for the other set. Now I can drill holes for the bearing to go in between the angle iron. This bearing keeps the sawblade from pushing off the wheels from the pushing force of cutting something. I drilled this hole by clamping the 2 pieces of angle iron together so the hole will be in the same spot on both sides. I put washers on both sides of the bearing so the outer race doesn't touch anything when spinning. And a metric bolt (black in color) is used to bolt the pieces together. 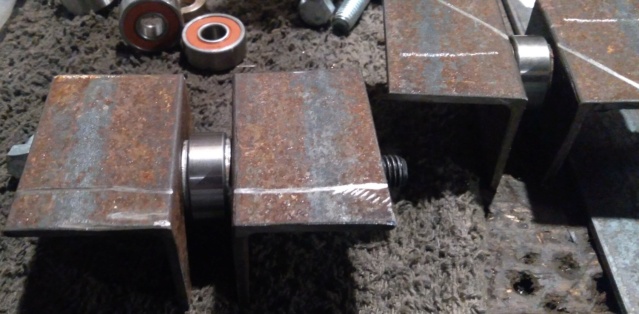 Next, I start the guides that hold the sawblade straight. 4 pieces of flat stock steel, the bearings (4), the bolts. I drill 2 holes in each set lower corners for the pivot point. These guides will swing into the sawblade and get tighten up with the bolts on the pivot point. Everything is just mocked up at this point. 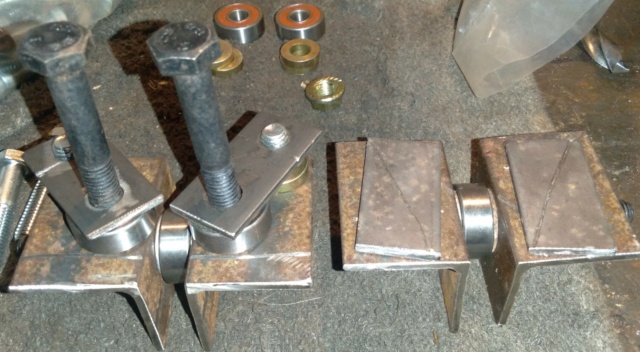 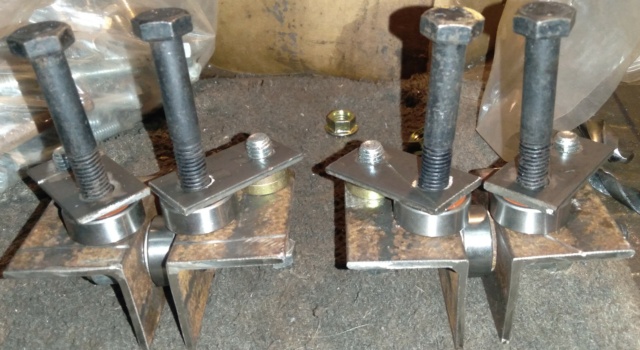 I need to keep the framing of the guides from twisting since the only thing holding the 2 pieces of angle iron together on each set is the bolt holding the bearing in. I drill holes and use the silver bolt to keep the 2 pieces of angle iron from twisting. 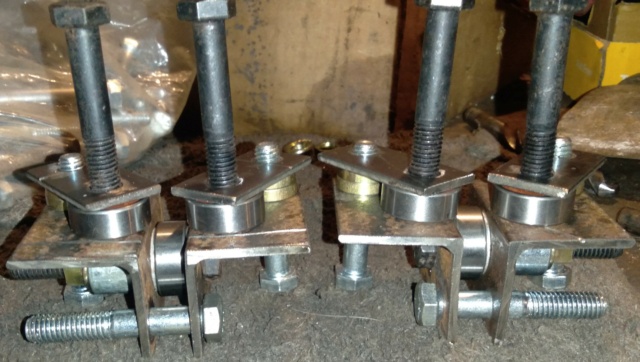 I trim all the bolts. The silver nuts and bolts are the pivot points for the guide swing arms and go through the angle iron. The black bolts are cut and do not go through the angle iron, they only hold the bearings in place. Then the silver bolts to keep the angle iron frames from twisting are trimmed just past the angle iron. 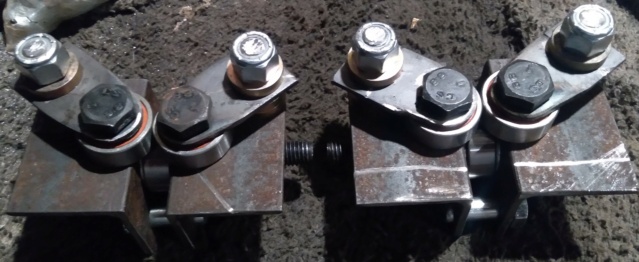 The black bolts only hold the bearings in place on the swing arms. These are 10mm metric bolts that fit inside the bearing. Which means the inner bearing race will spin on the bolts and will wear the bolts. This is bad. The inner race needs to not spin. I solve this by using a center punch and center punch the bolt shank to raise the metal and I will have to press the bolt into the bearing. Good enough to keep the bearings inner race from spinning. These black bolts are only long enough to go through the swingarms and bearings, I cut these on the other side of the bearings. 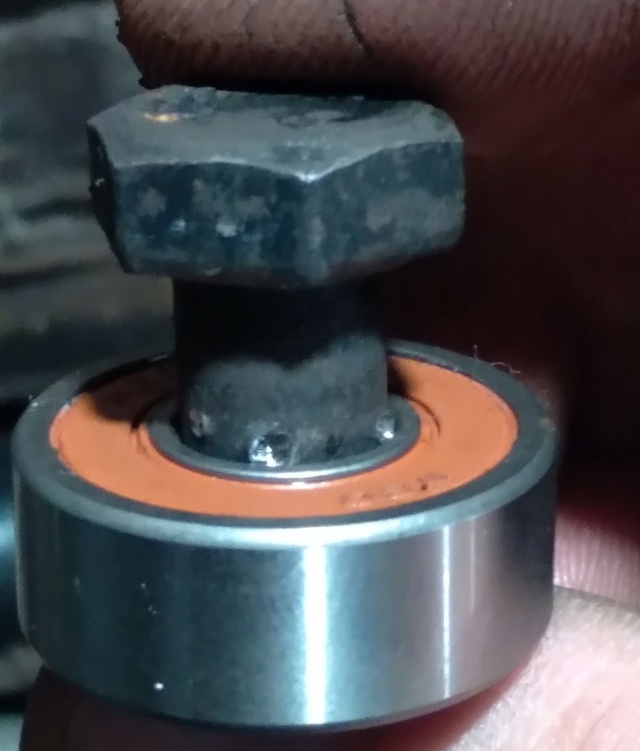 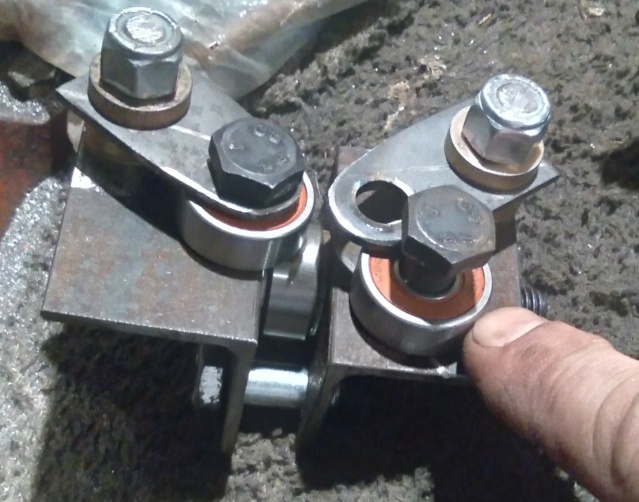 I then weld the bolts in place. The black bolts get spot welded to the swingarms. The silver bolts for the pivot points of the swingarms are spot welded also. It would be too hard to use a wrench on front and back to tighten the swingarms so I welded the bolts in place to simplify things. Then the bolt that keeps the framing from twisting is welded in place on one side. And the bolt that holds the pieces of angle iron together is welded in place. Keep in mind, I welded the bolts in place in such a way that the guides still can be pulled apart completely for doing any kind of maintenance. 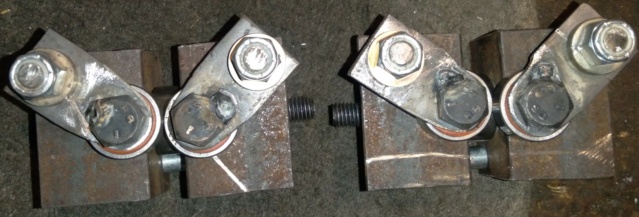 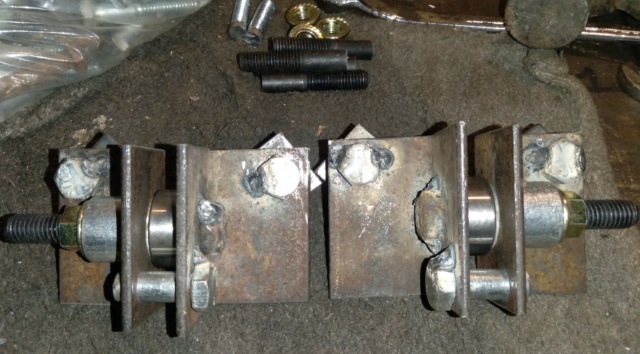 Here is where things get fuzzy, LOL. I try to figure out a way to mount the guides to the framing but can't quite remember what I did here. I mount an arm on one guide. The rest I don't know. I'll show the pics anyways. You all can figure it out.  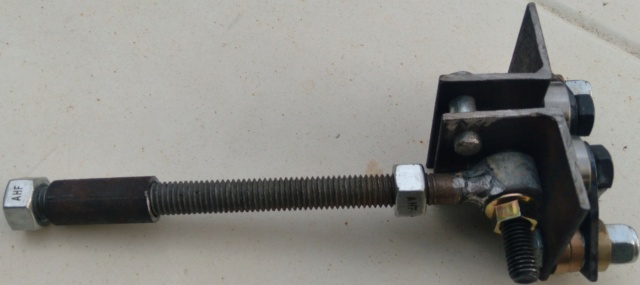  OK, Later................... | |
| | | | Sponsored content
| | | | | | | Homemade tools and stuff from junk laying around | |
|
Similar topics |  |
|
| | Permissions in this forum: | You cannot reply to topics in this forum
| |
| |
| | Who is online? | In total there are 64 users online :: 0 Registered, 0 Hidden and 64 Guests
None
Most users ever online was 412 on January 7th 2023, 7:59 am
|
|